To clean an awning with mold, identify the material, dry-brush loose growth, apply a compatible cleaner, gently scrub, rinse completely, and dry the awning fully before retracting it. The process usually takes 1-3 hours plus 4-8 hours of drying. Material identification is the factor that most determines whether the result is safe.
Key Facts
Never mix bleach with vinegar, ammonia, acids, or any other household cleaner.
A soft brush and low-pressure hose are safer for awning fabric than a pressure washer.
Clean a small hidden area first because cleaners can alter color, coating, or waterproofing.
Do not roll or retract an awning until the fabric, seams, and underside are completely dry.
Vinegar is unsuitable for every awning, and bleach is not a universal mold solution.
Typical DIY cleaning costs $15-$60; professional service commonly costs $150-$500.
What Is Awning Mold?
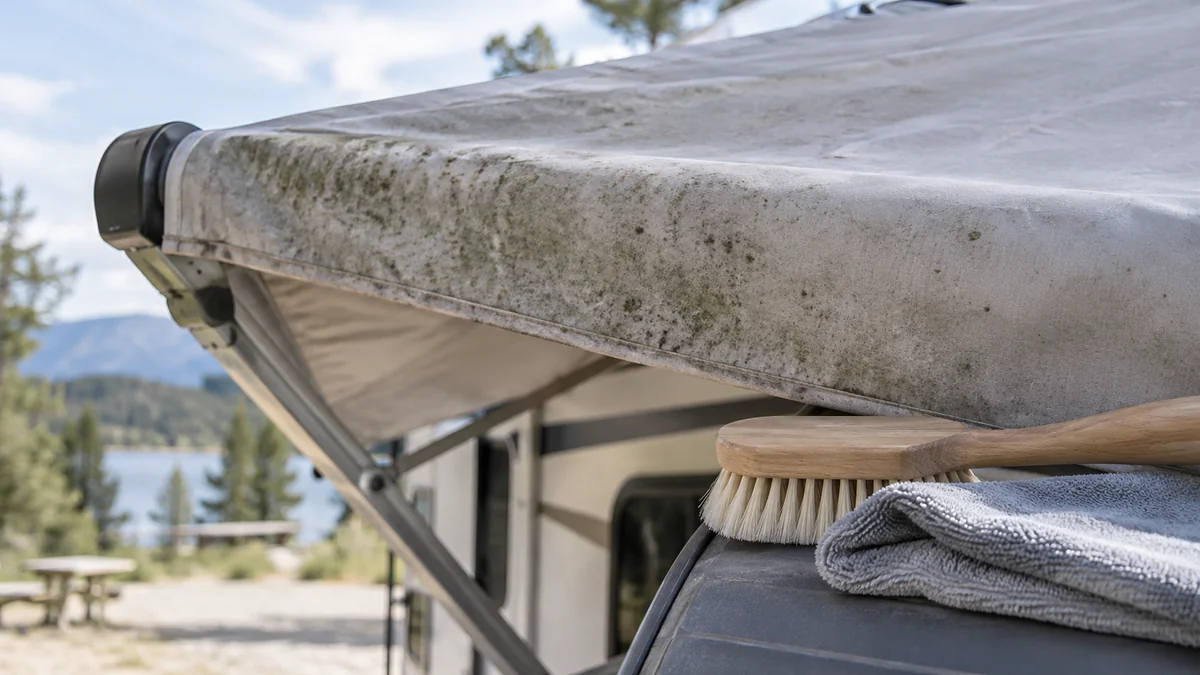
Awning mold is fungal growth that develops where moisture remains on fabric, vinyl, coated polyester, or sheltered metal. Mildew usually describes early, superficial growth, while established mold can penetrate porous fibers and leave permanent pigment stains even after the living growth has been removed.
Mold commonly feeds on dust, pollen, bird droppings, leaf residue, tree sap, and soap deposits. North-facing awnings, shaded patios, damp RV storage areas, and folded fabric have higher recurrence risk because evaporation is slow.
A dark mark is not automatically active mold. Organic growth may look fuzzy, powdery, green, gray, brown, or black, whereas soot, algae, rust, and dye damage can look similar. Place a disposable white cloth over a dampened area and wipe once. Transfer, odor, or surface texture suggests contamination, but the test does not identify species.
The U.S. Environmental Protection Agency recommends controlling moisture rather than relying only on chemical treatment. The EPA also advises that porous materials with extensive mold contamination may be difficult to clean completely. That limitation matters for old canvas, delaminated coatings, and fabric with weakened stitching.
Is Awning Mold Safe to Clean Yourself?
Small, accessible patches are usually reasonable for a careful DIY cleaning, but extensive growth, severe odor, damaged fabric, or respiratory sensitivity changes the decision. People with asthma, mold allergies, immune suppression, or chronic lung disease should avoid direct exposure and consider professional help.
Wear waterproof gloves, eye protection, long sleeves, and a well-fitting particulate mask. A disposable N95 respirator offers more protection from airborne particles than a loose dust mask, although chemical vapors require ventilation and the correct cartridge rather than an N95.
Stop and seek professional advice when:
- Mold covers more than approximately 10 square feet.
- The awning is above a second story or requires unsafe ladder work.
- Fabric tears when lightly handled or stitching has separated.
- Mold extends into a wall, ceiling, roller tube, or motor housing.
- Cleaning runoff could enter a pond, storm drain, vegetable garden, or sensitive planting bed.
- The awning has unknown asbestos-containing components, unusual insulation, or electrical damage.
Turn off power to motorized awnings before cleaning near switches, sensors, motors, or electrical housings. Never spray a motor, remote-control receiver, outlet, or junction box.
Before You Start
| Requirement | Typical specification | Why it matters |
|---|---|---|
| Cleaning time | 1-3 hours | Covers setup, treatment, brushing, and rinsing |
| Drying time | 4-8 hours | Prevents damp storage and rapid regrowth |
| DIY cost | $15-$60 | Includes cleaner, gloves, brush, and protectant |
| Weather | 50-85°F, low wind | Reduces rapid drying and sail loading |
| Brush | Soft nylon, 8-12 inches | Protects seams and coatings |
| Hose | Garden hose with gentle spray | Flushes residue without cutting fabric |
| Test area | 2-4 square inches | Reveals color or coating damage |
Use a bucket, measuring cup, soft brush, garden hose, microfiber cloths, absorbent towels, painter’s plastic, and the awning manufacturer’s care instructions. Have a compatible fabric guard available if cleaning or age has reduced water repellency.
Choose an overcast or lightly cloudy day if possible. Direct hot sun can dry a cleaner before it has worked, while strong wind can load a wet awning and stress mounting brackets. Do not clean during rain, freezing weather, or gusty conditions.
How to Clean an Awning With Mold
Step 1: Identify the Awning Material
Find the sewn-in label, owner’s manual, model number, or manufacturer website before selecting a chemical. Acrylic fabric is often solution-dyed and water resistant, vinyl has a coated smooth surface, canvas may be cotton or synthetic, and polyester can have a laminated or treated finish.
If the material remains uncertain, use a manufacturer-approved neutral cleaner first. Do not begin with bleach, acetone, abrasive powder, or concentrated solvent.
Success checkpoint: You can name the surface material and its cleaning restrictions.
Common mistake: Treating every fabric as if it were Sunbrella acrylic. Some acrylic products tolerate diluted bleach, but that does not make bleach safe for every coating, thread, trim, or nearby surface.
Step 2: Extend, Isolate, and Protect the Area
Fully extend a retractable awning only if the frame is stable and the weather is calm. For an RV awning, support the arms according to the vehicle manufacturer’s instructions. Move furniture and toys away from runoff, and cover sensitive plants with breathable protection rather than sealing wet foliage under plastic for hours.
Disconnect or switch off motorized equipment. Place towels or a temporary catch area beneath low edges if runoff could stain masonry, decking, or soil.
Success checkpoint: The awning is stable, accessible, and isolated from electrical equipment and vulnerable landscaping.
Common mistake: Standing on a chair or leaning a ladder against an unsupported fabric edge. Use an extension brush from the ground or hire help for elevated installations.
Step 3: Dry-Brush Loose Mold and Debris
Brush the dry surface lightly with a soft nylon brush. Start at the highest accessible area and work downward, keeping your face away from the brushing path. Remove leaves, cobwebs, pollen, and loose powder before adding water.
Do not aggressively dry-brush heavy mold indoors or in a confined patio. A light mist can reduce airborne dust, but saturation before debris removal may spread organic residue through the weave.
Success checkpoint: Loose debris is gone, and remaining marks appear attached to the surface rather than sitting on top.
Common mistake: Using a wire brush or stiff deck brush. Abrasion can fuzz acrylic, expose canvas fibers, scratch vinyl, and weaken printed graphics.
Step 4: Test the Cleaner
Prepare the selected cleaner exactly as its label or awning manufacturer specifies. Apply it to a hidden 2-4 square inch area, leave it for the stated dwell time, rinse, and allow it to dry fully before judging color or water repellency.
A wet fabric can look darker and damaged when it is temporarily saturated. Test both visible color and surface feel after drying.
Success checkpoint: The test area shows no color transfer, tackiness, cracking, whitening, or coating loss.
Common mistake: Testing only the cleaner but not the complete process. Dwell time, brushing, rinsing, and drying can produce a different result from a quick spot wipe.
Step 5: Wet the Awning and Apply Cleaner
Rinse gently with a garden hose, working from the top downward. Pre-wetting reduces uneven absorption and helps suspend dirt, although some delicate manufacturers recommend applying cleaner to a dry surface. Follow the product label when it differs.
Apply enough solution to keep the affected area wet for approximately 5-15 minutes. Do not allow the cleaner to dry on the material. A soft brush or sponge distributes the solution more evenly than a narrow spray stream.
Success checkpoint: The cleaner remains visibly wet during its dwell time without pooling inside seams, hems, or motor housings.
Common mistake: Increasing chemical strength when growth does not disappear immediately. Longer compatible contact time and gentle agitation are safer than an improvised concentrated mixture.
Step 6: Scrub Mold Without Damaging the Weave
Scrub with overlapping light passes, following the fabric weave where visible. Work in sections of roughly 2-4 square feet, rinsing heavily contaminated areas before moving on. Clean the underside, folds, valance, hems, and gutter-facing edges because sheltered surfaces often retain more moisture.
Avoid circular force on printed, coated, or aged fabric. Do not grind mold into seams. Reapply cleaner to a stubborn patch instead of increasing pressure.
Success checkpoint: Surface growth lifts without fuzzy fibers, loose threads, peeling coating, or color bleeding.
Common mistake: Expecting every dark mark to vanish. Mold can etch pigment into fibers, and repeated scrubbing can create more damage than the original stain.
Step 7: Rinse Until No Cleaner Remains
Rinse from the highest point downward with clean water. Flush both sides when the construction allows it, paying particular attention to hems, pockets, grooves, and the underside of a rolled RV awning.
Continue until water no longer feels slippery and no foam, odor, or visible cleaner leaves the surface. Chemical residue can attract dirt, irritate skin, damage plants, and interfere with a later waterproofing treatment.
Success checkpoint: Runoff is clear, the surface has no slick feel, and no cleaner odor remains.
Common mistake: Using a pressure washer. High pressure can force water through seams, cut degraded fabric, remove protective finishes, bend aluminum, and drive contamination into adjacent walls.
Step 8: Dry Completely Before Retracting
Leave the awning fully extended with airflow on both sides. Typical drying takes 4-8 hours, but thick canvas, cool shade, high humidity, and wet seams can require 24 hours. Inspect hems and underside folds by touch rather than relying only on the top surface.
Do not retract a damp awning. A rolled, wet fabric creates a dark, poorly ventilated enclosure where mold can return quickly and corrosion can develop on hardware.
Success checkpoint: Fabric, seams, underside folds, and the roller-facing surface feel dry, with no cool damp patches.
Common mistake: Using intense heat from a hair dryer or heater. Localized heat can distort vinyl, shrink fabric, soften adhesive, or create uneven drying.
Which Cleaner Should You Use?
The safest cleaner is the mildest product that removes the growth without damaging the identified material. Manufacturer-approved awning cleaner or a neutral detergent solution is the first choice; peroxide, vinegar, and bleach require material-specific judgment rather than automatic substitution.
| Cleaner | Typical use | Main limitation | Avoid on |
|---|---|---|---|
| Manufacturer-approved awning cleaner | Acrylic, vinyl, RV fabric | Product directions vary | Any surface excluded by label |
| Neutral mild detergent | Routine dirt and light mildew | May not remove established staining | Unrinsable seams and electrical parts |
| Hydrogen peroxide cleaner | Selected synthetic fabrics and spot treatment | Can lighten some dyes | Unverified colors, trim, and natural fibers |
| White vinegar solution | Some washable synthetic surfaces | Acidic odor and uncertain coating compatibility | Natural stone, sensitive coatings, unknown fabric |
| Diluted bleach | Only manufacturer-approved materials | Can fade, weaken fibers, strip repellency, harm plants | Canvas, unknown fabric, metal hardware, vinyl |
Never combine bleach with vinegar or ammonia. The Centers for Disease Control and Prevention gives the direct rule: “Never mix bleach with other household cleaners.” Bleach mixed with acids can release chlorine gas, while bleach and ammonia can produce chloramine gases.
A commercial mold cleaner is not automatically safer than a household product. Read the active ingredients, required dilution, dwell time, ventilation instructions, and surface list. “Mold remover” on a label does not guarantee compatibility with acrylic, vinyl, stitching, or waterproof coatings.
Material-Specific Cleaning Methods
| Awning material | Preferred starting method | Conditional treatment | Main precaution |
|---|---|---|---|
| Solution-dyed acrylic | Manufacturer cleaner or mild soap | Approved diluted oxygen or chlorine product | Re-proofing may be needed after strong treatment |
| Coated vinyl | Mild soap and water | Vinyl-safe commercial cleaner | Avoid acetone, abrasive powder, and concentrated bleach |
| Synthetic polyester | Label-approved cleaner | Diluted peroxide product after testing | Coating and dye may react differently |
| Cotton or traditional canvas | Canvas manufacturer’s cleaner | Gentle oxygen-based product if approved | Strong bleach can weaken natural fibers |
| Aluminum | Mild detergent and soft brush | Metal-compatible oxidation cleaner | Keep chemicals away from joints and painted finishes |
Acrylic awnings often tolerate more moisture than untreated canvas, but solution-dyed color does not mean unlimited chemical resistance. Vinyl can look clean while its plasticizer or surface coating has been damaged, so cracking or tackiness may appear later rather than during the wash.
Traditional canvas needs special caution. If the fabric has become thin, brittle, or fibrous, cleaning cannot restore lost structural strength. The correct action may be repair or replacement, not a stronger chemical.
Can You Use Bleach on Awning Mold?
Bleach can be used on some solution-dyed acrylic awnings only when the manufacturer permits it, the dilution is exact, and the surface is thoroughly rinsed. Bleach is a poor default for canvas, unknown fabric, vinyl coatings, colored trim, seams, plants, and metal hardware.
Bleach may remove visible discoloration while reducing water repellency or weakening adjacent thread. It also does not eliminate the need for physical removal, rinsing, and complete drying. Never assume that a white awning is chemically safe because color fading is less visible.
If a care label specifically authorizes diluted bleach, use the label’s ratio, protect surrounding materials, control runoff, ventilate the area, and perform a hidden test. Do not use homemade bleach recipes when the manufacturer provides a different formula.
Why Should You Avoid a Pressure Washer?
Pressure washers are unsuitable for most fabric awnings because concentrated water pressure can tear seams, strip coatings, force moisture into hems, and damage retractable mechanisms. A low-pressure garden hose removes cleaner more safely and gives the operator better control around stitching and hardware.
Pressure washing may be acceptable for some rigid, unpainted metal structures when the manufacturer permits it, but the awning fabric, joints, wall attachment, and motor must still be protected. A pressure washer is not a substitute for dwell time and gentle brushing.
Should You Re-Proof the Awning?
Re-proof the awning only after it is fully clean and dry, and only with a product compatible with the material. Cleaning can reduce factory-applied water repellency, but unnecessary coating can create residue, alter appearance, or interfere with breathability.
Test water repellency by placing a few drops on a dry, clean section. If water beads and remains on the surface, additional treatment may not be necessary. If water rapidly darkens and penetrates fabric that previously repelled water, consult the manufacturer’s recommended fabric guard.
Do not apply fabric protectant to wet material. Avoid coating vinyl unless the product specifically supports vinyl, because some fabric guards can leave a film or cause premature surface deterioration.
How Does the Method Change for an RV?
RV awnings need cleaning on the top surface, underside, roller-facing folds, and support arms, but the awning must remain supported and clear of the vehicle wall. Follow the RV manufacturer’s instructions before using any cleaner, because acrylic and vinyl RV awnings have different coating requirements.
| Situation | Typical adjustment | Extra risk |
|---|---|---|
| Light RV mildew | Mild cleaner, 5-10 minute dwell | Over-scrubbing |
| Heavy rolled-up growth | Open in calm weather, treat sections | Mold dust and sudden frame load |
| Motorized RV awning | Disconnect power before wet work | Motor or switch damage |
| High wind | Delay cleaning | Wet fabric acting as a sail |
| Brittle or cracked fabric | Professional inspection | Tearing during extension |
Some RV cleaning instructions suggest partially rolling an awning to keep a solution wet. Use that method only when the RV awning manufacturer explicitly recommends it. Rolling wet chemical solution into a fabric tube can trap residue and expose the inside surface to prolonged chemical contact.
Why Does Mold Come Back?
Mold returns when moisture, organic residue, shade, and poor drying remain after cleaning. Surface treatment alone cannot correct a leaking gutter, blocked drainage channel, tree contact, condensation, or a habit of retracting the awning while damp.
Inspect the installation after the next rain. Look for water pooling at the wall edge, sagging sections, clogged gutters, failed sealant, and folds that remain wet several hours after the exposed surface dries. Trim branches that touch the fabric and remove bird droppings promptly.
Use this prevention schedule:
- Brush off leaves and pollen every 2-4 weeks during the wet season.
- Rinse routine dust every 1-3 months.
- Inspect seams, hems, arms, and mounting points twice yearly.
- Dry the awning before storage or retraction every time.
- Store removable fabric in a clean, dry, ventilated location.
The most effective prevention measure is not a stronger chemical. It is reducing the time that moisture remains trapped against organic debris.
Common Problems and How to Fix Them
| Problem | Likely cause | Correct response |
|---|---|---|
| Dark marks remain after washing | Permanent pigment staining or dye damage | Stop aggressive scrubbing; repeat only with approved spot treatment |
| Water now penetrates fabric | Repellent was removed or had already failed | Dry fully, test, then apply compatible protectant |
| Green film returns in days | Residue, shade, or damp storage | Rinse more completely and correct the moisture source |
| White powder appears on vinyl | Coating or plasticizer damage | Stop chemicals and obtain manufacturer advice |
| Plants show leaf damage | Concentrated runoff | Rinse foliage and soil with clean water; prevent future runoff |
| Awning smells after drying | Moisture trapped in hems or roller | Extend longer, inspect folds, and clean concealed surfaces |
A remaining stain does not prove that live mold is present. If the surface is dry, odor-free, and no growth transfers to a clean cloth, further abrasion may damage the awning without improving sanitation.
When Is Professional Remediation Better?
Professional cleaning is preferable when contamination exceeds approximately 10 square feet, the installation is elevated, the fabric is structurally degraded, or the household includes someone medically vulnerable to mold exposure. Typical residential service costs $150-$500, while difficult commercial or multi-story work can cost more.
| Service type | Typical price | Typical duration | Appropriate situation |
|---|---|---|---|
| Small DIY cleaning | $15-$60 | 1-3 hours | Accessible patch under 10 square feet |
| Residential professional cleaning | $150-$500 | 2-5 hours | Large fixed or retractable awning |
| RV professional service | $100-$300 | 1-3 hours | Heavy buildup or fragile fabric |
| Commercial elevated work | $300-$1,000+ | Half to full day | Scaffolding, containment, or multiple awnings |
A cleaning company should explain its chemical, runoff, access, drying, and re-proofing procedures before work begins. Ask whether the company carries insurance and whether it will identify fabric damage rather than masking it with aggressive stain removal.
Professional cleaning cannot reverse rotten canvas, failed lamination, cracked vinyl, corroded frames, or permanent dye loss. Replacement may be the more economical option when repair estimates approach the price of new fabric.
How Much Time and Money Does Cleaning Take?
A typical accessible awning requires 1-3 hours of labor, 4-8 hours of drying, and $15-$60 in DIY supplies. The final cost rises with height, fabric replacement, professional access equipment, severe contamination, and post-cleaning waterproofing.
| Cost component | Typical range | What changes the price |
|---|---|---|
| Soft brush and hose attachments | $10-$35 | Handle length and quality |
| Cleaner | $8-$25 | Ready-to-use versus concentrate |
| Gloves, mask, eye protection | $8-$30 | Reusable versus disposable equipment |
| Fabric protectant | $15-$50 | Coverage and material compatibility |
| Professional cleaning | $150-$500 | Size, height, access, and severity |
Do not compare quotes by price alone. A low quote that excludes underside cleaning, rinsing, runoff control, or drying advice may leave the main recurrence problem untreated.
FAQ
Can I clean awning mold with dish soap?
Mild dish soap can remove surface dirt and light organic residue when the manufacturer permits it, but dish soap is not a complete mold-remediation product. Use a small amount, rinse until no slippery film remains, and avoid formulas containing bleach, abrasives, degreasers, or strong solvents.
Is vinegar better than bleach for an awning?
Neither cleaner is universally better. Vinegar may be less damaging than bleach on some tested synthetic surfaces, but its acidity can affect coatings and nearby stone; bleach can damage fibers, remove water repellency, and create toxic gas when mixed incorrectly. Material instructions should decide.
Can moldy awning fabric be saved?
Moldy fabric can often be saved when growth is superficial, the fibers remain strong, and the coating is intact. Fabric that tears easily, has widespread odor after drying, shows delamination, or contains deeply embedded staining may need professional assessment or replacement rather than repeated chemical treatment.
How long should an awning stay open after cleaning?
Keep the awning open until the top, underside, seams, hems, and folds are completely dry, usually 4-8 hours in favorable conditions. Cool shade, high humidity, thick canvas, and weak airflow can extend drying to 24 hours.
Should I clean the awning frame too?
Yes. Clean the frame, arms, gutter, roller, and mounting area with a compatible mild detergent, then dry moving joints and hardware. Do not flood motors, sensors, switches, wall penetrations, or electrical connections, and do not apply fabric chemicals to unprotected metal.
What is the safest way to prevent mold after cleaning?
Prevent mold by drying the awning before retraction, removing leaves and bird droppings promptly, maintaining drainage, improving airflow, and inspecting shaded folds regularly. A compatible water-repellent treatment can help fabric resist wetting, but it cannot compensate for a leak or damp storage.
The Bottom Line
To clean an awning with mold safely, identify the material first, test a compatible cleaner, brush gently, rinse completely, and allow every fold and seam to dry before retraction. Avoid pressure washers and improvised bleach mixtures. When fabric is brittle, contamination is extensive, or access is unsafe, professional cleaning or replacement is the more reliable choice.