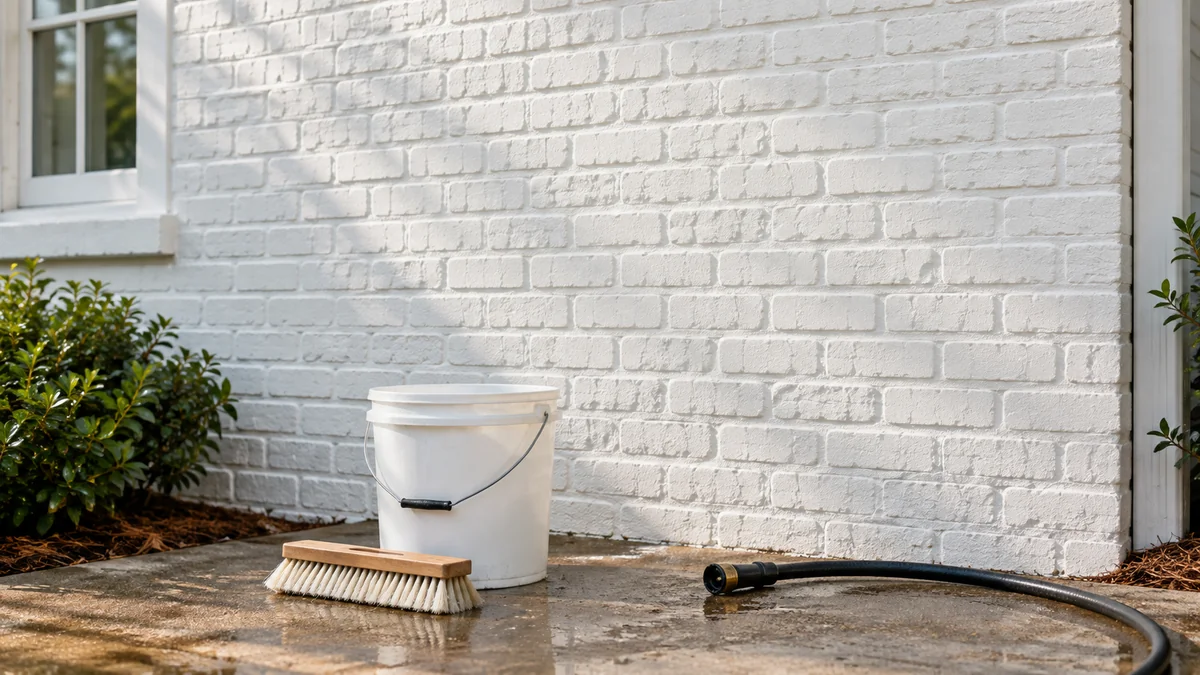
Safe pressure washing for painted brick means using a low-impact soft-washing process, not a high-pressure blast. A controlled detergent solution removes organic growth while wide-fan, low-pressure rinsing protects the paint film, porous brick, and mortar. The safest method depends on paint adhesion, masonry condition, chemical concentration, spray distance, and runoff control.
Key Facts at a Glance
- Painted brick should normally be cleaned with low pressure and a wide fan, never a 0-degree or turbo nozzle.
- A typical professional house-wash solution for sound painted brick contains about 0.5%-1.5% sodium hypochlorite at the wall, although product labels and paint manufacturers take priority.
- Ambient-temperature water is usually safer than hot water because heat can soften some acrylic and latex coatings.
- Pre-wetting plants, controlling runoff, and post-rinsing vegetation reduce chemical injury.
- Peeling, chalking, limewashed, or poorly bonded paint cannot be made sound by washing.
- A typical residential service costs $350-$750, with access, height, damage, and wall area driving the final price.
Is Pressure Washing Safe for Painted Brick?
Low-pressure cleaning is safe for sound painted brick when the operator controls pressure, flow, nozzle pattern, distance, chemical strength, dwell time, and water direction. Conventional pressure washing at concrete-cleaning settings is unsafe because it can remove paint, erode mortar, drive water behind coatings, and scar the brick face.
“Pressure washing” describes equipment, not a single safe setting. A pressure washer can apply detergent through a downstream injector, while a dedicated soft-wash pump can deliver chemical solution at lower operating pressure. Neither machine makes damaged paint safe to wash.
Painted brick is vulnerable for two separate reasons. The coating can lose adhesion, and the masonry assembly can absorb water through cracks, failed joints, holes, and unsealed penetrations. A wall that looks solid from the yard may still contain open mortar joints or paint blisters that become larger during rinsing.
Why high pressure damages painted masonry
Brick is porous fired clay, while mortar generally has lower resistance to abrasion than the brick units. A narrow spray concentrates force into a small area, and a near-contact pass can remove the paint film before the operator sees damage from ground level.
High pressure also creates problems that are not immediately visible:
- Water can enter cracks around windows, trim, and flashing.
- Mortar joints may lose their outer surface and begin to weather faster.
- Paint may lift where moisture enters through pinholes.
- Aged brick can develop surface “spalling,” where the exterior face flakes away.
- The operator may create stripes by overlapping narrow spray passes.
What Should You Inspect Before Cleaning?
Inspect the coating and masonry before applying water or chemicals. A safe pre-cleaning inspection identifies loose paint, failed joints, limewash, efflorescence, electrical hazards, and areas where water could enter the building.
Use these checks:
- Test adhesion. Press painter’s tape onto a clean painted area and remove it sharply. A large amount of coating on the tape indicates poor adhesion.
- Check chalking. Rub the wall with a dark cloth. Heavy white or colored transfer indicates oxidation and possible paint failure.
- Look for cracks and voids. Mark open mortar joints, brick cracks, failed caulk, exposed fasteners, and gaps around doors.
- Identify the coating. Latex, acrylic, elastomeric, silicate, limewash, and masonry paint respond differently to water and oxidizers.
- Check for lead paint. Homes built before 1978 may contain lead-based coatings. Disturbing that coating requires lead-safe practices and, in the United States, compliance with EPA Renovation, Repair and Painting requirements where applicable.
- Locate sensitive areas. Protect vents, outlets, door hardware, cameras, irrigation controls, and unfinished wood.
Do not wash limewashed brick when the goal is preservation. Limewash is designed to weather and can be removed or visibly altered by detergents, bleach, and pressure.
What Pressure and Flow Should You Use?
Use the lowest pressure that rinses away loosened soil, usually below 500 PSI for painted brick, with a wide spray pattern and generous working distance. A dedicated soft-wash system commonly operates around 60-150 PSI, while a pressure washer used through a soap injector may produce a higher pressure than the chemical pump but still remain suitable when the rinse is controlled.
The 500 PSI figure is a practical upper limit, not a guarantee of safety. Actual impact depends on nozzle orifice, spray angle, distance, flow rate, surface condition, and whether the operator holds the wand still.
| Cleaning situation | Typical pressure | Flow rate | Spray approach |
|---|---|---|---|
| Fragile or peeling paint | 60-100 PSI | 2-5 GPM | Soft-wash pump, broad spray, test first |
| Sound painted brick | 100-300 PSI | 3-6 GPM | 25-40 degree fan, 12-24 inches away |
| Firm painted masonry, difficult rinse | 300-500 PSI | 4-8 GPM | Wide fan, constant movement, test section |
| Bare brick restoration | 500 PSI or less initially | 4-8 GPM | Masonry-specific method, never assume paint settings |
| Concrete cleaning | 2,000-3,500 PSI | 3-8 GPM | Not appropriate for painted brick |
A high flow rate helps carry away dissolved soil without relying on concentrated impact. Homeowners with a 1.5-2.0 GPM electric machine may need smaller work sections and more rinse time, rather than increasing pressure.
Which nozzle should you use?
Use a wide-fan rinse nozzle, such as a 40-degree tip, or a dedicated low-pressure soap nozzle. Never use a red 0-degree tip, yellow 15-degree tip, turbo nozzle, or rotary surface-cleaner head on painted brick.
Keep the wand moving. Do not aim upward beneath siding laps, trim, flashing, or weep openings, because water can enter behind the facade.
Which Cleaning Solution Is Appropriate?
Sodium hypochlorite is commonly used for algae, mold, mildew, and organic staining, but chemical strength must match the coating and contamination. A typical field range for sound painted brick is 0.5%-1.5% active sodium hypochlorite at the surface, mixed with water and a compatible surfactant.
The range is a practitioner guideline, not a universal paint warranty. Always follow the paint manufacturer’s cleaning instructions and the chemical label. Stronger solution does not compensate for failed paint, mineral staining, rust, or inadequate dwell time.
| Stain or condition | Preferred first treatment | Typical dwell | Important limitation |
|---|---|---|---|
| Green algae | 0.5%-1.0% SH solution | 5-10 minutes | Keep wet and rinse completely |
| Black mildew | 1.0%-1.5% SH solution | 10-15 minutes | Test pigment stability first |
| General dirt | Neutral detergent and low-pressure rinse | 5-10 minutes | Bleach may be unnecessary |
| Efflorescence | Dry brushing, then masonry cleaner test | 5-15 minutes | SH does not dissolve mineral salts |
| Rust | Manufacturer-approved rust remover | Product label | Acid can damage mortar and metals |
| Red clay staining | Masonry-specific cleaner | Product label | Test for paint discoloration |
Never mix sodium hypochlorite with acids, ammonia, vinegar, or products containing incompatible solvents. Dangerous gases or heat can result. Store bleach away from sunlight and heat because sodium hypochlorite loses strength over time.
Surfactant improves cling on vertical walls, but excessive soap creates residue and demands more rinsing. Choose a product labeled for exterior masonry or painted surfaces.
How Do You Soft Wash Painted Brick?
A controlled painted-brick cleaning job usually takes 2-4 hours for a standard home, excluding repairs and repainting. The process has seven stages, and preventing chemical drying is the factor that most strongly affects the finish.
Before You Start
| Requirement | Typical value |
|---|---|
| Difficulty | Moderate to high |
| Professional labor time | 2-4 hours |
| DIY labor time | 6-8 hours |
| Chemical solution | 0.5%-1.5% SH at surface |
| Rinse water | Ambient temperature |
| Minimum useful equipment | Hose, low-pressure sprayer, wide-fan nozzle |
| Typical professional cost | $350-$750 |
Do not work in strong wind, intense direct sun, freezing temperatures, or rain that will carry untreated chemical runoff across landscaping.
Step 1: Document and test the surface
Photograph existing damage, test a hidden area, and allow the test section to dry before judging the result. Apply the weakest effective solution first, then inspect paint color, gloss, adhesion, and residue.
You will know the test passed when the coating remains intact and the cleaned area matches the surrounding color after drying. Stop if paint lifts, the surface changes color, or mortar begins shedding.
The common mistake is testing only a clean-looking section. Test near windows, corners, lower walls, and visibly chalky areas because coating age can vary across one elevation.
Step 2: Protect the property
Close windows and doors, cover outdoor electronics, shield light fixtures, and protect unfinished wood and metal. Disconnect or cover equipment that cannot tolerate chemical exposure.
Pre-wet plants, grass, shrubs, and soil with clean water until the foliage is fully saturated. Move portable furniture and rinse nearby vehicles before chemical application.
You will know the property is prepared when no exposed plant leaves remain dry beneath or beside the work area. The common mistake is covering plants with plastic during hot weather, which can trap heat and worsen damage; temporary shielding must allow ventilation.
Step 3: Apply the cleaning solution
Apply the diluted solution from the bottom of the wall upward in manageable sections, commonly 6-10 feet wide. Bottom-up application reduces dirty drip marks because untreated dry areas are not streaked by runoff from above.
Use a low-pressure fan or soft-wash sprayer. Keep the spray off windows, vents, door seals, bare metals, and electrical components.
You will know the solution is working when algae darkens, releases, or turns pale without aggressive scrubbing. The common mistake is applying too much liquid, which increases runoff without improving cleaning.
Step 4: Control dwell time
Allow approximately 5-15 minutes of dwell time, adjusting for shade, temperature, wind, contamination, and product instructions. Keep the surface visibly wet, but do not allow sodium hypochlorite solution to dry on the paint.
A shaded wall may need less reapplication than a sun-exposed south elevation. Mist a drying section with compatible solution or clean water rather than allowing white chemical residue to form.
You will know the dwell period is sufficient when organic staining has released and the rinse can remove it with light flow. The common mistake is extending dwell time to solve a chemistry problem, which can increase oxidation without removing mineral or rust stains.
Step 5: Rinse from top to bottom
Rinse from the highest cleaned area downward using clean water, a wide-fan tip, and continuous wand movement. Maintain at least 12-18 inches of distance initially, then increase the distance if paint appears soft or unstable.
Use a shallow spray angle across the wall. Do not drive water upward into joints, trim, vents, or weep holes.
You will know the rinse is complete when no foam, loose debris, or chemical film remains and runoff is clear. The common mistake is rinsing too close because the wall appears slow to clean; a second detergent application is safer than a concentrated jet.
Step 6: Flush plants and hardscape
Continue rinsing vegetation, soil, walkways, and adjacent surfaces for approximately 5-10 minutes after the wall is clean. Direct runoff away from ponds, storm drains, vegetable gardens, and sensitive landscaping where possible.
You will know the property is flushed when foliage is wet with clean water and no visible chemical residue remains on walkways or window sills. The common mistake is rinsing only the wall while allowing concentrated runoff to collect at the foundation.
Step 7: Inspect after drying
Inspect the wall several hours later, and again the next day if the coating is old. Look for white residue, streaks, blistering, changed gloss, exposed mortar, and areas where stains remain.
Do not repaint immediately after washing. Allow the masonry and coating to dry according to the paint manufacturer’s requirements, often at least 24-48 hours, and confirm that trapped moisture is not causing blistering.
How Do the Main Cleaning Methods Compare?
Soft washing is usually the best method for organic growth on sound painted brick. Hand cleaning offers more control for small areas, while paint removal is appropriate only when the coating itself must be replaced.
| Method | Typical pressure | Best use | Main risk |
|---|---|---|---|
| Soft washing | 60-500 PSI | Algae, mildew, dirt | Chemical or runoff damage |
| Hand washing | Hose pressure | Small stains and fragile details | Labor and ladder exposure |
| Conventional pressure washing | 1,500-3,500 PSI | Unpainted hardscape | Paint loss and mortar erosion |
| Paint stripping | Varies by product | Failed coating before repainting | Substrate damage and hazardous waste |
| Steam or hot-water cleaning | Often 500-3,000 PSI | Selected restoration work | Softened paint and moisture entry |
Soft washing does not remove every stain. Efflorescence, rust, tannin, smoke, and clay minerals require different chemistry, and aggressive bleach application can worsen the appearance without treating the underlying deposit.
What Does Painted-Brick Cleaning Cost?
Professional painted-brick cleaning typically costs $350-$750 for a standard two-story home, with a common minimum service charge of $250-$300. A typical wall-area rate is approximately $0.20-$0.45 per square foot, but contractors may price by elevation, access, setup complexity, and environmental protection.
| Project factor | Typical range | Effect on price or time |
|---|---|---|
| One-story accessible wall | $250-$500 | Lowest setup and ladder cost |
| Two-story home | $350-$750 | More hose reach and access time |
| Tall or difficult elevation | $600-$1,200+ | Lift, scaffolding, or extra protection |
| Heavy biological growth | 3-6 hours | More dwell and rinse cycles |
| Peeling or failed paint | Inspection plus repair quote | Washing alone is unsuitable |
| Small service area | $250-$300 minimum | Travel and setup dominate |
DIY expenses commonly include a pump or pressure washer, sprayer, chemical, surfactant, protective coverings, gloves, eye protection, and plant-rinsing equipment. The apparent equipment savings disappear if paint, landscaping, window seals, or electrical components require repair.
What Problems Occur During or After Washing?
Most failures result from pre-existing coating damage, excessive impact, dried chemical, incompatible stain chemistry, or uncontrolled runoff. The correct response is to stop and diagnose the failure rather than apply more pressure.
| Symptom | Likely cause | Immediate response |
|---|---|---|
| Paint flakes during rinsing | Failed adhesion or excessive impact | Stop, lower pressure, document damage |
| White powder after drying | Surfactant residue or efflorescence | Rinse; use masonry diagnosis before acid |
| Brown streaks | Rust, tannin, or dirty runoff | Identify stain; do not increase SH blindly |
| Pale paint patches | Oxidation or chemical overexposure | Stop chemical use and assess repainting |
| Green growth remains | Weak, degraded, or short-dwell solution | Retest a small area and follow label |
| Plants wilt after service | Chemical overspray or concentrated runoff | Flush immediately with clean water |
A counterintuitive practitioner rule is that stronger chemical often fails when the stain is mineral-based. Sodium hypochlorite kills biological growth, but it does not dissolve rust or efflorescence.
Another rule is to treat peeling paint as a painting problem, not a cleaning problem. Washing can expose the failure, but no nozzle or detergent can restore adhesion.
When is painted brick too damaged to wash?
Do not proceed with whole-wall washing when more than isolated areas are peeling, mortar joints are open, bricks are cracked, or the coating blisters when lightly rinsed. Repairs may include scraping, repointing, crack treatment, primer, and repainting with a compatible masonry coating.
Professional assessment is particularly appropriate for historic buildings, lead-painted surfaces, limewash, multi-family properties, buildings with interior moisture, and walls adjacent to sensitive waterways.
Which Equipment Should a Homeowner or Contractor Choose?
A homeowner usually needs a low-output electric washer or pump, wide-fan nozzle, chemical-resistant sprayer, hose, plant-rinsing supply, and protective equipment. A contractor benefits from a dedicated soft-wash system because diaphragm pumps handle chemical solutions and deliver consistent flow over large elevations.
| User | Suitable setup | Typical output | Appropriate scope |
|---|---|---|---|
| Homeowner, small wall | Electric washer and soap nozzle | 1.5-2.0 GPM | One-story, sound paint |
| Experienced DIY user | Low-pressure pump and sprayer | 2-4 GPM | Controlled small sections |
| Soft-wash contractor | Diaphragm pump | 4-8 GPM | Whole-home exterior |
| Property manager | Insured contractor system | 5-8 GPM | Multi-story or public site |
Ask a contractor for proof of liability insurance, a written scope, chemical and runoff controls, pre-existing damage photographs, and confirmation that the crew will use soft-wash methods rather than concrete-cleaning pressure.
Trade organizations such as the Power Washers of North America and the United Association of Mobile Contract Cleaners provide industry education, but membership alone does not guarantee careful work. The written method and the technician’s test-spot procedure matter more than a logo.
How Should You Handle Special Situations?
Painted brick veneer
Brick veneer still requires low-impact cleaning, but water-entry risk is often greater because the veneer includes cavities, flashing, weep openings, and wall penetrations. Keep spray away from weep holes and avoid directing water upward beneath trim.
Historic or limewashed brick
Historic masonry may use lime mortar or limewash that is intentionally sacrificial. Sodium hypochlorite, surfactants, and pressure can remove historic material, so consult a masonry conservator before cleaning.
Heavy mold inside a damp building
Exterior washing does not solve interior moisture intrusion. Repair roof leaks, flashing failures, plumbing leaks, failed caulk, and ventilation problems before treating recurring growth.
Repainting after cleaning
Allow the wall to dry fully, remove failed coating, repair mortar, and use a primer and masonry paint compatible with the existing substrate. A paint manufacturer’s data sheet should determine recoat conditions, not a generic 24-hour rule.
Frequently Asked Questions
Can bleach strip paint from brick?
Yes. Sodium hypochlorite can fade, oxidize, or weaken exterior paint when the concentration is excessive, the solution dries, or the coating is already failing. Use the weakest effective label-compliant mixture, test a hidden area, keep the surface wet, and rinse thoroughly. Bleach is not a substitute for repairing poor adhesion.
Can I use TSP on painted brick?
TSP or a phosphate-free substitute can remove greasy soil, but it does not reliably kill biological growth or remove mineral stains. Use a soft nylon brush and low-pressure rinse on a small area first. Protect plants and prevent phosphate-containing runoff from entering waterways.
How often should painted brick be cleaned?
Many homes need cleaning every 1-3 years when shade, humidity, trees, and drainage support algae or mildew. Annual inspection is more useful than an automatic annual wash. Remove overhanging vegetation and correct persistent moisture so biological growth does not return quickly.
Why does painted brick turn white after washing?
White residue may be dried surfactant, sodium salts, or efflorescence transported from within the masonry. Rinse thoroughly with clean water first. If the residue returns after drying, identify it as mineral efflorescence before using an acidic masonry cleaner, because acid can damage paint and mortar.
Should I pressure wash painted brick before selling a house?
Cleaning can improve appearance when the coating is sound, but washing peeling or chalking paint may make the exterior look worse. Obtain a test area and inspection first. If repainting is already necessary, repair and coat the wall rather than paying for a cleaning process that exposes widespread failure.
Can pressure washing remove mold permanently?
Low-pressure chemical cleaning removes visible organic growth and kills much of the surface contamination, but it cannot permanently prevent recurrence. Shade, humidity, roof runoff, leaking joints, and nearby vegetation determine how quickly algae or mildew returns. Correcting the moisture source provides longer-lasting results than increasing washing pressure.
The Bottom Line
Safe pressure washing for painted brick is a controlled soft-wash process using low impact, compatible chemistry, careful dwell time, wide-fan rinsing, and complete property protection. Inspect the coating first, keep sodium hypochlorite within a tested and label-compliant range, avoid concentrated nozzles, and stop when paint or mortar begins to fail. For sound painted brick, the safest cleaning method is gentle chemical action followed by a thorough, low-pressure rinse.