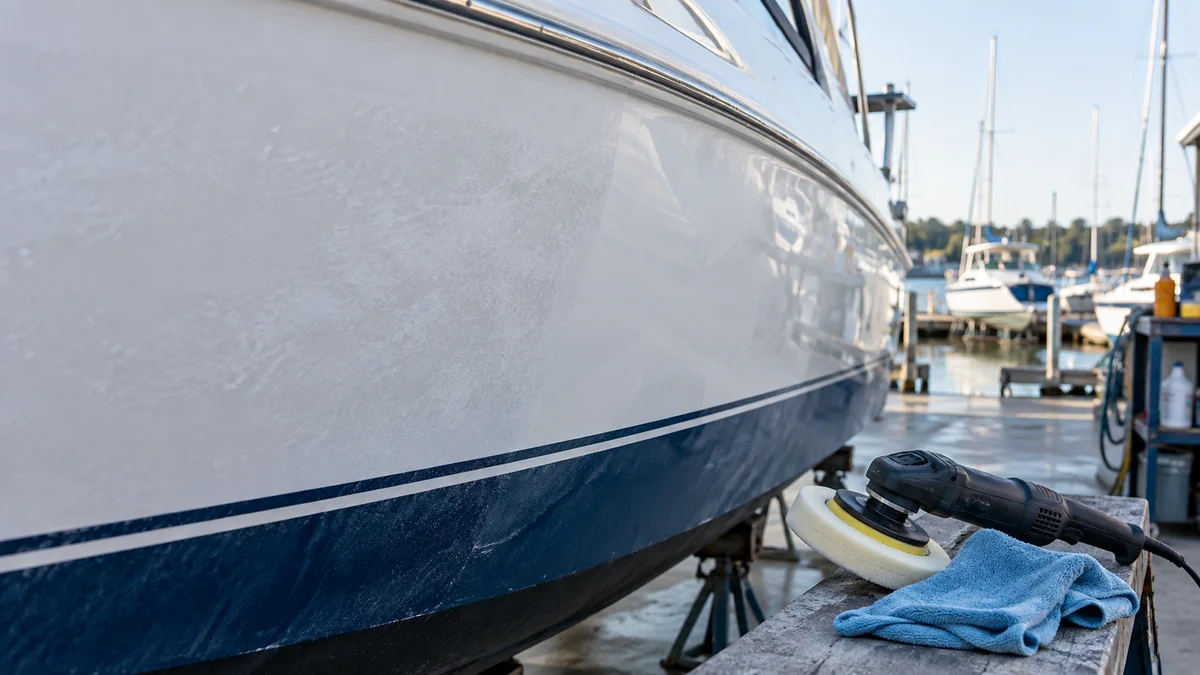
Restoring heavily oxidized gelcoat requires removing the damaged surface, refining the remaining resin, and protecting the finish before ultraviolet exposure starts the cycle again. The reliable sequence is decontamination, controlled wet sanding, heavy compounding, finishing polish, and UV protection. A test spot determines whether the gelcoat can be saved without exposing fiberglass.
Key Facts at a Glance
- Factory gelcoat is typically about 15-25 mils thick, but thickness varies by panel, corner, repair history, and manufacturer.
- Heavy oxidation usually requires sanding before compounding because chalking can include pits and uneven resin loss.
- A typical 20-foot boat or 25-foot RV takes 16-24 labor hours for a full five-stage restoration.
- A rotary polisher cuts faster than a standard free-spinning dual-action machine, but excessive heat can permanently discolor gelcoat.
- Freshly polished gelcoat needs wax, polymer sealant, or a compatible ceramic coating because polishing alone provides no meaningful UV barrier.
- Exposed fiberglass fibers, persistent transparent patches, or gelcoat thinner than the surrounding area indicate a refinishing problem rather than a polishing problem.
What Is Gelcoat Oxidation?
Gelcoat oxidation is the breakdown of the resin-rich outer surface of a fiberglass structure. Ultraviolet radiation, oxygen, moisture, salt, and heat damage the polymer surface, removing gloss and leaving a porous layer that appears white, gray, yellow, or chalky.
Gelcoat is a relatively thick modified polyester or vinyl ester resin applied to a mold before fiberglass reinforcement is laminated behind it. Unlike automotive clear coat, gelcoat may contain pigments, fillers, and waxes, and it can often tolerate controlled abrasion during several restoration cycles.
The damaged surface scatters light because microscopic pits and raised resin fragments replace the original smooth surface. Dirt, salt, mineral deposits, and wax residue then lodge in those irregularities. Washing removes contamination, but it cannot rebuild resin that ultraviolet exposure has already degraded.
Can heavily oxidized gelcoat be saved?
Heavily oxidized gelcoat can usually be restored when a continuous layer of sound, colored resin remains beneath the chalking. Gelcoat cannot be restored by polishing when the surface is deeply eroded, fiberglass fibers are visible, or previous sanding has removed the colored layer.
A small test area gives the most reliable answer. Clean a 12-by-12-inch section, wet-sand it with 1000 grit, compound it, and inspect it in direct sunlight. A uniform color change and increasing gloss indicate recoverable gelcoat; translucent spots, exposed weave, or sharp color boundaries indicate material loss.
Before You Start: Tools, Cost, and Conditions
Plan on $200-$450 for a typical DIY restoration using a polisher, pads, abrasives, compound, polish, cleaning chemicals, and protection. A professional restoration commonly costs $35-$75 per linear foot, although access, height, repairs, color, and non-skid areas can move the price substantially.
Work in shade with a surface temperature below approximately 90°F. Hot panels cause compound to dry rapidly and increase the risk of resin softening, pad grabbing, and uneven cutting.
| Requirement | Typical specification | Practical quantity |
|---|---|---|
| Rotary polisher | 1,200-1,500 RPM cutting range | 1 machine |
| Wool cutting pads | 7-9 inch twisted wool | 2-4 pads |
| Foam polishing pads | 7-9 inch medium or fine foam | 2 pads |
| Wet sandpaper | 600, 800, 1000, 1500 grit | 10-20 sheets per grit |
| Compound and polish | Marine heavy cut plus finishing polish | 16-32 fl oz each |
| Surface protection | Marine wax, sealant, or coating | 16-24 fl oz |
| Safety equipment | Eye protection, gloves, respirator where required | 1 set |
Use a sanding block on broad flat panels, clean microfiber towels, a hose or pump sprayer, masking tape, a pad-cleaning spur, a bright inspection light, and a thermometer if the panel receives direct sun. Remove or mask decals, rub rails, trim, stainless fittings, rubber seals, and painted areas before abrasive work begins.
How Should You Choose a Restoration Method?
Choose wet sanding and compounding for severe chalking when the gelcoat still has adequate thickness. Choose a chemical-mechanical kit for moderate oxidation or beginner projects, and choose an acrylic coating only when the surface is too thin or fragile for meaningful abrasion.
| Method | Suitable damage | Typical labor | Expected result | Main limitation |
|---|---|---|---|---|
| Wet sanding plus compound | Deep chalking and pitting | 16-24 hours for a 20-foot boat | Highest gloss potential | Can remove too much gelcoat |
| Chemical restoration kit | Moderate oxidation | 6-12 hours | Noticeable gloss improvement | Limited correction of pits |
| Acrylic coating | Very thin or porous surface | 4-8 hours | Fast wet-look appearance | Can peel, yellow, or complicate later repairs |
| New gelcoat | Missing or failed surface | Several days | Structural surface renewal | Requires repair skill and curing time |
| Marine paint system | Exposed fiberglass or inconsistent substrate | Several days | Uniform new finish | Requires extensive preparation |
A compound is an abrasive suspension, not a chemical replacement for missing resin. Products marketed as oxidation removers can clean and fill minor defects, but they cannot level deep erosion without removing material.
Step 1: Wash and Decontaminate the Surface
Wash the surface with a wax-stripping marine detergent, rinse until no slippery residue remains, and remove mineral or rust contamination before sanding. A contaminated panel embeds salt, grease, iron deposits, and old wax into the abrasive scratches.
Use a dedicated marine wash or a diluted high-pH cleaner according to its label. Oxalic-acid hull cleaners can remove rust, tannin, and waterline staining, but they should not be allowed to dry on the surface and should be rinsed thoroughly.
Cleaning sequence
- Rinse loose sand, salt, and grit from the panel.
- Wash from the top downward with a clean mitt.
- Treat rust or tannin stains with an oxalic-acid product.
- Rinse until the runoff is free of foam and cleaner.
- Wipe the surface with a compatible solvent or panel cleaner if old wax remains.
- Allow the gelcoat to dry completely.
You will know the panel is ready when a clean microfiber towel moves without waxy drag and water does not form oily rainbow patches. Do not sand a damp panel merely because it is wet from washing; trapped moisture can obscure the scratch pattern and reduce inspection accuracy.
Common mistake: Starting with compound over old wax. The pad then smears contamination across the panel, loads quickly, and produces inconsistent cutting.
Step 2: Inspect Thickness and Mask Vulnerable Areas
Inspect corners, edges, raised lettering, chines, hatch rims, repaired areas, and high-contact locations before using a machine. Gelcoat is often thinner on edges, while previous restorations may have removed more material from one panel than another.
Mask adjacent paint, anodized aluminum, rubber, vinyl graphics, and polished metal. Abrasive compound can stain porous trim, and wet sanding can soften paper graphics or force slurry beneath decals.
When should you stop sanding?
Stop sanding when the chalky appearance has disappeared from the test area and the scratch pattern is uniform, not when every stain has vanished. Dark stains, pinholes, or transparent defects may lie below the safe gelcoat thickness and cannot be removed without sacrificing more surface.
Use a conservative starting grit:
| Surface condition | Starting grit | Refinement sequence |
|---|---|---|
| Light haze with intact gloss | 1200-1500 | Compound, then polish |
| Moderate chalking | 1000-1200 | 1500, compound, polish |
| Heavy chalking with shallow pits | 800-1000 | 1200, 1500, compound |
| Severe rough chalking | 600-800 | 1000, 1200, 1500, compound |
| Exposed fibers or missing color | Do not sand further | Repair, paint, or re-gelcoat |
The common advice to begin all severe oxidation at 600 grit is unnecessarily aggressive. Starting at 1000 grit and stepping down only when the test area proves inadequate preserves material and usually reduces finishing time.
Step 3: Wet-Sand the Oxidized Gelcoat
Wet-sand the surface with a rigid block, clean water, and waterproof abrasive paper until the chalking is removed and the surface shows a consistent matte finish. Sand in straight, overlapping passes rather than circles, because linear scratches are easier to inspect and remove.
Add a few drops of mild dish detergent to the water only if the abrasive manufacturer permits it. The lubricant carries away resin dust and reduces paper loading, but excessive detergent can leave a film that interferes with inspection.
Wet-sanding procedure
- Work in sections of approximately 2-by-2 feet.
- Keep the paper and panel flooded with clean water.
- Use light, even pressure on flat surfaces.
- Wipe the slurry away every few passes.
- Change paper when it stops cutting or becomes contaminated.
- Rotate the sanding direction between grits to confirm that the previous scratches are gone.
- Sand edges by hand with reduced pressure.
You will know the first grit has done its job when no chalky islands remain and the dull surface has one consistent scratch direction. Move to the next grit only after the preceding pattern is even; polishing cannot efficiently remove random deep scratches left by careless sanding.
Common mistake: Continuing to sand a dark patch until it matches the surrounding area. The patch may be a thin section, repair boundary, or pigment loss rather than oxidation.
Step 4: Compound the Sanding Scratches
Compound the sanded gelcoat with a marine heavy-cut compound and a clean twisted-wool pad. A rotary machine usually removes 600-1500 grit scratches faster than a conventional free-spinning DA polisher, although a forced-rotation DA provides a safer compromise for inexperienced users.
Work at approximately 1,200-1,500 RPM on a rotary, using a 2-by-2-foot section and moderate pressure. Keep the pad flat, keep it moving at roughly 1-2 inches per second, and use enough compound to maintain lubrication without flooding the surface.
Apply a small amount of compound to the pad or panel, spread it at low speed, then make overlapping passes. Clean or change the pad when fibers become matted with dried product.
| Symptom during compounding | Likely cause | Correction |
|---|---|---|
| Compound balls or gums | Hot panel or excess product | Move to shade, reduce product |
| Pad grabs the surface | Dry compound or tilted pad | Add product, flatten pad |
| Gloss remains cloudy | Incomplete scratch removal | Recheck sanding sequence |
| Black or yellow heat mark | Excessive heat | Stop, cool panel, assess damage |
| Uneven color | Variable gelcoat thickness | Reduce pressure and inspect test spot |
You will know the cut phase is complete when the panel has strong color and gloss but may still show fine wool trails or light haze under direct inspection. Do not chase every hologram with the aggressive pad; finishing polish is designed to remove those marks more safely.
Expert rule: Pad cleanliness often matters more than compound brand. A loaded wool pad stops cutting evenly and generates heat, so clean it after each small panel rather than waiting until the fibers are hard.
Step 5: Polish for Clarity and Gloss
Polish the compounded surface with a fine marine polish and a clean foam or finishing-wool pad. A rotary machine generally runs around 1,000-1,200 RPM for this stage, while a DA polisher can operate according to the polish manufacturer’s recommended speed.
Use light pressure and two or three overlapping passes. Remove residue with a soft microfiber towel before it dries, then inspect the panel from several angles under sunlight or a bright LED light.
Finishing polish removes fine haze and buffer trails, but it cannot correct deep sanding scratches. If isolated straight scratches remain, return to the preceding abrasive stage rather than applying more polish.
Common mistake: Using one pad for every compound and polish. Residual heavy-cut abrasive in a finishing pad can recreate the haze the final stage is intended to remove.
Step 6: Seal the Restored Gelcoat
Apply protection immediately after polishing because freshly corrected gelcoat has an exposed, porous surface with no durable UV barrier. A marine paste wax is easy to apply, a polymer sealant generally lasts longer, and a ceramic coating can last longer still when preparation and compatibility are correct.
Remove all polishing oils according to the coating manufacturer’s instructions before applying a ceramic product. Wax or sealant residue can prevent a coating from bonding evenly.
| Protection type | Typical service interval | Application difficulty | Best use |
|---|---|---|---|
| Marine paste wax | 2-4 months outdoors | Low | Seasonal maintenance |
| Synthetic polymer sealant | 4-8 months | Low-medium | Regularly used boats and RVs |
| Marine ceramic coating | 12-24 months | Medium-high | Prepared, smooth gelcoat |
| Acrylic coating | 6-24 months, variable | Medium | Thin surface unsuitable for cutting |
Apply thin coats on cool panels and respect the product’s curing period. Do not assume a ceramic coating repairs oxidation; coatings preserve a prepared surface, but they cannot level chalking or hide severe porosity indefinitely.
Which Protection Option Is Best?
Marine paste wax is the simplest choice for seasonal users, polymer sealant is the practical compromise for outdoor storage, and ceramic coating is appropriate when the owner can perform meticulous preparation. None of these options substitutes for a sound substrate.
A waxed boat may need reapplication every 2-4 months in strong sun, while a polymer product may last 4-8 months under similar conditions. Typical ceramic claims of 12-24 months depend on washing chemistry, surface preparation, UV exposure, and whether the product was applied at the correct film thickness.
The most durable strategy is not necessarily the hardest coating. A correctly prepared surface that receives regular washing and shade can outlast a poorly prepared surface covered with expensive ceramic material.
What If Compound Does Not Fix the Damage?
Compound will not fix missing gelcoat, exposed fiberglass, deep crazing, delamination, or severe color loss. Those conditions require localized repair, new gelcoat, fairing compound, or a marine paint system after the substrate is stabilized.
| Visible condition | Diagnosis | Correct next action |
|---|---|---|
| White chalk wipes off but color remains | Surface oxidation | Clean, sand lightly, compound |
| Gloss returns unevenly | Variable oxidation or thickness | Reduce abrasive aggressiveness |
| Fiberglass weave is visible | Gelcoat has been removed | Stop sanding and repair |
| Fine branching cracks | Gelcoat crazing | Remove damaged area and re-gelcoat |
| Soft or raised laminate | Possible delamination | Obtain structural inspection |
| Persistent transparent spots | Very thin gelcoat | Consider coating or refinishing |
| Yellow staining under clear resin | Embedded discoloration | Test chemical cleaning before sanding |
Acrylic coatings can provide a temporary visual improvement on thin, porous surfaces, but they do not restore the resin. Peeling acrylic layers can make later refinishing more laborious because the coating must be stripped without damaging the remaining gelcoat.
Special Cases: Boats, RVs, and Non-Skid Surfaces
RV gelcoat restoration follows the same cleaning, abrasive, and protection principles as boat restoration, but roof access, sealants, decals, and vertical runoff create additional risks. Keep solvents away from EPDM or TPO roofing, inspect sealant joints before washing, and protect graphics from abrasive slurry.
Non-skid gelcoat should not be treated like a flat hull side. A machine can flatten raised texture, collect compound in the recesses, and make the deck dangerously slippery. Use a soft brush, compatible cleaner, and a manufacturer-approved non-skid restoration product; limit machine work to smooth borders and flat sections.
Dark blue, black, and red gelcoat reveal holograms and uneven color more readily than white gelcoat. These colors also show heat marks and contamination clearly, so smaller sections, cleaner pads, and more frequent inspections are worthwhile.
Cost and Time Expectations
A DIY restoration of a 20-foot boat or 25-foot RV commonly requires 16-24 hours of physical labor when the entire exterior needs cleaning, sanding, compounding, polishing, and sealing. A small hull side may take 3-6 hours, while ladder work, rails, cabins, and multiple decks can double the estimate.
| Project scope | DIY labor | Typical material cost | Professional range |
|---|---|---|---|
| 8-10-foot repair area | 3-6 hours | $60-$150 | $250-$600 |
| 20-foot boat hull sides | 16-24 hours | $200-$450 | $875-$1,875 |
| 25-foot RV exterior | 16-28 hours | $250-$550 | $1,000-$2,200 |
| Severe repair and refinishing | 30+ hours | $500-$1,500 | $2,000-$6,000+ |
Professional pricing varies because linear-foot estimates may exclude the cabin, roof, non-skid deck, decals, oxidation below a rub rail, and repairs. Request a written scope that identifies sanding grits, included panels, protection product, and whether fiberglass exposure changes the price.
Common Mistakes and Their Fixes
- Starting too aggressively: Begin with 1000 or 1200 grit on a test area when possible. Use 600 grit only when finer paper cannot remove the damaged layer efficiently.
- Buffing in direct sunlight: Move into shade and let the panel cool. Heat dries compound and concentrates friction.
- Holding the rotary pad at an angle: Keep the pad flat to prevent edge digging, uneven color, and localized heat.
- Using too much compound: Start with a small amount and add product only when lubrication declines.
- Skipping the finishing stage: Wool cutting pads commonly leave holograms. Use a separate finishing pad and polish.
- Leaving the surface unprotected: Apply wax, sealant, or coating immediately after final inspection.
One counterintuitive fact matters here: a wetter-looking finish immediately after polishing does not prove the gelcoat is healthy. Oils in some compounds can temporarily fill microscopic defects, so inspect after cleaning the panel according to the protection product’s preparation instructions.
How Long Will the Restoration Last?
A properly corrected and protected gelcoat surface commonly retains useful gloss for several months to several years, depending on UV exposure, storage, washing, color, and coating choice. Outdoor boats in intense sun may need wax every 2-4 months, while covered vessels can go much longer.
Wash with a pH-neutral marine soap once contamination accumulates, rinse salt after each saltwater outing, and avoid household cleaners that strip wax or attack aluminum and sealants. Inspect for chalking at the start of each season rather than waiting for widespread whitening.
Early maintenance is less abrasive than repeated heavy restoration. A lightly hazed panel may need a fine polish and sealant, while a neglected panel may again require sanding that permanently reduces gelcoat thickness.
FAQ
Can I restore gelcoat without wet sanding?
You can restore moderate oxidation without wet sanding by using a marine oxidation remover, compound, polish, and protection product. Chemical-mechanical systems are less effective on deep pits, uneven erosion, and rough chalking. Test a small area first, because a temporary gloss increase does not prove that the damaged layer has been removed.
Is a dual-action polisher safe for gelcoat?
A dual-action polisher is generally safer for beginners because it concentrates less heat than a rotary machine, but a free-spinning DA may cut slowly on severe oxidation. A forced-rotation DA provides more cutting ability while retaining easier control. Heavy sanding scratches still require suitable compound, pad, and working time.
Can automotive compound be used on marine gelcoat?
Automotive compound can sometimes remove fine haze from gelcoat, but marine compounds are usually better matched to the harder, more porous surface and larger correction defects. Automotive products may dry quickly, lack sufficient cut, or leave oils that complicate coating preparation. Always test compatibility on an inconspicuous panel.
How do I remove oxidation from a gelcoat roof?
Clean and inspect the roof, protect rubber and roof sealants, and use a controlled hand or machine process on smooth gelcoat sections. Do not machine-polish textured non-skid or walkable roof coatings without confirming compatibility. Use fall protection and avoid allowing acidic cleaners to dry on the surface.
Should I paint gelcoat that has lost its shine?
Loss of shine alone does not require paint because sound gelcoat can often be sanded and polished. Paint or new gelcoat becomes appropriate when fiberglass is exposed, crazing is widespread, the surface is too thin, or previous repairs create uneven color and thickness. A test spot should precede that decision.
What is the best way to prevent oxidation from returning?
The best prevention is regular washing, UV protection, and covered storage when possible. Apply a compatible marine wax every 2-4 months outdoors, a polymer sealant at its stated interval, or a ceramic coating after thorough preparation. Protection works only when the surface is clean and free of unresolved oxidation.
Conclusion
Restoring heavily oxidized gelcoat is a controlled material-removal process, not a single-product treatment. Clean and decontaminate first, begin with the least aggressive wet-sanding grit that works, compound with controlled heat, refine the finish with a separate polish, and seal the restored surface immediately. Stop when fiberglass, crazing, or thin transparent patches appear, because those signs call for repair or refinishing rather than more abrasion.