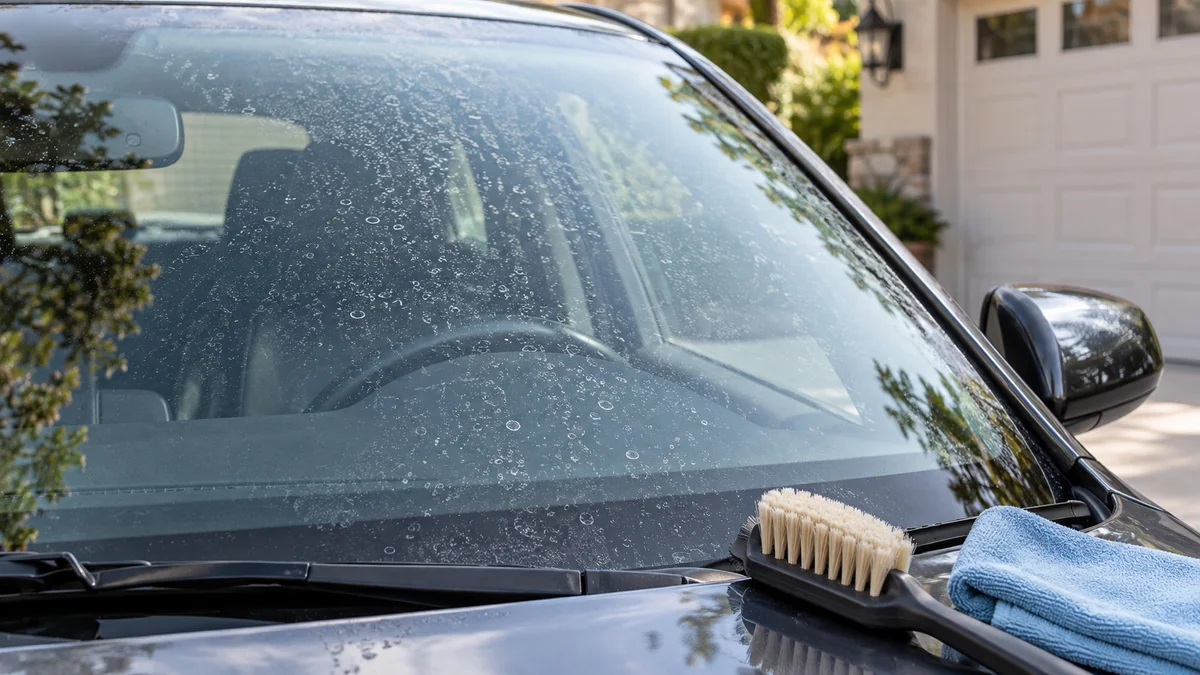
To remove hard water stains from glass on a car, wash and dry the cool glass, dissolve fresh mineral deposits with diluted white vinegar or an automotive spot remover, then rinse and buff completely. If the marks remain after the surface feels clean, the glass is probably etched and needs a dedicated glass polish rather than more chemical cleaner.
Key Facts at a Glance
- Fresh calcium and magnesium deposits usually respond to mild acid, such as diluted white vinegar, within 5-15 minutes.
- A clay bar removes bonded surface contamination, but it cannot repair mineral etching inside the glass.
- Glass that remains marked after chemical cleaning usually needs cerium oxide or a dedicated automotive glass compound.
- Never apply acidic remover to hot glass, allow it to dry, or let it dwell on painted trim.
- Typical hand removal takes 20-45 minutes per windshield; severe machine polishing can take 1-3 hours.
- A glass sealant reduces future bonding, but it cannot prevent spots if sprinkler water repeatedly dries on the vehicle.
Before You Start
A basic water-spot removal job requires 30-60 minutes, shade, clean microfiber towels, and either diluted vinegar or an automotive glass spot remover. Typical DIY cost is $3-$30 for chemical cleaning and $15-$50 for a glass polishing kit.
| Requirement | Typical specification | Why it matters |
|---|---|---|
| Work area | Shade, 60-85°F surface temperature | Prevents rapid drying and uneven chemical action |
| Initial wash | pH-neutral car shampoo, 1-2 gallons water | Removes grit before wiping |
| Towels | 4-6 clean microfiber towels, 300-500 GSM | Separates washing, rinsing, and buffing |
| Vinegar solution | 1:1 distilled white vinegar and water | Dissolves light carbonate deposits |
| Spot remover | 5-10 drops per small section | Limits chemical exposure and waste |
| Glass polish | Cerium oxide or automotive glass compound | Levels light etching mechanically |
| Protection | Nitrile gloves and eye protection | Reduces acid and abrasive exposure |
Check the glass before beginning. Chips, cracks, aftermarket tint, windshield-mounted cameras, rain sensors, and exposed rubber seals require extra care. Do not use abrasive polishing near a damaged chip, because heat and pressure can enlarge it.
Cover painted edges and exterior trim with painter’s tape if you are using an acidic product. Automotive glass cleaner is safer than household bathroom descaler, toilet cleaner, muriatic acid, or limescale remover because those products may contain acids and additives unsuitable for vehicle finishes.
What Hard Water Stains Are
Hard water stains are mineral residues left when dissolved water salts remain after evaporation. Calcium carbonate, magnesium compounds, silica, road film, and washing chemicals can form pale rings, cloudy patches, or a rough crust on automotive glass.
The important distinction is between a deposit and etching. A deposit sits on the glass and can usually be dissolved or lifted. Etching is a microscopic change to the surface that remains after the mineral residue has been removed.
How can you tell whether glass is stained or etched?
Clean one small area with glass cleaner and feel it with a dry fingertip or a clean plastic bag over the finger. If the roughness disappears but the mark remains when viewed at an angle, the glass is likely etched rather than coated with removable minerals.
A simple diagnosis sequence helps:
- Wash and dry a 4-inch test area.
- Apply diluted vinegar for 3-5 minutes.
- Rinse and dry the area.
- Inspect it in direct and reflected light.
- Compare the treated section with untreated glass.
If the spot lightens, chemical treatment should continue. If the appearance does not change but the glass feels smooth, polishing is the next option. If the glass feels rough after treatment, repeat chemical cleaning once before increasing abrasion.
Why do acids remove some water spots?
Acids react with alkaline carbonate deposits and convert part of the mineral residue into more soluble compounds. Diluted acetic acid in white vinegar is relatively mild, while dedicated spot removers may use stronger acids or chelating ingredients that act faster.
Acid does not reverse every form of glass damage. It cannot fill pits, restore missing glass, or reliably remove deposits containing heavy silica and baked road contamination. More dwell time is not a substitute for the correct method.
Which Removal Method Fits the Stain?
The best method depends on whether the mineral is loose, bonded, or etched. Use the least aggressive approach that produces a clear result, because unnecessary abrasion can create haze or visible distortion.
| Condition | Recommended method | Typical time | Expected result |
|---|---|---|---|
| Fresh white rings | 1:1 vinegar solution | 10-15 minutes | Removes light carbonate film |
| Rough bonded contamination | Clay bar with lubricant | 15-25 minutes | Smooths surface contamination |
| Persistent mineral deposits | Automotive spot remover | 10-20 minutes | Breaks down stronger deposits |
| Light etching | Glass compound by hand | 30-60 minutes | Reduces fine marks and haze |
| Heavy etching | Cerium oxide and machine pad | 1-3 hours | Levels shallow surface defects |
| Deep pits or distortion | Professional glass service | 1-2 days | Determines repair or replacement need |
Household vinegar is the lowest-risk starting point, but it is not the strongest option. A dedicated remover is more efficient on older deposits, while glass polishing is the only practical DIY route for marks that remain after the mineral layer is gone.
Step-by-Step Removal Process
Step 1: Move the Vehicle Into Shade
Park the car away from direct sunlight and wait until the glass feels cool. Hot glass causes vinegar, water, and spot-remover carriers to evaporate quickly, which creates uneven dwell time and concentrated residue.
You will know the surface is ready when a damp microfiber remains wet for at least 30 seconds without immediately flashing dry. The common mistake is beginning on sun-heated glass because the outside air feels comfortable while the windshield surface is much hotter.
Step 2: Wash the Glass and Surrounding Panels
Rinse loose grit from the vehicle, then wash the glass with pH-neutral car shampoo. Use a clean microfiber mitt and separate towels for the wheels, paint, and glass.
Rinse thoroughly and dry with a clean towel. Do not rub mineral crust aggressively during the wash, because trapped sand can create scratches. The success checkpoint is a clean surface with no visible dust, oily film, or loose debris.
Step 3: Protect Paint, Rubber, and Electrical Components
Apply painter’s tape along the glass edge when using a dedicated acidic cleaner. Keep the product away from painted trim, polished aluminum, wiper arms, rubber seals, windshield cameras, and sensor housings.
Place a towel across the hood below the windshield to catch runoff. The common mistake is treating the windshield without considering where liquid drains. Even a short dwell can stain unprotected trim or soften residue on a previously damaged clear coat.
Step 4: Dissolve Fresh Mineral Deposits With Vinegar
Mix equal parts distilled white vinegar and clean water. Saturate a microfiber towel or applicator, place it on a small glass section, and leave it for 3-5 minutes without allowing the solution to dry.
Wipe with light pressure using overlapping vertical and horizontal passes, then rinse the section with clean water. Repeat once if the residue is improving. You will know the method worked when the glass feels smooth and the ring disappears after drying.
Do not use lemon juice as a default substitute. Lemon juice contains sugars, oils, and variable acidity, which can leave residue and complicate final cleaning. Avoid vinegar on hot glass, unprotected natural stone, or surfaces that the product label excludes.
Step 5: Use a Dedicated Glass Spot Remover
Use a product labeled for automotive glass and follow its label rather than assuming all spot removers have the same strength. Apply roughly 5-10 drops to a microfiber or foam applicator, then work an area no larger than half a windshield.
Rub with moderate pressure for 30-60 seconds. Keep the product wet, never let it dry, and rinse the section immediately with water or the manufacturer’s specified neutralizer. Wipe with one towel and buff with a second dry towel.
Test first near a lower corner. Dedicated products can vary from mild acidic cleaners to aggressive formulations. The common mistake is leaving a gel on the glass for several minutes because the label says it works quickly. Longer dwell can damage adjacent trim without improving etched areas.
Step 6: Polish Etched Glass With a Glass Compound
Use a purpose-made glass compound containing cerium oxide or another product specifically approved for automotive glass. Apply a small amount to a rayon, microfiber, or manufacturer-approved glass pad, depending on the product instructions.
For hand polishing, work a 4-6-inch section with firm, even pressure for 2-5 minutes, keeping the compound slightly damp. For machine polishing, use low speed, frequent movement, and light pressure; stop often to check temperature and clarity.
You will know polishing is helping when the mark becomes less visible from multiple angles, not merely when residue disappears from one viewing direction. The common mistake is using a general paint polish or coarse rubbing compound, which may leave haze or fail to cut glass evenly.
Cerium oxide is not a magic scratch remover. Deep scratches, pitting, wiper wear, and optical distortion may require professional evaluation or glass replacement. Excessive machine polishing in one spot can create a lens-like distortion that is more distracting than the original stain.
When Should You Use a Clay Bar?
Use a clay bar when the glass feels rough after washing but the contamination is not dissolving with mild vinegar. Clay removes bonded overspray, industrial fallout, and embedded road film with lubrication, but it does not chemically dissolve mineral scale or repair etching.
Apply a dedicated clay lubricant generously and glide the clay lightly across a small section. Fold the clay when its working face becomes dirty. Stop if the clay picks up sharp grit, because contaminated clay can scratch.
Clay is often useful before chemical treatment because a clean surface lets the remover contact the mineral deposit evenly. Clay should not replace rinsing, and dry claying is unsafe.
Common Mistakes and How to Fix Them
| Mistake | What happens | Recovery |
|---|---|---|
| Applying remover to hot glass | Product dries unevenly | Rinse, cool the glass, and retest |
| Using a kitchen scrub pad | Fine scratches or haze appear | Stop abrasion and assess under angled light |
| Letting acid run onto paint | Clear coat or trim may stain | Rinse immediately with plenty of water |
| Repeating cleaner on etched glass | No improvement after residue removal | Switch to a glass polishing compound |
| Using one dirty towel | Grit spreads across the windshield | Replace towels and rewash the surface |
| Polishing one spot too long | Local optical distortion develops | Stop, cool, inspect, and seek professional help |
A hazy finish usually indicates residue, dried compound, or an uneven coating rather than newly etched glass. Rewash with an ammonia-free automotive glass cleaner, rinse thoroughly, and buff with a clean low-pile towel.
Streaks that appear only when the wipers operate may come from silicone, washer-fluid additives, worn blades, or oily road film. Replace contaminated wiper blades after cleaning the glass; otherwise the marks can return within minutes.
Time, Cost, and Method Comparison
Typical figures below describe consumer-level work in the United States. Product prices vary by brand, package size, and local availability.
| Method | Typical material cost | Working time | Skill level |
|---|---|---|---|
| Vinegar and microfiber | $3-$8 | 10-20 minutes | Beginner |
| Clay bar and lubricant | $15-$30 | 15-25 minutes | Beginner |
| Dedicated spot remover | $15-$35 | 10-20 minutes | Beginner to intermediate |
| Hand glass compound | $12-$30 | 30-60 minutes | Intermediate |
| Machine cerium-oxide polish | $35-$100 | 1-3 hours | Advanced |
| Professional glass polishing | $100-$300 | 1-3 hours | Professional |
A professional may recommend replacement rather than polishing when deep pits affect night visibility, when the windshield has severe wiper abrasion, or when polishing would create optical distortion. Ask for an inspection under angled light before approving extensive machine work.
Which Method Should You Choose?
Fresh spots from a recent car wash
Start with a 1:1 vinegar solution, followed by a complete rinse. Fresh deposits have not bonded strongly and usually do not justify abrasive polishing.
Sprinkler or well-water deposits
Use a dedicated automotive spot remover after washing. Sprinkler water can contain concentrated minerals, and repeated evaporation may create deposits that vinegar handles slowly.
Marks that survived vinegar and glass cleaner
Perform a small test with an automotive glass compound. If the mark remains after the surface is smooth and chemically clean, treat it as etching rather than continuing to increase chemical strength.
Windshield with night glare
Prioritize evenness over maximum spot removal. A professional detailer should inspect the glass if marks, pits, or polishing haze remain in the driver’s viewing area.
Side windows and mirrors
Chemical cleaning is usually simpler because side glass has fewer sensors and less optical importance. Protect rubber seals, rinse fully, and avoid abrasive work near aftermarket tint film.
How to Prevent New Water Spots
Dry automotive glass immediately after washing instead of allowing tap water to evaporate. Use a clean drying towel, then inspect the lower windshield and mirror edges where water commonly collects.
Avoid parking within sprinkler spray. If exposure occurs, rinse the vehicle with clean water before the droplets dry, especially in hot weather or areas with high mineral content.
After the glass is clean, apply a windshield-specific water-repellent coating or sealant according to its instructions. Such products reduce adhesion and improve runoff, but they do not eliminate mineral deposits when contaminated water repeatedly dries on the surface.
Replace worn wiper blades and clean them with a damp microfiber. Contaminated blades redistribute minerals and oily residue across the glass, creating a recurring haze that can be mistaken for new hard water stains.
FAQ
Can WD-40 remove hard water stains from car glass?
WD-40 may loosen oily contamination, but it is not a reliable mineral remover and can leave an oily film that causes glare and wiper chatter. Use an automotive glass cleaner or mineral-spot product instead, then clean the glass thoroughly before driving.
Does baking soda remove water spots from a windshield?
Baking soda is a mild abrasive, not an effective dissolver for calcium carbonate deposits. Rubbing it dry or with too little lubrication can create haze or fine scratches. Use diluted vinegar for light deposits and a glass compound for confirmed etching.
Can toothpaste remove hard water stains from automotive glass?
Toothpaste may reduce very light residue because it contains fine abrasives, but formulas vary and some include oils or whitening particles that leave film. A dedicated glass polish provides more predictable abrasiveness and is safer for controlled spot correction.
Are hard water stains permanent?
Hard water stains are not always permanent. Surface deposits can often be removed chemically, while mineral etching may remain until the glass is polished. Deep pits, severe wiper wear, and optical distortion may be permanent without glass replacement.
Should you use household limescale remover on a car windshield?
Avoid household limescale removers unless the label specifically approves automotive glass and vehicle finishes. Bathroom products may contain stronger acids, fragrances, dyes, or surfactants that can damage paint, rubber, trim, coatings, or sensor components.
Why do water spots return after removal?
Water spots return when mineral-rich water continues to dry on the glass. Sprinklers, incomplete drying, contaminated wiper blades, and failed water-repellent coatings are common causes. Rinse exposed glass promptly, dry it, and apply a compatible glass sealant after correction.
The Bottom Line
To remove hard water stains from glass on a car, begin with shade, a thorough wash, and diluted white vinegar for fresh deposits. Use a dedicated automotive spot remover for persistent surface minerals, then switch to cerium oxide or glass compound only when cleaning confirms that the remaining marks are etched. Always rinse chemicals completely, avoid hot glass, and stop machine polishing when optical distortion or deep damage appears.