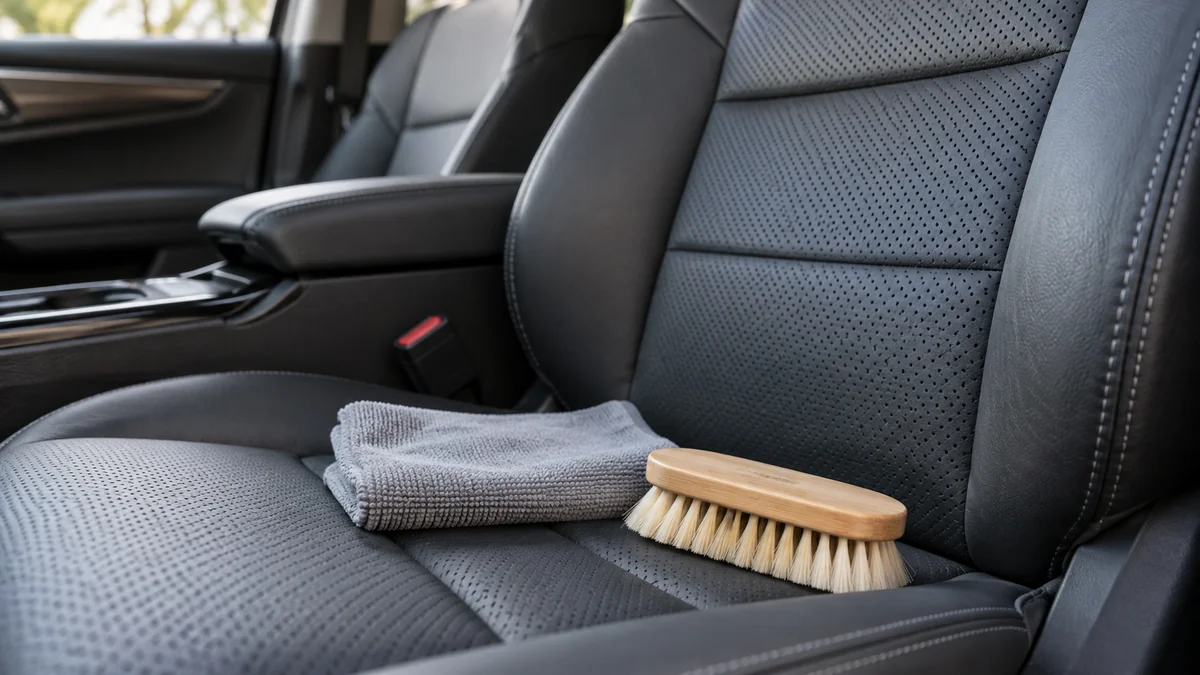
To get urine smell out of leather car seats, remove the liquid from the surface, clean the contaminated leather with a compatible product, and treat the seams or foam where urine may have soaked through. Use minimal moisture on perforated seats, allow 24-72 hours for deep drying, and escalate to professional extraction when odor returns in heat or humidity.
Key facts at a glance
Fresh urine should be blotted within minutes, not scrubbed into the leather grain.
Automotive leather is usually coated leather, but perforations and seams can carry liquid into polyurethane foam.
A leather-safe enzymatic or bio-based odor treatment is more useful than fragrance or ordinary disinfectant when organic residue remains.
Surface drying commonly takes 6-8 hours, while contaminated foam can require 24-72 hours.
Typical DIY supplies cost $15-$50; professional deep remediation commonly costs $150-$400 or more.
Bleach, household ammonia, steam, and high heat can discolor, shrink, crack, or permanently distort leather.
Why Does Urine Odor Return From a Leather Seat?
Urine odor returns when dissolved salts and organic residue remain in stitching, perforations, foam, carpet, or the seat’s lower structure. As the seat becomes warm or humid, those residues release volatile ammonia-like odors again, making a seat appear clean while the underlying source remains untreated.
Urine contains water, urea, salts, pigments, and uric-acid-related residues. Fresh urine is easier to remove because the liquid has not yet spread deeply or dried around fibers. Old urine is harder because drying concentrates the residue and can carry it below the visible leather panel.
Automotive leather is rarely an untreated animal hide. Most seats use a pigment-coated leather finish, and some areas described as leather are actually polyurethane-coated vinyl. The finish resists liquid, but it does not make seams, needle holes, perforations, foam, or carpet underneath waterproof.
The odor source may also be outside the seat. Check the seatbelt buckle, floor carpet, door sill, child-seat padding, center console, and the carpet beneath the seat. Cleaning only the visible stain can leave the strongest reservoir untouched.
Which parts of the seat should you inspect?
| Location | Typical contamination depth | Odor risk | Inspection method |
|---|---|---|---|
| Smooth coated leather | 0-1 mm | Low to moderate | White microfiber wipe and visual inspection |
| Stitching and piping | 1-5 mm | Moderate | Press dry towel along the seam |
| Perforated leather | 3-20 mm | Moderate to high | Inspect holes and underside airflow |
| Polyurethane seat foam | 10-80 mm | High | Odor test after warming the seat |
| Carpet beneath seat | 3-15 mm | High | Lift edge trim or inspect floor mat area |
A useful practitioner rule is to warm the closed vehicle for 10-15 minutes, then identify where the odor is strongest before applying more cleaner. Heat can reveal a hidden source, but do not use a hair dryer or seat heater to force drying.
What Should You Do Before Cleaning?
Before cleaning urine from a leather car seat, identify the leather type, isolate the contaminated area, and prepare controlled quantities of product. You need two or three microfiber towels, a vacuum with a soft brush, a leather-compatible cleaner, a compatible odor treatment, nitrile gloves, and moving-air ventilation.
Before-you-start checklist
| Requirement | Typical specification | Why it matters |
|---|---|---|
| Microfiber towels | 4-6, 300-500 GSM | Separates blotting towels from finishing towels |
| Leather cleaner | 30-60 mL for one seat | Limits liquid exposure |
| Odor treatment | 15-60 mL initially | Allows a controlled test application |
| Drying time | 6-8 hours surface, 24-72 hours foam | Prevents trapped moisture |
| DIY budget | $15-$50 | Covers cleaner, towels, gloves, and applicator |
| Ventilation | Doors open, fan outside vehicle | Removes moisture without high heat |
Look for perforations, exposed cracks, peeling finish, open seams, and non-leather inserts. If the seat has an airbag label or wiring underneath, do not remove the seat unless you understand the vehicle’s restraint-system procedures. Disconnecting seats can create diagnostic faults or safety risks.
Read the product label before use. A product designed for carpet, fabric, or hard plastic is not automatically suitable for coated leather. Product chemistry varies, so compatibility must be established by the manufacturer’s instructions and a hidden-area test.
How to Get Urine Smell Out of Leather Car Seats
The safest process has seven stages: blot, surface-clean, test and apply an odor treatment, address contamination below the leather, remove residue, dry slowly, and condition only after the leather is fully dry. The determining factor is not the strength of the cleaner, but whether the treatment reaches every contaminated layer without saturating the foam.
Step 1: Blot Fresh Urine Immediately
Press dry microfiber towels onto the urine with firm, even pressure, then replace the towel as soon as it becomes damp. Blot from the outside toward the center so liquid does not spread into clean leather, and press along seams without dragging the towel.
For a fresh spill, use several folded towels and hold each in place for 10-20 seconds. Do not scrub. Rubbing drives liquid into the grain, stitching, and perforations.
If liquid reached the seat edge, press towels against the vertical side and the seam where the cushion meets the backrest. Remove the floor mat and inspect the carpet at once.
You will know this step worked when: a fresh dry towel remains mostly dry after 10 seconds of pressure.
Common mistake: rubbing until the visible wet mark disappears. The mark may disappear while the contamination spreads.
Step 2: Clean the Entire Leather Panel
Apply a small amount of leather-specific cleaner to a microfiber towel or soft upholstery brush, not directly onto the seat. Work from seam to seam across the entire panel, then wipe residue with a barely damp cloth and dry with a separate towel.
Cleaning one small circle can leave a visible boundary called a water line. A full panel application produces more even appearance and removes residue carried beyond the original spot.
Use light pressure on coated leather. Avoid aggressive brushing, melamine foam, abrasive pads, and household degreasers. If the finish is cracked or peeling, stop brushing because the cleaner can lift damaged pigment.
Test first in a concealed area. Wait until the test area dries before judging color, gloss, tackiness, or dye transfer.
You will know this step worked when: the panel feels clean rather than slippery, sticky, or heavily fragranced.
Common mistake: flooding the seat to compensate for a stubborn smell. More liquid increases foam contamination risk.
Step 3: Apply a Leather-Compatible Odor Treatment
Choose a product whose manufacturer specifically permits automotive leather or finished leather, then apply a light amount to an applicator towel. Keep the surface damp enough for the stated dwell time, but never wet enough for liquid to pool or run into perforations.
Enzymatic and microbial odor products can help break down organic residue, but they are not magic solvents and they cannot reliably treat foam through an untouched leather surface. Follow the label for dwell time, usually 5-30 minutes, and remove or dry the product as directed.
Do not mix an enzyme product with bleach, ammonia, disinfectant, vinegar, or another cleaner. Mixing changes the chemistry and may deactivate the biological ingredients or damage the finish.
For perforated leather, spray the towel rather than the seat. Press the towel lightly over the affected area so the product contacts the leather without filling the holes.
You will know this step worked when: the odor is weaker after drying, not merely hidden by perfume.
Common mistake: applying a carpet enzyme spray without checking leather compatibility. Surfactants, solvents, alcohol, or strong fragrance can affect the protective coating.
Step 4: Treat the Seat Foam Only When Evidence Justifies It
Treat the foam when odor remains after the leather surface is clean, when urine entered perforations or seams, or when the smell becomes obvious after the vehicle warms. Do not inject liquid into a seat as a first response because unnecessary saturation can create a longer drying problem.
Professional technicians may access the foam through seams, carefully remove the leather cover, use controlled injection, or perform extraction with equipment designed for upholstery. A consumer syringe technique is risky near seat airbags, occupancy sensors, heating elements, and wiring.
If you can see liquid below the leather, or if odor is strong at the seat base, stop DIY treatment and obtain a written estimate from an automotive detailer or upholstery specialist. Ask whether the quote includes foam extraction, leather cleaning, carpet treatment, seat removal, and final odor verification.
You will know this step worked when: the odor does not return after the seat becomes warm and the cabin reaches normal humidity.
Common mistake: injecting a large volume into perforations. Foam absorbs liquid unevenly and can hold odor for days.
Step 5: Remove Residue Without Clogging Perforations
Vacuum loose residue with a soft brush only after the treatment has dried according to its label. Avoid spreading baking soda across perforated leather, because powder can lodge in the holes and migrate toward ventilation channels or seat electronics.
Baking soda can absorb some surface moisture and odor, but it does not reliably destroy urine residue trapped in foam. If used on smooth, intact leather, apply a very thin layer for 2-4 hours, then vacuum gently and wipe the surface with a clean, barely damp cloth.
Do not use baking soda on wet leather or open cracks. Powder mixed with moisture can form a paste that is difficult to remove from stitching.
You will know this step worked when: no visible powder remains in seams, perforations, or the seat crease.
Common mistake: treating baking soda as the primary odor-removal chemistry. It is an absorbent aid, not a substitute for source removal.
Step 6: Dry the Seat With Airflow
Leave the vehicle in a shaded, ventilated location with doors open when safe, and use a fan outside the cabin to move air through the open doors. Allow 6-8 hours for a lightly treated leather surface and 24-72 hours when foam or padding became damp.
Do not use a high-temperature hair dryer, heat gun, steam cleaner, or intense direct sunlight. Excess heat can shrink leather, harden coatings, distort foam, and accelerate cracking.
Humidity changes the timetable. A cool, damp garage may require longer than a dry day with cross-ventilation. Do not sit on the seat until the surface is dry, and do not close the vehicle while the foam still feels cool or damp.
You will know this step worked when: the leather feels room-temperature, dry, and even, with no cool dampness at seams.
Common mistake: closing the doors after cleaning to keep dust away. Trapped humidity prolongs drying and can create a musty odor.
Step 7: Condition and Protect Dry Leather
Apply a small amount of a manufacturer-approved leather conditioner only after the seat is fully dry and free of cleaner residue. Spread a thin, even layer, allow the label’s absorption time, and buff away excess so the surface is not greasy.
Conditioner restores feel and lubricity to some leather finishes, but it does not neutralize urine in foam and cannot repair peeling pigment. Modern coated automotive leather may need little conditioner, while older or less heavily coated leather may benefit more.
Avoid heavily oily products on perforated seats because residue can migrate into the holes. Follow the vehicle manufacturer’s care guidance when available.
You will know this step worked when: the leather feels flexible and clean, not slick or tacky.
Common mistake: conditioning damp leather. Conditioner can trap moisture and make odor evaluation harder.
Which Odor-Removal Method Should You Choose?
The best method depends on contamination depth, seat construction, and the age of the odor. A leather-safe surface treatment suits a fresh spill on intact leather, while recurring odor from perforations or foam requires controlled extraction or professional disassembly.
| Method | Typical cost | Best use | Main limitation |
|---|---|---|---|
| Leather cleaner and microfiber towels | $10-$25 | Fresh surface spill | Cannot reach contaminated foam |
| Leather-compatible enzyme treatment | $15-$50 | Organic residue on finished leather | Requires product compatibility and dwell time |
| Diluted vinegar | $3-$8 | Emergency wipe on some finished surfaces | Acidic odor, finish risk, weak deep treatment |
| Professional extraction | $100-$300 | Foam, carpet, seams, and repeated accidents | Requires drying time and access |
| Ozone treatment | $75-$200 add-on | Residual cabin odor after source removal | Does not remove urine from foam |
| Seat removal and upholstery work | $250-$600+ | Severe padding or structural contamination | Higher labor, restraint-system concerns |
Is vinegar safe for leather car seats?
Diluted vinegar is not the preferred urine treatment for leather because acidity can affect some finishes, dyes, and protective coatings, while the vinegar smell may remain. If no compatible product is available, use a small hidden-area test and a lightly damp cloth, never a soaking 50/50 application.
Vinegar may help wipe an intact, coated surface in an emergency, but it does not reliably dissolve dried urine residue in foam. It also should never be mixed with bleach or chlorine products.
Does ozone remove urine smell from a car?
Ozone can reduce some residual airborne odor after the urine source has been removed, but ozone does not extract dried urine from leather, seams, carpet, or foam. Ozone treatment should be performed by a trained professional with the cabin unoccupied and ventilated afterward.
Ozone exposure can irritate the respiratory system and may affect rubber, plastics, dyes, and certain materials when misused. Treat it as a finishing service, not as a substitute for cleaning.
How Much Does Professional Remediation Cost?
Professional urine-odor remediation typically costs $150-$400 for a heavily contaminated seat or interior, with higher prices when technicians must remove a seat, open upholstery, treat foam, or repair damaged leather. Local labor rates, vehicle design, contamination area, and drying requirements determine the final quote.
| Service level | Typical price | Typical duration | Appropriate situation |
|---|---|---|---|
| Surface leather detail | $50-$120 | 1-3 hours | Fresh spill, no foam odor |
| Seat and carpet extraction | $100-$250 | 3-8 hours | Liquid reached padding or floor |
| Deep foam treatment | $150-$400 | 1-3 days | Odor returns after warming |
| Seat cover removal | $250-$600+ | 1-3 days | Contamination beneath leather |
| Full interior remediation | $300-$800+ | 1-3 days | Multiple seats, carpet, and trim |
Ask the detailer how odor success will be checked. A competent provider should identify the source, explain which materials will be treated, and state whether drying, disassembly, or replacement is included.
A low-cost ozone-only service may appear attractive, but it is poor value when urine remains in the foam. Source removal comes first.
What Changes for Different Situations?
Different seat materials and contamination patterns require different moisture limits. Fresh liquid on smooth coated leather is the easiest case; cat urine in perforated leather, repeated child accidents, and old odor under the seat have a much higher chance of requiring professional treatment.
Fresh spill on smooth leather
Blot immediately, clean the entire panel, apply a compatible odor treatment sparingly, and dry with airflow. Recheck the seat after it warms naturally the next day.
Cat urine on perforated leather
Treat the leather, seams, perforations, carpet, and seat base as connected surfaces. Do not flood the holes or inject liquid without understanding the seat’s sensors and heating elements.
Cat urine often smells intense because concentrated waste contains a high load of odor-producing compounds. Repeated marking may also mean the source is carpet or the seat rail rather than the leather.
Child accident with a car seat installed
Remove the child seat and inspect its cover, underside, harness padding, and vehicle seat crease. Clean the child restraint only according to its manufacturer’s instructions, because bleach, solvents, and unapproved soaking can weaken or damage restraint materials.
Old odor in a used vehicle
Warm the cabin briefly, map the odor, and inspect carpet and seat mounting areas. If the odor returns after two careful surface treatments, stop adding chemicals and obtain a professional foam and carpet assessment.
Common Mistakes and How to Fix Them
| Mistake | Result | Corrective action |
|---|---|---|
| Scrubbing wet leather | Spreads contamination | Blot vertically and replace towels |
| Flooding perforations | Saturates foam | Apply product to towel, then press lightly |
| Using bleach or ammonia | Discoloration and stronger odor | Rinse only under product guidance, then seek professional assessment |
| Applying heat | Shrinkage or cracking | Stop heating and dry with room-temperature airflow |
| Using perfume first | Masks rather than removes odor | Locate and treat the source |
| Conditioning too early | Traps moisture and residue | Clean, dry, then condition |
Bleach and ammonia are especially poor choices. Ammonia resembles one of the odors associated with aged urine, and bleach can damage pigment, coatings, thread, and skin. Never combine household cleaners.
Steam is also a poor default for leather car seats. Steam can drive moisture into seams and foam while exposing the finish to heat. Professional steam use, where appropriate, requires equipment control and material knowledge.
How Do You Know the Smell Is Gone?
A urine odor is probably removed when the seat remains neutral after complete drying, normal cabin warming, and a 24-hour recheck. A fragrance-covered seat is not proof of success, and a temporary improvement immediately after cleaning can occur because moisture suppresses odor release.
Use three checks:
- Smell the seat when fully dry and cool.
- Warm the cabin naturally for 10-15 minutes, then inspect the seat, seams, carpet, and seat base.
- Compare the suspected seat with an untreated seat from the same vehicle.
If the odor returns only during humid weather, assume a porous reservoir remains. Check foam, carpet, seat rails, child-seat padding, and the underside of the seat before repeating surface cleaning.
How Can You Prevent Another Urine Odor Problem?
Prevent recurrence by using a waterproof barrier during transport, removing soiled items promptly, and inspecting seams and floor carpet after every accident. A removable absorbent pad is safer than relying on the leather finish to contain liquid.
Keep two clean microfiber towels and a compatible leather cleaner in the vehicle. Store products upright, protect them from freezing and heat, and test any new chemical at home on a hidden section of similar material.
For pets, secure the animal and use a washable carrier liner. For children, inspect the gap between the seat cushion and child restraint because liquid often bypasses the visible seat surface.
FAQ
Can I use regular pet urine cleaner on leather?
Use regular pet urine cleaner only when its label explicitly approves finished leather or automotive leather. Carpet formulas may contain solvents, surfactants, alcohol, or strong fragrance that affect leather coatings. Test compatibility in a hidden area, apply minimal liquid, and prevent runoff into perforations.
Will leather conditioner remove urine odor?
Leather conditioner will not remove urine odor from foam, seams, or dried residue. Conditioner can improve the feel of clean, dry leather after treatment, but applying it before odor removal may mask the source and trap moisture. Use conditioner as the final care step, not the cleaning chemistry.
Can urine permanently damage a leather car seat?
Urine can permanently stain, discolor, stiffen, or weaken a leather finish when exposure is prolonged or cleaning is aggressive. Damage is more likely when urine reaches foam, remains wet for an extended period, or is treated with bleach, ammonia, heat, or abrasive tools.
Should I remove the car seat to clean underneath?
Remove the vehicle seat only if you understand the manufacturer’s restraint-system and electrical procedures, or have a qualified technician do it. Seat removal may involve airbags, occupancy sensors, wiring, and stored diagnostic faults. Professional access is safer when odor comes from the underside or foam.
Why does my car still smell after cleaning the leather?
The remaining source may be seat foam, carpet, a seatbelt, child-seat padding, door trim, or the floor beneath the seat. Warm the cabin briefly, map the strongest odor, and inspect connected porous materials. Recurring odor after complete drying usually indicates contamination below the visible leather.
The Bottom Line
To get urine smell out of leather car seats, blot quickly, clean the full leather panel, use a leather-compatible odor treatment, and control moisture around seams and perforations. Surface cleaning works for shallow spills, but recurring odor after 24-72 hours points to foam, carpet, or another hidden reservoir that needs professional extraction rather than stronger household chemicals.


