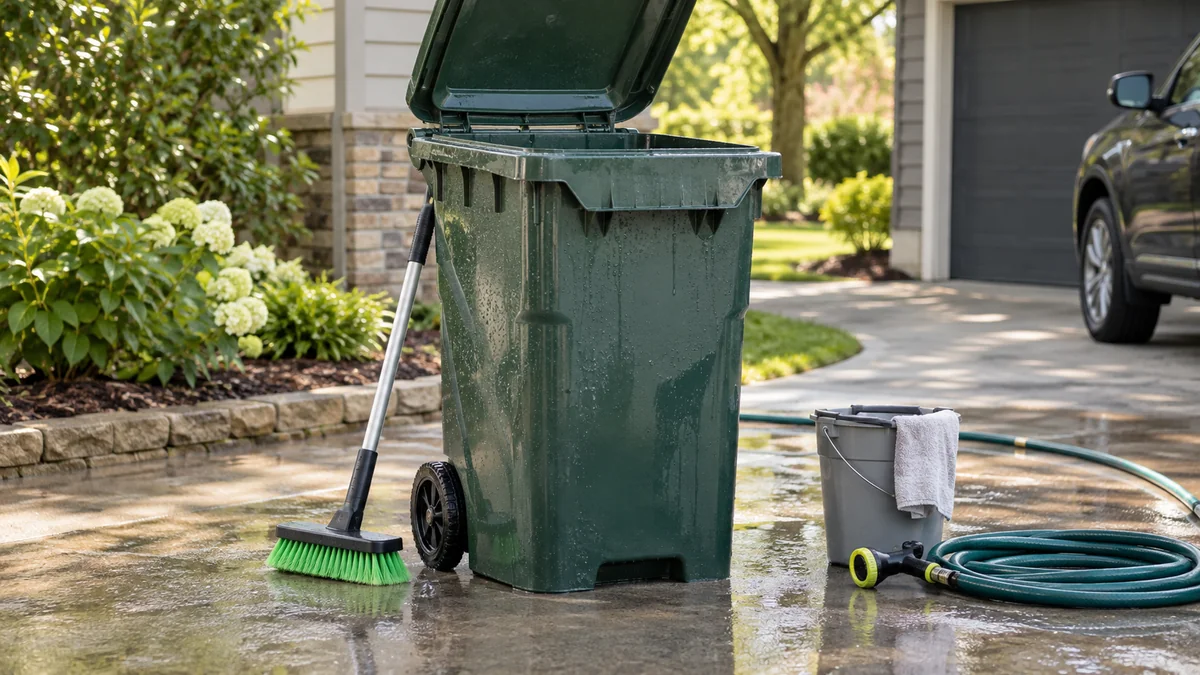
To clean a trash can with maggots, isolate the bin, remove loose waste, kill larvae with hot water or an approved insecticide, scrub away organic residue, disinfect the empty surface, and dry it completely. The most important step is removing the sticky food biofilm, because leftover meat, fish, or liquid waste can attract flies and support another hatch.
Key Facts at a Glance
- Maggots are fly larvae, and houseflies or blowflies usually lay eggs in moist decomposing food.
- Warm conditions can allow fly eggs to hatch in roughly 8-24 hours, although temperature and species change the timing.
- Removing the garbage bag does not remove eggs, spilled food, or residue trapped under the lid and around the wheels.
- Dish soap and vigorous scrubbing remove organic film; a labeled disinfectant addresses microorganisms after cleaning.
- Vinegar can reduce odor, but vinegar and water should not be presented as a substitute for a registered disinfectant.
- A completely dry bin is less attractive to flies than a warm, wet container containing food residue.
Why Do Maggots Appear in a Trash Can?
Maggots appear when adult flies find moist, decomposing organic material and lay eggs on or near it. Meat, fish, poultry, pet food, dairy products, and liquid-soaked paper are common sources, while heat accelerates both decomposition and fly development.
A fly life cycle can move quickly. Eggs may hatch within about 8-24 hours in warm conditions, larvae commonly feed for several days, and mature larvae may leave the wet waste to pupate in a dry crack, beneath the bin, or nearby soil. Exact timing depends on species, temperature, humidity, and food quality.
The visible larvae are therefore only part of the problem. A leaking bag can leave a thin layer of protein-rich residue on the base, wheels, lid hinge, and upper rim. That residue is often called biofilm in household-cleaning guidance, although the material may also contain grease, food particles, and bacterial contamination.
What Should You Do Before Cleaning?
Prepare the cleaning area, protective equipment, and waste containers before moving the infested bin. Use outdoor pavement or another washable, nonporous surface, and keep children and pets away from splash water, dead larvae, and cleaning chemicals.
Before-you-start checklist
| Item | Typical amount or specification | Purpose |
|---|---|---|
| Nitrile or rubber gloves | 1 pair, chemical-resistant | Protects hands from contaminated waste |
| Eye protection | 1 pair of sealed or wraparound glasses | Limits splash exposure |
| Face covering | 1 disposable mask or respirator where odor is severe | Reduces nuisance odor and droplets |
| Heavy-duty waste bags | 2-4 bags, 30-60 gallon size | Contains loose waste and used cleaning materials |
| Stiff brush | 1 brush, 2-4 inch head | Scrubs corners, seams, and lid rims |
| Dish detergent or degreaser | 30-60 milliliters per 4 liters of water | Breaks down grease and food residue |
| Disinfectant | Label-directed dilution | Sanitizes after visible soil is removed |
| Hose or buckets | 10-20 liters of rinse water | Removes loosened residue |
Do not pressure-wash contaminated liquid toward a storm drain, garden, playground, or lawn. Collect solids and avoid creating aerosolized spray. If the bin contains sharps, chemicals, animal waste, or a large amount of decomposing material, contact the waste authority or a professional cleaning service instead of handling it casually.
How to Clean a Trash Can With Maggots
A practical cleanup takes about 30-60 minutes, excluding drying time, and requires five stages: isolate, kill, scrub, disinfect, and dry. The factor that most determines success is complete removal of organic residue from seams and hidden surfaces, not the strength of the first killing method.
Step 1: Empty and Isolate the Bin
Move the trash can to a washable outdoor surface after collection if possible. Put on gloves and eye protection, place loose waste into a heavy-duty bag, tie the bag securely, and keep it separate from clean equipment.
Do not drag an overflowing bag across the floor. The movement can spread larvae, liquid, and eggs through a kitchen, garage, or driveway. If larvae are crawling on the exterior, place the bin inside a larger bag or plastic tub while moving it, when practical.
You will know this step worked when: no loose waste remains inside the container and the bin is positioned away from soil and stormwater routes.
Common mistake: hosing larvae onto grass. Larvae can leave the wet waste, pupate in protected places, and emerge as adult flies.
Step 2: Kill the Visible Larvae
Use hot water carefully, but inspect the bin material first. Pouring boiling water into thin plastic can soften, deform, or damage the container, and splashing boiling water can cause serious burns. Hot tap water, typically around 50-60°C (122-140°F), may be adequate for knockdown when applied directly and followed by scrubbing.
For a heat-resistant metal or thick plastic bin, slowly apply hot water to the lid rim, hinge area, side seams, and base. Work in small amounts rather than tipping a full kettle suddenly. A hand sprayer containing hot water is unsafe because pressurized hot liquid can cause splash injuries.
A labeled household insecticide may be used only if the product label permits use on garbage containers and the treated surface will not contact food, animals, or children. Do not improvise with fuel, solvents, ammonia, or concentrated pesticides.
You will know this step worked when: no larvae are moving after several minutes and the liquid carries them toward the collection area rather than deeper into a crack.
Common mistake: assuming dead larvae mean the bin is clean. Killing larvae does not remove eggs, odor, or the food layer supporting the infestation.
Step 3: Scrub Away Food Residue
Mix warm water with dish detergent or a product whose label permits degreasing trash containers. Scrub the entire interior, including the bottom, side walls, underside of the lid, hinge recesses, wheel housings, drain plug, and upper lip.
Use a stiff nylon brush. A deck brush works for a large wheelie bin, while a smaller bottle brush reaches narrow lid hinges. Work from the cleanest upper surfaces toward the dirtiest bottom area, then rinse and repeat any section that still feels greasy.
Organic residue can remain invisible after one rinse. Run a gloved finger over the base and corners, or inspect the surface under bright light. A slippery feel indicates that another detergent pass is needed.
You will know this step worked when: the plastic feels clean rather than greasy, no food particles remain in seams, and rinse water runs mostly clear.
Common mistake: using disinfectant before detergent. Disinfectants work less reliably when dirt and organic material shield microorganisms from contact.
Step 4: Disinfect the Clean Surface
Apply a household disinfectant according to its label, including the required dilution and contact time. Keep the surface visibly wet for the full label time, then rinse if the product instructions require rinsing.
Unscented household bleach can be suitable for some plastic bins when diluted according to the product label. In the United States, CDC household guidance has commonly described dilutions such as 5 tablespoons of 5%-9% bleach per gallon of water for certain disinfection uses, but label directions and local guidance take priority because bleach concentrations vary.
Vinegar can help with odor and mineral deposits, but vinegar is not a dependable general-purpose disinfectant for a contaminated trash container. Never combine bleach with vinegar, ammonia, acids, or other cleaners. Mixing bleach and acids can release chlorine gas.
You will know this step worked when: the cleaned surface remains wet for the required contact period and no chemical odor indicates that products were mixed.
Common mistake: closing the lid immediately after treatment. Trapped chemical vapor and moisture can damage some materials and prolong the odor.
Step 5: Rinse and Dry Completely
Rinse the bin if the disinfectant label requires rinsing, then turn the container upside down in a secure, ventilated location. Leave the lid open and allow the interior to dry fully, commonly for 2-4 hours in warm, dry weather.
Sunlight may help dry exposed surfaces, but ultraviolet light should not be treated as a measured replacement for cleaning and disinfection. Indoor bins can dry beside an open window or fan, provided the surface cannot contaminate food-preparation areas.
You will know this step worked when: no water collects in the base, hinge, or lid channel and the interior no longer feels cool or damp.
Common mistake: reinstalling a liner while the bottom is wet. A closed, damp liner can recreate the odor and humidity that attracted flies.
Which Cleaning Method Works Best?
Hot water, detergent, disinfectant, and professional steam cleaning solve different parts of the problem. Detergent and mechanical scrubbing are essential for residue removal, while heat or an approved insecticide handles live larvae and a labeled disinfectant addresses sanitation.
| Method | Main function | Typical time | Main limitation |
|---|---|---|---|
| Warm or hot water | Larva knockdown and loosening residue | 5-10 minutes | Can deform thin plastic if too hot |
| Dish detergent and brush | Removes grease and biofilm | 10-20 minutes | Does not provide full disinfection |
| Labeled disinfectant | Reduces microorganisms after cleaning | 10-30 minutes | Requires correct dilution and contact time |
| Vinegar solution | Odor and light mineral residue | 10-30 minutes | Not a reliable general disinfectant |
| Salt or diatomaceous earth | Drying exposed larvae | 30-120 minutes | Leaves residue and cannot clean the bin |
| Professional steam wash | Heat, pressure, and wastewater capture | 10-20 minutes | Typical cost is $15-$40 per visit |
Salt, lime juice, and diatomaceous earth may dry larvae that are directly exposed, but they are poor substitutes for washing. Powder can lodge in hinges and mix with organic waste. Food-grade diatomaceous earth is not harmless when inhaled, so avoid creating airborne dust around children, pets, or people with respiratory conditions.
Should You Use Bleach, Vinegar, or Soap?
Use soap or degreaser first, followed by a label-approved disinfectant when sanitation is required. Vinegar is useful for odor control, but bleach and vinegar are not interchangeable, and neither product removes greasy residue without mechanical cleaning.
| Product | Best use | Typical contact range | Safety rule |
|---|---|---|---|
| Dish detergent | Grease and food residue | 5-15 minutes of scrubbing | Rinse before disinfecting |
| Enzyme cleaner | Protein and food odor | 10-30 minutes | Follow label and rinse if directed |
| Diluted bleach | Disinfection of compatible plastic | Label-specific, often 5-10 minutes | Never mix with acids or ammonia |
| White vinegar | Odor and mineral deposits | 10-30 minutes | Do not claim it sterilizes the bin |
| Quaternary ammonium disinfectant | Labeled hard-surface sanitation | Product-specific | Follow dilution and wet-contact time |
A practitioner rule is to treat “clean” and “sanitized” as separate checkpoints. A bin can look spotless while retaining bacteria in a hinge recess, and a disinfectant can fail when grease prevents contact with the plastic.
How Much Time and Money Does Cleanup Require?
A DIY cleanup usually costs $5-$20 if detergent, gloves, and disinfectant are already available, and drying commonly adds 2-4 hours. Mobile bin-washing services typically cost about $15-$40 per visit for one residential container, although location, contamination severity, and subscription frequency change the price.
| Situation | Typical labor time | Typical out-of-pocket cost | Best approach |
|---|---|---|---|
| Small indoor bin | 20-35 minutes | $3-$10 | Sink or outdoor hose, detergent, disinfectant |
| Standard 60-96 gallon bin | 30-60 minutes | $5-$20 | Pavement, brush, hose, label-approved disinfectant |
| Severe residue or repeated infestation | 45-90 minutes | $10-$40 DIY | Two detergent passes or professional wash |
| Mobile professional cleaning | 10-20 minutes on site | $15-$40 | Useful when wastewater capture matters |
| Multiple household bins | 60-120 minutes | $15-$60 | Clean after collection and process sequentially |
Professional cleaning is preferable when the bin is too heavy to move safely, wastewater cannot be contained, or contamination includes bodily fluids, sharps, chemicals, or animal remains.
How Can You Clean Different Types of Trash Bins?
Indoor kitchen bins need controlled handling because they are close to food-preparation surfaces, while outdoor wheelie bins need attention to wheels, handles, lid channels, and runoff. The same five-stage method applies, but the equipment and containment change.
Indoor kitchen bin
Carry the bin outside while wearing gloves. Place it on a washable surface, remove the liner, and inspect the cabinet, floor, and nearby wall for leaked liquid or larvae. Wash those surrounding surfaces separately with detergent, then use an appropriate disinfectant.
Do not wash a contaminated indoor bin in a kitchen sink unless the sink can be thoroughly cleaned and disinfected afterward. A bathtub is also unsuitable when splash water could contact toiletries, towels, or children’s items.
Outdoor wheelie bin
Open the lid carefully and inspect the underside before tipping the bin. Wash the handle, wheel axle, wheels, hinge recesses, and drain plug because flies and residue often remain outside the main cavity.
Keep the lid open during drying. If the container has a manufacturer-installed drain plug, keep it closed while washing when possible so contaminated water can be collected rather than sent toward a drain.
Compost or food-waste caddy
Empty the caddy after every collection and rinse it promptly. Compostable liners reduce residue but do not prevent leaks, particularly when wet food sits for several days in hot weather.
Freeze meat and fish scraps in a sealed bag until collection day where local rules permit. That practice reduces odor and prevents flies from reaching decomposing material indoors.
What If Maggots Keep Returning?
Repeated maggots usually indicate an unresolved source rather than a failure of the killing step. Inspect the underside of the lid, the ground beneath the bin, neighboring containers, pet-waste bags, compost, fallen fruit, and leaking food packages.
Use these corrective actions:
- Replace leaking or torn liners and double-bag wet food waste.
- Wrap meat, fish, and poultry scraps before placing them in the outdoor bin.
- Keep the lid fully closed and repair warped lids or broken hinges.
- Store the container in shade when practical, because heat accelerates decomposition.
- Wash the bin after collection, when the interior is empty.
- Check nearby pet-waste bins, composters, and animal remains if larvae reappear within 24-48 hours.
A dry layer of baking soda can reduce residual odor, but baking soda does not disinfect or prevent flies by itself. Odor that persists after two detergent washes may indicate residue beneath a removable liner, inside a cracked wheel housing, or under the bin.
What Are the Most Common Cleaning Mistakes?
The most common failure is stopping after the larvae disappear. Successful remediation requires source removal, physical cleaning, appropriate disinfection, and complete drying.
| Mistake | Result | Corrective action |
|---|---|---|
| Dumping cold water only | Larvae and eggs remain in residue | Use detergent, brushing, and controlled hot water |
| Pouring boiling water into thin plastic | Warping or burns | Check material; use warm water and mechanical cleaning |
| Spraying bleach onto dirty surfaces | Poor disinfectant contact | Wash and rinse before disinfecting |
| Mixing bleach and vinegar | Potential chlorine gas | Ventilate, leave the area, and seek emergency help for symptoms |
| Leaving the lid closed while damp | Odor and fly attraction | Dry upside down with the lid open |
| Washing toward a storm drain | Environmental contamination | Collect solids and control wastewater |
If bleach or another cleaner splashes into the eyes, rinse continuously with clean water and follow the product safety instructions. Leave the area immediately if mixing chemicals produces fumes, coughing, chest tightness, or breathing difficulty, and contact emergency services or poison control.
Frequently Asked Questions
Can maggots survive after the garbage bag is removed?
Yes. Maggots can remain in food residue, lid channels, wheel housings, or the ground beneath a bin after the bag is gone. Mature larvae may also leave the container to pupate. Wash the bin and inspect the surrounding area rather than relying on bag removal alone.
Does boiling water kill maggot eggs?
Direct hot water can kill exposed larvae and eggs, but coverage and temperature determine the result. Boiling water can warp plastic and cause severe burns, so use it only with a heat-resistant container and careful handling. Detergent scrubbing remains necessary because heat does not remove food residue.
Can I put a maggot-infested trash can in the shower?
Avoid doing so when possible. Shower cleaning can spread contaminated water onto bathroom surfaces, drains, towels, and toiletries. Clean the bin outdoors on a washable surface, or use a professional service that captures wastewater.
How do I remove the smell from a cleaned bin?
Wash the bin twice with warm water and detergent, rinse it, apply a compatible disinfectant as directed, and dry it completely. After drying, a small amount of baking soda can absorb residual odor, but persistent smell often means food residue remains in a hinge, drain plug, or crack.
Should I use fly spray on maggots?
Do not use ordinary flying-insect spray unless the label specifically permits use against larvae and on the intended surface. Aerosol insecticides are not a substitute for removing waste and biofilm, and spraying chemicals into a food-waste container can create avoidable residue.
When should I call a professional?
Call a professional when the container contains sharps, chemicals, bodily fluids, animal remains, or heavy contamination that cannot be moved safely. Professional service is also sensible when local rules restrict wastewater disposal or repeated infestations continue after thorough cleaning.
The Bottom Line
To clean a trash can with maggots, remove the waste, kill visible larvae safely, scrub every food-contact surface with detergent, apply a correctly labeled disinfectant, rinse when directed, and dry the container completely. Prevent recurrence by controlling wet food waste, keeping the lid closed, and cleaning the bin after collection day.