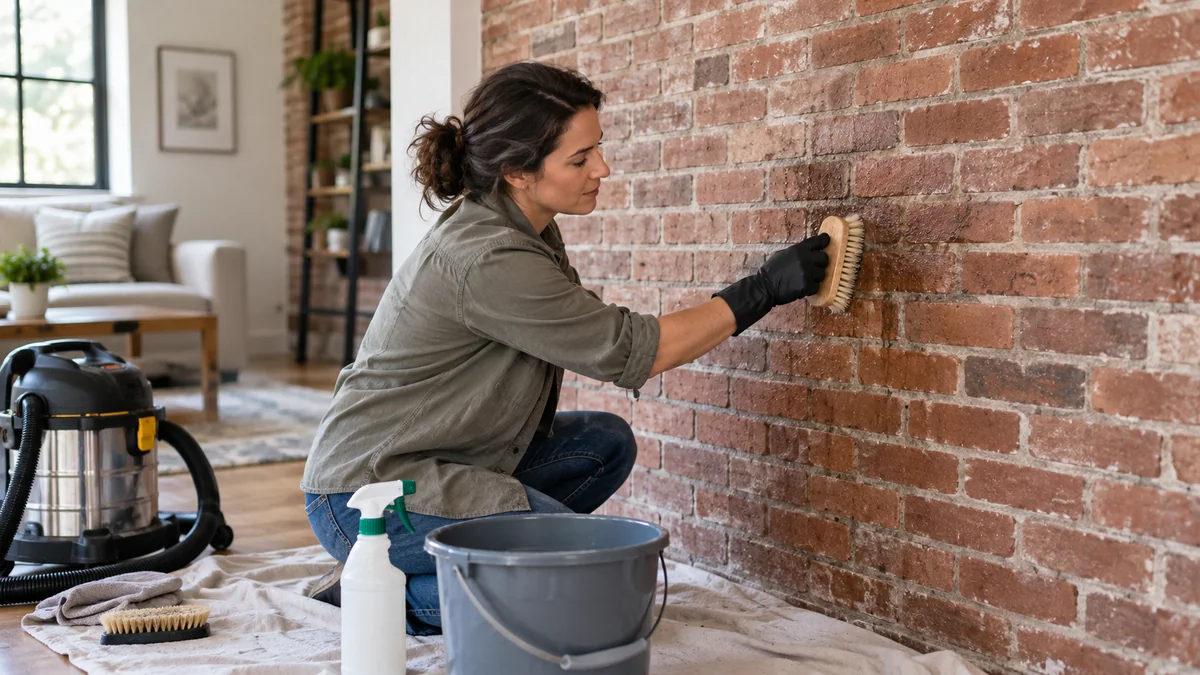
To clean an interior brick wall, vacuum loose dust, test a mild cleaner, lightly dampen the brick, scrub with a nylon brush, rinse with minimal water, and dry the wall rapidly. Most sound, unpainted brick walls take 2-4 hours to clean and 12-24 hours to dry, but crumbling mortar, active dampness, and historic brick require professional assessment.
Key Facts / At a Glance
A mild solution of warm water and a few drops of dish soap is the safest starting cleaner for sound interior brick.
Interior brick should be dampened, not saturated, before applying a water-based cleaner.
Nylon brushes are suitable for brick; wire brushes can damage the fired surface and leave rust marks.
TSP is appropriate only for severe grease or smoke residue, with gloves, eye protection, ventilation, and careful rinsing.
A typical 100-square-foot wall takes 2-4 hours to clean and 12-24 hours to dry.
White powder after washing usually indicates efflorescence, not mold.
Why Interior Brick Requires a Gentle Cleaning Method
Interior brick is porous masonry made from fired clay, while its mortar joints are usually softer and more absorbent than the brick face. Water and dissolved grime move through microscopic pores by capillary action, so excessive liquid can carry salts inward, loosen mortar, or leave a visible tide line as the wall dries.
The brick face is usually more durable than the mortar. That difference matters because aggressive scrubbing may leave the bricks looking clean while removing the joint surface that holds the wall together. Older, handmade, or low-fired bricks can also have a softer exterior that powders under abrasion.
The safest cleaning principle is simple: remove dry soil first, use the least aggressive wet method that works, and stop when the surface or mortar begins to deteriorate. Interior brick cleaning is not the same as exterior masonry washing because an indoor wall cannot safely discharge large volumes of contaminated water.
What should you inspect before cleaning?
Inspect the brick, mortar, paint, and surrounding finishes before adding water. Do not begin wet cleaning if the mortar crumbles under light pressure, bricks shed powder, damp patches are expanding, or a musty odor suggests moisture behind the wall.
Check these conditions:
- Loose mortar: Probe a joint gently with a wooden skewer, not a screwdriver. Soft, sandy material indicates repointing may be needed.
- Spalling: Flaking or shell-like loss from the brick face indicates freeze damage, moisture damage, or deterioration.
- Paint or sealer: Coatings change how water and cleaners behave and can trap moisture.
- Electrical fixtures: Protect outlets, switches, heaters, and cable penetrations from spray and runoff.
- Lead-containing coatings: Painted brick in older homes may contain lead-based paint. Avoid sanding or dry scraping and obtain appropriate testing before disturbing the coating.
A test patch is mandatory. Choose an inconspicuous area approximately 12 by 12 inches, apply the intended method, and allow it to dry completely before judging the result.
What Supplies Do You Need?
A basic cleaning job requires a vacuum with a brush attachment, plastic sheeting, absorbent towels, two buckets, clean water, a soft sponge, and a nonmetallic brush. Add gloves and eye protection for every wet-cleaning method, even when using ordinary dish soap.
| Item | Typical specification | Quantity for 100 sq. ft. | Typical cost |
|---|---|---|---|
| Vacuum | Brush attachment, HEPA preferred | 1 | $0-$150 |
| Nylon brush | Soft or medium bristles, 2-4 inches wide | 1-2 | $5-$15 |
| Microfiber towels | Absorbent, lint-free | 8-12 | $8-$20 |
| Plastic sheeting | 2-4 mil thickness | 1 roll | $8-$20 |
| Dish soap | Neutral, non-bleaching formula | 15-30 milliliters | $3-$8 |
| Buckets | 3-5 gallon capacity | 2 | $8-$20 |
| Nitrile or rubber gloves | Chemical-resistant | 1 pair | $5-$15 |
| Eye protection | Sealed or wraparound goggles | 1 pair | $5-$15 |
Avoid colored cleaning cloths that can transfer dye into porous masonry. Use white or colorfast microfiber towels for the final wipe.
How to Clean Brick Wall Interior in Four Steps
The four-step process is vacuuming, testing and preparing, cleaning in small sections, then rinsing and drying. A 100-square-foot wall typically takes 2-4 hours, and the result depends more on controlling water and changing dirty rinse materials than on using a powerful chemical.
Step 1: Protect the Room and Remove Dry Dust
Move furniture away from the wall and cover floors, baseboards, trim, and nearby furniture with plastic sheeting. Tape the sheet to the floor rather than relying on loose edges, because dirty rinse water can travel farther than expected.
Put on gloves and eye protection. Use a vacuum brush attachment to remove cobwebs, loose grit, soot, and powder from the brick and joints. Keep the nozzle slightly above fragile mortar instead of dragging it across the surface.
You will know this step worked when the wall no longer releases visible dust during a light pass with a clean, dry nylon brush.
Common mistake: Wetting dusty brick first. Water turns loose soil into a paste that can lodge in pores and mortar joints.
Step 2: Test the Cleaner and Lightly Dampen the Brick
For ordinary dirt, mix approximately 1 teaspoon of neutral dish soap into 1 gallon of warm water. Apply the solution to the test patch with a sponge, then observe color, texture, and mortar condition after the area dries.
If the test patch is unchanged, mist a small working area with clean water until the surface looks uniformly damp. Do not flood the wall or allow water to pool at the floor. Pre-dampening slows immediate absorption, but it does not make a damaged wall safe to wash.
Use a barely damp sponge instead of pre-wetting when the wall has crumbling mortar, exposed soft brick, active dampness, or an unknown historic finish. In those cases, dry cleaning or professional treatment is safer.
You will know this step worked when water darkens the brick evenly without running down the face or collecting in joints.
Common mistake: Saturating the wall in an attempt to prevent cleaner absorption. Excess water increases drying time and can mobilize salts.
Step 3: Scrub Small Sections With the Mildest Effective Cleaner
Work from the top downward in sections no larger than 3 by 3 feet. Dip a soft nylon brush or sponge into the cleaner, wring it out, and scrub with overlapping strokes rather than forceful circular grinding.
Rinse the brush frequently. Use a separate sponge for each heavily soiled section if soot or grease begins spreading. Mortar joints need less pressure than brick faces because their binder can be removed mechanically.
For general grime, leave the soapy solution on the surface for 2-5 minutes, not long enough to dry. For a baking soda paste, apply a thin layer, wait 5-10 minutes, and remove it before it hardens.
You will know this step worked when the cleaned section is lighter without exposed aggregate, widened joints, streaks, or a gritty film after wiping.
Common mistake: Using a wire brush. Steel bristles can scratch the brick, remove the surface layer, and leave iron particles that later produce orange stains.
Step 4: Rinse Sparingly and Dry the Wall
Rinse each section with a clean sponge dampened in fresh water. Do not pour or spray water directly onto the brick. Change the rinse water as soon as it becomes cloudy, greasy, or gray.
Blot the surface with clean towels, remove floor sheeting only after collecting runoff, and open windows where weather permits. Use fans to move air across the wall, but do not aim high heat directly at the masonry because rapid uneven drying can produce deposits and stress fragile finishes.
The wall should dry within 12-24 hours under typical indoor conditions. A longer drying period indicates excess water, poor ventilation, a sealed surface, or moisture entering from behind the wall.
You will know this step worked when the brick returns to a uniform dry color and no tacky cleaner residue remains on the surface.
Common mistake: Treating a second rinse as harmless. Repeated wetting can dissolve and redeposit masonry salts, especially on older walls.
Which Cleaner Should You Use?
The best cleaner depends on the contaminant, brick condition, and amount of water the wall can tolerate. Mild soapy water is the default; baking soda helps with odor and light soot, while TSP is reserved for severe grease or smoke residue.
| Cleaner or method | Suitable soil | Typical concentration or use | Main risk |
|---|---|---|---|
| Dish soap solution | Dust, fingerprints, light grease | 1 teaspoon per gallon of warm water | Residue if poorly rinsed |
| Baking soda paste | Light soot, odor, localized grime | 1 cup baking soda with enough water for paste | Abrasion if scrubbed aggressively |
| Salt-based paste | Small grease marks on sound brick | Use sparingly with soap, then rinse fully | Grit can abrade soft brick and mortar |
| TSP solution | Heavy grease, smoke residue | Follow product label, commonly 1/4-1/2 cup per gallon | Alkaline irritation and paint damage |
| Commercial poultice | Historic brick, embedded oily stains | Product-specific application and dwell time | Cost, residue, specialist handling |
| Acid cleaner | Limited masonry residues | Professional evaluation only indoors | Etching, fumes, salt movement |
Is TSP safe for an interior brick wall?
TSP can clean severe grease and smoke residue from sound, unpainted brick, but it is not the safest general-purpose cleaner. Trisodium phosphate is strongly alkaline, can irritate skin and eyes, and may damage adjacent painted wood, metal, plaster, or drywall.
Use the product label rather than assuming a universal recipe. Wear chemical-resistant gloves and goggles, provide cross-ventilation, protect nearby finishes, and rinse with minimal clean water. Never mix TSP with acids, bleach, or ammonia.
TSP is a poor choice for fragile historic brick, crumbling mortar, painted masonry, or a wall with active moisture. A commercial masonry cleaner or poultice may produce better control in those situations.
Can vinegar or muriatic acid clean interior brick?
Acidic cleaners are generally unsuitable for routine interior brick cleaning. Vinegar can react with alkaline masonry and may alter mortar or leave salts, while muriatic acid creates hazardous indoor fumes and can etch brick, corrode metal, and damage nearby finishes.
Acid may have a narrow professional use for specific cement or mineral residues, but the wall must first be identified and tested. A qualified masonry conservator should select the acid, concentration, exposure time, and neutralization method.
How Do You Remove Fireplace Soot and Smoke?
Dry fireplace soot should be removed with a vacuum and dry cleaning sponge before any water-based cleaner is applied. Water can turn carbon residue into a greasy smear, while baked-on smoke deposits may require an alkaline cleaner or a professional poultice.
| Fire or smoke residue | First method | Escalation method | Stop condition |
|---|---|---|---|
| Loose black soot | HEPA vacuum and dry sponge | Mild detergent solution | Soot spreads into a film |
| Light fireplace haze | Baking soda paste | Commercial fireplace cleaner | Brick color changes |
| Greasy smoke residue | TSP or labeled degreaser | Professional poultice | Finish or mortar softens |
| Creosote-like tar | Professional assessment | Masonry restoration treatment | Odor persists after cleaning |
| Smoke odor in porous brick | Surface cleaning and ventilation | Odor-sealing treatment | Odor returns after drying |
Do not seal a fireplace surround while soot, creosote, moisture, or odor remains. A sealer can trap contamination and make later restoration more difficult. Confirm that the fireplace and chimney are safe before cleaning a wall exposed to repeated combustion.
How Do You Clean Painted, Sealed, or Historic Brick?
Painted brick should be cleaned with the least moisture and abrasion because cleaning can expose uneven color or detach weak paint. Test the paint for adhesion, avoid TSP unless the coating manufacturer permits it, and never dry-sand an unknown old coating.
Sealed brick also requires testing. Some sealers darken permanently when wet, turn cloudy under alkaline cleaners, or prevent moisture from escaping. A water droplet that beads for several minutes suggests a water-repellent coating, but it does not identify the product or prove that the coating is healthy.
Historic brick usually needs a conservation approach rather than ordinary household scrubbing. Low-fired brick and lime mortar can be damaged by pressure, strong alkalis, acids, and repeated wetting. If the building predates approximately 1940 or the wall has decorative, handmade, or unusually soft brick, consult a masonry-restoration professional before using TSP or an abrasive paste.
What Methods Should You Avoid?
Never pressure-wash an interior brick wall. A pressure washer introduces uncontrolled water into floors, cavities, electrical penetrations, and adjacent finishes, and it can erode mortar within minutes.
Avoid these methods:
- Wire brushes: remove the brick surface and damage mortar.
- Muriatic acid: produces hazardous fumes and can etch masonry.
- Bleach: does not reliably remove soot or grease and may discolor adjacent materials.
- Steam cleaning without testing: can drive moisture into porous brick and loosen paint.
- Undiluted degreasers: can leave alkaline residues and soften some coatings.
- Abrasive blasting: can permanently remove the fired face of historic brick.
- Mixing chemicals: bleach, ammonia, acids, and alkaline cleaners can create dangerous reactions.
A clean-looking brick face is not proof of a successful treatment if the mortar has become recessed, powdery, or visibly eroded.
How Do You Troubleshoot Brick Cleaning Problems?
Most post-cleaning problems result from excess water, dirty rinse materials, unsuitable chemicals, or cleaning a wall with pre-existing deterioration. Stop the process whenever brick powder, widening joints, strong chemical odor, or new damp patches appear.
| Problem | Likely cause | Correct response | Professional trigger |
|---|---|---|---|
| White powder after drying | Efflorescence from dissolved salts | Dry-brush and vacuum gently | Deposits recur or wall stays damp |
| Black smearing | Saturated sponge or soot mixed with water | Replace sponge and rinse water | Oily residue remains |
| Orange streaks | Rust transfer from metal brush or fixture | Stop abrasion and identify metal source | Streak penetrates deeply |
| Crumbling mortar | Existing deterioration or over-scrubbing | Stop wet cleaning and vacuum loose grit | Joints crumble under light pressure |
| Cloudy sealer | Cleaner incompatibility or moisture | Stop chemicals and allow drying | Coating remains opaque |
| Musty odor | Moisture behind or within wall | Investigate leaks and ventilation | Odor returns after complete drying |
What is the white powder on brick after cleaning?
White powder on brick after cleaning is usually efflorescence, a deposit of soluble masonry salts transported to the surface by moisture. Allow the wall to dry fully, then remove the deposit with a soft, dry nylon brush and vacuum it rather than adding more water.
If white deposits repeatedly return, cleaning is not the underlying solution. Check plumbing, exterior water entry, rising damp, condensation, and chimney leakage. A low-acid efflorescence product should be considered only after identifying the moisture source and testing the brick.
How do you know when to stop cleaning?
Stop immediately when mortar turns sandy, the brick face begins shedding powder, paint lifts, the wall remains wet beyond 24-48 hours, or the cleaner causes a persistent color change. Additional scrubbing cannot restore material already removed from a masonry surface.
A masonry specialist should assess extensive spalling, recurring efflorescence, damp patches, structural cracks, or joints deeper than approximately 1/4 inch. Cleaning and repair are separate tasks, and cleaning first can make damaged masonry harder to stabilize.
How Much Time and Money Does Interior Brick Cleaning Take?
A typical 100-square-foot interior brick wall costs $10-$40 for a basic DIY cleaning setup and takes 2-4 hours of labor, excluding furniture movement and drying. Professional masonry cleaning commonly costs about $2.50-$6 per square foot, with minimum service charges affecting small walls.
| Project type | Typical labor time | Material or service cost | Typical drying time |
|---|---|---|---|
| 25 sq. ft. light dust | 30-60 minutes | $5-$15 DIY | 6-12 hours |
| 100 sq. ft. general grime | 2-4 hours | $10-$40 DIY | 12-24 hours |
| 100 sq. ft. heavy soot | 3-6 hours | $25-$100 DIY | 24-48 hours |
| 100 sq. ft. professional cleaning | 2-5 hours onsite | $250-$600 typical minimum-adjusted price | 12-48 hours |
| Historic or poultice treatment | 1-3 days including dwell time | $500-$1,500 or more | 24-72 hours |
Prices vary with access, stain depth, local labor rates, containment requirements, and whether mortar repair is included. A small fireplace may cost more per square foot than a large accessible wall because contractors often apply a minimum visit charge.
Should You Seal an Interior Brick Wall After Cleaning?
Sealing is optional, not an automatic final step. A breathable, masonry-compatible water repellent may reduce future staining on sound, dry brick, but sealing a damp wall can trap moisture and worsen efflorescence or spalling.
Do not seal until the wall has dried completely and the cause of any dampness has been corrected. Test the proposed product on an inconspicuous area for darkening, gloss, odor, and compatibility with paint or mortar.
A sealer will not repair crumbling joints, stop chimney leaks, remove smoke odor, or make a contaminated fireplace safe. For decorative interior brick with ordinary household grime, regular dry dusting and prompt spot cleaning may be safer than applying a permanent coating.
The Bottom Line
To clean brick wall interior surfaces safely, begin with dry vacuuming, test a mild dish-soap solution, dampen the wall lightly, scrub in small sections with nylon, rinse with minimal water, and ventilate until fully dry. Use TSP only for severe grease or smoke on sound brick, avoid acids and pressure washing, and stop when mortar or brick begins to deteriorate.
FAQ
Can I use a magic eraser on interior brick?
A melamine foam sponge can abrade soft brick, remove paint, and leave a lighter patch, so it is not a preferred masonry-cleaning tool. If used at all, test it on a hidden area with almost no pressure and avoid mortar joints. A soft nylon brush gives better control on textured surfaces.
How often should an interior brick wall be cleaned?
Dust an exposed brick wall every one to three months and wet-clean it only when visible grime requires treatment. Frequent wet cleaning increases the chance of salt movement, residue, and mortar wear. Fireplace surrounds may need spot cleaning after use, provided soot is removed while dry.
Can mold grow on an interior brick wall?
Mold can grow on dust, paint, wallpaper adhesive, or organic residue on damp brick, although brick itself is inorganic. Do not treat recurring dark growth as ordinary dirt. Correct the moisture source, improve ventilation, and use an appropriate remediation process rather than repeatedly applying household bleach.
Can I clean brick with a steam cleaner?
Steam cleaning can loosen grime, but it introduces heat and moisture into porous brick and soft mortar. It is unsuitable for fragile, painted, historic, or damp walls unless a professional has tested the method. For sound unpainted brick, a controlled damp sponge usually creates less moisture risk.
Why does cleaned brick look darker?
Wet brick naturally appears darker because water changes how light scatters through its pores. The color should return toward its original appearance as the wall dries within 12-24 hours. Persistent dark patches indicate retained moisture, an uneven sealer, absorbed cleaner, or water entering from behind.
What is the safest cleaner for a rental property?
A diluted neutral dish-soap solution, applied to a small test patch with minimal water, is generally the lowest-risk option for a rental. Protect adjacent paint and flooring, photograph the wall before work, and obtain written permission before treating painted, historic, sealed, or fireplace brick.