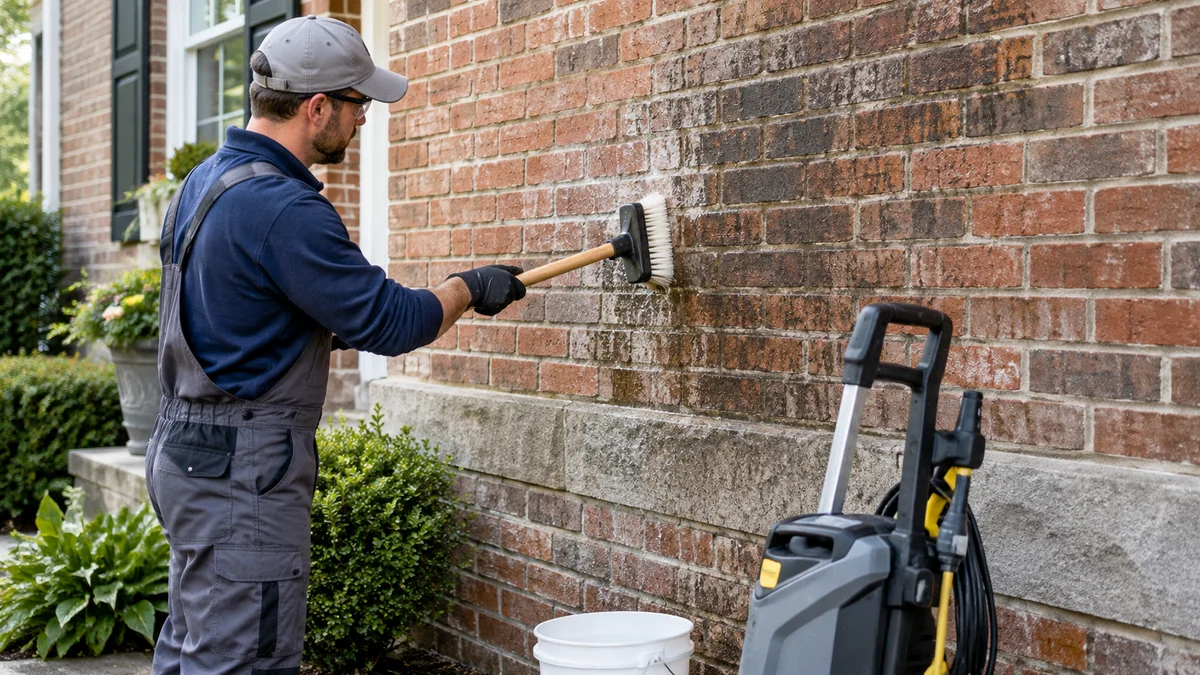
To clean an exterior brick wall, identify the stain, inspect the masonry, protect nearby surfaces, pre-wet the brick, apply the mildest suitable cleaner, gently agitate, and rinse thoroughly. A small test patch determines whether the method is safe. Most sound modern brick walls take 2-6 hours, while historic or damaged masonry may require specialist cleaning.
Key Facts at a Glance
A soft nylon or natural-fiber brush is safer than a wire brush for brick faces and mortar joints.
Mild detergent and water are suitable for ordinary dust, soil, and light atmospheric grime.
Organic growth usually needs a labeled biocidal cleaner, not stronger pressure.
Acid cleaners can etch brick, weaken mortar, and permanently alter dark or historic masonry.
Pressure washing is not automatically unsafe, but close-range, narrow-jet pressure can remove the fired surface.
Clean brick in mild, dry weather when temperatures remain above freezing during the following 24 hours.
What You Need Before Cleaning
Exterior brick cleaning requires different materials for different stains. Gather only the equipment needed for the identified contaminant, because adding stronger chemicals rarely compensates for poor diagnosis.
Tools and materials
| Item | Typical specification | Purpose |
|---|---|---|
| Garden hose | Adjustable spray nozzle | Pre-wetting and final rinsing |
| Soft brush | Nylon or Tampico fiber, 6-12 inches | Agitating brick without scoring it |
| Pump sprayer | Chemical-resistant, 1-2 gallons | Applying detergent or biocide |
| Mild detergent | pH-neutral or low-alkaline masonry detergent | Dust and general grime |
| Drop cloths | Polyethylene or absorbent canvas | Protecting windows, paving, and plants |
| Safety equipment | Goggles, chemical-resistant gloves, boots | Preventing splash and skin exposure |
| Test materials | 1 square foot of hidden masonry | Confirming compatibility before full cleaning |
A pressure washer is optional, not a default requirement. If used, select a wide fan nozzle, keep the wand moving, and begin at the lowest effective setting. A garden hose and brush are usually adequate for a small wall with light soil.
Inspect the wall first
Look for missing mortar, open cracks, loose bricks, flaking faces, damp patches, and white crystalline deposits. Do not saturate a wall with visibly damaged joints until repairs have cured and the source of moisture has been addressed.
New mortar commonly needs at least 7 days before gentle cleaning, although the mortar manufacturer may specify a longer curing period. Freshly repointed work can stain or erode when exposed to early washing.
Which Cleaner Should You Use?
The correct cleaner depends on the contaminant, not on how dirty the wall looks. Mild detergent is the safest starting point for ordinary grime, while algae, efflorescence, and cement residue require separate treatment.
| Stain or deposit | First-choice method | Avoid first | Typical dwell or action |
|---|---|---|---|
| Dust and soil | Mild detergent plus soft brushing | High pressure at close range | 5-10 minutes |
| Green algae | Labeled biocidal wash, low pressure | Aggressive blasting | 10-20 minutes |
| Black organic film | Biocide or specialist softwash | Wire brushing | Product label |
| White powder | Dry nylon brushing, then moisture diagnosis | Immediate acid application | Dry removal first |
| Cement or mortar smear | Masonry cleaner after test patch | Household acid or undiluted acid | Product label |
| Soot and carbon | Specialist masonry detergent or steam | Abrasive blasting | 5-15 minutes |
| Rust staining | Brick-safe rust remover | Chlorine bleach | Product label |
Is vinegar safe for exterior brick?
Diluted vinegar can damage some brick and mortar because acetic acid reacts with alkaline cementitious materials. Vinegar is therefore not a universal brick cleaner. For light dirt, use a small amount of mild detergent in water instead; reserve acidic products for identified mineral or cement deposits and test them first.
A commonly suggested 50:50 vinegar-and-water mixture is not a dependable general-purpose recipe. Repeated acid exposure can roughen soft brick, dissolve joint surfaces, and increase water absorption. The absence of immediate discoloration does not prove that the mortar is unaffected.
Can bleach clean brick?
A labeled sodium-hypochlorite product can remove or kill algae and some organic staining when used according to its instructions. Bleach does not dissolve efflorescence, cement residue, or rust, and runoff can injure plants, corrode metal, and discolor fabrics.
Never mix bleach with acids, ammonia, or other cleaners. Chlorine gas can form when hypochlorite contacts acidic products. Professional softwashing is often safer for large walls because operators can control concentration, overspray, dwell time, and wastewater.
How to Clean Brick Wall Exterior in Six Steps
The following process suits sound, unpainted modern brick with light or moderate contamination. Stop if the brick face sheds grains, mortar becomes soft, or the test patch changes color after drying.
Step 1: Identify the stain and inspect the masonry
Classify the deposit before selecting a chemical. Green film usually indicates algae or another organism, white powder usually indicates efflorescence, and gray cement smears usually indicate construction residue.
Check the wall from ground level and from oblique angles. A glossy, thin surface layer may be paint, sealant, or a fired brick finish rather than dirt. Cleaning cannot safely restore a coating that is already failing.
You will know the step worked when: the stain has a plausible cause and the wall has no loose face, open joint, or active leak.
Common mistake: treating every white mark with acid. Some white deposits are paint, salt, or failed sealant, and each requires a different remedy.
Step 2: Test a hidden patch
Choose a roughly 1-square-foot area behind a downspout, shrub, or low architectural feature. Apply the proposed cleaner at the intended dilution, dwell time, agitation level, and rinse method.
Allow the patch to dry for at least 24 hours. Compare color, texture, mortar firmness, and water absorption with adjacent brick. Dark bricks can show temporary wetting differences, so inspect again when fully dry.
You will know the step worked when: the patch is cleaner without chalking, color loss, etched texture, softened mortar, or an expanding stain edge.
Common mistake: testing only the chemical and not the complete process. Pressure, brush friction, dwell time, and rinsing can cause damage even when the product itself appears compatible.
Step 3: Protect surrounding surfaces and pre-wet the wall
Close windows and doors, cover exterior lights, protect metal fixtures, and move furniture. Wet nearby soil and plants with clean water, then use coverings that allow air circulation and do not trap chemical runoff against the wall.
Pre-wet sound brick with a hose from the bottom upward or in controlled sections. The goal is even saturation, not forceful water penetration through cracks. Keep water away from open electrical fittings and avoid directing a jet into mortar joints.
Pre-wetting reduces rapid absorption of some cleaning solutions, but it does not make an unsuitable chemical safe. Damaged masonry can absorb water deeply regardless of preparation.
You will know the step worked when: the brick has an even darkened appearance and nearby surfaces are protected from splashes.
Common mistake: covering dry plants and then allowing contaminated runoff to collect underneath the cover. Rinse foliage before and after cleaning and control the discharge path.
Step 4: Apply the mildest suitable cleaner
Mix a low-alkaline masonry detergent according to the label. For a small wall, a hand or pump sprayer provides more control than pouring solution directly onto the brick.
Work in sections of approximately 10-20 square feet. Apply enough product to keep the surface uniformly wet, but do not flood joints or allow the cleaner to run uncontrolled onto paving. Follow the manufacturer’s order of application, because some products are designed for bottom-up application to reduce streaking while others specify top-down use.
For organic growth, use only a product labeled for masonry and biological deposits. Keep the surface wet for the stated dwell period, commonly 10-20 minutes, and never allow the product to dry.
You will know the step worked when: grime softens, organic film changes appearance, and the cleaner remains active without drying into a crust.
Common mistake: increasing concentration when the wall does not clean immediately. Longer controlled dwell time and gentle agitation are usually safer than a stronger mixture.
Step 5: Agitate gently
Scrub softened deposits with a soft nylon or natural-fiber brush. Use overlapping strokes with moderate pressure, concentrating on the surface rather than grinding into the mortar.
A small hand brush is useful around joints and textured brick, while a long-handled brush reduces ladder use. Do not use steel or brass wire brushes. Metal fragments can remain in porous masonry and later create rust-colored marks.
For persistent carbon deposits, stop rather than escalate blindly. Steam cleaning, a specialist masonry detergent, or a conservation contractor may remove the deposit with less damage than abrasive brushing.
You will know the step worked when: the deposit lifts under the brush and the brick texture remains unchanged.
Common mistake: judging success while the wall is wet. Wet brick can appear darker and cleaner than it will after drying.
Step 6: Rinse until no residue remains
Rinse with clean, low-pressure water, working methodically across one section at a time. Flush from the highest cleaned area downward after the cleaner has been removed from the surface, while preventing dirty water from drying on lower sections.
Rinse window frames, paving, plants, and metal fixtures separately. Continue until water runs clear and no slippery or foaming residue remains. Incomplete rinsing can leave streaks, salt movement, or a new surface film.
You will know the step worked when: the wall has an even appearance, the joints feel firm, and no cleaner remains at the base or in textured brick.
Common mistake: allowing the lower wall to dry before upper runoff has been removed. Work in manageable sections and keep adjacent areas wet when necessary.
Which Brick-Cleaning Method Is Best?
Mild manual cleaning is the best default for sound brick and light grime. Softwashing is more effective for widespread organic growth, steam suits sensitive historic masonry, and acidic products belong to carefully controlled removal of mineral or cement deposits.
| Method | Working pressure or action | Suitable condition | Main risk | Typical professional cost |
|---|---|---|---|---|
| Hose and detergent | Hose pressure, soft brushing | Light dirt on sound brick | Incomplete removal | $0.10-$0.50 per sq. ft. |
| Low-pressure softwash | Low-pressure spray, chemical dwell | Algae and organic film | Plant or metal damage | $0.20-$0.80 per sq. ft. |
| Steam cleaning | Specialist heated vapor system | Historic or fragile brick | Thermal or moisture stress | $2-$4+ per sq. ft. |
| Masonry acid cleaner | Label-specific application | Cement residue or selected mineral stains | Etching and joint erosion | $1-$1.60 per sq. ft. |
| Pressure washing | Wide fan, low effective setting | Durable modern brick after testing | Face loss and water intrusion | $0.25-$0.75 per sq. ft. |
Can you pressure wash an exterior brick wall?
You can pressure wash some modern, sound brick, but pressure washing is not suitable for every wall. Begin with the lowest effective setting, use a wide fan spray, maintain distance, and never use a pinpoint turbo nozzle on old, soft, cracked, or deteriorating brick.
There is no universal safe PSI because nozzle angle, distance, flow rate, brick hardness, joint condition, and operator technique all change the impact. The often-repeated 3,000-PSI limit is not a safe default for residential masonry. A low setting that damages one soft historic brick may be harmless on a dense modern engineering brick, while a narrow nozzle can damage both.
A practical rule is to test from at least 12 inches away, keep the wand moving, and increase force only when the test patch shows no face loss or joint erosion. Hire a masonry cleaner for pre-1950 buildings, painted brick, lime mortar, or visible spalling.
How Do You Remove White Powder From Brick?
White powder on brick is usually efflorescence, a deposit of soluble salts carried to the surface by moisture. Begin with a dry, firm nylon brush and investigate the water source; adding repeated wet cleaning can draw more salts through the masonry.
Brush the deposit away when the wall is dry, collect the powder, and observe whether it returns. Recurrence may indicate rising damp, leaking gutters, failed flashing, sprinkler overspray, or moisture entering through porous joints.
If dry brushing fails, use a masonry efflorescence remover only after testing it. Acid can remove some mineral deposits but may also attack mortar and brick. Efflorescence is a moisture-management problem as well as a cleaning problem, so chemical treatment alone often provides only temporary improvement.
How Do You Remove Algae, Mold, and Moss?
Remove organic growth with a labeled masonry biocide or low-pressure softwash, followed by thorough rinsing and correction of persistent shade or moisture. Pressure alone may remove visible growth while leaving spores and roots behind.
Trim vegetation away from the wall, clear blocked gutters, and redirect downspouts before cleaning. Pre-wet plants, shield sensitive foliage, control runoff, and follow the product’s required contact time.
Moss with established roots can loosen mortar and hold moisture against brick. Do not pull large mats away with force; soften them first and inspect the joints afterward. Black staining may be biological, soot-related, or a mixture, so a small test patch remains essential.
When Should You Use Acid or Specialist Cleaning?
Use acid or specialist cleaning only for a confirmed deposit that a milder method cannot remove. Acid is sometimes appropriate for cement film or certain mineral residues, but it is a poor choice for routine dirt, biological growth, soft historic brick, glazed brick, or weak mortar.
Commercial masonry products are preferable to improvised hydrochloric or muriatic acid mixtures because their instructions specify dilution, dwell time, protective equipment, and compatible substrates. Even commercial products require a test patch, pre-wetting where directed, controlled application, and extensive rinsing.
Professional cleaning is justified when the wall is high, historic, fragile, heavily soot-stained, extensively painted, or adjacent to sensitive landscaping. A qualified contractor should explain the test method, runoff controls, chemical product, pressure range, and repair plan before beginning.
What Does Exterior Brick Cleaning Cost?
Typical exterior brick cleaning costs range from about $0.10-$0.50 per square foot for homeowner supplies and basic manual or low-pressure work, while specialist steam restoration commonly costs $2-$4 or more per square foot. Access, stain type, repairs, height, and wastewater control can change the quote substantially.
| Project type | Typical area | Typical duration | Typical total cost |
|---|---|---|---|
| DIY detergent wash | 100-300 sq. ft. | 2-6 hours | $25-$100 |
| Basic professional wash | 1,000-2,000 sq. ft. | 2-5 hours | $400-$1,200 |
| Organic-growth softwash | 1,000-2,000 sq. ft. | 2-4 hours | $500-$1,500 |
| Mortar or cement removal | 500-2,000 sq. ft. | 1-3 days | $1-$1.60 per sq. ft. |
| Historic steam restoration | Project-dependent | 1-5 days | $2-$4+ per sq. ft. |
These are typical planning ranges, not guaranteed market prices. Ask whether the quote includes test cleaning, plant protection, access equipment, repairs, chemical neutralization, and final rinsing.
Common Mistakes and How to Fix Them
High-pressure blasting
Symptom: Brick becomes fuzzy, pale, powdery, or more absorbent.
Cause: The spray removed the hard-fired outer surface.
Fix: Stop cleaning, allow the wall to dry, and have a mason assess face loss and water absorption. Do not seal damaged brick to hide the texture.
Wire-brush damage
Symptom: Orange or gray marks appear after several days.
Cause: Metal particles or scratches remain in the porous face.
Fix: Stop brushing and test a brick-safe rust remover on an inconspicuous area.
Cleaner dries on the wall
Symptom: Vertical streaks, pale patches, or sticky residue remain.
Cause: Dwell time exceeded the product’s working period.
Fix: Re-wet a small section, gently agitate, and rinse fully. Do not apply a stronger product over dry residue.
Mortar joints become soft
Symptom: Joints crumble under light brushing or water exposure.
Cause: Weak mortar, excessive pressure, or chemical attack.
Fix: Stop immediately. Allow the wall to dry and obtain a repointing assessment before further cleaning.
Efflorescence returns
Symptom: White powder reappears days or weeks later.
Cause: Moisture continues moving salts through the wall.
Fix: Inspect drainage, flashing, gutters, sprinklers, and interior dampness. Dry brushing is safer than repeated wet washing.
Plants or metal are damaged
Symptom: Leaves scorch, metal tarnishes, or paving discolors.
Cause: Chemical runoff or overspray.
Fix: Rinse affected surfaces promptly with clean water and improve masking and runoff control before continuing.
Should You Seal Brick After Cleaning?
Exterior brick does not automatically need a sealer after cleaning. Sound, breathable masonry generally benefits more from functioning gutters, sound mortar, and controlled drainage than from a film-forming coating.
If water penetration remains a documented problem, consider a vapor-permeable masonry water repellent recommended for the specific brick and climate. Do not seal damp brick, recently cleaned brick, or walls with unresolved efflorescence. Moisture trapped behind an unsuitable coating can accelerate spalling and freeze-thaw damage.
Wait until the wall is fully dry, often 3-7 days in favorable weather, and follow the product’s moisture limits. A sealer will not repair cracks, stop rising damp, or prevent algae where the wall remains shaded and wet.
When Should You Hire a Professional?
Hire a masonry-cleaning professional when the wall is historic, structurally damaged, more than two stories high, heavily contaminated, painted, or built with lime mortar. Specialist cleaning is also appropriate when the stain returns after ordinary washing or when the correct chemical is uncertain.
Ask for:
- A written test-patch procedure and drying inspection.
- The proposed pressure range, nozzle type, and working distance.
- The product name, dilution, dwell time, and safety data.
- A plan for protecting plants, windows, metal, and drains.
- Separate pricing for cleaning, repointing, access equipment, and sealing.
- References involving comparable brick age and condition.
A contractor who promises identical results on every brick wall without testing is overlooking the variables that control damage.
FAQ
How often should an exterior brick wall be cleaned?
Clean exterior brick when contamination becomes established or drainage problems create recurring growth, not on an arbitrary annual schedule. Many sound walls need only occasional washing every 3-10 years, while shaded walls beneath trees or leaking gutters may need attention sooner. Correct moisture sources before repeating chemical cleaning.
Can dish soap damage brick?
A small amount of mild, non-abrasive dish soap is generally suitable for light grime on sound brick when thoroughly rinsed. Concentrated soap, degreasers, and products containing strong acids or solvents can leave residue or affect coatings and mortar. Test the mixture first and avoid letting it dry on the wall.
How long does brick take to dry after washing?
Exterior brick commonly needs 24-72 hours to dry after gentle cleaning in mild, breezy weather. Dense brick, shaded walls, cool temperatures, high humidity, and saturated joints can extend drying to a week. Do not seal, paint, or repoint until the masonry has reached the product or mortar manufacturer’s moisture requirement.
Will cleaning remove black stains from brick?
Cleaning may remove black stains when they come from algae, mold, soot, or atmospheric grime, but the method differs by cause. Biocide suits organic growth, while steam or specialist detergent may suit soot. If the stain penetrated damaged brick or came from metal corrosion, cleaning alone may not restore the original color.
Is exterior brick cleaning safe in winter?
Avoid wet brick cleaning when temperatures may fall below freezing during the following 24 hours. Water held in porous brick or weak joints can freeze, expand, and worsen cracks or spalling. Choose a mild period with adequate drying time, especially for old masonry.
How can you prevent brick from getting dirty again?
Maintain gutters, downspouts, flashing, and grading; trim vegetation away from the wall; reduce sprinkler overspray; and improve airflow in shaded areas. Prevention addresses the moisture and pollutant sources that cleaning cannot remove. Breathable masonry treatment may help in selected cases, but it cannot compensate for leaks or defective drainage.
The Bottom Line
The safest way to clean an exterior brick wall is to diagnose the stain, test a small hidden patch, use the mildest compatible method, control runoff, and rinse completely. Mild detergent and soft brushing suit ordinary grime; biocidal softwashing suits organic growth; steam suits fragile historic masonry; and acid belongs only to carefully tested mineral or cement deposits. Use the exact process above for how to clean brick wall exterior without trading short-term appearance for permanent masonry damage.