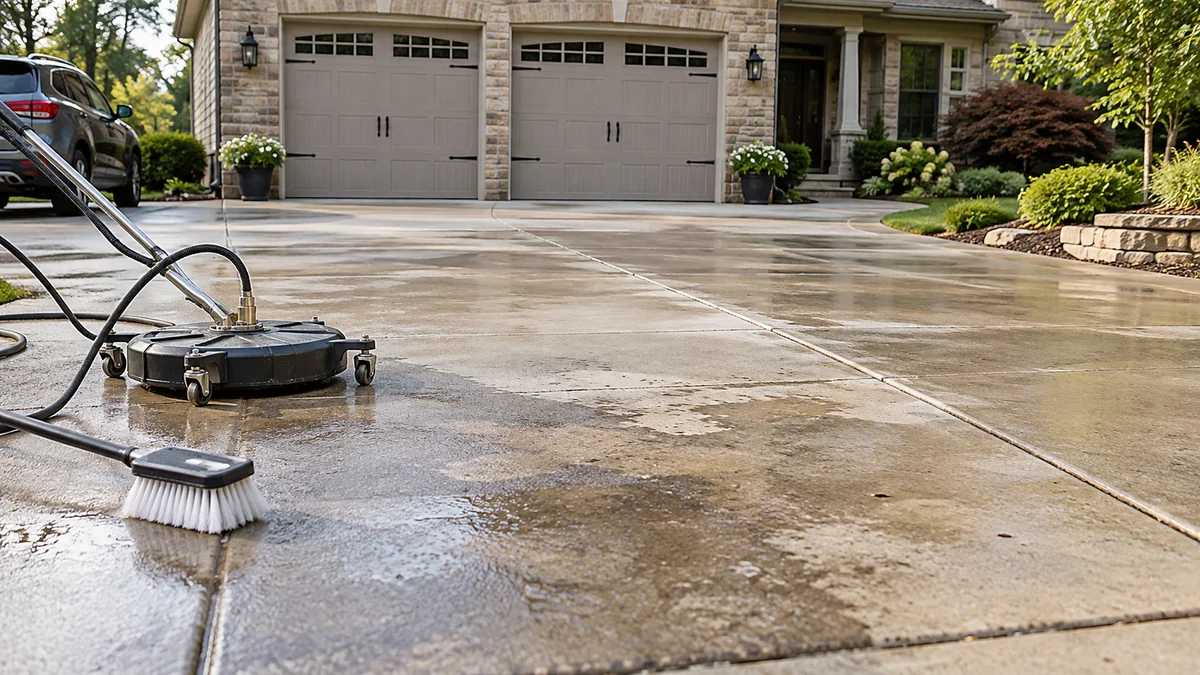
Driveway maintenance tips after pressure washing focus on drying, repairing, protecting, and monitoring the surface before normal use resumes. Allow concrete and pavers to dry for 24-48 hours, replace displaced paver joint sand, repair defects, then apply a material-appropriate sealer only during suitable weather. Asphalt requires sealcoating rather than concrete sealer.
Key Facts at a Glance
- A washed driveway usually needs 24-48 hours of drying before sealing, but shaded, humid, or poorly drained areas may need longer.
- Penetrating silane or siloxane sealers protect sound concrete without creating a slippery surface film.
- Polymeric sand belongs in empty or eroded paver joints before a joint-stabilizing sealer is applied.
- Fresh sealer commonly needs 4-12 hours before foot traffic and 24-72 hours before vehicles.
- Typical DIY material costs range from $0.20-$0.50 per square foot; professional cleaning and sealing often costs $1.50-$3.50 per square foot.
- A sealer cannot repair structural cracks, standing water, failed asphalt, or moving pavers.
What Should You Do Immediately After Pressure Washing?
Immediately after pressure washing, inspect the driveway, remove remaining sludge, protect it from traffic, and document defects while the surface is exposed. Do not begin sealing while water remains in pores, joints, cracks, or shaded edges.
Walk the entire surface after runoff stops. Look for:
- Open concrete cracks wider than approximately 1/8 inch.
- Asphalt potholes, loose aggregate, or spreading edge failures.
- Empty paver joints and displaced bedding sand.
- Oil shadows that remain after degreasing.
- White mineral deposits, called efflorescence, on concrete or pavers.
- Low spots where water remains for more than several hours.
Use a leaf blower or soft broom to remove leaves and loose grit. Avoid aggressive sweeping on weak asphalt edges because pressure washing may expose already deteriorated binder.
Photograph problem areas before applying any product. A dark patch after washing may be residual oil, trapped moisture, or a naturally different aggregate. Sealer can make all three more visible.
What Does Pressure Washing Remove?
Pressure washing removes soil, algae, mold, tire residue, loose efflorescence, and some existing sealant. The cleaning process does not automatically remove oil that has penetrated deeply into concrete, nor does it stabilize cracks or paver joints.
Concrete pores become more receptive to water and sealer after cleaning. Paver joints may lose sand because the spray dislodges material between blocks. Asphalt can lose loose surface aggregate if the nozzle is held too close or operated at excessive pressure.
A practical rule is to treat pressure washing as surface preparation, not as the complete maintenance job. Cleaning exposes the work that must follow.
How Long Should a Driveway Dry Before Sealing?
A driveway should usually dry for 24-48 hours before sealing, with longer drying required after heavy rain, in shade, during high humidity, or where drainage is poor. Product instructions control the final decision because water-based and solvent-based sealers tolerate different conditions.
Check the surface at several points, including joints, cracks, shaded borders, and areas beneath vehicles. A dry-looking top surface can conceal moisture below.
A simple field check uses clear plastic sheeting. Tape a roughly 18-by-18-inch sheet tightly to the concrete for several hours during dry weather. Condensation beneath the plastic or a visibly darker concrete patch indicates that sealing should wait. This test is useful, but it does not replace the sealer manufacturer’s requirements.
Do not seal when rain is expected within the product’s stated protection window. Many products require at least 12-24 hours without rain, while some joint sealers need longer for reliable curing.
What Weather Is Suitable?
Apply most driveway sealers when air and surface temperatures remain between 50 and 90 degrees Fahrenheit, or 10 and 32 degrees Celsius. Avoid hot midday concrete, freezing nights, strong wind, and rapidly changing weather.
| Condition | Typical minimum | Main risk | Better action |
|---|---|---|---|
| Concrete moisture | Dry at all test points | Haze, poor adhesion | Wait and retest |
| Air temperature | 50°F-90°F | Slow cure or rapid flash-off | Follow label range |
| Rain-free period | 12-24 hours | Washout and spotting | Check hourly forecast |
| Night temperature | Above 50°F for many products | Blushing or slow cure | Apply earlier in season |
| Direct sunlight | Avoid peak midday heat | Bubbles and lap marks | Work in shade |
| Relative humidity | Preferably below 70% | Extended cure | Allow extra time |
The best application window is often a dry morning after the surface has cooled, not the hottest part of the afternoon. Solvent evaporation accelerates on hot concrete, which can trap air and produce bubbles.
How Do You Repair the Surface Before Applying Sealer?
Repair concrete cracks, asphalt defects, and paver movement before sealing because a protective coating cannot restore structural stability. Repairs must be clean, dry, and compatible with the intended sealer.
Concrete Repairs
Hairline, non-moving cracks may accept a compatible concrete crack filler or polyurethane sealant. Wider cracks, vertical displacement, and recurring cracks indicate movement or slab failure that requires evaluation rather than cosmetic filling.
Remove loose debris and allow the repair material to cure according to its label. Many polyurethane products require roughly 24 hours before coating, although temperature and bead size change the result.
Do not fill an active expansion joint with rigid filler. Expansion joints need a flexible joint system that allows slab movement.
Asphalt Repairs
Use asphalt patch material for potholes and significant depressions, then allow the repair to set before sealcoating. Cold-patch products may remain soft longer than expected, particularly in cool weather.
Sealcoating hides color variation but does not rebuild a failed base. If water enters through wide cracks or the driveway edge is crumbling, paving repair should precede cosmetic protection.
Paver Repairs
Reset rocking pavers before adding sand. Correct low areas, replace damaged units, and verify that water drains away from buildings. A sealer can lock an unstable paver pattern in place, making later correction more difficult.
Which Sealer Should You Use for Each Driveway Material?
The correct sealer depends first on the driveway material, then on appearance, climate, traffic, and slip resistance. Penetrating silane or siloxane products usually suit sound plain concrete, acrylics suit decorative surfaces, polymeric systems suit pavers, and asphalt requires sealcoat.
| Driveway material | Product type | Typical appearance | Typical reapplication | Main limitation |
|---|---|---|---|---|
| Plain concrete | Silane or siloxane | Invisible matte | 5-7 years | Does not hide stains |
| Stamped concrete | Acrylic topical sealer | Satin or wet look | 1-3 years | Can peel or become slick |
| Concrete pavers | Joint-stabilizing sealer | Natural to enhanced | 2-4 years | Needs clean joints |
| Brick pavers | Penetrating or acrylic masonry sealer | Matte or color-enhanced | 2-5 years | Haze risk on damp masonry |
| Asphalt | Asphalt emulsion or coal-tar sealcoat | Dark black | 2-3 years | Does not fix base failure |
Penetrating Concrete Sealers
Silanes and siloxanes enter capillary pores and reduce water absorption without creating a thick surface film. They are particularly useful in freeze-thaw regions because they preserve traction and do not normally peel like a topical coating.
Penetrating sealers are poor choices when the homeowner wants gloss, color enhancement, or concealment of oil stains. They protect the substrate, not the appearance of every imperfection.
Acrylic Concrete Sealers
Acrylic sealers form a film over concrete and can deepen the color of stamped or decorative surfaces. Solvent-based formulas generally create stronger color enhancement, while water-based products typically produce less odor and lower volatile organic compound emissions.
Acrylics require careful coverage control. Over-application creates a plastic-looking layer that can haze, flake, bubble, or become slippery when wet. Mix a manufacturer-approved anti-slip additive into traffic-bearing areas.
Paver Joint Sealers
Paver maintenance requires joint stabilization as well as surface protection. Use polymeric sand only after the joints are dry and structurally sound, and choose a sand grade compatible with the joint width.
Sweep sand until the joints are filled to approximately 1/8 inch below the paver surface. Remove every visible grain from the paver faces before misting. Watering excess sand on the surface can permanently bond a cloudy residue to the blocks.
Asphalt Sealcoat
Asphalt sealcoat forms a sacrificial layer against ultraviolet exposure, water, and automotive fluids. It is normally applied only after the pavement has cured sufficiently and repaired cracks have been allowed to set.
Coal-tar products may provide strong chemical resistance, while asphalt-emulsion products generally have lower odor and different environmental restrictions. Local regulations and the product safety data sheet should guide the choice.
What Is the Correct Post-Wash Application Process?
The correct process has seven stages: dry, inspect, repair, restore joints, test, apply, and cure. The most important checkpoint is a completely dry and stable substrate.
Step 1: Let the Driveway Dry
Wait at least 24-48 hours in dry conditions. Extend the wait after rain or when shaded areas remain cool and dark.
Success checkpoint: The surface has consistent color, no damp joints, and no condensation under a plastic test sheet.
Common mistake: Sealing the sunny center while shaded edges remain wet.
Step 2: Remove Remaining Debris
Use a leaf blower, soft broom, or clean microfiber mop appropriate to the material. Do not leave dust because loose particles become trapped in the coating.
Success checkpoint: No loose grit remains in cracks, joints, corners, or expansion grooves.
Common mistake: Blowing debris across a recently repaired crack.
Step 3: Repair Defects
Fill suitable concrete cracks, patch asphalt damage, and reset unstable pavers. Follow the repair product’s cure time rather than assuming the surface is ready.
Success checkpoint: Repairs are firm, flush where required, and free of uncured residue.
Common mistake: Applying sealer over flexible filler that still feels soft.
Step 4: Refill Paver Joints
Sweep polymeric sand into dry joints, compact it by vibration or repeated sweeping where the product allows, and leave the specified recess below the surface.
Success checkpoint: Every joint is uniformly filled and no sand remains on top of the pavers.
Common mistake: Misting aggressively, which can wash out shallow joints.
Step 5: Confirm the Product and Coverage
Measure the driveway and compare the area with the manufacturer’s coverage rate. Typical coverage varies widely, from approximately 100 to 400 square feet per gallon depending on porosity and product.
Success checkpoint: Enough material is available to complete the section without an emergency batch change.
Common mistake: Buying coverage based on smooth new concrete when the washed surface is porous.
Step 6: Apply Thin, Even Coats
Use a 3/4-inch nap roller, squeegee, or compatible pump sprayer according to the product. Work in manageable sections and maintain a wet edge to prevent lap marks.
Success checkpoint: No puddles, heavy roller lines, dry bands, or overlapping glossy patches appear.
Common mistake: Adding extra product to make porous areas look equally shiny.
Step 7: Protect the Cure
Block pedestrians for approximately 4-12 hours and vehicles for 24-72 hours, using the label’s longer interval when humidity is high or temperatures are low.
Success checkpoint: The film is firm, uniform, and no longer tacky under light contact.
Common mistake: Driving across the surface and turning stationary tires before full cure.
How Much Does Post-Washing Driveway Maintenance Cost?
Typical DIY maintenance costs $0.20-$0.50 per square foot for sealer, repair products, and paver sand, while professional cleaning, preparation, and sealing commonly costs $1.50-$3.50 per square foot. Complex repairs, access problems, regional labor rates, and premium coatings increase the total.
| Work item | Typical DIY cost | Typical professional cost | Typical duration |
|---|---|---|---|
| Concrete penetrating sealer | $0.10-$0.35/sq. ft. | $1.25-$3.00/sq. ft. installed | 1 day |
| Acrylic concrete sealer | $0.15-$0.60/sq. ft. | $1.50-$4.00/sq. ft. installed | 1-2 days |
| Polymeric paver sand | $0.10-$0.35/sq. ft. | $1.50-$4.50/sq. ft. installed | 1-2 days |
| Asphalt sealcoat | $0.10-$0.30/sq. ft. | $0.25-$0.75/sq. ft. | 1-2 days |
| Crack repair | $10-$80 materials | $100-$600 typical visit | 1-2 days |
These are typical planning ranges, not fixed quotations. A 600-square-foot driveway might require $120-$300 in DIY materials, but replacing failed paver joints or repairing asphalt can dominate the budget.
How Should You Maintain the Driveway After Sealing?
Maintain the driveway by removing spills promptly, improving drainage, limiting deicing chemicals, and inspecting it twice yearly. Routine care extends the coating’s useful life more effectively than applying repeated thick coats.
Use absorbent material on fresh oil, then clean with a compatible degreaser. Do not scrub aggressively with a wire brush on an acrylic film. Avoid rock salt where possible because chlorides can worsen concrete scaling and harm nearby vegetation.
Keep downspouts from discharging onto the driveway. Standing water accelerates staining, joint erosion, freeze-thaw damage, and sealer failure even when the coating itself was applied correctly.
A practical schedule includes:
- Monthly: remove leaves, dirt, and visible spills.
- Before winter: inspect cracks, joints, and drainage.
- In spring: check for scaling, frost damage, and paver movement.
- Every 1-2 years: review appearance and water behavior.
- At the expected service interval: test absorption before resealing.
Do not automatically reseal because the calendar says so. A penetrating sealer may still work after five years, while a heavily trafficked acrylic film may need repair sooner.
What Problems Can Happen After Sealing?
The most common post-sealing failures are haze, bubbles, slipperiness, peeling, and white residue. Each symptom points to a different combination of moisture, product thickness, contamination, temperature, or surface preparation.
| Symptom | Likely cause | First response | Prevention |
|---|---|---|---|
| Milky white haze | Moisture or thick water-based film | Stop traffic; follow product repair guidance | Test dryness |
| Bubbles | Hot surface or trapped air | Contact manufacturer before recoating | Apply in shade |
| Slippery wet surface | Smooth acrylic without aggregate | Add compatible anti-slip topcoat | Mix additive initially |
| Peeling or flaking | Poor adhesion or excess layers | Strip only with compatible method | Avoid over-application |
| White paver residue | Polymeric sand on faces | Use manufacturer-approved cleaner | Remove dust before wetting |
| Dark patches | Uneven absorption or oil | Diagnose before adding sealer | Degrease and test |
Solvent-based acrylic haze is sometimes recoverable with a compatible re-emulsifying solvent such as xylene, but xylene is flammable, hazardous to inhale, and unsuitable for casual experimentation. Water-based coatings often require stripping and reapplication. Read the safety data sheet and contact the manufacturer before using a solvent.
A slippery surface is not solved by simply adding another smooth coat. A compatible micronized polymer or aggregate additive is required, and the coating must remain thin enough to avoid texture loss.
When Should You Not Seal the Driveway?
Do not seal a driveway with active structural movement, persistent standing water, uncured repairs, heavy efflorescence, or unresolved oil contamination. Protective products are inappropriate when the underlying surface cannot provide stable adhesion.
Postpone the project when:
- Concrete is scaling or visibly delaminating.
- Asphalt aggregate is loose across broad areas.
- Pavers rock under foot traffic.
- Water remains after ordinary drainage time.
- Rain or freezing temperatures are forecast.
- The driveway has multiple unknown previous coatings.
- The surface remains oily after cleaning.
An honest limitation matters here: no sealer can convert a failing driveway into a sound one. Sealing may slow water entry and staining, but reconstruction, drainage correction, or professional repair may be the economical choice.
Which Option Fits Your Situation?
| Homeowner situation | Recommended approach | Finish | Reapplication | Avoid when |
|---|---|---|---|---|
| Plain concrete in freeze-thaw climate | Silane or siloxane | Natural matte | 5-7 years | Gloss is required |
| Decorative stamped concrete | Acrylic with anti-slip additive | Satin or enhanced | 1-3 years | Moisture remains |
| Interlocking pavers | Polymeric sand plus joint sealer | Natural or enhanced | 2-4 years | Joints are unstable |
| Standard asphalt | Asphalt sealcoat | Dark black | 2-3 years | Base is failing |
| Budget DIY project | Water-based penetrating product | Low odor matte | 3-5 years typical | Surface needs color change |
For most sound plain concrete driveways, a penetrating silane or siloxane sealer offers the best balance of durability, traction, and low failure risk. Decorative concrete may justify acrylic for appearance, while pavers require joint work before any surface coating.
FAQ
Can I pressure wash the driveway again after sealing?
Wait until the sealer has fully cured, commonly 24-72 hours for vehicle-grade products and longer in cool or humid conditions. After curing, use the lowest effective pressure and a suitable nozzle distance, because aggressive cleaning can erode paver joints, expose weak aggregate, and shorten the coating’s life.
Should I seal a driveway every year?
Most driveways should not be sealed annually. Acrylic coatings commonly last 1-3 years, asphalt sealcoat 2-3 years, and penetrating concrete sealers about 5-7 years under typical conditions. Apply another coat only after checking absorption, wear, adhesion, and the manufacturer’s recoat instructions.
Can rain damage a freshly sealed driveway?
Rain can spot, dilute, wash away, or cloud fresh sealer before it forms a stable film. Protect the driveway during the product’s stated rain-free period, typically 12-24 hours or longer for some paver systems. If rain is likely, postpone application rather than relying on a temporary cover.
How do I know whether concrete still has old sealer?
Sprinkle water on several areas. If water beads strongly instead of darkening and absorbing, an existing coating or treatment may remain. This test is not definitive, because dense concrete can also absorb slowly. A professional can use additional adhesion or solvent tests before recoating.
Is polymeric sand necessary for every paver driveway?
Polymeric sand is useful when joints are stable, clean, and dry, but it is not a substitute for resetting moving pavers or correcting drainage. Some narrow joints require a specific sand grade, and certain historic brick systems may need a different joint material. Follow the paver and sand manufacturer’s compatibility requirements.
What is the best season for driveway sealing?
Dry spring or early autumn usually provides the most forgiving conditions, with moderate temperatures, low rain risk, and enough curing time before freezing weather. Local climate matters more than the calendar. Avoid applying sealer when the surface may freeze, overheat, or remain damp overnight.
The Bottom Line
The most reliable driveway maintenance tips after pressure washing are simple: dry the surface completely, repair defects, restore paver joints, choose a sealer for the actual material, apply a thin coat in suitable weather, and protect the cure. Penetrating concrete sealer is usually the safest functional choice, while acrylic, polymeric joint systems, and asphalt sealcoat solve different appearance and material problems.