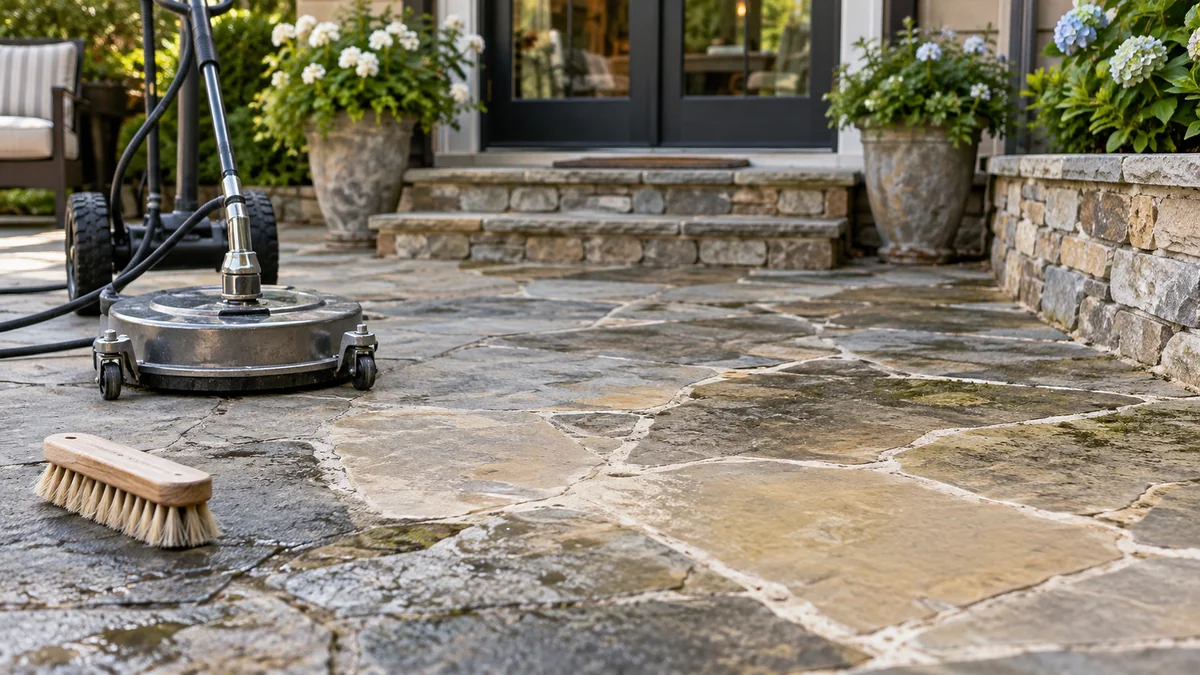
Yes, you can pressure wash flagstone, but only with controlled pressure, a wide-angle nozzle, and a test patch. Start around 800-1,000 PSI, keep the nozzle 12-18 inches from the stone, and avoid direct spray on joints. Soft sandstone, slate, loose mortar, and flaking surfaces may require low-pressure chemical cleaning instead.
Key Facts at a Glance
A practical starting pressure for sound flagstone is 800-1,000 PSI, adjusted after a test patch.
A 40-degree white nozzle is the safest general-purpose choice for inexperienced users.
A 0-degree red tip and 15-degree yellow tip can etch stone, remove joint material, and create visible stripes.
Sandstone and slate usually need more caution than dense quartzite because their layers can split or flake.
Pressure washing can remove sealer, polymeric sand, mortar fines, and unstable surface layers.
A 500-square-foot patio typically takes 3-5 hours for a careful DIY cleaning, including setup and cleanup.
What Makes Flagstone Different From Concrete?
Flagstone is natural stone cut or split into irregular paving pieces, commonly sandstone, slate, limestone, or quartzite. Natural layers, pores, mineral veins, and uneven edges make flagstone less uniform than concrete or manufactured pavers, so one pressure setting may affect adjacent stones differently.
Concrete has a relatively consistent cementitious surface. Flagstone may contain soft bedding planes that absorb water, release grains, or separate under concentrated impact. The most vulnerable areas are thin edges, old repairs, exposed layers, and joints filled with loose sand.
Pressure washing removes contamination through impact and water flow. PSI determines the force at the surface, while GPM determines how efficiently loosened soil and cleaner are flushed away. A high-PSI machine with poor control can damage flagstone even when the total cleaning time is short.
Which Flagstone Types Need the Most Caution?
Sandstone and slate generally require the most conservative approach because both can split along natural layers. Limestone is vulnerable to acidic cleaners, while quartzite is usually denser but still has vulnerable joints and edges.
| Flagstone type | Typical vulnerability | Starting approach | Cleaner restriction |
|---|---|---|---|
| Sandstone | High porosity, grain loss, layered bedding | 600-900 PSI test patch, 40-degree nozzle | Avoid strong acid and aggressive degreasers |
| Slate | Flaking, spalling, lifted edges | 600-900 PSI, 18-inch distance | Avoid forcing water beneath layers |
| Limestone | Acid etching, surface dulling | 700-1,000 PSI, alkaline cleaner | Do not use muriatic or other acidic cleaners |
| Quartzite | Lower surface erosion, joint damage | 900-1,200 PSI after testing | Keep cleaner away from plants and metal |
These ranges are conservative practitioner starting points, not universal material standards. A thin Indian sandstone slab over weak bedding may fail below the pressure tolerated by a dense, thick quartzite paver. The test patch determines whether the selected setting is acceptable.
What Pressure and Nozzle Should You Use?
Use the lowest pressure that removes the contamination, usually 800-1,200 PSI on sound flagstone. Choose a 40-degree nozzle for general cleaning, maintain 12-18 inches of working distance, and keep the wand moving in overlapping passes.
A pressure washer’s advertised maximum does not equal the pressure reaching the stone. Trigger position, nozzle size, hose length, pump condition, and distance all change the delivered force. A gas machine rated at 3,000 PSI can often be adjusted downward, but a homeowner should not assume that pulling the trigger lightly creates a reliable 1,000 PSI output.
| Component | Recommended choice | Avoid | Reason |
|---|---|---|---|
| Operating pressure | 800-1,200 PSI | More than 1,500 PSI without testing | Reduces etching and joint loss |
| Nozzle | 40-degree white tip | 0-degree red tip | Spreads force across a wider area |
| Alternative nozzle | 25-degree green tip at distance | 15-degree yellow tip | Provides more cleaning force with control |
| Working distance | 12-18 inches | Less than 6 inches | Prevents concentrated impact |
| Spray angle | About 45 degrees | Straight down at 90 degrees | Protects pores, edges, and joints |
| Surface cleaner | Low-pressure, compatible unit | Oversized commercial spinner | Reduces streaking without excessive force |
A rotary surface cleaner can produce a more even appearance on a broad, stable patio, but it is not automatically safer. The attachment must be rated for the pressure being used, and its nozzles must remain at the manufacturer’s specified height. On uneven flagstone, a surface cleaner can strike raised edges or leave uncleaned shadows.
Why Do PSI and GPM Both Matter?
PSI supplies impact, while GPM carries loosened soil, detergent, and organic residue away from the stone. A lower-pressure machine with adequate water flow may clean more effectively than a high-pressure machine used with a restricted nozzle and poor rinsing.
A homeowner should not increase PSI merely because dirty water remains after a pass. Persistent residue may indicate insufficient dwell time, inadequate rinsing, or a stain that pressure alone cannot remove. Chemical pretreatment often solves that problem with less mechanical force.
Before You Start: Tools, Conditions, and Inspection
A typical 500-square-foot flagstone patio requires a pressure washer with adjustable output, a 40-degree nozzle, a garden hose, a stiff nonmetallic brush, stone-safe cleaner, protective sheeting, and a method for controlling runoff. Plan 3-5 hours for a careful DIY project, with additional drying time before sealing.
| Item | Typical quantity or specification | Purpose |
|---|---|---|
| Pressure washer | Adjustable, capable of 600-1,500 PSI working pressure | Controlled cleaning |
| White nozzle | 40-degree fan tip | General stone washing |
| Garden hose | 50-75 feet, adequate flow | Water supply and rinsing |
| Stone cleaner | 1 gallon per 500-1,000 square feet | Soil or organic pretreatment |
| Pump sprayer | 1-2 gallons | Even detergent application |
| Nylon brush | 1 medium-stiff brush | Edges, joints, and spot treatment |
| Plastic sheeting | Enough for nearby outlets and delicate plants | Runoff protection |
| Sealer | Quantity specified by product coverage | Optional post-cleaning protection |
Do not clean during freezing weather, extreme heat, or strong wind. A practical working range is about 50-85°F, with enough time for the surface to remain wet during detergent dwell. Check local rules before allowing chlorine-containing runoff into storm drains, ponds, streams, or planted beds.
Inspect the patio before adding water. Look for rocking stones, hollow sounds, cracked mortar, missing joint sand, lifted slate layers, and areas where previous sealer has turned cloudy. Photograph existing defects so cleaning damage is not confused with a pre-existing condition.
How Do You Pressure Wash Flagstone?
Clean flagstone in eight controlled steps: protect the area, inspect and test, pre-wet, pretreat, wash in sections, rinse thoroughly, restore joints, and seal only after complete drying. The most important success factor is maintaining consistent distance and movement rather than chasing stains with additional pressure.
Step 1: Clear and Protect the Area
Remove furniture, planters, hoses, toys, and loose objects. Sweep leaves, gravel, and sand from the surface before connecting the pressure washer.
Cover delicate plants temporarily, but do not seal living vegetation under plastic in direct sun. Close windows and doors, protect electrical outlets, and identify where dirty water will flow. Move runoff away from painted walls, untreated wood, ponds, and neighboring property.
You will know this step worked when: no loose debris can become a projectile or abrasive under the water stream.
Common mistake: covering plants but ignoring the soil where detergent and dirty water will collect.
Step 2: Inspect and Test a Hidden Area
Choose a test patch of approximately 1-2 square feet in a corner or behind furniture. Begin with the widest nozzle, the lowest practical pressure, and an 18-inch distance.
Make one slow pass, let the stone dry partly, and compare it with the surrounding surface. Look for lighter streaks, roughened texture, exposed grains, lifted flakes, cloudy sealer, or missing joint material. Wet stone can hide discoloration, so the final evaluation requires drying.
You will know this step worked when: the test patch is cleaner without a visible change in texture or color.
Common mistake: judging the test immediately while the stone is still uniformly wet.
Step 3: Pre-Wet the Flagstone
Rinse the patio with clean water at low pressure. Saturate the stone, joints, and nearby masonry before applying detergent.
Pre-wetting reduces rapid absorption and helps keep cleaning chemicals near the surface. It also reveals drainage problems before dirty water is produced. Do not rely on pre-wetting to make an unsuitable chemical safe for limestone or plants.
You will know this step worked when: the stone appears evenly darkened and no area is absorbing water dramatically faster than the rest.
Common mistake: skipping areas beneath furniture locations, where dry stone can react differently to cleaner.
Step 4: Apply a Stone-Safe Cleaner
Select the chemical based on the stain. Use a labeled natural-stone cleaner for general soil, a compatible biocide for algae and lichen, and a stone-safe degreaser for fresh oil. Apply with a pump sprayer and follow the product label for dilution and dwell time.
A 5-10 minute dwell is typical for many cleaners, but the surface must remain wet and the label controls. Chlorine solutions can damage plants, metals, fabrics, and some finishes. Do not improvise a sodium hypochlorite concentration when the product label provides a different dilution.
Acidic products are especially hazardous on limestone because acid reacts with calcium carbonate and can leave a permanently dull or rough surface. Vinegar, muriatic acid, and acidic rust removers should not be used on limestone unless the stone manufacturer specifically approves the product.
You will know this step worked when: organic growth softens or changes appearance before rinsing, without the cleaner drying on the stone.
Common mistake: increasing chemical strength when more dwell time or light brushing would solve the problem.
Step 5: Wash in Small, Overlapping Sections
Divide the patio into sections of about 25-50 square feet. Use the 40-degree tip at 12-18 inches, hold the wand at roughly 45 degrees, and sweep across the surface with overlapping passes.
Start at the highest point and work toward the drainage outlet. Keep the spray moving at a steady walking pace. Direct the fan across joints rather than into them, and reduce pressure near edges, walls, drains, and previously repaired areas.
For a broad, stable patio, a compatible surface cleaner can reduce wand marks. Keep the attachment moving and do not leave it stationary over one spot.
You will know this step worked when: soil lifts in an even pattern and no narrow bright stripe follows the nozzle.
Common mistake: moving closer when a stain remains. Pretreat the stain instead.
Step 6: Flush and Rinse Completely
Rinse each section with clean water before moving to the next. Use low pressure and high available flow to carry loosened debris away from the stone and joints.
Inspect low points, corners, and the edges of retaining walls. Cleaner left in a joint can affect vegetation, metal edging, or later sealer adhesion. If runoff is cloudy, continue rinsing until the water becomes substantially clearer.
You will know this step worked when: no foam, slippery residue, or suspended dirt remains after the final rinse.
Common mistake: rinsing only the visible stone while leaving detergent concentrated in joints.
Step 7: Restore Joints After Drying
Allow the patio to dry before adding sand or evaluating joint condition. Drying commonly takes 24-48 hours, depending on stone porosity, shade, humidity, airflow, and weather.
Sweep compatible joint sand into empty joints only after the base and joint depth are suitable. Polymeric sand requires a clean, dry installation and careful misting according to its label. It should not be used to hide moving stones or a failed foundation.
You will know this step worked when: joints remain filled after light sweeping and no stone rocks under normal foot pressure.
Common mistake: replacing sand while the joints are wet, which can create clumps and prevent proper setting.
Step 8: Seal Only When the Stone Is Ready
A penetrating, breathable sealer can reduce water absorption and staining, but sealing is optional and does not repair unstable stone. Wait at least 48 hours after cleaning, then confirm the stone and joints are fully dry according to the sealer manufacturer’s instructions.
Apply a small compatibility test first. Some sealers darken sandstone, alter slip resistance, or react poorly with old coatings. Do not seal over efflorescence, trapped moisture, active flaking, or dirty joints.
You will know this step worked when: the sealer absorbs evenly without a glossy film, sticky residue, or patchy darkening.
Common mistake: sealing immediately because the surface looks dry while moisture remains below the stone.
Should You Pressure Wash or Use Another Method?
Pressure washing is fastest for loose dirt on sound, stable flagstone, but soft washing or hand cleaning is safer for fragile stone, biological growth, and deteriorated joints. The best method depends on the stone’s condition and the type of contamination, not only on how dirty the patio looks.
| Cleaning method | Best use | Typical time for 500 sq. ft. | Main risk |
|---|---|---|---|
| Controlled pressure washing | Surface dirt, algae film, loose soil | 3-5 hours DIY | Etching and joint loss |
| Soft washing | Moss, lichen, black organic spotting | 2-4 hours plus dwell | Chemical runoff or plant injury |
| Hand scrubbing | Small areas, delicate slate, isolated stains | 4-8 hours | Labor and uneven appearance |
| Professional cleaning | Historic, large, unstable, or complex patios | 1-2 hours onsite | Higher service cost |
| Steam or hot-water cleaning | Grease and persistent organic residue | 2-4 hours | Thermal or sealer damage |
Soft washing combines low-pressure water with a compatible cleaning agent. It can remove organic growth without relying on a concentrated jet, but it is not harmless: incorrect concentration, overspray, or runoff can damage plants and metals.
Hand cleaning is the least aggressive choice for a small fragile area. It is inefficient for a large patio and may leave inconsistent results if the stone has deep biological staining.
What Stains Can Pressure Washing Remove?
Pressure washing works best on loose dirt, surface algae, mud, and residue that has not chemically bonded to the stone. Pressure alone is usually insufficient for oil, rust, mineral deposits, deep lichen, and efflorescence.
| Stain or growth | First treatment | Pressure-washing role | Important limitation |
|---|---|---|---|
| Mud and loose soil | Water rinse | Primary cleaning method | May redeposit in joints |
| Green algae | Stone-safe biocide | Follow-up rinse | Requires runoff control |
| Moss and lichen | Biocide plus dwell | Removes dead residue | Roots may remain in pores |
| Oil or grease | Stone-safe degreaser | Flushes loosened oil | Multiple treatments may be needed |
| Rust | Approved stone rust remover | Light rinse only | Acid can damage limestone |
| Efflorescence | Dry brushing and approved cleaner | Limited | Water may worsen salt migration |
Black spots often indicate lichen or fungal growth rather than ordinary dirt. Increasing pressure can remove the visible mark while roughening the surrounding stone, so chemical pretreatment is usually preferable.
Common Failures and How to Fix Them
The most common pressure-washing failures are visible wand marks, eroded joints, surface flaking, chemical discoloration, and plant damage. Stop cleaning when a defect appears, because additional passes usually enlarge the damaged area.
- Bright stripes or circular marks: Stop using the wand on the affected area. Blend only with a wider fan at greater distance after testing, but recognize that true etching may be permanent.
- Sand blown from joints: Stop directing the fan across the gaps. Let the patio dry, assess joint depth, and replace compatible sand after checking for moving stones.
- Slate flakes or sandstone grains: Stop immediately and rinse. Do not reseal loose layers; unstable stone may need replacement or professional consolidation.
- White haze after cleaning: Allow complete drying before diagnosing. The haze may be efflorescence, cleaner residue, or failed sealer, and each requires a different treatment.
- Plant browning after chemical use: Rinse foliage and soil with clean water promptly, then follow the product’s safety instructions. Do not apply more cleaner to the patio until runoff is controlled.
- Persistent stain after several passes: Use a stain-specific product rather than higher pressure. A pressure washer cannot safely replace every chemical or abrasive treatment.
A practitioner rule is simple: if the surface becomes cleaner only when the nozzle approaches dangerously close, the cleaning method is wrong. Change the chemistry or dwell time instead.
How Much Does Flagstone Cleaning Cost?
Typical professional cleaning costs range from $0.25-$0.75 per square foot, while DIY equipment and supplies commonly total $55-$225 for a one-day project. Repairing displaced sand, damaged stone, or failed sealer can cost more than the original cleaning.
| Cost item | Typical range | Suitable project |
|---|---|---|
| Electric pressure-washer rental | $35-$100 per day | Small residential patio |
| Gas pressure-washer rental | $75-$175 per day | Large or heavily soiled area |
| Stone cleaner and supplies | $20-$75 | One 500-square-foot project |
| Professional basic cleaning | $0.25-$0.50 per sq. ft. | Sound patio with ordinary soil |
| Professional specialty cleaning | $0.50-$0.75 per sq. ft. | Lichen, delicate stone, complex access |
| Typical 500-square-foot service | $150-$450 | Standard residential layout |
Prices vary by region, access, drainage, minimum service charges, stain severity, and joint repairs. A contractor quote should state whether pretreatment, runoff protection, re-sanding, sealing, and damage repairs are included.
When Should You Hire a Professional?
Hire an insured professional when flagstone has crumbling mortar, widespread flaking, historic value, multiple levels, severe lichen, unknown sealers, or drainage that could carry chemicals into sensitive areas. Professionals can measure working pressure, select soft-wash chemistry, and manage runoff more consistently than a first-time user.
A first-time homeowner can usually handle a small, stable patio with solid joints, ordinary soil, and a controllable electric washer. An experienced homeowner with adjustable equipment can manage a larger surface after testing pressure and chemical compatibility.
Do not use pressure washing as a repair strategy. Moving stones, hollow bedding, failed retaining edges, and deep structural cracks require masonry or landscape repair before cleaning.
The Bottom Line
You can pressure wash flagstone safely when the stone is stable, the pressure is controlled, and the cleaning method matches the stone and stain. Start around 800-1,000 PSI with a 40-degree nozzle, test a hidden area, keep the wand 12-18 inches away, and protect the joints from direct spray.
Pressure washing is not the best answer for every patio. Soft washing is often safer for algae and lichen, while hand cleaning suits fragile or small surfaces. If you can see flaking layers, loose mortar, or uncertain previous coatings, professional assessment is less expensive than replacing damaged flagstone.
FAQ
Can you pressure wash sealed flagstone?
Yes, but pressure washing may strip or cloud an existing sealer. Test a hidden section first and use the lowest effective pressure. A sealer that is peeling, chalky, or uneven may require complete removal and reapplication rather than spot repair. Confirm that the replacement product is compatible with the stone and previous coating.
Can you use a 3,000-PSI pressure washer on flagstone?
A 3,000-PSI machine can sometimes be adjusted for flagstone, but its maximum rating is too aggressive for direct use on most natural stone. Use an adjustable regulator, a wide nozzle, and a test patch. Never assume a low trigger position produces a verified safe pressure without equipment control or measurement.
Will pressure washing remove weeds between flagstones?
Pressure washing can remove shallow weeds and loose debris, but it may also remove joint sand and destabilize the paving. Pull or cut established weeds first, then clean around the joints rather than directly into them. Refill empty joints only after the patio dries and the stones remain stable.
Can pressure washing damage limestone flagstone?
Yes. Pressure can roughen soft limestone, while acidic cleaners can chemically etch its calcium-based surface. Use an alkaline, stone-labeled cleaner, a wide nozzle, and a conservative starting pressure. Avoid muriatic acid, vinegar, and unapproved rust removers, even when a stain appears resistant.
How long should flagstone dry before sealing?
Flagstone commonly needs at least 48 hours of dry weather before sealing, although porous stone, shade, humidity, and thick joints can extend that period. Follow the sealer label and test moisture in a joint or inconspicuous area. Sealing damp stone can trap moisture and create cloudy or uneven results.
Is pressure washing better than scrubbing flagstone?
Pressure washing is faster for a large patio with stable stone and ordinary dirt. Scrubbing is safer for small delicate areas, lifted slate, uncertain coatings, or fragile mortar. A chemical pretreatment followed by low-pressure rinsing often provides the best balance for algae and lichen because it reduces the force needed to remove organic growth.