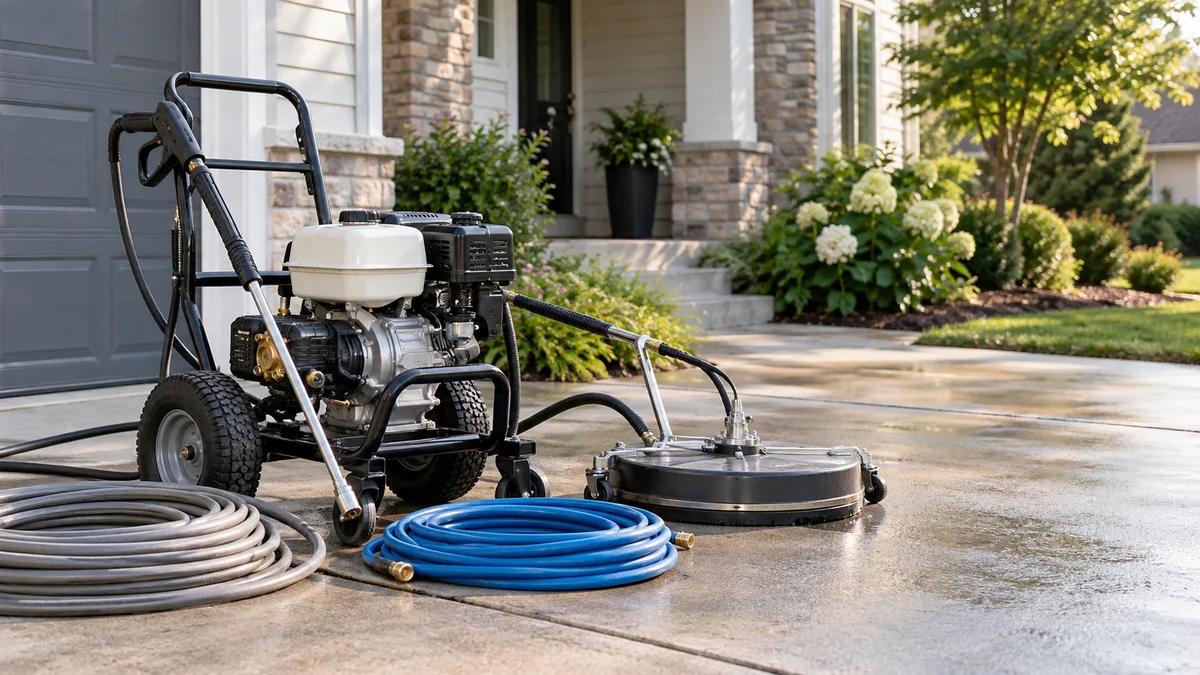
To protect plants from power washing, move portable plants, pre-rinse nearby vegetation and soil, shield beds with breathable or waterproof barriers, control chemical runoff, and rinse foliage immediately after exposure. Keep covers loose and short-lived, maintain a physical standoff from the spray, and remove plastic as soon as the washing ends.
Key Facts
Pre-watering dilutes incidental cleaner contact, but it does not neutralize bleach or prevent damage from a direct spray.
A pressure washer can shred leaves and snap stems even when no detergent is used.
Plastic sheeting blocks liquid chemicals but can overheat plants quickly in direct sun.
Canvas and frost fabric provide airflow, but saturated fabric can transfer detergent to foliage.
Never mix vinegar, ammonia, or other household chemicals with bleach.
Typical homeowner protection takes 30-60 minutes before washing and 15-30 minutes afterward.
Why Power Washing Damages Plants
Power washing damages plants through mechanical impact, chemical exposure, heat, and contaminated runoff. A high-pressure stream can tear leaf tissue, strip waxy coatings, break young stems, and force grit into open wounds. Detergent overspray can cause bleaching or scorched margins, while concentrated runoff may injure roots and soil organisms.
The type of cleaning matters. A cold-water rinse aimed at siding creates mainly mechanical and drift risks. A soft-wash mixture containing sodium hypochlorite creates a chemical hazard even at lower spray pressure. Hot water, alkaline degreasers, paint strippers, and acidic masonry cleaners add separate risks.
Plant distance is the first control. A shrub touching a wall is exposed to rebound, dripping solution, and direct operator movement; a bed 6 feet away is more likely to receive mist or diluted runoff. Protection should therefore combine separation, shielding, clean water, and drainage control rather than relying on a cover alone.
What damage can occur?
| Damage type | Typical visible sign | Usual timing | First response |
|---|---|---|---|
| Pressure injury | Torn leaves, bent stems, missing buds | Immediate | Stop spray, remove debris, water soil |
| Bleach or detergent burn | White, tan, or translucent leaf patches | 1-24 hours | Rinse foliage with clean water |
| Heat injury | Limp, curled, crispy leaves | Same day to 48 hours | Remove plastic, provide shade, irrigate |
| Root-zone exposure | Yellowing, wilt, or dieback from base upward | 3-14 days | Control runoff and deeply flush soil |
| Abrasion from grit | Scraped bark or punctured leaves | Immediate | Rinse, avoid pruning healthy tissue |
What to Do Before Power Washing
Prepare the site 1-24 hours before washing. The most important actions are moving portable plants, identifying the detergent, establishing a runoff path, and creating enough distance that the spray never needs to pass through foliage.
Step 1: Identify the cleaner and plant risk
Ask the operator for the product name, active ingredients, dilution ratio, application method, and expected wash time. Sodium hypochlorite, sodium hydroxide, sodium carbonate, trisodium phosphate, acids, solvents, and strong surfactants do not create identical risks.
Read the product Safety Data Sheet and label. Do not assume that a product described as biodegradable is safe for leaves, roots, ponds, or edible crops. Biodegradability describes breakdown under particular conditions, not immediate plant compatibility.
Avoid washing when wind carries mist toward a vegetable garden, pond, greenhouse, or neighboring property. A typical practical limit is to postpone work when steady wind exceeds about 10 mph, although the product label and local conditions control.
You will know this step worked when: you can name the cleaner, its dilution, the expected spray direction, and where contaminated water will go.
Common mistake: Accepting “we only use soap” as a chemical specification. Ask for the label or product container.
Step 2: Move, prune, and separate
Move potted plants, hanging baskets, garden tools, hoses, and outdoor furniture at least 10 feet from the work zone when space permits. Remove delicate plants from under eaves because dripping cleaner can continue after the machine stops.
Prune only branches that physically obstruct the work, and create approximately 1-2 feet of clearance from siding or masonry where practical. Do not conduct major pruning immediately before chemical exposure, because fresh cuts can increase tissue vulnerability.
Mark irrigation emitters, low-voltage lighting, plant tags, and shallow-rooted specimens. Protect trunks with a rigid shield when a tree sits beside a wall, but never strap an impermeable cover tightly around bark.
You will know this step worked when: no movable plant or hanging branch occupies the operator’s spray path.
Common mistake: Cutting healthy branches instead of moving the nozzle path or using a temporary rigid shield.
Step 3: Pre-wet foliage and soil
Use clean tap water to wet leaves, stems, mulch, and the soil throughout the likely overspray zone, usually 1-2 hours before work. Saturate the root-zone surface without creating standing water that can carry cleaner farther downhill.
Pre-wetting works by diluting incidental deposits and reducing immediate absorption by dry surfaces. It does not form an impermeable “water barrier,” and it cannot protect foliage from a concentrated direct stream or prolonged chemical contact.
Water from the top and underside of leaves, then repeat shortly before detergent application if the surface has dried. Avoid excessive irrigation near plants that are already waterlogged or susceptible to root disease.
You will know this step worked when: foliage is evenly wet and the upper soil is moist several inches below the surface, without active puddling.
Common mistake: Wetting plants once and then allowing them to dry during a long setup.
Which Plant Barrier Should You Use?
The best barrier depends on whether the main threat is liquid chemical drift, pressure impact, heat, or runoff. No single cover protects against all four risks, and a cover that blocks spray can still fail if contaminated water pools on its upper surface.
| Barrier | Typical specification | Main protection | Main limitation |
|---|---|---|---|
| Polyethylene sheeting | 4-6 mil; 10-20 ft rolls | Liquid overspray and drips | Heat buildup; no airflow |
| Canvas drop cloth | 8-12 oz fabric; reusable | Light impact and short drift | Absorbs cleaner when saturated |
| Nonwoven plant fabric | 0.5-1.5 oz per square yard | Mist and airflow | Poor protection from direct streams |
| Plywood shield | 1/4-1/2 inch sheets | High impact and rebound | Heavy; can crush plants |
| Corrugated plastic board | 4-6 mm sheets | Moderate impact; washable | Less stable in wind |
When is plastic sheeting appropriate?
Use 4-6 mil polyethylene for short-duration liquid protection when the cover can remain loose, shaded, and monitored. Drape the plastic over stakes or a simple frame rather than laying it directly on leaves, and leave openings at the bottom for air movement.
Remove plastic immediately after detergent application and rinsing. As a practical rule, do not leave clear plastic over plants longer than 30-60 minutes in direct sun; even shorter periods can cause heat injury on hot days. Opaque plastic may reduce solar gain but still restricts airflow.
Plastic is not appropriate for a long job, hot weather, tender seedlings, or plants already stressed by drought. It also fails when water and detergent pool on top and later spill onto the bed.
When is fabric or canvas better?
Use breathable plant fabric for fragile flowers exposed mainly to light mist. Use canvas when brief physical shielding matters more than complete chemical impermeability, but remove it once saturated because absorbed cleaner can wick onto leaves.
Do not confuse breathable fabric with chemical resistance. A fabric cover can reduce droplet impact while allowing dissolved detergent through. Keep the material above the foliage on hoops or a frame when possible.
When should you build a rigid shield?
Use plywood or corrugated plastic when a prized shrub, young tree, climbing vine, or rose sits within the rebound zone. Position the shield between the spray and the plant, leaving ventilation space and avoiding contact with stems.
A rigid board protects against impact, but it does not stop chemical runoff flowing around its lower edge. Combine the board with pre-wetting, a clean-water rinse, and a temporary diversion channel.
How to Cover and Anchor Plants
Cover the plant from above without compressing stems. Anchor barrier edges with landscape staples, sandbags, bricks, or water-filled weights placed outside the root crown; do not tape plastic directly to bark or tie it tightly around stems.
Maintain a gap between the cover and foliage whenever the cover will remain in place for more than a few minutes. Avoid placing heavy weights in the center of flower beds, where they can crush crowns or compact wet soil.
Create a low berm or temporary diversion using clean soil, absorbent socks, or plastic edging on the uphill side of the bed. The goal is to direct contaminated water away from roots, drains, ponds, and edible crops. Do not block a foundation drain or force water toward a neighboring property.
You will know this step worked when: a hand-held hose can be aimed at the building without the barrier lifting, collapsing, or touching most leaves.
Common mistake: Covering a plant completely with loose plastic and assuming the cover prevents all exposure. Drips, heat, and runoff remain hazards.
How to Manage Rinsing During the Wash
Assign one person to monitor plants and hold a garden hose on a gentle shower or fan setting. The spotter should rinse exposed foliage and hardscape edges when detergent is applied, while the operator works from the cleanest, highest area toward the drainage outlet.
Keep the hose stream gentle. A concentrated garden-hose jet can also bruise leaves and erode soil around roots. Rinse from the top of the foliage downward, then rinse the ground between the structure and the plant so residue does not migrate into the root zone.
Stop the work if wind shifts, a cover tears, runoff reaches a pond, or detergent visibly pools near roots. The spotter should communicate immediately rather than waiting for the full surface to finish.
Should you use vinegar to neutralize bleach?
Do not use vinegar to neutralize bleach on plants or soil. Mixing sodium hypochlorite with acids such as vinegar can release chlorine gas, and household acidification is not a controlled or reliable way to make landscaping safe.
Use clean water for immediate dilution, stop the chemical source, and follow the cleaner’s label for any approved neutralizer. Sodium thiosulfate is used in some controlled water-treatment applications, including chlorine removal, but its suitability, concentration, and application method must come from the product label or a qualified professional.
Never add neutralizers to a pressure washer tank or chemical line unless the equipment and product instructions specifically permit it. In most residential incidents, rapid rinsing and runoff control are safer than improvised chemistry.
Step 4: Remove Covers and Flush the Landscape
Remove impermeable covers as soon as the active spray and nearby dripping stop, usually within minutes rather than hours. Rinse the cover away from the plants before folding it, because its upper surface may hold concentrated detergent.
Flush exposed foliage, stems, mulch, and soil with clean water. A typical small bed may need 10-20 minutes of moderate flow, while a larger or sloped bed may need repeated shorter rinses with pauses to prevent erosion.
Do not direct all wash water into one flower bed. Spread clean rinse water across the affected area and use temporary diversion material to prevent concentrated flow toward a drain, pond, stream, or edible garden. Local wastewater rules may restrict discharge of detergents or chlorine-containing water.
You will know this step worked when: no visible foam or slick residue remains on leaves, mulch, or hardscape edges, and runoff is no longer discolored or strongly odorous.
Common mistake: Removing a cover but leaving the plant underneath dry and contaminated by droplets that collected on the cover.
What Does Plant Protection Cost and Take?
Typical homeowner preparation costs $20-$100, excluding professional labor. A small bed may require one roll of plastic, several stakes, a hose, and two sandbags; extensive landscaping or rigid shielding increases both material cost and setup time.
| Job scale | Setup time | Rinse time | Typical materials cost |
|---|---|---|---|
| One shrub or small bed | 15-30 minutes | 10-15 minutes | $10-$30 |
| Average house perimeter | 30-60 minutes | 15-30 minutes | $25-$100 |
| Large landscaped property | 60-120 minutes | 30-60 minutes | $75-$250 |
| Delicate or high-value garden | 1-3 hours | 30-90 minutes | $100-$400 |
Typical material prices vary by region and season. Polyethylene sheeting often costs about $0.05-$0.20 per square foot, plant fabric commonly costs $10-$30 per roll or panel, and reusable canvas drop cloths often cost $15-$50 each.
A professional crew may charge more for a dedicated ground worker, hand rinsing, plant relocation, and runoff controls. The extra labor is most justified when bleach-based soft washing occurs beside mature landscaping, steep slopes, ponds, or rare plants.
Special Situations That Need Different Protection
How do you protect plants beside a driveway?
Protect plants beside a driveway by controlling runoff before covering foliage. Use a temporary berm or absorbent barrier along the bed edge, pre-wet the soil, shield the plant from rebound, and keep detergent wash water moving toward an approved collection or discharge area.
Concrete cleaning often creates dirty, alkaline, or degreasing runoff. A low plant may receive more contaminated water from the pavement than from airborne overspray. Covering the leaves alone does not solve that problem.
What changes when washing a wood deck?
Deck stripping can involve strong alkaline cleaners or brighteners that remain in cracks and drip for several minutes. Use rigid shields near shrubs, keep canvas away from direct chemical contact, and rinse beneath the deck where runoff can collect.
Avoid allowing cleaner to dry on foliage or soil. Work in small sections so the operator can rinse each section before moving to the next.
How should you protect edible plants?
Move containers and harvestable herbs indoors or at least well outside the drift zone. Do not assume rinsing makes edible leaves safe after exposure to a product lacking a food-crop label.
For in-ground vegetables, use a rigid temporary enclosure, stop wind-driven work, and prevent contaminated runoff from entering the bed. Follow the product label and contact the manufacturer or local extension service if edible tissue receives chemical spray.
What about ponds, rain barrels, and drains?
Cover or disconnect rain barrels, turn off pond pumps temporarily if safe, and prevent wash water from entering aquatic systems. Chlorine-containing cleaners can harm fish and aquatic invertebrates, while detergents may reduce surface tension and oxygen exchange.
Do not rinse contaminated water into a storm drain unless local rules and the product label allow it. Storm drains commonly discharge to waterways without treatment.
Common Mistakes and Recovery Actions
| Mistake | Why it fails | Recovery action |
|---|---|---|
| Using thin 1-mil plastic | Airflow tears it or blows it into plants | Replace with 4-6 mil sheeting or a framed shield |
| Leaving plastic in sun | Trapped heat dehydrates foliage | Remove immediately, shade, and irrigate soil |
| Taping cover to stems | Movement snaps branches or abrades bark | Use stakes and edge weights |
| Relying on pre-watering | Water does not stop concentrated exposure | Rinse foliage and redirect runoff |
| Letting canvas become soaked | Fabric transfers cleaner to leaves | Remove, rinse plants, and replace with a clean barrier |
| Mixing vinegar with bleach | Acid can release chlorine gas | Stop mixing, leave the area, ventilate, and seek emergency guidance if exposed |
If leaves develop white or tan patches within 24 hours, rinse the canopy if exposure is recent and avoid fertilizer or additional chemical treatments. Damaged tissue will not regain its color, so prune only dead material after the plant’s condition stabilizes.
Wilted, crispy leaves without bleaching may indicate heat or hot-water injury. Remove covers, provide afternoon shade, and maintain appropriate soil moisture. Do not repeatedly flood poorly drained soil.
Yellowing that begins several days later may indicate root-zone exposure, but it can also result from waterlogging, heat, or unrelated disease. Flush only when drainage is adequate; excessive irrigation can compound root damage. Contact a local extension office or certified arborist for severe tree injury, broad dieback, or exposure to an unknown chemical.
FAQ
Can rain protect plants during power washing?
Rain is not a dependable protection method. Rain may dilute airborne droplets, but it can also increase runoff, spread detergent across soil, and prevent a cover from staying anchored. Delay washing when wind or heavy rain prevents accurate spray control.
Should plants be fertilized after chemical overspray?
Do not fertilize immediately after chemical overspray. Fertilizer increases salt concentration around already stressed roots and can worsen leaf injury. Rinse appropriately, maintain normal moisture, and wait for stable new growth before resuming a regular feeding program.
Can I power wash near a rose bush?
You can wash near a rose bush if the operator uses physical separation, a rigid shield or elevated breathable cover, low wind, and immediate clean-water rinsing. Roses have tender leaves and can suffer both mechanical shredding and chemical spotting, so direct spray should never pass through the canopy.
Is oxygen bleach safe for landscaping?
Oxygen bleach products based on percarbonates are generally less persistent than chlorine bleach, but “oxygen bleach” does not mean harmless at every concentration. Product additives, surfactants, soil contact, and exposure duration still matter. Follow the label and rinse plants when drift occurs.
How long should I wait before washing after moving plants?
Wait until moved plants are stable and no longer blocking the work path, usually immediately for containers and several days for plants disturbed during digging. Avoid moving drought-stressed or newly transplanted specimens solely to accommodate a wash unless the alternative is direct chemical exposure.
When should a professional handle the job?
Use a professional when strong chemicals, hot water, steep slopes, mature trees, ponds, edible gardens, or high-value specimens are involved. Request the product label, dilution, runoff plan, and plant-protection procedure before work begins, rather than relying on a verbal promise that landscaping will be safe.
The Bottom Line
To protect plants from power washing, control the spray path first, then combine pre-wetting, suitable barriers, active clean-water rinsing, and runoff management. Move portable plants, keep plastic short-lived, avoid improvised chemical neutralizers, and treat delayed yellowing or dieback as a possible root-zone problem. The safest wash is the one that keeps detergent and high-pressure water away from vegetation entirely.