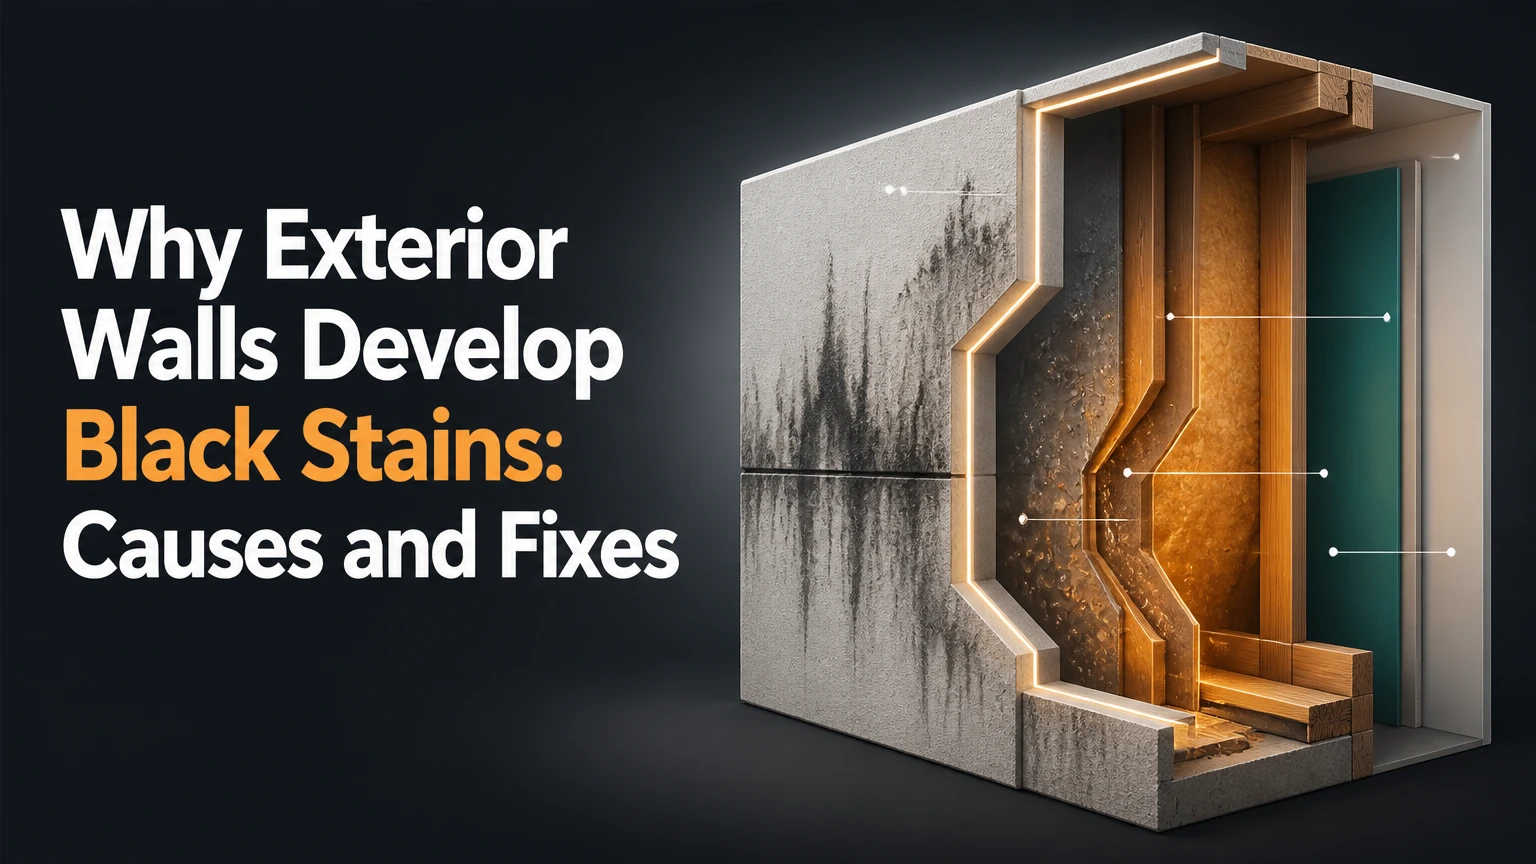
Exterior walls develop black stains when moisture allows biological growth, airborne soot and dust to adhere, or metals and minerals to oxidize and migrate through the facade. The most common causes are algae or cyanobacteria on slow-drying surfaces, fungal growth near persistent leaks, pollution film, and dirty roof or gutter runoff. Correct identification must come before cleaning.
Key Facts at a Glance
Shaded, damp walls usually support algae, cyanobacteria, lichen, or fungi more readily than sunny, fast-drying walls.
Vertical black streaks commonly indicate concentrated water flow from gutters, roof edges, flashing, or masonry openings.
A black mark is not automatically indoor mold, and color alone cannot identify a species or hazard.
Pressure washing can remove surface deposits while damaging stucco, mortar, wood fibers, paint, or EIFS layers.
Cleaning without correcting the moisture source often produces visible recurrence within 12-24 months.
EPA mold guidance summarizes the prevention principle as, “The key to mold control is moisture control.”
Why Exterior Walls Develop Black Stains
The immediate mechanism is repeated wetting followed by slow drying. Rain, dew, condensation, irrigation overspray, leaking gutters, and plumbing leaks leave a surface damp long enough for particles or microorganisms to attach. Porous stucco, brick, concrete, and unfinished wood retain more water than smooth, sealed metal or well-maintained painted siding.
Biological staining begins when airborne cells or spores reach a suitable surface. Algae and cyanobacteria use light, water, and carbon dioxide; fungi use available organic dust and residues. They do not generally “feed on the minerals” in brick or concrete as the overview claims. Mineral salts can influence surface chemistry, but deposited dust, pollen, paint binders, and organic debris are more relevant nutrients for many fungi.
Inorganic staining follows a different path. Diesel soot, chimney smoke, road dust, and industrial particles form a film when moisture makes the facade tacky. Iron, manganese, or vanadium compounds may move through masonry with water and leave brown, purple, or black deposits as the water evaporates. The appearance can resemble microbial growth, but the treatment is different.
How Does the Staining Process Work?
Black wall staining develops through wetting, deposition, attachment, accumulation, and sometimes substrate damage. Biological colonies add a sticky extracellular matrix that traps dust, while inorganic deposits accumulate directly or travel with runoff through pores and joints.
Biological pathway
- The wall becomes wet. Shade, north-facing exposure, dense vegetation, high humidity, or a leaking detail slows evaporation.
- Cells and spores arrive. Wind carries algae, cyanobacteria, fungal spores, soil particles, pollen, and soot.
- Surface attachment occurs. Rough mineral coatings and wood grain provide more anchoring points than smooth, intact paint.
- A film accumulates. Microorganisms, dust, and organic residue darken the surface and retain additional moisture.
- The surface becomes harder to clean. Roughened coatings and open pores hold dead material even after the active growth is killed.
A visible black patch can therefore contain living growth, dead growth, trapped soil, and damaged coating at the same time. Killing the organism does not guarantee instant removal of the remaining pigment or residue.
Inorganic pathway
Soot and road grime settle from the air, then bond more firmly after repeated wetting and drying. Brick can also release soluble compounds through mortar or fired clay, particularly where water enters through the wall and exits at joints, cracks, sills, or weep holes.
Oxidation produces another category. Rust from steel lintels, fasteners, balcony components, and exterior fixtures travels downward in water and creates narrow brown-black trails. Tannin from cedar, redwood, leaves, or mulch can produce dark runoff on painted surfaces. These stains are chemical or particulate deposits, not mold colonies.
What Type of Black Stain Is on the Wall?
Black stains can usually be narrowed down by pattern, texture, location, and response to a small test area, although a visual inspection cannot identify a microorganism with certainty. Photograph the wall dry and wet, inspect the area above it, and test only an inconspicuous section with the substrate manufacturer’s approved cleaner.
| Appearance and location | More likely cause | Useful clue | Main caution |
|---|---|---|---|
| Black-green film on shaded stucco or siding | Algae or cyanobacteria | Slimy or powdery when wet; follows damp exposure | A biocide may kill growth without removing dead pigment |
| Speckled, fuzzy patches beside a leak | Fungal growth | Persistent dampness, musty nearby area, organic debris | Investigate wall assembly moisture rather than relying on bleach |
| Uniform gray-black film near traffic | Soot, diesel particulate, or road dust | Wipes onto a white cloth as greasy gray residue | Acidic cleaners may damage masonry or paint |
| Narrow brown-black streak below metal | Iron oxide or corroding fastener | Begins at a screw, flashing edge, or bracket | Cleaning alone will not stop new rust |
| Dark runs below roof or gutter | Dirty runoff or organic roof debris | Repeats directly below a defect or downspout | Repair drainage before washing |
| Black crust on old brick joints | Carbon, biological film, or altered masonry | Hard, bonded surface; irregular mortar loss | Abrasive blasting can remove historic material |
| Brown-black marks below trees or mulch | Tannin and soil runoff | Appears after rain; often follows splash zones | Source removal matters more than stronger chemicals |
A simple wipe test has limits. A greasy gray transfer suggests soot or grime, while a green-black smear supports algae, but a dry crust may transfer poorly regardless of cause. Do not scrape an unknown material aggressively, especially on painted surfaces, historic masonry, or areas that may contain hazardous legacy coatings.
Which Moisture Sources Create Exterior Wall Stains?
Roof drainage, splashback, irrigation, vegetation, condensation, and facade defects create the moisture conditions that make black staining persistent. The most productive inspection starts above and beside the stain, because water commonly enters at one location and appears lower on the wall.
Check these sources in order:
- Gutters and downspouts: Look for overflow marks, blocked outlets, loose joints, and discharge too close to the foundation.
- Roof edges: Inspect missing drip edges, damaged shingles, failed flashing, and valleys that concentrate water.
- Windows and doors: Examine sealant joints, head flashing, sills, and staining beneath corners.
- Sprinklers: Confirm that spray does not reach walls, especially stucco, wood, and painted masonry.
- Plants: Trim foliage several inches away from the wall where practical, because leaves reduce airflow and hold dew.
- Ground splash: Use properly graded soil, gutters, and compatible splash control near the base of the facade.
- Plumbing and HVAC: Check hose bibs, condensate lines, exterior taps, and concealed leaks.
- Cracks and joints: Hairline cracks may admit little water individually, but open control joints and failed sealants can admit repeated wetting.
A wall can stain without a leak. In humid climates, a shaded surface that dries only briefly each day may support growth even when the building envelope is intact.
How Do Different Wall Materials Respond?
Stucco, brick, concrete, wood, vinyl, and EIFS require different cleaning pressures and chemical tolerances. A method safe for dense concrete can permanently roughen soft mortar or drive water behind a synthetic wall system.
| Wall material | Typical vulnerability | Safer starting approach | Avoid first |
|---|---|---|---|
| Painted stucco | Erosion, discoloration, water intrusion | Low-pressure rinse, compatible detergent, soft brush | Rotary nozzle and aggressive pressure |
| Brick with sound mortar | Mortar erosion, efflorescence, trapped moisture | Low-pressure washing and masonry-approved cleaner | Acid on unknown brick or lime mortar |
| Concrete | Surface paste loss and etching | Controlled low-to-moderate pressure after testing | Holding a nozzle close to the surface |
| Painted wood | Raised grain, paint failure, swelling | Low-pressure detergent wash, gentle brushing | High pressure at joints and end grain |
| Vinyl siding | Water behind laps and discoloration | Low-pressure rinse, mild cleaner, work downward | Spraying upward under panels |
| EIFS | Puncture and hidden water retention | Manufacturer-approved low-pressure method | High pressure, abrasive tools, unapproved solvents |
| Historic masonry | Irreversible mortar or surface loss | Conservator-led testing and nonabrasive cleaning | Bleach, sandblasting, strong acids |
The National Park Service preservation guidance has long warned that cleaning historic masonry requires testing and the gentlest effective method. Historic brick is not interchangeable with modern hard-fired brick, and lime mortar can be damaged by pressure, acids, and excessive water.
Which Cleaning Method Is Safest?
Soft washing or another low-pressure, substrate-approved process is usually safer than high-pressure washing for biological staining on stucco, painted wood, EIFS, and older masonry. Pressure washing remains useful for some dense, sound concrete or robust modern surfaces, but nozzle distance, pressure, water volume, and operator control determine the risk.
| Method | Typical operating profile | Best use | Main failure risk |
|---|---|---|---|
| Garden-hose rinse | Low pressure, high water volume | Loose dust and dead residue | Does not kill established growth |
| Soft wash | Low pressure with detergent or biocide | Algae on compatible siding and stucco | Runoff, plant injury, coating incompatibility |
| Pressure wash | Often 1,500-3,000 psi equipment range | Sound concrete and selected masonry | Mortar loss, surface etching, water intrusion |
| Low-pressure steam | Usually specialist equipment | Sensitive or historic surfaces after testing | Heat damage, slow production, specialist cost |
| Manual brushing | Variable hand force | Small patches and detail work | Scratches, incomplete treatment |
| Surfactant or degreaser | Product-specific dilution | Soot and oily road film | Paint dulling or chemical staining |
Is bleach safe for exterior walls?
Bleach is not automatically safe, and full-strength household bleach is unsuitable for most exterior-wall cleaning. Sodium hypochlorite can discolor paint, corrode metal, harm plants, and damage masonry or sealants; a product label and substrate manufacturer should determine whether it is appropriate.
A professional may use a controlled hypochlorite solution for compatible biological growth, but concentration, dwell time, temperature, ventilation, runoff control, and rinsing all matter. Never mix bleach with acids, ammonia, or other cleaners. Chlorine chemistry also has limited value against soot, rust, and mineral deposits because those stains are not primarily living organisms.
Quaternary ammonium compounds and proprietary exterior biocides can provide alternatives, but “eco-friendly” does not mean harmless to aquatic life or plants. Keep runoff out of storm drains, protect vegetation with appropriate pre-wetting and rinsing, and follow the product label rather than copying an internet ratio.
Can you pressure wash black-stained walls?
Pressure washing can be used on some sound concrete and modern, durable masonry, but it should not be the default for stucco, EIFS, painted wood, loose mortar, or unknown historic brick. A pressure washer may remove the visible stain while opening pores, stripping paint, or forcing water into cavities.
A practitioner’s rule is to begin with the least aggressive method that can work, then increase cleaning intensity only after a test patch. Keep the nozzle moving, maintain the equipment manufacturer’s recommended distance, and never aim upward beneath siding laps, window trim, or wall penetrations.
How Should You Clean a Black-Stained Exterior Wall?
Exterior wall cleaning should follow a test-first sequence: diagnose the source, protect nearby areas, apply a compatible cleaner, allow the labeled dwell time, rinse gently, and inspect after drying. A small wall section often reveals more than a whole-house wash because it shows whether the stain is biological, greasy, mineral, or embedded.
Before you start
| Item | Typical requirement | Why it matters |
|---|---|---|
| Inspection time | 30-60 minutes | Finds roof, gutter, irrigation, and crack sources |
| Test patch | 0.25-1 square meter | Measures color change and coating response |
| Cleaning time | 4-8 hours for a two-story home | Includes setup, treatment, rinsing, and cleanup |
| DIY material cost | $25-$100 typical | Covers cleaner, brushes, gloves, and protection |
| Professional cost | $300-$1,500 typical | Varies by height, access, substrate, and runoff controls |
| Personal protection | Eye protection, gloves, suitable clothing | Reduces chemical and splash exposure |
Step 1: Map the stain and moisture
Photograph the stain, mark its uppermost point, and inspect the wall above, behind, and below it. Check the area during or immediately after rain if possible, because active runoff paths are easier to see then.
Success checkpoint: You can identify whether water reaches the stain from above, beside it, the ground, or general humidity.
Common mistake: Starting with chemicals before inspecting a leaking gutter or failed flashing.
Step 2: Remove loose debris
Brush away loose leaves, cobwebs, soil, and bird residue with a dry, soft brush where the surface will not release hazardous dust. Do not dry-scrape thick unknown growth on a deteriorated coating.
Success checkpoint: Loose material is gone without exposing bare substrate or spreading wet debris.
Common mistake: Using a stiff wire brush that scores paint or removes mortar.
Step 3: Test a compatible cleaner
Read the wall, paint, siding, and cleaning-product instructions. Apply the product to a small hidden area, keep it within the labeled dilution and dwell time, and compare the dry result rather than judging only while wet.
Success checkpoint: The test removes or lightens the deposit without softening paint, changing gloss, or damaging joints.
Common mistake: Assuming a cleaner labeled for concrete is safe for stucco, wood, or EIFS.
Step 4: Clean from the top downward
Work in manageable sections from the upper wall toward the base. Use low pressure, gentle agitation, and enough rinse water to remove residue, while directing runoff away from doors, vents, plants, ponds, and storm drains.
Success checkpoint: No cleaner remains in joints, under laps, around fixtures, or on windows.
Common mistake: Cleaning from the bottom upward, which can create uneven dwell marks and dirty streaks.
Step 5: Let the wall dry before judging
Allow the surface to dry fully, often 24-72 hours depending on weather, shade, and material porosity. Some biological stains fade after the dead film weathers away, while mineral or rust marks require a different treatment.
Success checkpoint: The wall is uniformly dry, and remaining marks have a consistent pattern.
Common mistake: Repeating stronger chemicals immediately because wet masonry still looks dark.
Step 6: Repair the moisture source
Clean gutters, extend downspouts, redirect irrigation, replace failed sealant, repair flashing, trim vegetation, or obtain a building-envelope inspection. A coating or water-repellent treatment cannot compensate for active water entry.
Success checkpoint: The wall dries faster after the next rain and no new vertical runs appear.
Common mistake: Applying sealer over damp masonry, which can trap moisture and cause peeling or salt deposits.
Why Do Black Stains Return?
Black stains return when the wall remains wet, the original growth is not fully treated, runoff continues, or the surface stays rough and porous. In typical residential conditions, untreated biological staining may reappear within 12-24 months, while a corrected moisture source and compatible maintenance treatment can extend the clean interval to several years.
| Recurrence pattern | Probable cause | Corrective action | Expected observation |
|---|---|---|---|
| Same vertical lines after every storm | Gutter, flashing, or drip-edge runoff | Repair roof drainage | New lines stop forming |
| Broad stain on shaded elevation | Slow evaporation and vegetation | Improve airflow and reduce wetting | Growth develops more slowly |
| Small spots around fasteners | Corrosion | Replace or isolate corroding hardware | Rust streaks cease |
| Dark film near a road | Soot and dust deposition | Degrease and reduce surface contamination | Gray transfer decreases |
| Marks at wall base | Splashback or poor grading | Correct drainage and ground slope | Lower wall stays cleaner |
| Stain beneath a window | Failed sill or head flashing | Repair opening detail | Wetness disappears after rain |
Exterior biocides and water repellents have limits. A sealer may reduce absorption on compatible masonry, but it cannot stop water entering through cracks, joints, parapets, window openings, or defective roof details. Some coatings also trap moisture when applied before the wall reaches an acceptable moisture condition.
How Much Does Exterior Wall Stain Removal Cost?
Typical exterior-wall stain removal costs range from $25-$100 for basic DIY supplies, $300-$1,500 for professional cleaning of an accessible home, and more than $1,500 for tall buildings, difficult access, historic materials, extensive repairs, or controlled runoff. Prices vary more by substrate and access than by stain color.
| Work scope | Typical cost | Typical duration | Price drivers |
|---|---|---|---|
| Small DIY test and spot clean | $25-$60 | 2-4 hours | Cleaner, brush, protective materials |
| One-story professional wash | $300-$700 | 2-5 hours | Wall area, plants, chemical controls |
| Two-story professional treatment | $600-$1,500 | 4-8 hours | Ladders, lifts, height, rinsing |
| Historic masonry cleaning | $1,000-$5,000+ | 1-5 days | Conservator testing and hand methods |
| Stain removal plus repairs | $800-$5,000+ | 1-14 days | Flashing, gutters, sealants, coating work |
Treat a quote that includes only washing with caution when stains return in exact lines or appear beside windows and roof edges. The proper scope should identify the substrate, cleaning method, chemical controls, plant protection, water management, and any repair recommendation.
When Is a Black Stain a Building Problem?
A black stain becomes a building-maintenance problem when it accompanies persistent dampness, coating failure, cracking, corrosion, soft wood, deteriorating mortar, interior odor, or water marks. Surface color alone does not prove structural damage, but those associated signs justify a closer inspection.
Situations requiring escalation
- The wall remains wet for days after ordinary rain.
- Paint blisters, stucco bulges, or EIFS feels soft.
- Wood siding is swollen, punky, or separated at joints.
- Mortar is powdery, missing, or visibly recessed.
- Staining appears inside the building near the exterior mark.
- A roof, balcony, window, or parapet leaks repeatedly.
- The building is historic or has fragile lime mortar.
- The stain is near electrical equipment, vents, or concealed services.
- The cleaning contractor proposes high pressure without a test patch.
- The suspected contamination covers a large area or follows a sewage or flood event.
Exterior wall growth is not automatically an indoor-air emergency. However, EPA and CDC guidance treats moisture correction as the central control measure, and interior mold, damaged materials, or occupant symptoms require a separate indoor assessment rather than cosmetic facade washing.
Common Cleaning Mistakes and Better Fixes
The most expensive mistakes combine incorrect diagnosis with excessive force. Stronger chemicals cannot repair failed flashing, and high pressure cannot remove rust at its source.
- Treating every black mark as mold: Test the pattern and residue first. Soot, rust, tannin, and algae need different approaches.
- Using high pressure on fragile surfaces: Reduce pressure and use a wider spray pattern, or hire a contractor familiar with the wall system.
- Applying bleach without runoff control: Protect plants and drains, follow the label, and never mix cleaning chemicals.
- Ignoring dwell time: Rinsing immediately may leave living growth behind, while excessive dwell time can damage the coating.
- Sealing a wet wall: Measure or verify drying conditions before applying a coating recommended for that substrate.
- Cleaning only the visible patch: Treat the full runoff path and correct the upper moisture source, or the stain will migrate back.
One counterintuitive field observation matters: a wall that looks clean immediately after pressure washing may be more vulnerable afterward because the process can expose fresh pores and remove protective surface material. Visual improvement is not proof of a durable repair.
How Can You Prevent Exterior Wall Stains?
Prevention depends on keeping the facade dry, reducing deposited debris, and maintaining the components that move water away from the wall. A practical schedule combines seasonal roof and gutter checks with periodic inspection of sealants, vegetation, irrigation, and the lower wall.
- Clean gutters before the wet season and after nearby trees shed leaves.
- Keep downspout discharge away from the wall and foundation.
- Trim branches and dense shrubs to improve drying and inspection access.
- Adjust sprinklers so nozzles do not spray siding, stucco, or masonry.
- Repair cracked sealants, open joints, damaged flashing, and leaking hose bibs.
- Wash roadside grime before it forms a bonded film.
- Recoat painted surfaces when the existing coating begins chalking or failing.
- Use only a compatible masonry water repellent where the manufacturer permits it.
- Inspect north-facing and shaded walls more frequently than sun-exposed elevations.
- Record stain locations after each major storm to detect changing runoff patterns.
A maintenance wash can remove the food and dust that support recolonization, but it cannot replace ventilation, drainage, or envelope repairs. Prevention works when the wall dries reliably.
Frequently Asked Questions
Are black stains on exterior walls dangerous?
Most exterior black stains are cosmetic deposits or outdoor biological growth, not proof of a dangerous mold species. Risk increases when the stain accompanies indoor dampness, damaged porous materials, sewage contamination, or extensive growth. Avoid disturbing suspect material aggressively, and arrange an inspection when occupants report symptoms or the wall shows water-entry damage.
Why are black stains worse on the north side of a house?
North-facing walls in the Northern Hemisphere often receive less direct sun, so dew and rain evaporate more slowly. Nearby trees, wind protection, and local climate can strengthen the effect. In the Southern Hemisphere, the comparable low-sun exposure may occur on a south-facing wall, so orientation alone does not identify the cause.
Can rain itself make a wall black?
Rain does not usually create black pigment by itself, but it can mobilize soot, roof dirt, rust, tannin, and masonry compounds. Concentrated rainwater also wets porous surfaces long enough for algae or cyanobacteria to grow. If black marks appear immediately after storms, inspect roof edges, gutters, flashing, and nearby metal before selecting a biological cleaner.
How long should a cleaned wall stay free of stains?
A cleaned wall may remain visually clear for several months to several years. Typical untreated biological stains return in 12-24 months when shade and moisture remain unchanged; corrected drainage, improved drying, and compatible maintenance treatments can extend that interval, but no coating guarantees a fixed clean period across every climate and substrate.
Should I paint over black stains?
Do not paint over black staining until the cause is corrected, the surface is cleaned, and the wall is fully dry. Paint can hide a deposit temporarily while trapped moisture causes blistering, peeling, efflorescence, or concealed decay. For wood, stucco, and masonry, follow the coating manufacturer’s preparation and moisture requirements.
When should a professional clean the wall?
Use a qualified professional when the wall is high, historic, fragile, difficult to access, adjacent to sensitive landscaping, or connected to suspected water intrusion. A suitable contractor should identify the substrate, perform a test patch, state the pressure and chemical method, manage runoff, and explain which repair prevents recurrence.
The Bottom Line
Why exterior walls develop black stains is usually answered by a combination of moisture, slow drying, deposited pollution, and chemical runoff rather than one universal “black mold” cause. Identify the pattern and substrate first, inspect the roofline and drainage second, then use the least aggressive compatible cleaning method. Durable results come from correcting water movement, not from applying a stronger chemical.


