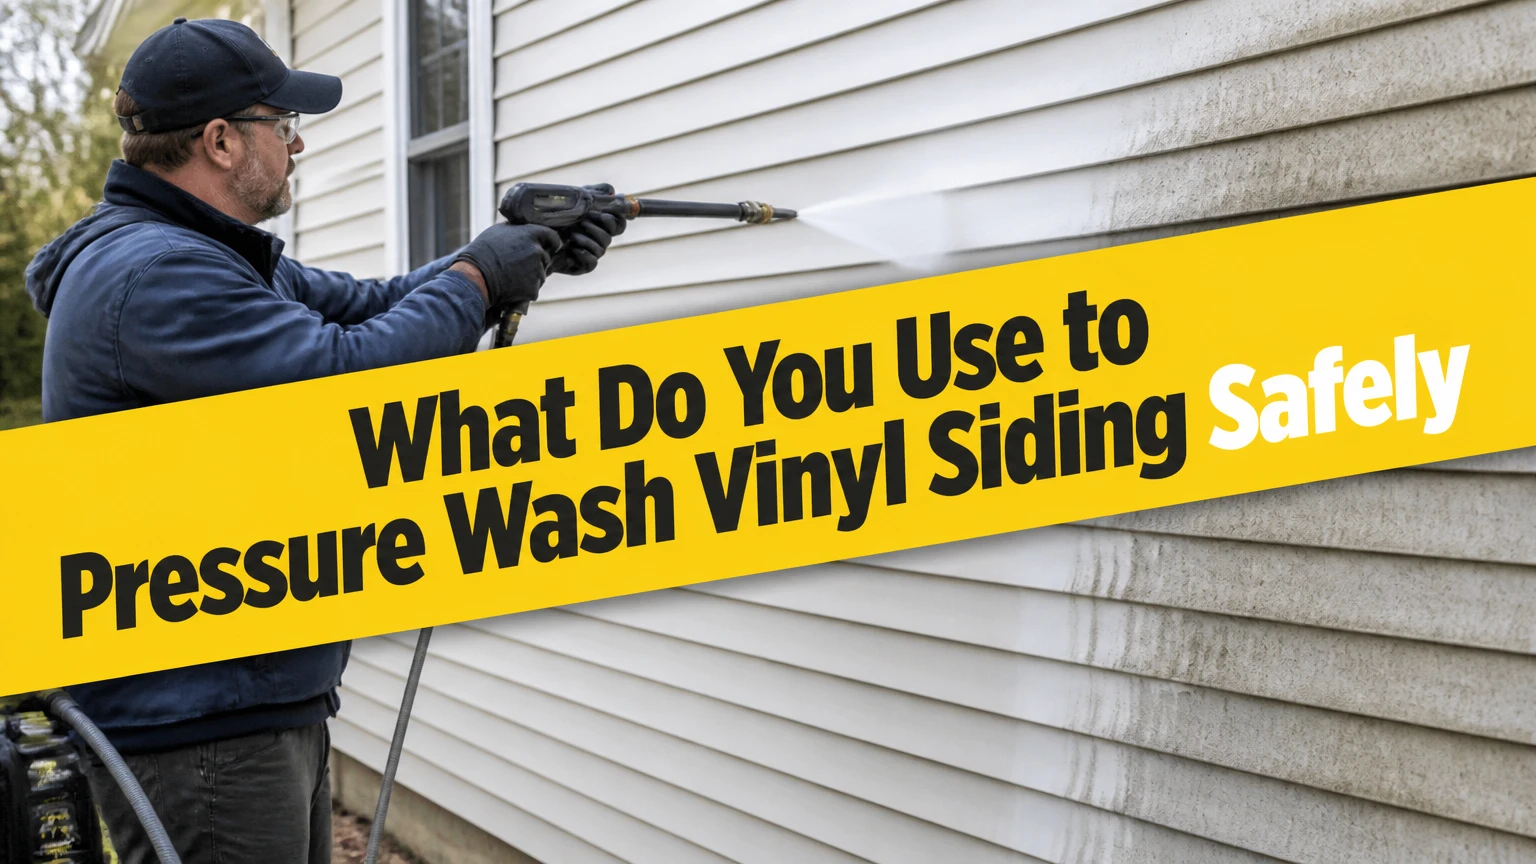
To pressure wash vinyl siding, use a vinyl-safe house-wash detergent, a low-pressure soap nozzle, and a wide-angle rinse nozzle. Apply detergent from the bottom upward, allow five to ten minutes of dwell time without drying, then rinse from the top downward with the wand angled toward the ground.
Key Facts
- Vinyl siding is cleaned primarily by detergent and water volume, not maximum pressure.
- A black low-pressure soap nozzle applies detergent; a white 40-degree nozzle is usually the safest rinse tip.
- Keep the spray directed downward so water does not enter behind overlapping siding panels.
- Commercial siding cleaner is the safest routine choice; bleach-based products require label compliance and careful runoff control.
- Typical DIY equipment costs $100-$250 to buy or $40-$90 per day to rent.
- A 2,000-square-foot home usually takes 2-4 hours, excluding setup and difficult access.
What Do You Use to Pressure Wash Vinyl Siding?
The practical setup is a pressure washer capable of roughly 1,200-2,000 PSI, 1.5-2.5 gallons per minute, a manufacturer-approved house-wash detergent, a black soap nozzle, and a 40-degree rinse nozzle. For routine dirt, a commercial vinyl or house-wash cleaner is preferable to a strong bleach mixture.
Maximum machine pressure is not the same as pressure delivered at the siding. Nozzle selection, wand distance, spray angle, and the washer’s flow rate change the force reaching the surface. A machine labeled 3,000 PSI can be used more gently when the operator uses detergent, a wider tip, and greater distance.
A garden hose with a siding-cleaner injector may be enough for a one-story home with light algae. A pressure washer becomes more useful when the siding has embedded dirt, the house is tall, or the hose attachment cannot deliver enough water and cleaner.
Which cleaner should you use?
Use a ready-to-use or concentrated cleaner specifically labeled for vinyl siding, exterior siding, or house washing. Products such as Simple Green House Wash, Krud Kutter House and Siding Cleaner, and similar manufacturer-labeled formulas typically combine surfactants with ingredients that loosen organic grime.
For green algae or mildew, a product containing sodium hypochlorite can work quickly, but the concentration must follow the product label. The commonly repeated DIY formula of one part outdoor bleach to three parts water is not a universal safety standard because bleach strength, siding condition, temperature, runoff, and label directions vary.
Never mix bleach with ammonia, acids, vinegar, or unknown cleaners. The U.S. Centers for Disease Control and Prevention warns that mixing bleach with ammonia can produce toxic chloramine gases. Use only compatible products, and rinse chemical containers and equipment according to their labels.
How Does Soft Washing Work on Vinyl Siding?
Soft washing uses detergent chemistry, dwell time, and high water volume to remove contamination while keeping impact pressure low. The pressure washer acts mainly as a delivery and rinsing system, rather than as a tool for blasting the vinyl surface.
Surfactants reduce the water’s surface tension, helping the solution spread across textured siding. Alkaline or oxidizing ingredients can loosen organic growth, while water flow carries the loosened residue away. Mechanical pressure still matters, but it should complete the cleaning rather than perform all of it.
High pressure can lift siding edges, damage caulk, force water through lap joints, strip oxidation unevenly, and drive moisture into wall assemblies. Vinyl siding is designed to shed rain from above, not to receive a concentrated jet from below or directly into seams.
What settings and nozzles are appropriate?
Start with the lowest effective setting and test an inconspicuous area. A 40-degree nozzle, greater wand distance, and a downward spray angle are safer starting points than a narrow, high-impact tip.
| Component | Typical starting choice | Practical limit or condition |
|---|---|---|
| Working pressure at siding | 1,200-2,000 PSI | Reduce pressure if panels flex, caulk erodes, or water enters seams |
| Water flow | 1.5-2.5 GPM | Higher GPM can rinse faster without requiring higher PSI |
| Soap nozzle | Black, approximately 65-degree | Use only for detergent application |
| Rinse nozzle | White, 40-degree | Start 18-24 inches from sound vinyl |
| Optional rinse tip | Green, 25-degree | Use cautiously, generally at least 3 feet away |
| Spray direction | 40-60 degrees downward | Never aim upward into siding laps |
| Test area | 1-2 square feet | Inspect after drying before cleaning the whole wall |
Nozzle color conventions are common but not universal, so confirm the angle in the pressure-washer manual. A white tip does not make direct spraying of window seals, electrical fixtures, or damaged siding safe.
Red 0-degree and yellow 15-degree tips concentrate too much force for ordinary vinyl siding cleaning. They can cut soft trim, remove surface color, and create visible streaks even when the operator stands several feet away.
Before You Start: Tools, Time, and Cost
A typical two-person DIY cleaning job for a 2,000-square-foot, one- or two-story house takes 2-4 hours, including setup, application, dwell time, rinsing, and plant protection. A first-time operator should allow a half-day because moving hoses, protecting fixtures, and correcting dry detergent takes longer than spraying.
| Requirement | Typical amount or range | Notes |
|---|---|---|
| Electric pressure washer | $100-$250 purchase | Suitable for many one- and two-story homes |
| Gas pressure washer | $300-$600 or more | Useful when higher flow and long hose runs matter |
| Rental | $40-$90 per day | Confirm nozzle availability and detergent compatibility |
| House-wash concentrate | $15-$40 per gallon | Coverage varies by dilution and siding texture |
| Garden hose | 50-100 feet | Use a reliable outdoor-rated hose |
| Soft brush | 10-18 inches wide | Use for nests, corners, and stubborn deposits |
| Protective plastic | 1-3 rolls or sheets | Do not seal plants airtight in heat |
| Safety equipment | Gloves, eye protection, nonslip shoes | Add respiratory protection only as product labeling requires |
Cover or avoid spraying exterior outlets, light fixtures, door hardware, cameras, doorbell units, vents, and open utility penetrations. Close windows and doors, remove fragile decorations, keep children and pets away, and inspect for loose panels before introducing water.
Do not climb a ladder while operating a pressure washer. Recoil, hose movement, and wet footing create a poor combination. Use an extension wand from the ground or hire a professional for areas that cannot be reached safely.
How to Pressure Wash Vinyl Siding Safely
The safest process has seven stages: prepare the site, pre-wet nearby plants, mix the cleaner, apply from bottom to top, allow controlled dwell time, rinse from top to bottom, and flush the surrounding landscape. Work in small sections so the detergent stays wet and the operator can inspect the result.
Step 1: Inspect and prepare the wall
Walk around the house and identify loose siding, cracked panels, failed caulk, damaged window seals, exposed insulation, and electrical equipment. Repair or isolate defects before washing because water pressure can enlarge a small opening.
Close every window and exterior door. Cover sensitive fixtures with plastic only when the covering will not trap heat or prevent drainage. Remove downspout extensions if they obstruct the work, and plan where detergent-laden runoff will go.
You will know the site is ready when every opening is closed, fragile equipment is protected, and no panel moves when lightly touched.
Common mistake: Cleaning first and discovering a loose panel after water has entered behind it.
Step 2: Pre-wet plants and test the cleaner
Thoroughly wet shrubs, grass, and garden beds with clean water before applying detergent. Pre-wetting dilutes incidental overspray and gives leaves a protective water film, although it does not make direct chemical spraying acceptable.
Mix the cleaner exactly as the label specifies. Test the solution on a hidden 1-2-square-foot area, leave it for the stated dwell period, rinse, and inspect after drying.
You will know the test passed when the vinyl shows no color change, streaking, sticky residue, or unusual gloss difference.
Common mistake: Increasing chemical concentration because the first test area did not brighten immediately.
Step 3: Apply detergent from bottom to top
Connect the detergent injector or soap nozzle and apply a consistent coat to a manageable section, usually 6-10 feet wide. Begin at the bottom and move upward, keeping the spray broad and the wand moving continuously.
Bottom-to-top application reduces the chance that dirty runoff will form long streaks through dry siding. Keep the spray directed across the face of the siding or slightly downward, never beneath the lower edge of a panel.
You will know the application is even when the surface is uniformly wet and no dry bands remain beneath the detergent line.
Common mistake: Applying detergent to the entire house before rinsing, which allows the first sections to dry.
Step 4: Control the dwell time
Allow the cleaner to remain on the siding for approximately five to ten minutes, unless the label specifies another interval. The solution needs time to loosen soil and kill or detach organic growth, but drying can leave residue and create uneven marks.
Hot siding, direct sun, low humidity, and wind shorten the workable period. Work on the shaded side first, clean smaller sections, or lightly mist the surface with clean water if the product label permits it.
You will know the dwell time is sufficient when dirt softens, green growth loses its grip, and the cleaner remains visibly wet.
Common mistake: Letting a bleach-containing solution dry on glass, metal, painted trim, or vinyl.
Step 5: Agitate isolated deposits
Use a soft-bristle brush on a pole for insect nests, heavy corners, mud daubs, and deposits that remain after detergent dwell. Apply gentle pressure and avoid stiff wire brushes, abrasive pads, and plastic scrapers that can score the finish.
Some black spots are artillery fungus from landscape mulch. Artillery fungus produces hard, tar-like specks that ordinary siding detergent may not dissolve. A plastic scraper, careful hand cleaning, or replacement of contaminated mulch may be necessary.
You will know agitation worked when the deposit releases without a bright scratch or a polished patch around it.
Common mistake: Holding a narrow nozzle close to the wall to compensate for a stain that needs hand treatment.
Step 6: Rinse from top to bottom
Switch to the 40-degree rinse tip and start at the highest cleaned area. Keep the nozzle approximately 18-24 inches from sound siding as a starting distance, then adjust farther away if the panel flexes or water reaches a seam.
Aim downward at roughly 40-60 degrees relative to the siding face. Rinse until no foam, discoloration, or slippery residue remains, paying attention to horizontal ledges, corners, and the underside of trim.
You will know the rinse is complete when the runoff becomes clear and the siding no longer feels slick after a clean-water pass.
Common mistake: Spraying upward into the bottom edge of overlapping panels. That direction can drive water behind the siding instead of removing it.
Step 7: Rinse plants and inspect the result
Flush plants, walkways, windows, and nearby hardscape with clean water after the final siding rinse. Remove protective coverings carefully so concentrated droplets do not fall onto leaves, paint, or glass.
Inspect the wall from several angles after it dries. Look for missed bands, detergent residue, lifted edges, water inside fixtures, and chalky oxidation.
You will know the job is complete when the siding is uniformly clean, panels remain seated, fixtures are dry, and no chemical film remains on adjacent surfaces.
Common mistake: Judging the result while the vinyl is still wet, when streaks and oxidation are difficult to distinguish.
Which Pressure Washer Is Best for Vinyl Siding?
An electric pressure washer is usually the better choice for a homeowner cleaning a small or medium house because its lower output, compact size, and quieter operation simplify control. A gas unit becomes useful for large elevations, long hose runs, and professional work where higher water flow reduces rinsing time.
| Equipment type | Typical specification | Best fit | Main limitation |
|---|---|---|---|
| Garden-hose injector | 40-100 PSI at outlet | One-story home, light algae | Limited reach and cleaning force |
| Compact electric washer | 1,300-2,000 PSI, 1.2-2.0 GPM | Small or medium home | Short hose and lower flow |
| Heavy electric washer | 1,800-2,300 PSI, 1.5-2.5 GPM | Two-story DIY work | Requires suitable electrical circuit |
| Gas washer | 2,500-3,500 PSI, 2.5-4.0 GPM | Large homes and professionals | Easy to overpressure siding |
| Dedicated soft-wash system | Low-pressure pump, 4.0 or more GPM | Large-area chemical application | Higher purchase cost and chemical handling |
Machine ratings describe potential output, not a mandatory operating level. Professionals often choose a gas washer for its GPM while using downstream equipment, wider nozzles, and distance to reduce impact on the siding.
Is a garden hose safer than a pressure washer?
A garden hose is safer when the siding is sound and the contamination is light, but a hose does not remove every stain effectively. A siphon bottle or hose-end house-wash product can clean low elevations without the concentrated force of a pressure washer.
Hose-based cleaning is a sensible alternative for vinyl that is chalky, brittle, loose, recently repaired, or adjacent to vulnerable windows. It is also appropriate when the operator cannot control chemical runoff or cannot safely reach the upper story.
Which Stains Need Different Treatment?
Green algae and mildew usually respond to a labeled house-wash detergent with appropriate dwell time, while ordinary dust and pollen often need only surfactant and water. Oxidation, artillery fungus, rust, and insect deposits require different tactics because pressure washing cannot reverse every type of discoloration.
| Stain or condition | Likely cause | First treatment | What pressure washing cannot fix |
|---|---|---|---|
| Green film | Algae or mildew | Labeled exterior cleaner, five to ten minutes | Severe growth inside damaged material |
| Black specks | Artillery fungus or soot | Test cleaner, then plastic scraper | Tar-like fungus bonded to the surface |
| White chalk | UV oxidation | Gentle cleaning and oxidation test | Restoring original color by pressure alone |
| Orange streaks | Rust or mineral runoff | Siding-safe rust remover | Rust source continuing above the wall |
| Mud near ground | Soil splash | Detergent and soft brush | Damaged or porous trim |
| Gray haze | Oxidation or residue | Dry inspection and small test | Uniform restoration without a specialty product |
Chalky siding can transfer pigment to a hand because ultraviolet exposure has degraded the surface. Increasing pressure may remove loose oxidation unevenly and create bright cleaning stripes, so restoration products and gentle manual work are safer.
Rust removers and acidic products must not be mixed with bleach. Read the label, protect nearby metals and plants, and test a hidden area because some products can alter vinyl color.
What Are the Alternatives to Pressure Washing?
Soft washing is the preferred method for mold, mildew, and algae because chemistry performs the biological cleaning while low-pressure water performs the rinse. Hand scrubbing is the most controllable option for fragile areas, whereas a garden hose is the simplest choice for light surface dirt.
| Method | Typical pressure | Typical time for 2,000 sq. ft. | Best use | Primary risk |
|---|---|---|---|---|
| Pressure washer with detergent | 1,200-2,000 PSI working range | 2-4 hours | Sound siding with moderate grime | Water intrusion or finish damage |
| Low-pressure soft wash | 50-300 PSI at surface | 2-4 hours | Algae, mildew, large elevations | Chemical overspray and runoff |
| Garden-hose cleaner | 40-100 PSI | 2-5 hours | One-story light contamination | Incomplete rinsing or weak reach |
| Hand wash and soft brush | Hose pressure | 4-8 hours | Fragile panels and detailed trim | Labor and uneven agitation |
When should you avoid pressure washing?
Avoid pressure washing when panels are loose, brittle, cracked, warped, or separated from trim; when window seals have failed; or when the wall assembly has known moisture damage. Painted vinyl, historic cladding, and siding with active repairs also warrant a low-pressure test or professional assessment.
A professional is appropriate for three-story access, severe mold, extensive water intrusion, hazardous electrical conditions, or chemical runoff near ponds and sensitive landscaping. Cleaning cannot correct rotted sheathing, missing flashing, or mold inside a wall cavity.
Common Mistakes and How to Fix Them
Spraying upward into the laps
Stop immediately and inspect interior walls, window heads, and the backside of accessible panels for moisture. Continue only with a downward rinse angle after the wall is dry and the siding remains secure.
Using a narrow nozzle too close
Switch to a wider tip, move back, and overlap passes gradually. If the finish shows stripes or the panel surface feels rough, stop using pressure and assess whether oxidation or surface damage has occurred.
Allowing detergent to dry
Re-wet the section with clean water, apply a fresh diluted solution if the label permits, and rinse thoroughly. Do not scrub dried bleach residue aggressively or combine a second chemical with the first.
Spraying fixtures and window seals directly
Turn off the machine, dry the area, and inspect for water inside the fixture or behind trim. A garden hose and soft brush are safer around seals, electrical components, and penetrations.
Cleaning in strong sun or wind
Move to the shaded side, reduce section size, and avoid windy conditions that carry chemical mist. Wind increases exposure risk and makes even dwell time difficult to control.
Treating oxidation as dirt
Perform a dry hand test with a clean cloth. If white pigment transfers, use a vinyl-restoration approach rather than more pressure, and accept that heavily oxidized siding may need repainting or replacement.
How Often Should Vinyl Siding Be Washed?
Most vinyl siding benefits from cleaning every one to three years, with annual inspection in shaded, damp, or tree-covered locations. Houses near roads, industrial pollution, irrigation overspray, or coastal air may show residue sooner.
Clean sooner when algae begins forming, gutters overflow onto the wall, or soil splash remains after rain. Removing organic growth early generally requires less chemical contact and less agitation than treating thick, established staining.
The interval is not a warranty requirement. Follow the siding manufacturer’s care instructions, particularly for insulated vinyl, specialty finishes, and recently installed panels.
FAQ
Can dish soap be used to clean vinyl siding?
A small amount of mild, ammonia-free dish soap can help loosen light dirt, but dish soap is not a complete house-wash formula for established algae or mildew. Excess soap can leave residue and may interfere with pressure-washer detergent injectors, so a product labeled for exterior siding is usually more predictable.
Can bleach damage vinyl siding?
Bleach can damage vinyl siding, plants, metal, painted surfaces, and seals when it is too concentrated, left to dry, applied in heat, or rinsed poorly. A label-approved sodium hypochlorite product can be effective against organic growth, but concentration and contact time must follow the product instructions.
What PSI removes dirt without damaging siding?
A typical starting range is 1,200-2,000 PSI at the siding, but PSI alone does not determine safety. A 40-degree nozzle, 18-24-inch distance, high GPM, detergent dwell, and downward spray angle usually matter as much as the machine’s pressure rating.
Should you pressure wash vinyl siding from the bottom up?
Apply detergent from the bottom upward to reduce streaking on dry, dirty siding, then rinse from the top downward to carry loosened soil away. Both stages should keep the wand pointed away from the underside of the overlapping panels.
Why does vinyl siding look worse after washing?
Vinyl can look worse after washing when oxidation, detergent residue, missed runoff, or uneven pressure creates contrasting bands. Allow the siding to dry, check for chalk transfer, and test a small area before repeating the cleaning process across the entire wall.
How can you clean second-story siding without a ladder?
Use an extension wand from the ground, a hose-end cleaner, or a professional soft-wash system designed for elevated surfaces. Do not stand on a ladder while operating a pressure washer, because recoil and wet footing reduce control exactly where water intrusion is most likely.
The Bottom Line
For the query “What do you use to pressure wash vinyl siding,” the best answer is a vinyl-safe house-wash detergent, a low-pressure soap nozzle, and a wide-angle rinse tip on a controllable pressure washer. Apply cleaner bottom to top, keep it wet for five to ten minutes, and rinse top to bottom at a downward angle. Use a garden hose for light dirt, and stop when damaged siding, oxidation, hazardous access, or serious mold makes pressure washing unsuitable.


