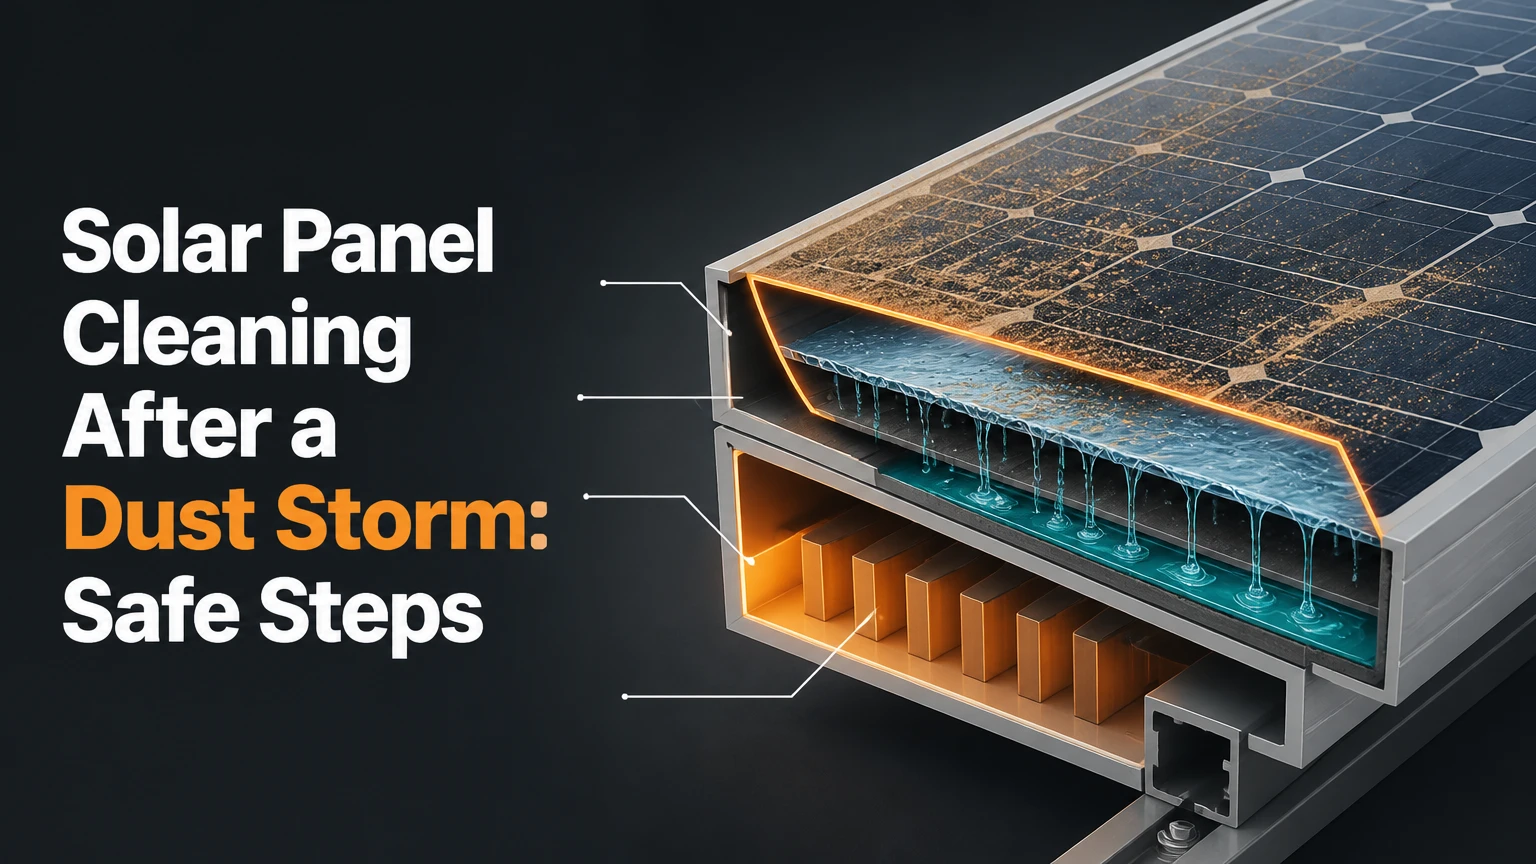
Solar panel cleaning after a dust storm removes loose dust, silica-rich grit, and rain-bonded residue that reduce sunlight reaching photovoltaic cells. Inspect the array first, clean only when modules are cool and undamaged, and use a low-pressure rinse with a soft nonabrasive tool; roof access and electrical damage determine whether a professional should do the work.
Key Facts at a Glance
- Heavy storm dust can reduce individual module output by 20-50% in severe conditions, although the actual loss depends on particle depth, moisture, tilt, and irradiance.
- Dry wiping can drag quartz and sand across the glass, causing scratches that cleaning cannot repair.
- A photovoltaic module still produces DC voltage in daylight after an inverter is switched off, so shutdown reduces equipment risk but does not make the array electrically dead.
- Low-mineral water prevents calcium and magnesium spots; a practical professional target is water below 50 parts per million total dissolved solids.
- Do not clean cracked glass, exposed conductors, loose frames, or damaged junction boxes yourself.
- Compare production at similar weather and time before judging whether cleaning restored output.
Why Dust Storms Reduce Solar Output
Dust storms reduce solar output because airborne particles scatter and absorb incoming light before irradiance reaches the silicon cells. Fine clay and silt can form an opaque film, while larger quartz grains create abrasion when a brush or cloth moves across dry glass.
The National Renewable Energy Laboratory’s PVWatts model uses a default soiling loss of 2% for general estimates, but desert installations and storm events can exceed that assumption substantially. A 20-50% loss is a severe-event possibility, not a universal result for every array. A thin layer may reduce production only modestly, while wet dust can block light across most of the module surface.
Storm residue also changes with weather. Dry dust remains mobile and may blow away from steep modules, but rain can cement fine particles into a hard layer. Bird droppings, plant debris, and oily industrial particulates create additional shading and may require longer soaking.
How much output should cleaning restore?
Cleaning should restore most removable optical loss, not compensate for inverter faults, damaged modules, high temperatures, cloud cover, or grid curtailment. Compare the same panel or string against its pre-storm performance under similar irradiance, temperature, and time of day.
A useful field check is to record array power at a clear-sky interval before cleaning, clean the array, then compare the next clear-sky interval. Monitoring platforms that report module-level data can reveal whether one damaged module remains abnormal. Whole-array comparisons are less reliable when clouds move across the site.
Before You Start: Safety, Tools, and Conditions
Solar panel cleaning requires safe access, a damage inspection, cool modules, and nonabrasive equipment. A typical 20-panel residential job takes 1-2 hours for a reachable single-story array, costs $20-$100 in reusable DIY equipment, and becomes unsuitable for DIY work when roof access is steep, wet, fragile, or electrically compromised.
| Requirement | Typical specification | Why it matters |
|---|---|---|
| Cleaning temperature | Modules cool to the touch, commonly dawn or shaded conditions | Reduces rapid evaporation and temperature difference |
| Water pressure | Garden-hose flow, roughly 30-60 psi; no pressure washer | Limits seal, frame, and junction-box intrusion |
| Brush | Soft nylon solar brush or clean microfiber head | Prevents grit-driven scratches |
| Water quality | Preferably below 50 ppm TDS for final rinse | Reduces mineral spotting |
| Access equipment | Ground pole or manufacturer-approved roof access | Avoids walking on modules and unnecessary falls |
| PPE | Non-slip footwear, gloves, eye protection | Protects against silt, debris, and wet surfaces |
| Electrical reference | Inverter manual and disconnect labels | Shutdown procedures differ by system |
Check the module manufacturer’s maintenance instructions before applying any cleaner. Some warranties specify approved tools, water quality, or prohibited chemicals. Record photographs of storm debris and existing damage before touching the array, especially when insurance or a service warranty may apply.
Do not walk on photovoltaic modules. Do not lean an extension ladder against module frames, conduit, or gutters. Roof work near overhead electrical conductors requires a qualified professional.
How Should You Time Post-Storm Cleaning?
Clean after the modules cool and after wind has dropped, but do not wait unnecessarily when wet dust is hardening. Early morning is often best, provided dew has not made the roof slippery; late afternoon can work when the array has entered shade and visibility remains adequate.
The common advice to clean only before 7:00 AM or after 7:00 PM is too rigid. Local sunrise, sunset, roof temperature, wind, and safe visibility matter more than fixed clock times. Avoid cleaning during active wind, lightning, rain, or extreme heat.
Solar glass is designed to tolerate outdoor thermal cycling, so a normal garden-hose rinse does not automatically shatter a hot panel. Nevertheless, spraying very cold water onto a sun-heated, damaged, or already stressed module creates an avoidable temperature gradient. Use water near ambient temperature, begin with a gentle spray, and stop if the glass is cracked.
Step-by-Step Solar Panel Cleaning After a Dust Storm
Step 1: Isolate the System and Secure Access
Follow the system’s labeled shutdown sequence, usually the inverter shutdown instruction followed by the AC and DC isolators where fitted. Keep in mind that modules exposed to daylight can still generate hazardous DC voltage after disconnects open.
Wait until the roof, ladder route, and surrounding ground are dry enough for stable footing. If the storm damaged overhead lines, racking, conduit, or wiring, do not approach the array.
Success checkpoint: The inverter display follows its normal shutdown procedure, and access is stable.
Common mistake: Treating a switched-off inverter as proof that rooftop conductors are de-energized.
Step 2: Inspect Glass, Frames, Wiring, and Mounting
Look for cracked or star-shaped glass, delamination, bent frames, displaced clamps, broken cable clips, exposed conductors, scorch marks, and debris lodged beneath module edges. Photograph each defect from a safe position.
A cracked module can admit water and may develop insulation faults. Damaged wiring can create shock, arc, or fire hazards. Contact the installer, an electrical contractor experienced with PV systems, or the module manufacturer rather than washing the area.
Success checkpoint: Every visible module, cable route, and mounting point appears intact.
Common mistake: Cleaning first and documenting storm damage afterward, which can complicate warranty or insurance claims.
Step 3: Remove Large Debris Without Dragging Grit
Remove branches, leaves, and plastic from the array without sliding them across the glass. Lift debris vertically where possible, and use a clean soft tool for material that cannot be reached by hand.
Do not use metal scrapers, razor blades, steel wool, hard brooms, or abrasive pads. Sand and silica are harder than many coatings and can scratch when pressure is applied.
Success checkpoint: Large debris is gone, while the remaining dust has not been rubbed into the surface.
Common mistake: Pulling a gritty branch diagonally across several modules.
Step 4: Blow Off Loose Dust Only When It Is Dry
Use a leaf blower on a low setting from the ground or a stable access point to move loose powder away from the array. Keep the nozzle several feet from the glass, direct air parallel to the surface, and avoid blasting grit into connectors or roof penetrations.
Do not dry-brush a thick layer of storm dust. A dry brush can turn loose quartz particles into an abrasive slurry on the glass. If dust is caked, skip direct dry contact and proceed to wet pre-soaking.
Success checkpoint: Loose powder has lifted without forceful contact.
Common mistake: Using compressed air at close range, which can drive grit under seals or into sensitive components.
Step 5: Pre-Soak the Modules With Low-Pressure Water
Rinse from the upper edge downward using clean, near-ambient water at ordinary hose pressure. Wet a manageable section, allow five to ten minutes for the film to soften, and re-wet any area that begins drying.
Never aim a narrow high-pressure jet at the frame gap, junction box, connectors, or cable entry points. A pressure washer can exceed 1,500 psi and may damage seals, coatings, or electrical interfaces.
Success checkpoint: Dust changes from a dry powder to a soft, flowing film without hard granules remaining.
Common mistake: Beginning agitation after a quick splash, before the abrasive layer has softened.
Step 6: Agitate With a Clean Soft Tool
Use a dedicated soft solar brush or clean microfiber washer on an extension pole. Apply only the pressure needed to maintain contact, work from the top toward the bottom, and rinse the tool frequently so collected grit does not return to the glass.
Use straight overlapping passes rather than circular scrubbing. Circular motion does not inherently damage glass, but it makes grit distribution and missed areas harder to control. Replace a brush head that has touched roofing tar, soil, or concrete.
Success checkpoint: The surface feels uniformly clean under the wet tool, with no gritty drag.
Common mistake: Reusing a household broom or window mop that contains hardened dirt.
Step 7: Rinse With Low-Mineral Water
Rinse until no foam, silt, or streaking remains. Deionized, reverse-osmosis, or distilled water is preferable for the final rinse, particularly in regions with hard municipal or well water.
| Water source | Typical TDS range | Post-storm suitability |
|---|---|---|
| Distilled water | 0-10 ppm | Best for spot-free final rinse |
| Deionized water | 0-20 ppm | Best when resin is maintained |
| Reverse-osmosis water | 10-80 ppm | Good when tested and properly filtered |
| Municipal water | 100-500 ppm | Usable for pre-rinse, spotting risk at finish |
| Hard well water | 300-1,000+ ppm | Poor final-rinse choice without treatment |
TDS values vary by location, so test the actual source rather than relying on a label. A water-fed professional system may use filtration and a conductivity meter to verify output.
Success checkpoint: No visible mineral film remains as the water sheets off.
Common mistake: Assuming clear tap water is mineral-free.
Step 8: Squeegee or Air-Dry Without Leaving Residue
Use a clean, soft rubber squeegee only if water quality or rapid evaporation could leave spots. Pull the blade in straight passes with light pressure, and wipe the blade after each pass.
Avoid forcing water into the lower frame, connector openings, or damaged areas. If pure water was used, air-drying is usually acceptable, although high-mineral environments may still produce deposits around frame edges.
Success checkpoint: Glass dries clear, without chalky spots, streaks, or retained mud at the lower frame lip.
Common mistake: Allowing untreated water to evaporate on sun-heated glass.
Which Cleaning Method Fits the Site?
Professional manual cleaning is the best default for roof-mounted residential arrays, while DIY cleaning fits only safe, reachable installations. Fixed sprinklers and robots become sensible when frequent storms affect large arrays, labor access is difficult, and the water or equipment economics support the investment.
| Method | Typical cost | Typical capacity or time | Best operating condition |
|---|---|---|---|
| DIY pole and hose | $20-$100 equipment | 1-2 hours per 20 panels | Reachable, low-pitch single-story array |
| Professional pure-water service | $150-$350 per visit | 30-45 minutes per 20 panels | Roofs, multi-story homes, commercial sites |
| Fixed rinse system | $1,000-$3,000 installed | 5-10 minutes per cycle | Frequent storms and planned water supply |
| Robotic cleaner | $5,000-$20,000+ per unit | 10-15 minutes per array section | Large, continuous, low-slope arrays |
| Waterless vehicle or brush service | $100-$400 typical visit | 30-90 minutes per 20 panels | Water-restricted sites with approved equipment |
Costs are typical United States market ranges, not quotes. Roof pitch, travel distance, panel count, access, water treatment, and emergency scheduling can change the price substantially.
Robots are usually poor value for a small residential roof because purchase cost, storage, slope compatibility, and maintenance outweigh labor savings. Fixed sprinklers can also redistribute dust, create mineral scale, and wet electrical areas unless the system was engineered for the modules.
What Should You Avoid After a Dust Storm?
The most damaging cleaning errors are dry abrasion, high-pressure water, unapproved chemicals, and unsafe access. Recovery depends on what happened: mineral spots may be removed with another low-mineral rinse, but scratches, cracked glass, and coating damage require professional assessment.
| Mistake | Likely consequence | Corrective action |
|---|---|---|
| Dry wiping gritty glass | Scratches or coating wear | Stop, wet-soak, inspect under angled light |
| Pressure washing above 1,500 psi | Seal or junction-box damage | Stop using pressure; arrange inspection |
| Dish soap or glass cleaner | Residue that attracts dust | Rinse thoroughly; use only approved cleaner |
| Metal scraper or hard broom | Permanent surface marks | Do not polish; document and assess damage |
| Cold water on damaged hot glass | Thermal stress in existing defects | Let module cool; stop if cracking appears |
| Cleaning during high wind | Falls, blown grit, poor control | Wait for calm weather |
| Walking on modules | Cell and glass damage | Use approved access equipment |
The thermal-shock warning needs precision. PV modules experience temperature changes throughout normal service, and a cool hose does not automatically cause catastrophic shattering. The risk rises when glass is already cracked, water temperature differs greatly from the module, or a concentrated jet hits one small hot area.
How Can You Tell Whether Cleaning Worked?
A successful cleaning leaves clear glass and improves production under comparable weather, but a single power reading cannot prove the result. Temperature, irradiance, inverter clipping, grid limits, battery charging, cloud movement, and shading can all hide the benefit.
Use the monitoring portal to compare the same string or module at similar times on clear days. Check for persistent module-level alerts, ground-fault warnings, arc-fault messages, or a string that remains disproportionately low.
If output does not recover, inspect these possibilities:
- Storm damage: cracked glass, shifted racking, loose connectors, or damaged cables.
- Residual silt: mud retained along the lower frame edge can shade cells.
- Inverter or grid issue: faults may appear unrelated to surface cleanliness.
- Seasonal conditions: high cell temperature reduces voltage even with clean glass.
- Partial shading: new debris, a bent structure, or changed nearby foliage may affect one string.
A technician can perform insulation resistance testing, IV-curve tracing, thermal imaging, and connector inspection when monitoring data points to electrical rather than optical loss.
Is Rain Enough to Clean Dusty Panels?
Rain is not a dependable substitute for post-storm cleaning. Light rain can dissolve dust and then leave mineral or mud deposits, while intense rain may remove loose powder from steep modules but cannot reliably clear bonded silt, bird droppings, or frame-edge buildup.
Wait until the storm has passed and inspect the surface after the next rain. If the panel still shows a continuous film, visible streaks, or dried mud, cleaning is justified. Do not schedule rooftop work during ongoing storms or while surfaces remain slippery.
Rain can reduce the urgency for a thin layer on a steep ground mount. It does not remove the need for an output check, especially when a dust event was followed by rain and high heat.
How Often Should Panels Be Cleaned in Dusty Areas?
Cleaning frequency should follow measurable soiling, storm intensity, local rain, panel tilt, and lost energy value rather than a universal calendar. A suburban array may need one or two cleanings annually, while a desert or agricultural site may need inspection after each major storm and cleaning whenever production loss exceeds the site’s economic threshold.
Use a simple decision rule:
- Inspect after a visible dust storm.
- Clean when glass coverage is continuous or monitoring shows a meaningful decline.
- Prioritize cleaning before high-value production periods.
- Shorten intervals when rain repeatedly converts dust into hard mud.
- Extend intervals when natural rainfall removes residue and output remains normal.
Commercial operators often set a soiling-loss trigger, such as 2-5%, after comparing cleaning cost with the value of recovered kilowatt-hours. The correct threshold depends on tariff, system size, labor, water, and storm probability.
When Should You Hire a Professional?
Hire a professional when the array is on a steep or multi-story roof, when safe ground-based reach is impossible, or when any glass, wiring, mounting, or inverter damage appears. Professional service is also appropriate when water treatment, insurance documentation, or rapid restoration matters more than the $20-$100 equipment cost of DIY cleaning.
| Situation | Recommended choice | Reason |
|---|---|---|
| Single-story, low-slope roof with ground access | Careful DIY | Low fall exposure and simple hose reach |
| Two-story or steep roof | Professional | Fall prevention outweighs labor savings |
| Cracked glass or exposed cable | PV technician | Requires electrical and mechanical inspection |
| Twenty panels with hard municipal water | Pure-water service | Reduces spotting and repeat labor |
| Hundreds of panels after repeated storms | Standing commercial contract | Faster deployment and consistent measurement |
| Off-grid battery system | Planned professional or engineered rinse | Production loss can affect battery recovery |
Ask a contractor what water treatment they use, whether the service is insured, how they protect connectors and frames, and whether they document pre-existing damage. A cleaning company that cannot explain its equipment or access method is a poor choice for a storm-damaged array.
What If Mud or White Residue Remains?
Baked mud should be rehydrated with a sustained soak, while white residue usually indicates mineral deposits from hard water. Do not scrape either material dry, because the deposit can carry abrasive particles across the glass.
For baked silt, lay a clean damp microfiber cloth over the affected area for approximately 10 minutes, then rinse and repeat the soft agitation process. Do not leave cloths where wind can move them across modules. For chalky spots, use deionized or distilled water and a clean squeegee; avoid acidic household products unless the module manufacturer specifically approves them.
Persistent haze may be coating damage rather than residue. Photograph the area under oblique light and ask the installer or manufacturer for an assessment instead of polishing the glass.
Expert Rules of Thumb for Storm Cleanup
Loose dust and bonded dust require different first actions. Air is useful for powder, but water is safer once grit adheres to glass. The common impulse to brush everything dry increases abrasion exactly when silica content is highest.
The lower frame deserves a separate inspection. Silt can settle along the bottom edge after rinsing, and repeated wet-dry cycles can leave a shaded band or hide biological growth. A clean glass center does not prove a clean module.
The most valuable measurement is not the first watt reading. Compare normalized production under similar irradiance and temperature, because a clean but hot module can produce less power than a dusty but cool module during a casual before-and-after comparison.
Cleaning cannot repair optical or electrical damage. Scratches, microcracks, delamination, and failed bypass diodes are component problems. More washing may conceal symptoms while increasing water intrusion or handling risk.
Frequently Asked Questions
Can I use a garden hose on solar panels after a dust storm?
Yes, a garden hose at ordinary low pressure is generally suitable for an undamaged module when the water is near ambient temperature and the spray does not target connectors or junction boxes. Use the hose first to soften dust, then rinse thoroughly. Avoid a pressure washer, narrow jet, or cold water on cracked hot glass.
Is dish soap safe for photovoltaic modules?
Dish soap is usually unnecessary and can leave surfactant residue that collects dust. Use clean water and a soft solar brush unless the module manufacturer lists an approved, diluted cleaner. If soap was already used, rinse repeatedly with low-mineral water and check the dried glass for film or streaks.
Can I clean panels while they are producing electricity?
Cleaning in daylight is electrically hazardous because photovoltaic modules generate DC voltage whenever illuminated. Follow the manufacturer’s shutdown procedure, but remember that disconnecting the inverter does not remove voltage from the module wiring. Avoid roof work and exposed conductors unless a qualified PV professional controls the electrical risk.
Should I clean panels after every dust storm?
Inspect after every significant storm, but clean only when residue is substantial, bonded, or associated with measurable production loss. A brief dusting that a subsequent heavy rain removes may not justify labor. Frequent storms, shallow tilt, hard rain, and high electricity value support more frequent cleaning.
How do I clean ground-mounted solar panels after a storm?
Ground-mounted panels are often safer for DIY cleaning because access does not require roof work, but inspect the lower frame, posts, wiring, and animal damage first. Use the same cool-module, low-pressure, soft-brush, low-mineral-rinse process, and keep water away from exposed connectors and inverter equipment.
Will professional cleaning remove scratches from solar glass?
No. Professional cleaning can remove dust, mud, and mineral deposits, but it cannot restore scratched anti-reflective coatings, cracked glass, delamination, or cell damage. Ask for a condition report before service when scratches are visible, because further agitation can make existing surface damage easier to see without repairing it.
The Bottom Line
Solar panel cleaning after a dust storm should begin with a safety and damage inspection, not a brush or hose. For an intact, reachable array, cool the modules, loosen dust with low-pressure water, use a clean soft tool, finish with low-mineral water, and verify production under comparable conditions. Stop and hire a qualified professional for roof hazards, cracked glass, exposed wiring, damaged mounting, or unexplained low output.


