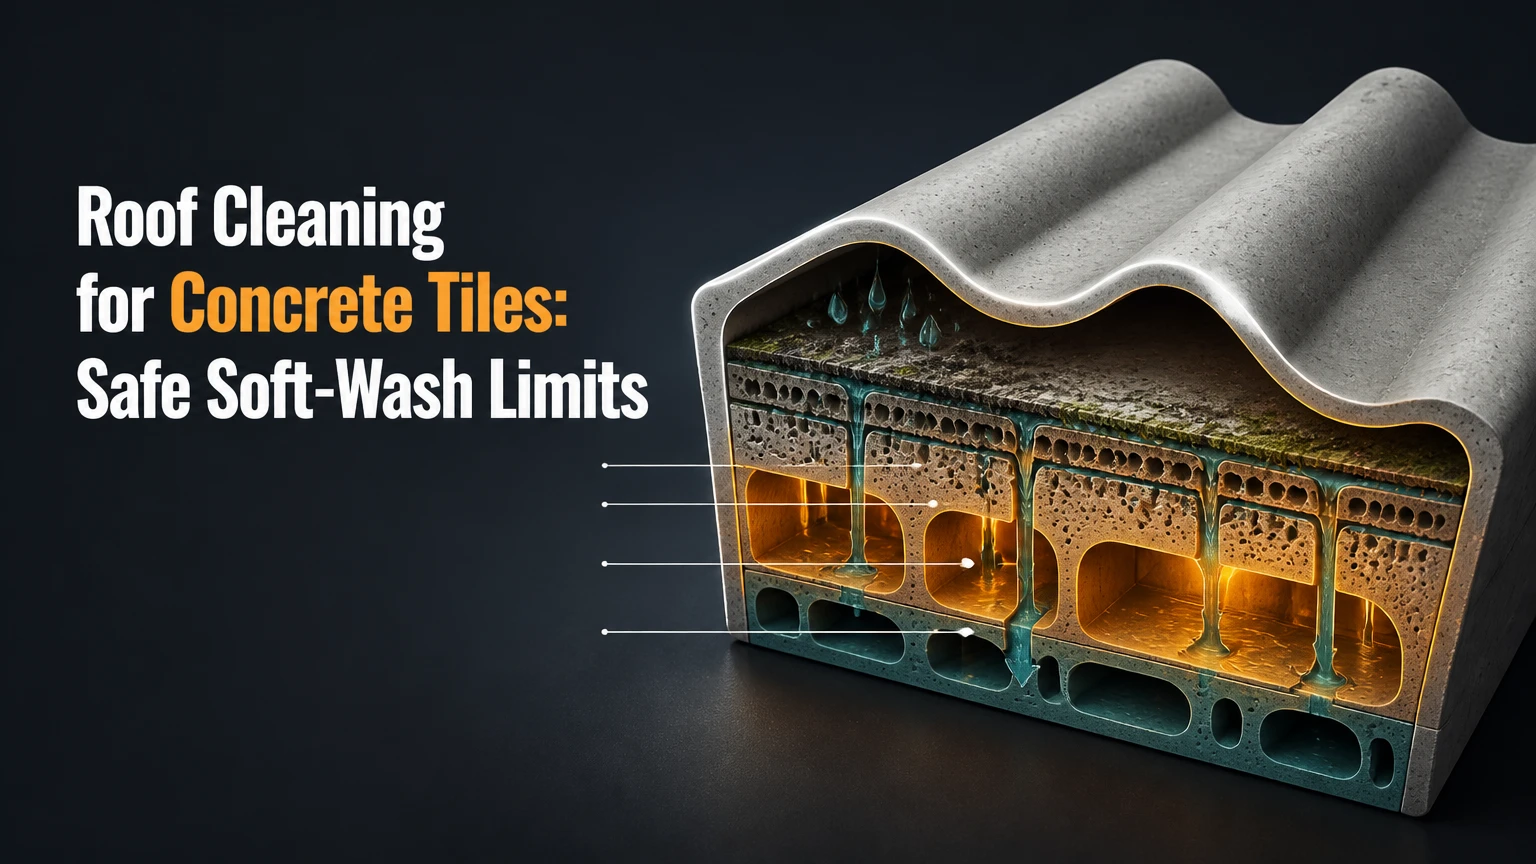
Roof cleaning for concrete tiles removes dirt, black algae, moss, and lichen while preserving the tile’s surface coating, overlaps, and underlying water-shedding system. The safest general approach is inspection, manual removal of heavy growth, label-directed biocide treatment, and a controlled downward rinse, not indiscriminate high-pressure washing.
Key Facts at a Glance
- Concrete roof tiles are porous, so organic growth can remain embedded after surface staining disappears.
- A low-pressure chemical application commonly uses 20-60 minutes of dwell time, but the product label controls dilution and contact time.
- Water should travel down the roof slope, never upward beneath the tile laps.
- Steel wire brushes and pressure above approximately 1,500 PSI can damage coatings, aggregate, brittle edges, or tile interlocks.
- Typical professional cleaning for a 1,500-2,500 square-foot roof costs about $250-$1,200 before major repairs.
- A clean roof still needs inspection every 1-2 years, especially under trees, in shaded areas, or in humid climates.
What Does Roof Cleaning for Concrete Tiles Remove?
Concrete tile roof cleaning removes atmospheric dirt, carbon staining, Gloeocapsa magma black algae, moss, lichen, leaf debris, and bird contamination from a mineral-based roofing surface. Cleaning does not repair cracked tiles, replace failed underlayment, correct structural movement, or restore concrete whose protective finish has already eroded.
Concrete tiles combine cement, mineral aggregate, pigments, and often a factory-applied slurry or acrylic coating. Their pores retain moisture and spores, while shaded roof planes dry slowly. Black streaks usually indicate algae, whereas raised green mats indicate moss and crusted, branching patches usually indicate lichen.
The appearance can mislead homeowners. A dark roof is not automatically dirty, and white powder may be efflorescence rather than cleaner residue. A competent contractor identifies the material and defect before selecting a chemical or pressure setting.
Why do concrete tiles grow algae and moss?
Concrete roof tiles retain enough surface moisture and mineral texture for spores to attach and grow, particularly where tree shade, blocked drainage, coastal humidity, or roof debris reduces drying. Algae usually creates broad black or blue-green staining; moss and lichen create physical growth that can lift or retain moisture against the tile.
Organic growth is more persistent on older, weathered tiles because surface pores become exposed as coatings thin. Repeated aggressive washing can worsen that condition by removing cement fines or the remaining color coat. Cleaning therefore needs to remove the organism without turning a surface-maintenance problem into accelerated weathering.
Before You Start: Safety, Tools, and Conditions
A typical two-person professional job takes 4-8 hours for a 1,500-2,500 square-foot roof, excluding repairs, steep access, extensive scraping, and difficult runoff control. DIY work requires more than a garden hose because fall exposure, chemical handling, fragile tiles, and ladder movement create separate hazards.
Minimum planning checklist
| Item | Typical specification | Why it matters |
|---|---|---|
| Roof inspection | Ground and roof-level review | Finds broken tiles, open laps, failed flashing, and unsafe access |
| Weather window | 24 hours without heavy rain | Allows treatment and surfaces to dry predictably |
| Chemical sprayer | Low-pressure pump sprayer | Applies solution without forcing water under laps |
| Rinse nozzle | 25-40 degree fan tip | Spreads water and reduces concentrated impact |
| PPE | Gloves, eye protection, non-slip footwear | Limits chemical splash and slip exposure |
| Fall protection | Rated anchor, harness, lifeline | Controls the primary roof-work hazard |
| Landscape protection | Clean water, breathable covers, collection plan | Reduces plant injury and uncontrolled runoff |
OSHA’s construction fall-protection rule states, “The employer shall provide protection for each employee on a walking or working surface,” when the applicable fall hazard exists. That requirement is directed at employers, not a guarantee that a homeowner can make roof work safe with a harness alone. A steep, wet, fragile, or high roof should be assigned to an insured roofing or exterior-cleaning contractor.
Do not work during high wind, lightning, freezing conditions, or intense heat that rapidly dries the chemical. Keep children, pets, and occupants away from the work area, and never mix sodium hypochlorite with acids, ammonia, or other cleaners.
Step-by-Step Concrete Tile Roof Cleaning
Step 1: Inspect the Roof and Classify the Tile
Inspect the roof before applying water or chemicals. Record broken, slipped, cracked, hollow-sounding, heavily weathered, or visibly delaminated tiles, then identify the underlayment, flashing, valleys, vents, ridge caps, gutters, and penetrations.
Concrete tiles may be color-through, where pigment is mixed into the tile body, or surface-coated, where a slurry or acrylic finish carries much of the visible color. A test area on an inconspicuous tile can reveal coating loss, color transfer, chalking, or an unsuitable cleaner.
Do not assume a clean-looking tile is structurally sound. A tile can hide a deteriorated underlayment, and cleaning cannot make that assembly watertight.
Success checkpoint: The roof has a marked repair list and a documented test patch.
Common mistake: Beginning with a pressure washer before determining whether the visible finish is a coating.
Step 2: Protect Plants, Walls, Windows, and Downspouts
Saturate nearby plants and soil with clean water before chemical application, then cover delicate vegetation with breathable, temporary material. Plastic sheeting can trap heat and chemical droplets against foliage, so it should not remain over plants in direct sun.
Disconnect or redirect downspouts into containers where practical, and prevent concentrated runoff from entering ponds, storm drains, vegetable beds, or neighboring property. Product labels and local rules govern discharge; a “biodegradable” product is not automatically harmless at application strength.
Rinse siding, glass, painted surfaces, and metal fixtures before and after treatment. Protect aluminum gutters because oxidizers can discolor or degrade some finishes.
Success checkpoint: Plants are wet, runoff has a controlled route, and sensitive surfaces are covered or continuously rinsed.
Common mistake: Covering plants but ignoring the chemical concentration discharged from the downspouts.
Step 3: Remove Heavy Moss, Lichen, and Debris
Remove leaves, pine needles, loose nests, and thick moss manually before applying treatment. Use a profile-matched plastic scraper or nylon-bristle brush, moving from the ridge toward the eave so debris does not wedge under overlapping tiles.
Never use a steel wire brush. Steel can score concrete, remove coating, and leave ferrous particles that later produce rust-colored marks. Avoid prying against tile corners, ridge caps, flashing, or exposed underlayment.
Heavy lichen may have attached firmly enough that complete scraping would damage the tile. In that situation, remove only loose material and let a suitable biocide weaken the remaining growth rather than forcing it off mechanically.
Success checkpoint: Gutters and valleys are clear, and attached growth is reduced without exposed underlayment or scraped coating.
Common mistake: Treating scraping as a race to expose clean color, then breaking tile edges or dislodging laps.
Step 4: Apply a Label-Directed Biological Treatment
Apply the selected cleaner or biocide uniformly with a low-pressure pump sprayer, commonly below 100 PSI. Work in manageable sections from the ridge downward, and keep the surface wet for the label-specified contact period, often 20-60 minutes for oxidizing soft-wash solutions.
Sodium hypochlorite products are often used for algae and mold, with typical roof-wash working strengths around 1%-4% available chlorine depending on the product, growth severity, temperature, and substrate. Those figures are practitioner ranges, not universal instructions. The product label, safety data sheet, local restrictions, and a test patch control the final dilution.
Quaternary ammonium biocides can provide slower, longer-residual treatment with different runoff considerations. Some treatments are leave-on products, while others require rinsing. Never infer the correct procedure from a chemical’s name alone.
Success checkpoint: Growth changes color or loses adhesion during dwell, while the test patch shows no coating bleed, chalking, or pigment loss.
Common mistake: Applying a stronger solution to compensate for poor wetting, hot surfaces, wind, or inadequate dwell time.
Step 5: Rinse Downward Across the Tile Profile
Rinse dissolved material with a wide fan pattern directed down the roof slope. A common low-impact range is 40-100 PSI for soft washing, while some stable, color-through tiles may tolerate more; pressure should be selected after testing, not from a fixed internet threshold.
Never spray upward into the headlap or perpendicular to the tile course. Water driven beneath interlocks can wet the underlayment, battens, insulation, and ceiling below, especially where flashing or seals are already compromised.
Keep the nozzle moving and approximately 12-18 inches from the surface when using a controlled rinse. Avoid concentrating the stream on tile corners, ridge caps, valleys, vents, and repaired areas.
Success checkpoint: Runoff is clear, no tile shifts, and no water appears inside attic or ceiling areas during or after rinsing.
Common mistake: Using a narrow tip close to the tile because it removes staining faster.
Step 6: Inspect, Spot-Treat, and Manage Residue
Inspect the dry or nearly dry roof for surviving lichen, black spots, coating loss, efflorescence, and exposed cracks. Spot-treat persistent biological growth according to the product label rather than increasing pressure until the mark disappears.
A residual treatment may slow recolonization, but no responsible contractor should promise a universal three-year result. Shade, rainfall, tree cover, roof orientation, product chemistry, and surface condition determine how long the roof remains visually clean.
Clean gutters after roof debris has settled, flush downspouts, and photograph repaired or replaced tiles. A final rinse of surrounding plants and walls reduces residual contamination.
Success checkpoint: The roof drains freely, tiles remain aligned, and the property owner receives photos of defects and treatment areas.
Common mistake: Applying a leave-on treatment that the label requires to be rinsed, or rinsing a product designed to remain in place.
Which Cleaning Method Should You Choose?
Soft washing is usually the best starting method for stained or biologically affected concrete tiles because chemistry attacks the organism without relying on abrasive force. Manual scraping plus a residual biocide suits fragile roofs and heavy moss, while steam and higher-pressure rinsing are specialized choices for particular substrates and access conditions.
| Method | Typical pressure or temperature | Best application | Main limitation |
|---|---|---|---|
| Soft wash | 40-100 PSI; 1%-4% SH typical | Black algae, coated tiles, broad staining | Requires plant and runoff controls |
| Biocidal treatment | Gravity-fed or pump spray | Sensitive landscapes, slow weathering | Moss and lichen may remain visible for 3-9 months |
| Controlled rinse | 100-1,200 PSI only after testing | Stable color-through tile, loose dirt | Repeated cycles can accelerate surface wear |
| Steam cleaning | 120-150°C; 200-500 PSI equipment range | Chemical-sensitive sites, specialist work | High equipment cost and slower production |
| Manual removal | Hand tools, no fixed pressure | Thick moss, brittle or aged tiles | Labor intensive and physically hazardous |
The 800-1,200 PSI range sometimes described for low-pressure washing is not automatically safe. Pressure at the pump, nozzle pressure, flow rate, tip angle, distance, and operator technique all affect impact. A wide fan at distance can be gentler than a narrow fan at close range, but neither replaces a test patch.
Is pressure washing safe for concrete roof tiles?
Pressure washing can be safe only under controlled conditions on structurally sound, appropriately tested concrete tiles, with downward spray direction and a suitable fan pattern. High-pressure cleaning above approximately 1,500 PSI is a poor default because it can strip coatings, expose aggregate, damage laps, and drive water under the roof covering.
Pressure is also not the only risk. A strong flow at 4-8 gallons per minute can overwhelm gutters, flood valleys, and carry chemical residue into landscaping. Professional cleaners should explain their equipment settings, nozzle distance, test results, and runoff plan rather than advertise “maximum power.”
How Much Does Concrete Tile Roof Cleaning Cost?
Typical professional cleaning costs range from $250-$1,200 for a 1,500-2,500 square-foot roof, with many ordinary projects landing near $550. Actual pricing changes with roof pitch, stories, access, tile repairs, moss thickness, regional labor rates, chemical containment, and whether the quoted area is roof surface or building footprint.
| Service component | Typical price range | Typical duration | Pricing driver |
|---|---|---|---|
| Soft wash | $0.15-$0.75 per sq. ft. | 3-6 hours | Staining, access, chemical controls |
| Controlled low-pressure wash | $0.30-$0.70 per sq. ft. | 4-8 hours | Tile testing and rinse volume |
| Manual scraping add-on | $0.60-$1.00 per sq. ft. | 2-6 additional hours | Moss thickness and roof pitch |
| Gutter cleaning | $70-$240 | 1-3 hours | Height, debris volume, access |
| Minor tile repairs | $100-$400 | 1-4 hours | Tile availability and flashing access |
| Sealer application | $0.50-$2.00 per sq. ft. typical | 1-2 days | Product, preparation, drying time |
These are typical planning figures rather than a national price list. A quote that appears inexpensive may exclude hand scraping, broken-tile replacement, runoff protection, steep-access charges, or post-treatment inspection.
Request an itemized quote showing roof area, method, chemical name, dilution basis, repairs, gutter work, access equipment, insurance, and warranty exclusions. Contractors should not guarantee that every old stain disappears if the stain represents pigment loss, aggregate exposure, or permanent oxidation.
When Is Cleaning the Wrong Service?
Cleaning is the wrong first service when tiles are actively leaking, widely cracked, displaced across multiple courses, structurally sagging, or losing their surface layer. Roof replacement or a roofing inspection becomes more appropriate when the covering and underlayment have reached the end of their useful condition.
| Visible condition | Likely issue | Appropriate next action | Cleaning risk |
|---|---|---|---|
| 1-2 isolated cracked tiles | Localized impact or aging | Replace tiles before washing | Water enters through opened defects |
| Widespread chalking | Coating or cement-fines loss | Roofing assessment | Washing removes remaining surface |
| Repeated interior leaks | Underlayment, flashing, or laps | Leak diagnosis | Rinse can worsen intrusion |
| Sagging roof plane | Structural movement | Structural roofing inspection | Worker loading adds hazard |
| Thick moss at laps | Persistent moisture and debris | Remove cause, then treat | Aggressive scraping lifts tiles |
| Rust at fasteners or flashing | Metal corrosion | Repair metal components | Chemicals can accelerate discoloration |
A cleaning contractor should pause when inspection reveals a roofing defect outside the cleaning scope. Cosmetic improvement is not a substitute for water-shedding performance.
Should You Seal Concrete Roof Tiles After Cleaning?
A breathable, compatible silane-siloxane sealer can be appropriate for some clean, dry, absorbent concrete tiles, but sealing is not automatically necessary and cannot repair cracks, failed underlayment, or degraded coatings. The roof manufacturer’s requirements and a tested product system should control the decision.
Seal only after the roof is clean, fully dry, and free of biological residue. Confirm that the product is designed for concrete roofing, remains vapor-permeable, does not create a slippery surface, and will not alter the color or void a manufacturer warranty.
A sealer can reduce water absorption on suitable mineral surfaces, yet it may produce patchiness when tiles have uneven weathering. Request a written explanation of expected service life, recoat requirements, and what happens if the sealer fails. “Waterproof” is not the same as “leak-proof.”
How Often Should You Clean a Concrete Tile Roof?
Most concrete tile roofs benefit from inspection every 1-2 years and cleaning when growth or debris becomes established, rather than an automatic calendar wash. A typical interval is 3-5 years in moderate exposure, but shaded humid roofs may need attention sooner while sunny, dry roofs can go longer.
Trim branches away from the roof, keep valleys and gutters clear, and correct persistent dampness near plumbing vents or blocked drainage. North-facing or tree-covered slopes generally recolonize faster than exposed south-facing planes in the same property.
Schedule cleaning when temperatures support the product label, wind is low, and rain will not immediately dilute the treatment. In freeze-prone regions, avoid leaving saturated roof components exposed before a freeze.
DIY or Professional Service?
DIY cleaning is reasonable only for low-risk, ground-accessible areas where the owner can avoid roof entry, follow the product label, control runoff, and identify tile defects. A professional is the safer choice for steep roofs, two-story access, brittle tiles, extensive moss, chemical exposure near ponds, or any roof with suspected leaks.
Choose DIY for limited ground-level maintenance
Use a telescoping tool from a stable location only for loose debris that can be removed without directing water under laps. Do not improvise roof anchors, walk on wet tiles, or use a pressure washer from a ladder.
Choose a cleaning specialist for biological growth
A specialist can combine test patches, low-pressure application, manual scraping, controlled rinsing, and runoff management. Confirm general liability insurance, workers’ compensation where applicable, chemical training, and clear responsibility for broken tiles discovered during work.
Choose a roofing contractor for defects
A roofing contractor is preferable when tiles are displaced, underlayment is exposed, flashing is damaged, or leaks exist. Cleaning first can hide evidence and make diagnosis more difficult.
Common Mistakes and How to Fix Them
Using excessive pressure
Failure: The washer removes coating, leaves exposed aggregate, or creates leaks.
Fix: Stop immediately, photograph the affected area, and have a roofing professional assess coating loss, cracks, and underlayment exposure. Do not apply more pressure to make uneven color match.
Walking on unsupported tile areas
Failure: Foot pressure cracks the center span or breaks overlap tips.
Fix: Use professional roof access equipment and step only where the tile is supported by the batten, when the roof system permits it. Replace damaged tiles before final cleaning.
Spraying upward beneath the lap
Failure: Water and chemical solution reach the underlayment or battens.
Fix: Change the spray direction to follow gravity, inspect the attic after the roof dries, and investigate any new ceiling marks.
Mixing incompatible chemicals
Failure: Acid, ammonia, or another cleaner reacts with sodium hypochlorite and produces dangerous gas or heat.
Fix: Stop work, leave the area, ventilate only from a safe position, and follow the product safety data sheet or emergency guidance.
Covering plants too long
Failure: Heat and trapped moisture damage foliage even when chemical exposure is limited.
Fix: Use breathable covers briefly, pre-wet vegetation, rinse after treatment, and remove covers promptly.
Treating permanent discoloration as active growth
Failure: Repeated chemicals or pressure damage the tile while the mark remains.
Fix: Compare a test patch, inspect under magnification if necessary, and accept that pigment loss, efflorescence, and aggregate exposure may not be cleanable.
Troubleshooting After Cleaning
| Symptom | Most likely cause | Safe response | Avoid |
|---|---|---|---|
| White powder after drying | Efflorescence or residue | Reinspect, use label-approved neutral cleaning, rinse gently | Acid washing without compatibility testing |
| Black spots remain | Embedded algae or lichen | Spot-treat and allow weathering | Increasing pressure |
| Orange marks appear | Rust particles or metal runoff | Identify source and clean compatible surfaces | Steel brushing concrete again |
| Tiles look pale | Coating loss or overcleaning | Stop chemical and pressure work; assess finish | Applying random paint or sealer |
| Interior leak follows washing | Open lap, flashing, or underlayment defect | Stop rinsing and arrange leak inspection | Assuming the leak will dry harmlessly |
| Green growth returns quickly | Shade, moisture, or debris source | Trim vegetation and correct drainage | Shortening intervals without fixing moisture |
Persistent black marks can remain for weeks or months after the organism dies because roots and pigments sit inside porous concrete. Visual persistence does not prove treatment failure; new growth, spreading edges, texture, and moisture should guide the follow-up decision.
FAQ
Can bleach damage concrete roof tiles?
Sodium hypochlorite can damage coatings, plants, metals, and painted surfaces when concentration, dwell time, or runoff is poorly controlled. A label-directed roof product and test patch are safer than household bleach used at an unknown strength. Never combine hypochlorite with acids or ammonia.
How do you remove moss without damaging roof tiles?
Remove loose moss with a plastic scraper or nylon brush moving downhill, then use a compatible biocidal treatment for attached growth. Avoid steel tools and forceful scraping at tile laps, because mechanical removal can crack edges or dislodge overlapping courses.
Will roof cleaning stop leaks?
Roof cleaning does not stop leaks caused by cracked tiles, failed flashing, displaced courses, or deteriorated underlayment. Cleaning can reveal those defects, and upward spraying or excessive pressure can worsen them. Leak diagnosis must come from a roofing inspection, not a cleaning promise.
How long does a cleaned concrete tile roof take to dry?
A roof commonly dries within several hours in warm, sunny, low-humidity weather, but shaded or humid surfaces may need 24 hours or longer. Tile porosity, rainfall, wind, temperature, treatment type, and roof orientation determine drying time.
Can black algae permanently stain concrete tiles?
Black algae can leave persistent pigments after the organism dies, and weathered or faded coatings may not return to their original color. A test patch distinguishes removable surface contamination from permanent discoloration. Additional pressure rarely improves a permanently altered tile surface.
Does rain remove dead moss and lichen?
Rain can gradually weather away dead moss and lichen after treatment, sometimes over 3-9 months. Thick growth may still require limited manual removal, but repeated blasting is not a substitute for time. Gutters should be checked because weathered debris can accumulate there.
The Bottom Line
Roof cleaning for concrete tiles should preserve the tile surface and the roof’s water-shedding geometry, not simply produce the fastest color change. Inspect first, protect landscaping, remove heavy growth gently, apply a label-directed treatment, rinse downward at controlled pressure, and repair defects before promising a cosmetic result.


