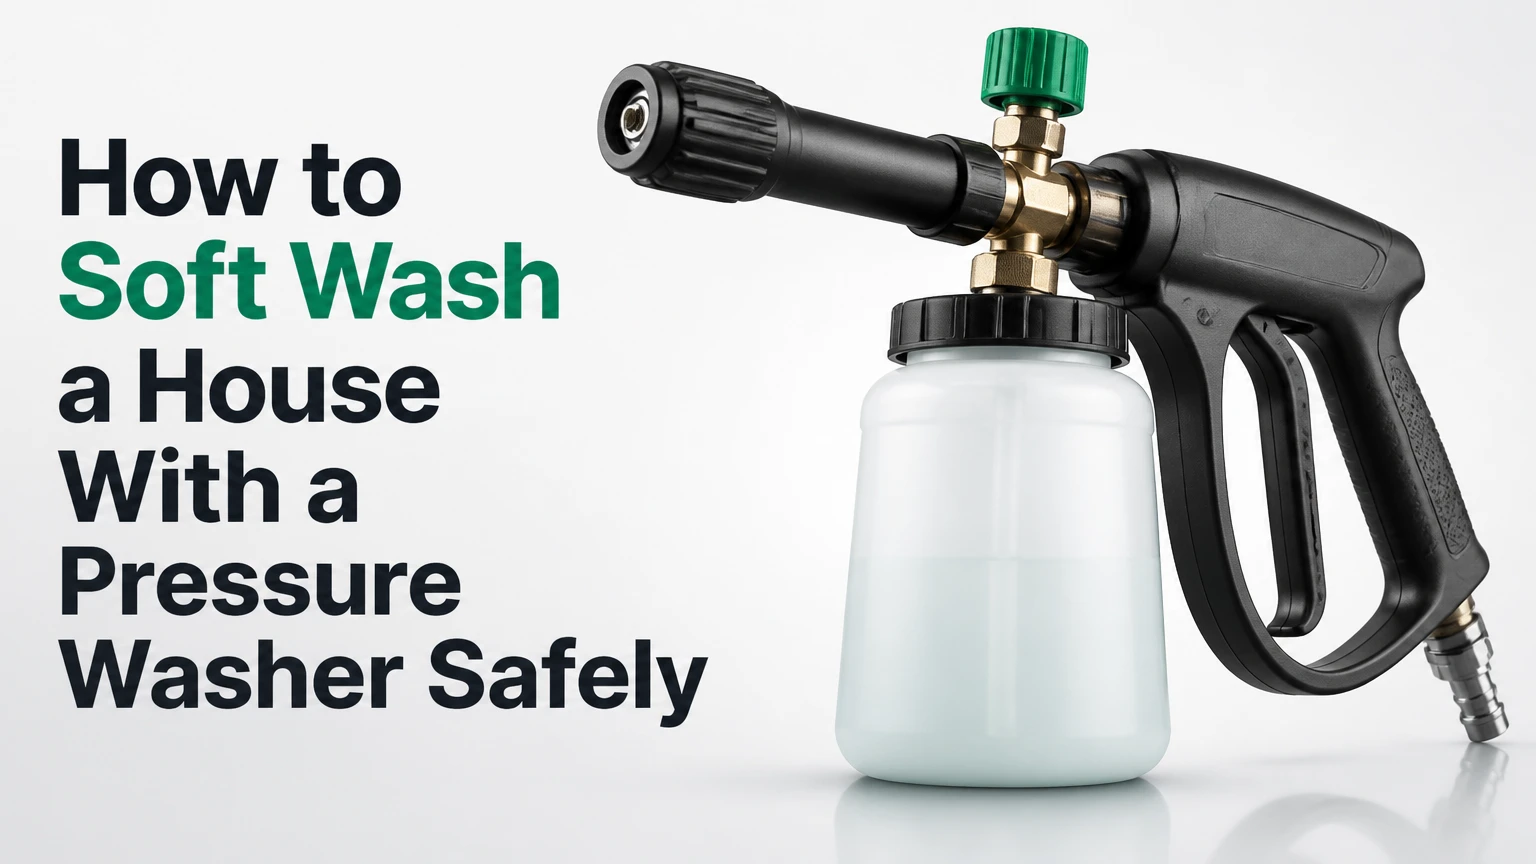
Soft washing a house with a pressure washer means applying a diluted cleaning solution at low pressure, allowing chemistry to kill mold, algae, and mildew, then rinsing with clean water. A typical one-story house takes 2-4 hours, and the result depends more on chemical control, surface protection, and thorough rinsing than on pump pressure.
Key Facts at a Glance
- Soft washing normally keeps pressure at the wall below 300 PSI, although the pressure washer pump itself may be rated much higher.
- Sodium hypochlorite is the primary active ingredient for removing organic growth; surfactant improves cling and dwell time.
- Apply cleaning solution from the bottom upward and rinse from the top downward to reduce streaking.
- Pre-wet plants before application and rinse them again immediately after the house wash.
- A downstream injector is suitable for many siding washes, but it may deliver a weaker mix than a dedicated soft-wash pump.
- Never mix sodium hypochlorite with ammonia, acids, vinegar, or other cleaners.
What Is Soft Washing?
Soft washing is an exterior-cleaning method that uses chemical action and high water volume instead of concentrated mechanical impact. The cleaning solution breaks down organic contamination at its roots, while low-pressure water removes the dead growth and loosened dirt from the surface.
Traditional pressure washing often uses 2,500-4,000 PSI at a narrow nozzle. That force can open seams, strip paint, damage screens, drive water behind siding, and scar soft wood. Soft washing uses a broad spray pattern and enough water to rinse without forcing the spray into joints or vents.
The term “soft wash” describes the method, not one universal machine setting. A pressure washer can supply rinse water, but the actual pressure at the surface depends on the nozzle, hose length, trigger position, distance, and pump output. A black soap nozzle may produce low impact, yet the exact PSI requires a gauge or manufacturer data.
Why does soft washing remove growth better than high pressure?
Sodium hypochlorite oxidizes organic staining and kills much of the living contamination that remains in porous material. High pressure can make a wall look clean by removing the visible layer, but it does not reliably disinfect algae, mildew, or mold colonies embedded in pores.
The chemistry still requires contact time. A solution that is too weak, sprayed in strong wind, or rinsed immediately may remove loose dirt while leaving dark biological staining behind. A solution that dries on glass, painted trim, or vegetation can cause damage, so dwell time must be actively managed.
What Equipment and Chemicals Do You Need?
A homeowner can soft wash many siding exteriors with a pressure washer, downstream injector, wide-angle soap nozzle, chemical-resistant hose, garden hose, pump sprayer, plastic sheeting, and appropriate protective equipment. The pressure washer should supply enough water for rinsing, rather than relying on high PSI.
Before You Start
| Requirement | Typical specification | Why it matters |
|---|---|---|
| Project time | 2-4 hours | Includes setup, application, rinsing, and cleanup |
| Pressure washer | 1,500-3,000 PSI rated; 2.0-4.0 GPM | Supplies low-impact application and adequate rinse volume |
| Downstream injector | 1:7 to 1:10 draw ratio | Keeps concentrated chemical away from the pump |
| Soap nozzle | 40-65 degree pattern | Reduces impact and permits injector draw |
| House-wash mix | 0.5%-1.5% SH for light or moderate growth | Suitable starting range for many siding surfaces |
| Safety equipment | Chemical goggles, gloves, long sleeves, boots | Limits eye and skin exposure |
| Plant protection | Clean water, hose, plastic only where needed | Reduces chemical contact and runoff risk |
Do not use a pressure washer merely because its maximum rating is high. A 4,000 PSI machine can damage siding even when used with a detergent nozzle if the operator stands too close or uses an unsuitable tip.
A downstream injector attaches after the pump and draws chemical from a separate container when the machine runs through a low-pressure nozzle. This arrangement protects the pump from concentrated sodium hypochlorite, although the injector’s fixed dilution can make the final wall concentration difficult to predict.
A dedicated 12-volt diaphragm system provides more control and often reaches upper stories with high volume at roughly 60-100 PSI. That setup is preferable for commercial work or roofs, but it costs more and requires chemical-rated hoses, fittings, tanks, and pump maintenance.
Which chemical mixture should you use?
Start with the weakest solution that can remove the growth, then increase strength only after a controlled test patch. Typical final sodium hypochlorite concentration at the wall ranges from 0.5%-1.5% for light or moderate siding growth and 1.5%-3% for heavy growth, although the surface manufacturer and product label take priority.
| Starting product | Available SH | Water for 1 gallon final mix at 1% SH | Water for 1 gallon final mix at 1.5% SH |
|---|---|---|---|
| Pool chlorine | 12.5% | 10.2 fl oz | 15.4 fl oz |
| Liquid bleach | 6% | 21.3 fl oz | 32.0 fl oz |
| Liquid bleach | 5% | 25.6 fl oz | 38.4 fl oz |
| Ready-made house wash | Label-defined | Follow label | Follow label |
The calculation is:
Concentrate volume = desired final strength ÷ starting strength × final batch volume.
For example, 1% ÷ 12.5% × 128 fluid ounces equals about 10.2 fluid ounces of 12.5% pool chlorine per gallon of finished solution. Add water to reach the final gallon, rather than adding concentrate to a full gallon of water.
Use a manufacturer-approved surfactant, usually about 1-2 fluid ounces per gallon unless the label specifies otherwise. Dish soap is a poor default because some formulas contain additives that increase spotting, reduce plant tolerance, or create excessive foam.
Sodium hypochlorite loses strength with heat, sunlight, and age. Store it cool, shaded, upright, and ventilated in a compatible container, and do not assume an old container still has its printed concentration.
How to Soft Wash a House With a Pressure Washer
The following procedure is designed for exterior siding and similar vertical surfaces. Do not use it as a roof-cleaning recipe, because roof materials, runoff controls, fall hazards, and manufacturer requirements demand a separate assessment.
Step 1: Inspect the House and Choose a Test Area
Walk around the property before connecting chemicals. Identify siding type, failing paint, open seams, cracked caulk, damaged screens, unsealed wood, oxidized vinyl, outdoor outlets, HVAC equipment, and plants beneath the work area.
Test a small hidden section with the planned solution and spray distance. Wait for the surface to dry before judging color, streaking, oxidation, or paint stability. Stop if the finish changes, the substrate softens, or the solution reacts with rust.
You’ll know it worked when: the test patch loses organic staining without color loss or surface damage.
Common mistake: treating the entire elevation before discovering that old paint or oxidized vinyl cannot tolerate the chosen mix.
Step 2: Protect Openings, Equipment, and Landscaping
Close windows and doors, remove screens if practical, and cover mail slots, keyholes, door hardware, cameras, and sensitive outdoor electronics. Move vehicles, furniture, toys, grills, and pet bowls outside the spray and runoff zones.
Pre-wet every plant, shrub, flower bed, and section of grass that could receive overspray. Clean water saturates leaf surfaces and soil before chemical contact, reducing absorption. Do not depend on plastic covering alone, because trapped heat and chemical runoff can damage foliage.
Shut off or shield outdoor electrical receptacles according to local electrical safety requirements. Do not seal equipment that must remain ventilated, and never spray directly into soffit vents, exhaust openings, or HVAC coils.
You’ll know it worked when: all vulnerable property is removed or protected and vegetation is visibly wet before chemical application.
Common mistake: protecting only the plants directly below the wall while ignoring windborne mist and downhill runoff.
Step 3: Connect and Test the Downstream Injector
Install the injector after the pressure washer pump, with its flow arrow pointing toward the gun. Place the chemical pickup hose and filter into the prepared solution, then select the manufacturer-approved low-pressure soap nozzle.
Run clean water first and inspect every connection. Switch to the soap nozzle and confirm that the injector draws liquid before aiming at the house. If the injector does not draw, check the nozzle, filter, pickup tube, injector direction, and trigger flow.
A downstream injector may draw at 1:7, 1:10, or another ratio under ideal conditions. Long hoses, restricted water supply, worn injectors, and low flow can reduce the draw rate, which is why the mixture should be tested at the nozzle or applied to a test patch rather than trusted solely from a bucket calculation.
You’ll know it worked when: the pickup tube visibly moves solution and the nozzle produces a broad, low-impact stream.
Common mistake: using a green 25-degree or red 0-degree tip, which creates back pressure, stops chemical draw, and raises surface impact.
Step 4: Apply the Cleaning Solution From Bottom to Top
Divide the house into sections approximately 10-15 feet wide. Spray the solution from the bottom upward, keeping the wand 12-24 inches away and using overlapping passes rather than a concentrated stream.
Bottom-to-top application prevents dirty chemical runoff from creating bright vertical “clean lines” across a dry wall. Keep the spray directed slightly downward or perpendicular to the surface, never upward beneath lap siding, window trim, or flashing.
Work in shaded conditions when possible. Wind, direct sunlight, and temperatures above roughly 85°F can shorten drying time and increase plant exposure. Avoid application when gusts carry mist toward neighboring property, people, vehicles, ponds, or food gardens.
You’ll know it worked when: the wall remains evenly wet, organic staining begins to fade, and the chemical does not run heavily into openings.
Common mistake: flooding the upper section first, allowing dirty runoff to streak lower areas before they receive solution.
Step 5: Control Dwell Time Without Letting the Mix Dry
Allow approximately 5-15 minutes of contact time, following the chemical label and the test-patch result. Light algae may respond quickly, while heavy mildew or porous masonry may need a second application rather than a longer unattended dwell period.
Reapply a light mist if the surface begins drying. Do not let sodium hypochlorite dry on glass, metal, painted trim, vinyl, wood, or plants. If the weather changes or you lose control of runoff, stop chemical application and rinse immediately.
Never add acid, ammonia, vinegar, or another cleaning product to sodium hypochlorite. The Centers for Disease Control and Prevention warns, “Never mix household bleach with ammonia or any other cleaner.” The resulting gases can cause severe respiratory injury.
You’ll know it worked when: the stain has visibly lightened and the surface remains wet before rinsing.
Common mistake: extending dwell time to compensate for an ineffective mix, which increases damage risk without reliably improving cleaning.
Step 6: Rinse From Top to Bottom With Clean Water
Switch to a wide-angle rinse nozzle or rinse setting. Begin at the highest cleaned section and work downward, keeping the wand at least 12 inches away from siding and farther away from fragile paint, wood, screens, and caulk.
Use high water volume and low impact. Flush window tracks, trim overlaps, soffit edges, downspouts, and horizontal ledges where solution can collect. Rinse until there is no visible foam, chemical smell at close range, or runoff discoloration.
Do not aim upward under vinyl siding or directly into brick weep holes. Water intrusion often occurs at seams and penetrations, where a powerful upward spray can reach the wall assembly even if the visible siding appears intact.
You’ll know it worked when: runoff is clear, the surface has an even appearance, and no chemical residue remains on glass or trim.
Common mistake: rinsing quickly from the ground and leaving concentrated solution behind shutters, gutters, and window frames.
Step 7: Rinse Plants, Grass, and Hard Surfaces Again
Immediately saturate nearby plants, lawn, soil, walkways, decks, and outdoor equipment with clean water. Rinse foliage from above and below where practical, and direct runoff away from ponds, storm drains, vegetable beds, and neighboring property.
Collect or dilute runoff when local rules require it. Sodium hypochlorite reacts with organic material and metals, so puddles can damage grass, discolor fabrics, corrode hardware, or harm aquatic life.
Remove plastic covers only after surrounding surfaces have been rinsed. Wash chemical-resistant equipment with clean water and flush the injector according to its manufacturer’s instructions.
You’ll know it worked when: vegetation remains wet with clean water and no pooled chemical solution remains around foundations or hardscape.
Common mistake: waiting until the end of the entire house wash to rinse plants, allowing several sections of overspray to dry.
Which Surfaces Can You Soft Wash?
Soft washing is generally appropriate for vinyl siding, painted masonry, stucco, and some painted wood when the finish is sound. Pressure, chemical strength, and rinse distance must change with the substrate.
| Surface | Typical application approach | Main risk | Safer decision |
|---|---|---|---|
| Vinyl siding | 0.5%-1.5% SH; low-pressure rinse | Water behind laps; oxidation streaks | Use broad spray and avoid upward angles |
| Stucco | 0.5%-1.5% SH; gentle high-volume rinse | Cracking and pigment loss | Test color and avoid concentrated spray |
| Painted wood | 0.3%-1.0% SH; short dwell | Paint failure and fiber damage | Use the weakest mix and inspect first |
| Brick masonry | 1%-2% SH for organic growth | Mortar erosion and trapped residue | Keep spray broad; protect mortar joints |
| Aluminum siding | 0.3%-1.0% SH; immediate rinse | Oxidation and chalking | Test a shaded area before full treatment |
| Asphalt shingles | Specialist roof method only | Granule loss and fall exposure | Follow roofing guidance or hire a contractor |
Soft washing does not repair failed paint, replace rotten wood, remove efflorescence, or correct rust staining. Organic growth and mineral deposits require different treatments, and mixing those treatments can create dangerous reactions.
Can you soft wash a roof with a pressure washer?
A pressure washer is usually the wrong tool for applying or rinsing a roof-cleaning solution. Asphalt shingles can lose protective granules under mechanical force, while roof work introduces fall, runoff, and warranty concerns that are absent from ordinary siding washing.
A dedicated low-pressure system or qualified roof-cleaning contractor provides better chemical control. Never climb a wet roof to compensate for inadequate reach, and never rinse roof chemicals toward ponds, gutters connected to rainwater collection, or edible gardens without a runoff plan.
Soft Washing Versus Pressure Washing
Soft washing is the better choice for biological staining on house exteriors; high-pressure washing is better for durable, unpainted hardscape when mechanical abrasion will not damage the substrate. The correct choice follows the surface and contamination, not the machine’s maximum PSI.
| Decision factor | Soft washing | High-pressure washing |
|---|---|---|
| Typical wall pressure | Below 300 PSI | 1,500-4,000 PSI |
| Primary cleaning force | Chemical oxidation | Water impact |
| Best target | Algae, mildew, mold, organic dirt | Concrete, pavers, heavy soil |
| Typical nozzle | 40-65 degrees | 15-40 degrees |
| Siding damage risk | Lower when controlled | Higher at close range |
| Residual biological growth | Lower after adequate dwell | Often remains in pores |
| Typical DIY equipment cost | $40-$150 beyond washer | $0-$50 for extra tips |
| Typical house-wash duration | 2-4 hours | 1.5-3 hours, excluding repairs |
High pressure can be appropriate for concrete driveways, unpainted brick pavers, and certain stone surfaces, but those surfaces still require correct nozzle distance and runoff management. A powerful washer does not make a safe house-washing method.
What If the Soft Wash Does Not Work?
Most failed house washes result from weak chemical delivery, insufficient dwell time, rapid drying, poor rinsing, or misidentified staining. Diagnose the process before increasing pressure, because more force often damages the surface without removing the underlying cause.
| Symptom | Likely cause | Corrective action |
|---|---|---|
| Injector will not draw | Wrong nozzle, low flow, blocked filter, reversed injector | Use soap tip, clean filter, verify arrow and water supply |
| Algae remains after rinse | Weak final SH strength or short dwell | Retest a stronger compliant mix and reapply |
| White chalky streaks | Oxidized siding or dried chemical residue | Stop, rinse thoroughly, test a restoration cleaner |
| Orange or brown staining | Rust or iron reaction | Rinse immediately; use a separate oxalic-acid treatment |
| Plants wilt or yellow | Concentrated overspray or delayed rinse | Flood with clean water and stop chemical work |
| Windows spot or haze | Solution dried or hard-water residue | Rinse, squeegee, and use a compatible glass cleaner |
Do not use oxalic acid on a surface that still contains sodium hypochlorite. Rinse thoroughly, separate the work sessions, and follow both product labels.
Hard water can leave mineral spots even when the house is chemically clean. A final rinse with softened or filtered water may help on glass, but it does not replace removal of dried chemical residue.
How Much Does It Cost and How Long Does It Take?
A typical DIY house wash costs $40-$150 when the homeowner already owns a functioning pressure washer. The range covers an injector, soap nozzle, surfactant, sodium hypochlorite, protective supplies, and replacement pickup tubing.
| Project type | Typical labor time | Typical DIY added cost | Typical professional price |
|---|---|---|---|
| Small one-story siding | 1.5-2.5 hours | $40-$90 | $200-$450 |
| Average 2,000-square-foot home | 2-4 hours | $60-$150 | $300-$800 |
| Two-story home | 3-5 hours | $100-$250 | $500-$1,200 |
| Roof and siding package | 4-8 hours | Usually specialist equipment | $700-$1,800+ |
Prices vary by region, access, height, staining, water availability, and local disposal requirements. Professional quotes can increase when contractors must protect delicate landscaping, reclaim runoff, use lifts, or treat rust and oxidation separately.
A pressure washer rated below about 2.0 GPM may rinse slowly, especially on a two-story home. GPM affects productivity more than maximum PSI once the operator is already using low-impact nozzles.
When Should You Hire a Professional?
Hire a professional when the building is more than two stories, the roof requires treatment, paint is failing, the substrate is unknown, runoff could enter a waterway, or the house has extensive electrical and landscaping exposure. Professional equipment also reduces ladder use and improves chemical proportioning.
DIY house washing is reasonable for a sound, accessible exterior when the operator can keep chemical spray controlled and rinse every vulnerable surface. It is not a good project during high wind, extreme heat, freezing weather, or active rain that carries runoff unpredictably.
A contractor should explain the proposed chemical strength, surface protection, plant-rinse plan, insurance coverage, and whether the price includes windows, gutters, rust, or oxidation. A low quote that omits protection and cleanup may transfer the risk to the homeowner.
Common Mistakes and How to Fix Them
- Using a high-pressure tip for chemical application: Replace the red or green tip with a compatible soap nozzle and verify draw before spraying.
- Applying sodium hypochlorite in direct afternoon sun: Work in shaded elevations, smaller sections, and shorter dwell periods.
- Spraying beneath siding or trim: Keep the wand level or slightly downward and let low-impact water flow over the surface.
- Skipping a test patch: Test hidden siding, painted wood, aluminum, and stucco before committing to the entire wall.
- Leaving chemical on glass or metal: Rinse immediately, then inspect for spotting, residue, and corrosion.
- Assuming dark stains are mold: Rust, artillery-spore spots, oxidation, and mineral deposits need different products and separate treatment.
One practitioner rule is to increase water volume before increasing pressure. More rinse water removes dead material efficiently, while extra pressure concentrates damage at seams, edges, and weak finishes.
A second rule is to keep a clean-water hose active throughout the job. The hose is an emergency control for eyes, skin, plants, glass, and any surface that begins drying unexpectedly.
A third rule is to treat chemical strength as a measured variable. The concentration at the wall can differ substantially from the concentration in the bucket when an injector, long hose, or restricted nozzle changes the draw rate.
FAQ
Can I use regular household bleach for soft washing?
Regular unscented liquid bleach can supply sodium hypochlorite, but its concentration is usually lower than pool chlorine and may vary with age. Calculate the final strength from the product label, use a compatible surfactant, wear chemical protection, and never combine bleach with ammonia, acids, vinegar, or other cleaners.
What PSI is safe for washing vinyl siding?
Keep pressure at the wall below 300 PSI as a conservative soft-washing target, while maintaining at least 12 inches of distance from the siding. The pressure washer’s maximum rating is not the wall pressure. Avoid upward spraying beneath overlapping vinyl panels because water can enter the sheathing.
How often should a house be soft washed?
Many homes need cleaning every 1-3 years, depending on shade, humidity, tree cover, rainfall, and nearby vegetation. North-facing walls under trees often develop algae sooner than sunny elevations. Cleaning before growth becomes thick usually permits a weaker solution and shorter dwell time.
Will soft washing remove black mold permanently?
Soft washing can kill and remove much of the visible organic growth, but it cannot prevent recurrence when moisture, shade, leaks, or poor drainage remain. Correct roof leaks, improve ventilation, trim vegetation, and keep gutters functioning if mold returns quickly after cleaning.
Can I soft wash with an electric pressure washer?
An electric pressure washer can handle a small, low-rise siding project if its water flow supports the injector and rinsing task. Low GPM units may apply solution adequately but rinse slowly. Avoid running concentrated sodium hypochlorite through the machine unless the manufacturer expressly permits it.
Is soft washing safe for pets?
Keep pets indoors until chemical application, rinsing, runoff control, and surface drying are complete. Remove bowls, toys, and bedding before work begins. A thoroughly rinsed exterior still requires preventing pets from licking wet surfaces or drinking contaminated puddles.
The Bottom Line
How to soft wash a house with a pressure washer safely comes down to controlled chemistry, low-impact application, complete rinsing, and property protection. Use a downstream injector for accessible siding, test the final mix on a hidden area, apply from bottom to top, rinse from top to bottom, and stop whenever wind, drying, runoff, or surface damage moves beyond your control.


