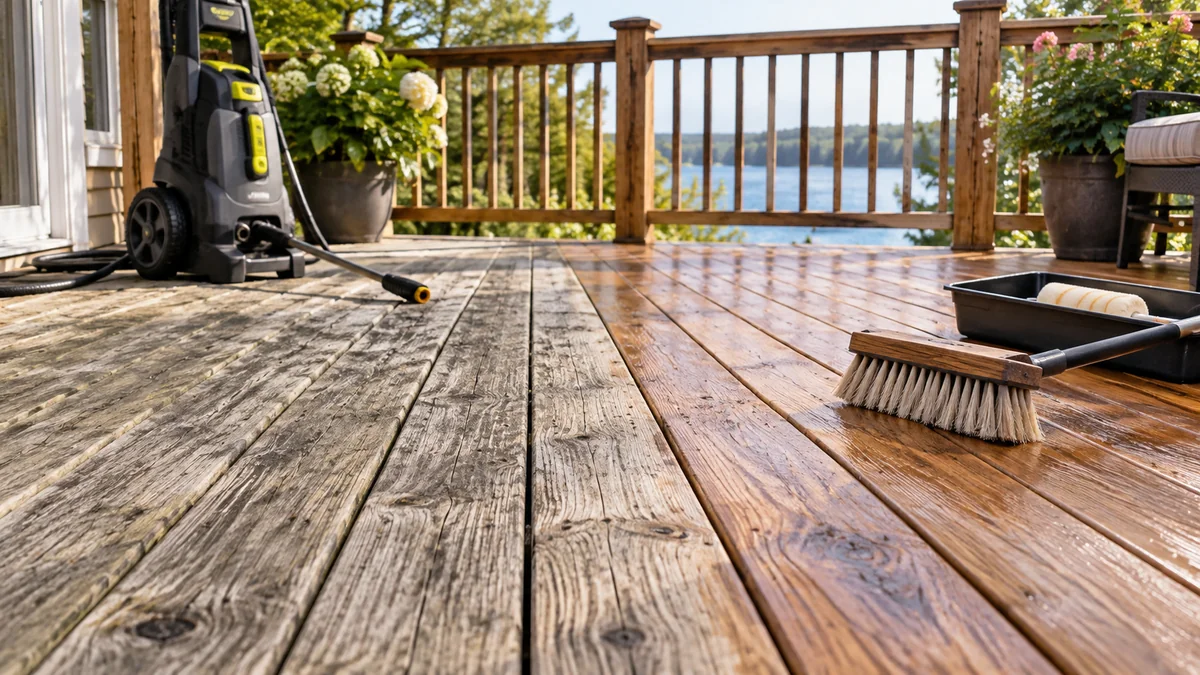
To restore a weathered wood deck with pressure washing, inspect and repair the boards, apply the correct cleaner or stripper, rinse with controlled low pressure, brighten the wood, let it dry, lightly sand raised fibers, and apply a compatible finish. Most projects take one active workday plus 48-72 hours of drying, and technique matters more than machine power.
Key Facts at a Glance
- Softwood decks usually need approximately 500-1,200 PSI at the surface, not the machine’s maximum rating.
- A 40-degree fan nozzle, 12-18 inches from the boards, is the safest starting setup for most wood decks.
- Oxygenated deck cleaner suits gray, dirty, mildew-stained bare wood; coating stripper is required for failing stain or paint.
- Wood should typically reach below 12-15% moisture content before staining.
- Pressure washing can expose fresh wood but cannot repair rot, structural movement, split boards, or failed framing.
- A 300-square-foot DIY restoration commonly costs $90-$190 before the final stain.
What Does Pressure Washing Do to Weathered Wood?
Pressure washing removes loose UV-damaged fibers, surface dirt, mildew, algae, and softened finish from weathered decking. A wood cleaner first breaks down organic contamination or coating residue; pressurized water then flushes away the loosened material along the grain.
Ultraviolet light degrades lignin, the component that binds wood fibers together. The result is a gray, friable surface that can hold dirt and moisture. Controlled washing removes the weakest surface material, but excessive pressure removes healthy fibers too.
Pressure washing is therefore a controlled rinsing process, not a substitute for structural repair. It is suitable for gray bare wood and many lightly coated decks, but it is a poor solution for deeply rotten boards, thick paint layers, or boards that flex underfoot.
When Should You Avoid Pressure Washing?
Avoid pressure washing until repairs are complete if a screwdriver penetrates joists or boards easily, fasteners no longer hold, or a board has extensive cracking. Replace unsound timber first because water pressure can enlarge damaged areas and force water into vulnerable end grain.
Do not pressure-wash painted surfaces of unknown age without testing for lead. The United States Environmental Protection Agency requires lead-safe practices for many pre-1978 painted homes and child-occupied facilities. A paint-removal contractor is the safer choice when old coatings may contain lead.
Composite decking also requires a different method. Many manufacturers permit low-pressure washing, but concentrated spray can damage the cap or drive dirt into its texture. Follow the manufacturer’s cleaning instructions rather than applying wood-deck settings.
Which Pressure Washer and Settings Should You Use?
An electric pressure washer is usually the best choice for a first-time homeowner because its lower flow and pressure are easier to control. A gas machine can work efficiently on large decks, but its greater output increases the consequences of a stationary wand or narrow spray.
| Deck condition | Typical machine | Starting pressure at surface | Nozzle and distance |
|---|---|---|---|
| Cedar or pine, light dirt | Electric, 1.2-1.5 GPM | 500-800 PSI | 40 degree, 14-18 inches |
| Gray softwood, mildew | Electric or regulated gas | 800-1,000 PSI | 40 degree, 12-18 inches |
| Redwood or aged softwood | Electric, 1.2-2.0 GPM | 600-900 PSI | 40 degree, 14-18 inches |
| Ipe or dense hardwood | Regulated electric or gas | 1,000-1,500 PSI maximum | 25-40 degree, test first |
| Rinsing cleaner | Any suitable washer | Lowest effective setting | 40 degree or wider, 18 inches |
The pressure listed on a machine is its maximum pump rating, not necessarily the force reaching the wood. Tip size, distance, angle, hose length, and water flow all change the working pressure.
How Do PSI, GPM, and Nozzle Angle Change Results?
PSI describes force per square inch, while GPM describes water volume moving across the surface. Higher GPM often speeds rinsing because it carries away loosened debris, whereas excessive PSI can cut soft fibers before the debris is removed.
Use a white 40-degree nozzle for the first test area and never use a red 0-degree tip on wood. A yellow 15-degree tip is also unnecessarily aggressive for ordinary decking. A green 25-degree tip may suit dense hardwood only after a test confirms that it does not scar the surface.
Begin at the widest fan, farthest distance, and lowest practical pressure. Increase force only when cleaner and dwell time have failed to release the residue. That sequence protects wood and reduces sanding afterward.
What Should You Do Before Washing?
Preparation determines whether pressure washing cleans the deck or spreads damage and chemical runoff. Clear the surface, inspect every board and fastener, protect surrounding vegetation, and create a plan for where dirty water will flow.
Before You Start
| Requirement | Typical quantity or value | Practical checkpoint |
|---|---|---|
| Active labor | 2-5 hours | Deck cleared and washed in one session |
| Drying time | 48-72 hours | No rain or heavy dew during drying |
| Cleaner | 1 gallon per 200-400 square feet | Confirm product label coverage |
| Brightener | 1 gallon per 200-400 square feet | Match dilution to label |
| Safety equipment | Gloves, goggles, boots, hearing protection | All available before mixing |
| Moisture target | Below 12-15% | Test several boards and end grain |
Remove furniture, rugs, planters, and grills. Sweep leaves from the boards and gaps, then cover nearby electrical outlets, lighting, and delicate outdoor equipment.
Wet plants thoroughly before chemical application and rinse them again afterward. Avoid sealing plants under plastic in hot sun for extended periods because trapped heat can cause more damage than the cleaner.
Drive protruding screws flush without crushing the board. Replace nails that have pulled through and mark boards requiring replacement. A pressure washer does not fix loose fasteners or a sagging ledger.
Choose a cool, cloudy day when possible. Direct sunlight dries cleaner too quickly, while rain can dilute chemicals and carry runoff beyond the work area.
Step 1: Identify the Existing Surface
Identify whether the deck is bare gray wood, coated with a transparent finish, covered by a failing penetrating stain, or covered by paint or solid stain. The correct chemical depends on the coating, and using a mild cleaner against a film-forming coating wastes time.
Test a hidden area with a scraper and water. If the finish flakes in sheets, use a compatible coating stripper. If water darkens the wood and the surface has no continuous film, an oxygenated cleaner is usually more appropriate.
Do not assume a darker deck needs stronger pressure. Dark color may come from tannins, mildew, old coating, or cleaner residue, and each condition requires a different response.
Success checkpoint: A small test patch reveals whether the selected product loosens dirt, mildew, or the existing finish.
Common mistake: Starting on the visible center of the deck before confirming chemical compatibility.
Step 2: Apply Cleaner or Stripper
Apply a wood-deck cleaner with a pump sprayer according to the manufacturer’s dilution. Oxygenated cleaners commonly target organic dirt and mildew; sodium-hydroxide-based strippers are stronger and more appropriate for many failing oil finishes, but they require careful handling and thorough rinsing.
Work in sections of approximately 25-50 square feet. Keep the surface wet for the listed dwell period, commonly 10-20 minutes, and mist it lightly if drying begins. Scrub stubborn traffic lanes with a stiff synthetic brush rather than extending dwell time indefinitely.
Never mix bleach, acids, ammonia, or alkaline strippers. Apply brightener only after the cleaner has been rinsed away, because acid and alkaline products can react unpredictably and reduce cleaning performance.
Success checkpoint: Dirt and loose coating soften, discoloration lifts, and the surface remains wet without drying into streaks.
Common mistake: Allowing cleaner to dry, which can create uneven pale marks and difficult-to-rinse residue.
Step 3: Pressure-Wash Along the Grain
Set the wand to a 40-degree nozzle and test the lowest effective pressure on an inconspicuous board. Hold the tip 12-18 inches above the surface, keep it moving, and sweep parallel to the board rather than across the grain.
Start moving before pulling the trigger. Wash each board from one end toward the other with overlapping passes of roughly 20-30 percent. Keep the fan evenly spaced so one section does not receive several times more water than its neighbors.
Maintain a consistent angle. A wand held too close or too steeply concentrates force into a small area and creates visible troughs. Edges, corners, and soft end grain require greater distance and shorter exposure.
Rinse dirty water toward a controlled drainage area. Do not direct concentrated runoff into a pond, storm drain, vegetable garden, or neighboring property.
Success checkpoint: The wood looks evenly clean without stripes, torn fibers, circular spray marks, or sharp color boundaries.
Common mistake: Pausing over a dark spot. If a mark remains, reapply cleaner and blend the entire board rather than attacking one point with more pressure.
Step 4: Brighten, Dry, Sand, and Seal
Apply a wood brightener after the cleaning chemical has been thoroughly rinsed. Oxalic-acid brighteners can reduce alkaline darkening, help restore a more even tone, and improve the appearance of tannin-stained boards when used according to the product label.
Allow the brightener to work for approximately 5-10 minutes, then rinse with a garden hose or a wide, low-pressure fan. Do not leave acid product to dry on the deck, metal hardware, glass, or masonry.
Let the deck dry for at least 48 hours in favorable weather, and use a moisture meter before applying finish. A reading below 12-15% is a practical target for many stains, although the finish manufacturer’s instructions control.
Pressure washing often raises loose fibers. After drying, sand handrails and visibly fuzzy boards with 80-100 grit paper, then remove dust with a vacuum or clean broom. Excessive fuzz indicates too much pressure, insufficient distance, or repeated passes.
Apply a compatible penetrating stain or film-forming coating only after the wood is clean, dry, and free of dust. Follow the product’s spread rate and back-brushing instructions; heavy application can leave sticky or peeling areas.
Success checkpoint: The surface is uniformly clean, dry, smooth enough for its intended use, and within the finish manufacturer’s moisture range.
Common mistake: Staining because the surface feels dry while the board core still holds moisture.
Which Finish Should You Apply After Restoration?
A penetrating semi-transparent stain is usually the forgiving choice for a weathered deck because it highlights grain and is easier to maintain than a thick film. Solid stain provides more color coverage but can peel when applied over unstable residue or damp wood.
| Finish type | Typical service interval | Appearance | Main risk |
|---|---|---|---|
| Clear water repellent | 1-2 years | Natural grain, little color | Limited UV protection |
| Semi-transparent penetrating stain | 2-4 years | Visible grain and moderate color | Uneven absorption |
| Solid penetrating stain | 3-5 years | Strong color with some texture | Surface preparation failure |
| Film-forming paint | 3-7 years | Opaque color | Peeling and trapped moisture |
These are typical maintenance intervals, not guarantees. Sun exposure, foot traffic, board orientation, local rainfall, and product formulation change performance.
Pressure Washing or Manual Restoration?
Pressure washing is faster for gray bare wood and mildew, but chemical stripping and sanding offer finer control on delicate or heavily coated surfaces. The best method depends on the finish, wood species, condition, and acceptable risk.
| Situation | Pressure washing | Chemical and manual method | Preferred approach |
|---|---|---|---|
| Gray bare cedar, 300 square feet | 2-5 active hours | 1-2 full days | Controlled pressure washing |
| Several layers of solid stain | May leave coating patches | 1-3 days | Chemical stripping and scraping |
| Historic softwood boards | Gouging risk | Slow but precise | Manual restoration |
| Deeply rotten decking | Cannot restore structure | Requires replacement | Board or framing repair |
| Dense ipe with light weathering | Effective at low controlled pressure | Also feasible | Test both methods |
| Lead-risk paint | Unsafe without controls | Professional containment | Lead-safe contractor |
Pressure washing is not ideal for making paint removal fast. A narrow spray can shred wood while leaving a film in the low areas, creating a rough surface that still requires scraping and sanding.
What Does Deck Restoration Cost and How Long Does It Take?
A typical 300-square-foot DIY restoration costs approximately $90-$190 before stain, while professional cleaning and restoration commonly ranges from $2.00-$4.50 per square foot. A complete project usually requires one preparation and washing day, followed by 48-72 hours of drying.
| Cost item | Typical range | 300-square-foot example |
|---|---|---|
| Pressure-washer rental | $40-$90 per day | $65 typical |
| Cleaner and stripper | $15-$40 | $25-$40 |
| Brightener | $15-$30 | $20-$30 |
| Sandpaper and safety gear | $20-$40 | $25-$40 |
| Professional service | $2.00-$4.50 per square foot | $600-$1,350 |
| Final stain | $35-$120 | Depends on coverage |
Professional pricing rises when access is difficult, boards need replacement, old coatings require stripping, or runoff containment is necessary. Two-story decks also add ladder, lift, and fall-protection requirements.
Common Mistakes and How to Fix Them
Gouges and Furrows
Gouges result from excessive pressure, a narrow nozzle, short wand distance, or stopping in one location. Let the board dry, sand shallow damage along the grain, and replace boards with deep structural cuts; do not try to hide severe damage under thick stain.
Stripes and Lap Marks
Uneven distance or overlapping passes create light and dark bands. Reapply cleaner to the affected board group, scrub lightly, and rinse the full board length with consistent motion. Spot-blasting usually makes contrast worse.
Fuzzy or Splintered Fibers
Raised fibers are common after water exposure, but severe fuzz means the washing process was too aggressive. Dry the deck fully, sand with 80-100 grit, and use lower pressure and a wider fan during future cleaning.
Dark or Blotchy Wood
Darkening can result from alkaline residue, mildew, tannins, or uneven cleaning. Rinse thoroughly, apply a compatible brightener, and test the finish on a small area before coating the full deck.
Peeling Finish After Staining
Peeling usually indicates unstable old coating, excessive application, or moisture trapped below the finish. Scrape loose material, allow the deck to dry, measure moisture, and follow the new product’s preparation requirements.
Plant or Metal Damage
Cleaner runoff can scorch leaves and discolor aluminum, galvanized metal, glass, and masonry. Rinse exposed materials immediately and use plastic barriers only for short periods while monitoring heat buildup.
Situations That Need a Different Method
If the Deck Has Thick Paint
Scrape and chemically strip the coating rather than using a concentrated pressure stream. Test for lead when the paint predates 1978 or its age is unknown, and use certified containment practices where regulations require them.
If the Deck Is Ipe or Another Hardwood
Start below 1,000 PSI with a 40-degree tip and increase only after testing. Dense hardwood can still show lap marks, and its natural oils may require a finish specifically labeled for exotic species.
If the Deck Is Elevated or Difficult to Access
Use professional equipment when fall protection, runoff control, or hose routing cannot be managed safely. A clean surface is not worth exposing a worker to an unprotected two-story edge.
If the Deck Has Only Light Dirt
Skip aggressive washing. A garden hose, soft brush, and compatible cleaner can remove ordinary surface dirt with less risk to the wood fibers.
FAQ
Can I Pressure-Wash a Deck Without Using Cleaner?
You can rinse loose dirt without detergent, but cleaner usually produces a more even result on weathered wood. Mold, mildew, gray fibers, and oily residue bond to the surface more strongly than loose soil, so relying only on pressure encourages operators to increase PSI and raises the risk of gouging.
Is 2,000 PSI Too Much for a Wood Deck?
A 2,000-PSI machine is not automatically too powerful, because the working pressure falls with a wide nozzle and greater distance. Use a 40-degree tip, begin around 500-800 PSI on softwood, and test first. Never use the machine’s maximum setting close to the boards.
How Soon Can I Stain After Pressure Washing?
Many decks need 48-72 hours of dry weather before staining, but calendar time alone is insufficient. Measure several boards with a moisture meter and follow the stain label. End grain, shaded areas, and humid conditions often remain wet after the surface appears dry.
Will Pressure Washing Remove All Old Stain?
Pressure washing can remove failing or softened stain, but it rarely removes every layer of a sound solid stain or paint. Use a dedicated stripper, scraping, and possibly sanding for film-forming coatings. Increasing pressure is more likely to damage wood than remove a firmly bonded finish.
Should I Sand the Deck Before or After Washing?
Wash and brighten before final sanding. Water raises loose fibers and reveals areas that need defuzzing, while sanding first can leave dust that interferes with cleaning and coating adhesion. Use approximately 80-100 grit after the deck has dried completely.
How Often Should a Wood Deck Be Restored?
Inspect the finish every year and clean when dirt, mildew, or fading appears rather than following a rigid calendar. Many penetrating finishes need renewal every 2-4 years, while exposed decks may require earlier maintenance because sunlight and standing water accelerate weathering.
The Bottom Line
To restore a weathered wood deck with pressure washing, let chemistry remove most contamination and use water only at the lowest effective force. Select a 40-degree nozzle, work 12-18 inches from the boards along the grain, brighten after rinsing, dry to below 12-15% moisture, sand raised fibers, and apply a compatible finish. Pressure washing is efficient for gray bare wood, but rotten boards, thick coatings, lead-risk paint, and elevated access require a different method or a qualified professional.