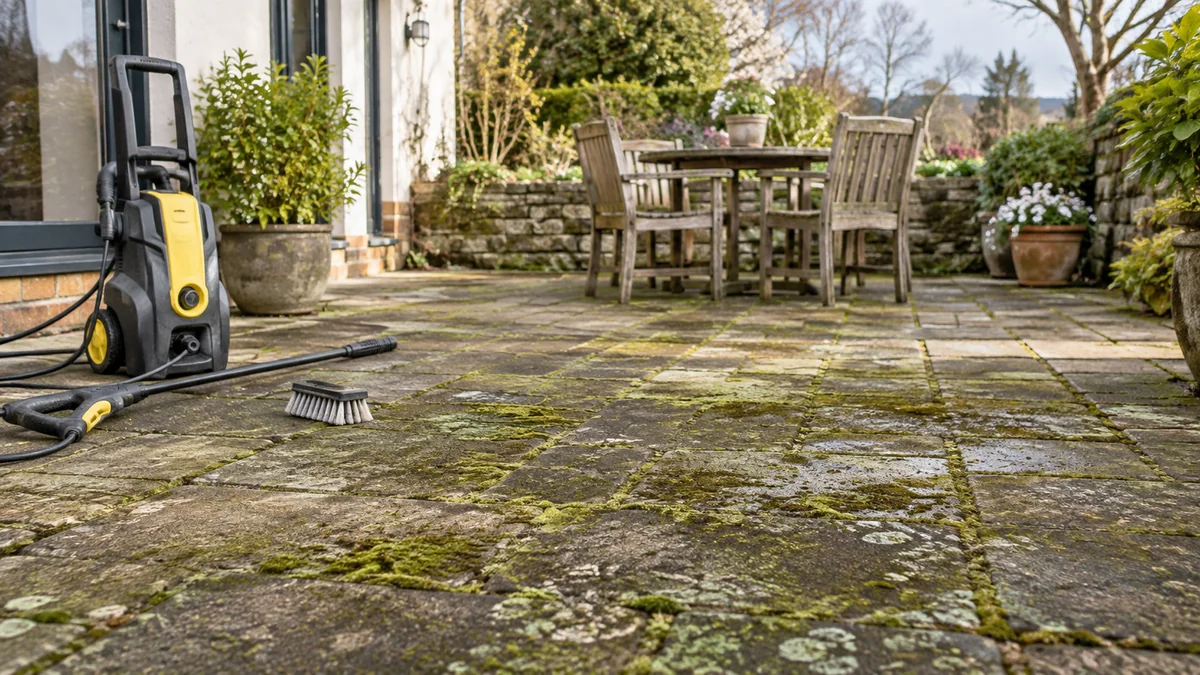
To remove stubborn algae and moss from shaded patios, first scrape and sweep away dry growth, then use a surface-appropriate biocide or controlled mechanical cleaning, rinse chemical residue, restore damaged joints, and improve drainage and airflow. Most patios take 2-6 hours of active work, but residual treatments can require 1-4 weeks to finish visibly clearing the surface.
Key facts
Dry scraping removes bulk moss before treatment and reduces chemical demand.
Sodium hypochlorite can produce rapid visual results, but it can damage plants, colored concrete, fabrics, and some stone finishes.
Benzalkonium-chloride biocides work more slowly and are useful for recurring growth when the product label permits patio use.
Pressure washing alone often leaves spores, disturbs jointing material, and cannot reliably remove embedded lichen.
Shaded paving usually regrows algae because it remains damp, not because the first cleaning necessarily failed.
Never mix bleach with vinegar, acids, ammonia, or other cleaners; hazardous gases can form.
What Is Growing on the Patio?
Algae forms a green, brown, or black film on damp paving, while moss grows as soft tufts that anchor in joints and surface irregularities. Lichen, often called black spot on patio stone, forms tightly attached circular or crusty marks and is harder to remove than loose moss or surface algae.
The organisms need different treatment intensity. A stiff brush may remove moss from a joint, whereas lichen can remain attached after ordinary rinsing. Green algae usually responds quickly to an appropriate cleaner, but the dark stain left by dead growth may require repeated treatment or careful agitation.
Why shaded patios regrow
Shade reduces evaporation and keeps paving wet after rain, irrigation, or washing. Overhanging branches also deposit leaves and organic debris, while blocked channels, leaking downspouts, and compacted joints hold water against the slabs.
Moss is especially persistent where joints contain soil rather than clean, stable jointing material. The moss is not the only problem. Its growth traps more moisture, which creates a feedback loop that accelerates further colonization.
Before You Start
A typical 20-square-metre patio requires 30-60 minutes for preparation, 60-180 minutes for cleaning, and at least 24-48 hours before joint repairs or sealing. Difficulty is moderate because chemical safety, surface identification, runoff control, and joint protection matter as much as scrubbing strength.
| Requirement | Typical amount or specification | Purpose |
|---|---|---|
| Stiff outdoor broom | 1, 40-60 cm head | Removes loose debris and dead growth |
| Patio scraper | 1, 10-20 cm blade | Clears moss from joints |
| Pump sprayer | 5-8 litres | Applies diluted treatment evenly |
| Biocide or patio cleaner | 1-2 litres concentrate per 20 m² | Treats active growth, subject to label coverage |
| Nitrile gloves and eye protection | 1 set per user | Protects skin and eyes |
| Clean rinse water | 100-200 litres typical | Flushes oxidizer and loosened residue |
| Replacement jointing material | 10-20 kg per 20 m², depending on gaps | Rebuilds eroded joints |
Check the paving material before applying anything. Concrete and dense brick generally tolerate more mechanical cleaning than limestone, polished stone, painted concrete, resin-bound surfacing, or old sandstone. Product labels override generic advice because concentrations and approved uses differ.
Choose a dry, overcast period with no rain forecast during the product’s specified contact time. Avoid hot, windy conditions because spray drifts and cleaner dries unevenly. Avoid freezing weather because water trapped in joints can expand and damage already weakened paving.
How to Remove Stubborn Algae and Moss From Shaded Patios
The reliable sequence is dry removal, surface testing, controlled treatment, gentle agitation, thorough rinsing where required, joint repair, and moisture management. The most important success factor is not maximum pressure; it is matching the treatment to the paving and removing the conditions that keep the patio damp.
Step 1: Clear and inspect the patio
Remove furniture, planters, rugs, toys, and loose decorations. Sweep away leaves, soil, and twigs, then inspect for cracked slabs, loose pointing, open joints, drainage channels, and nearby downspouts.
Photograph damaged areas before cleaning. A pressure washer can widen a pre-existing crack, and a chemical cleaner can reveal rather than cause discoloration. Protect nearby metal furniture, painted walls, timber, and fabrics from overspray.
Success checkpoint: the paving is visible, dry enough to inspect, and free of movable objects.
Common mistake: beginning with a pressure washer while soil and leaves remain in the joints.
Step 2: Scrape and brush off dry moss
Let surface moss dry when practical. Use a patio scraper held at a shallow angle to lift clumps from joints, then sweep the material into bags or green-waste containers.
A stiff nylon brush is safer than a wire brush on soft natural stone. A wire brush can scratch polished or honed surfaces and leave rust marks if its bristles shed. Do not force the scraper between tightly fitted slabs because it can chip edges and loosen stable jointing.
Success checkpoint: most raised moss has been removed and joint openings are visible.
Common mistake: wet-scrubbing thick moss first, which smears organic material across the paving and increases cleanup.
Step 3: Identify the surface and perform a patch test
Test the chosen cleaner on a hidden area measuring about 30 by 30 centimetres. Leave it for the label-specified period, rinse as directed, and inspect after the surface dries.
Look for color loss, whitening, etching, roughened texture, softened coating, or joint deterioration. A patch test is particularly important for colored concrete, sandstone, limestone, brick with friable faces, and previously sealed paving.
Success checkpoint: the test area has no unwanted color or texture change after drying.
Common mistake: testing only while the surface is wet, when whitening and patchiness may be difficult to see.
Step 4: Apply a suitable biocide
For rapid treatment on compatible, unpainted surfaces, a labeled sodium-hypochlorite patio product can kill green growth within approximately 10-30 minutes. Do not copy a universal bleach dilution from the internet; household bleach, pool chlorine, and professional hypochlorite have different strengths, and the product label determines the safe mix.
Residual products containing quaternary ammonium compounds, such as benzalkonium chloride, generally act more slowly. Some are designed to remain on the surface and weather away, while others require rinsing. Follow the label exactly.
Pre-wet adjacent plants with clean water, cover vulnerable plants where the label permits, and control runoff. Wear gloves, eye protection, and suitable clothing. Keep children and pets away until the label’s re-entry condition is met.
Success checkpoint: the treatment has wet the growth evenly without pooling against walls or entering a pond.
Common mistake: applying concentrated chemical to compensate for poor coverage, which increases surface and environmental risk.
Step 5: Agitate resistant growth
Agitate softened algae and remaining lichen with a stiff nylon brush. Work in manageable areas of 2-4 square metres so the product does not dry before the specified contact time.
Black spot may not disappear during the first application. Dead lichen can leave a mineral-colored mark even after the organism is no longer viable. Repeating a label-approved treatment is safer than increasing concentration or using an aggressive acid.
Success checkpoint: green film lifts under brushing and resistant marks become less raised or less dark.
Common mistake: using a rotary wire brush on limestone or sandstone, which can remove the stone surface along with the growth.
Step 6: Rinse or leave the product as directed
Rinse oxidizing cleaners thoroughly with clean water, directing runoff toward an appropriate drain rather than a flower bed, pond, or neighboring property. A low-pressure hose is usually safer than a concentrated jet.
Leave no-rinse residual products alone when the label instructs weathering. Rinsing them immediately can remove the active ingredient before it has worked. Never combine a no-rinse product with another cleaner.
Success checkpoint: rinsed surfaces show no slippery chemical film, and no visible runoff reaches sensitive planting or standing water.
Common mistake: rinsing every product automatically, even when the formulation is designed to remain active.
Step 7: Restore joints after the patio dries
Allow the paving to dry for at least 24-48 hours before filling joints. Sweep compatible jointing sand into dry gaps, compact it as the product requires, and remove excess material from the slab faces.
Use polymeric sand only when the paving system, joint width, climate, and manufacturer instructions support it. Polymeric material needs suitable moisture control and can haze the surface if residue is not removed. Do not fill unstable joints before addressing slab movement or drainage.
Success checkpoint: joints are full, firm, and slightly below the paving surface without loose residue remaining on top.
Common mistake: filling wet joints, which leaves voids and prevents reliable setting.
Which Treatment Works Best?
The best treatment depends on the growth, paving material, required speed, and tolerance for plant or joint risk. Fast oxidizers suit compatible concrete and severe green growth, while residual biocides suit recurring shaded areas and low-effort maintenance; mechanical cleaning is useful for bulk moss but can damage joints.
| Method | Typical visible result | Best surface or situation | Main limitation |
|---|---|---|---|
| Sodium hypochlorite product | 10-30 minutes, with rinsing | Unpainted concrete and severe green film | Plant damage, bleaching, runoff risk |
| Quaternary ammonium biocide | 1-4 weeks | Recurring growth and maintenance treatment | Slow results and strict label dependence |
| Hand scraping and nylon brushing | 1-3 hours per 20 m² | Moss-filled joints and delicate paving | Labor intensive, limited lichen removal |
| Pressure washing | Same day | Robust concrete with sound joints | Erodes surfaces and removes jointing |
| Vinegar solution | Several hours to days | Small isolated growth on compatible surfaces | Acid can damage stone and soil biology |
| Boiling water | Immediate tissue scorching | Small cracks or isolated moss | Burn risk and weak long-term control |
Is pressure washing better than chemical treatment?
Pressure washing is better for removing mud, loose debris, and dead surface material, but it is not automatically better for living algae, lichen, or recurring moss. A narrow jet can erode soft stone, stripe concrete, remove joint sand, and drive water into cracks.
Use the widest practical fan nozzle, keep the wand moving, begin farther away than expected, and test a hidden area. Exact pressure depends on the machine and stone, so manufacturer guidance and surface testing are safer than a universal pressure number. Avoid holding the jet vertically over joints.
Can you use bleach on a patio?
Bleach can be effective on compatible paving, but household bleach is not universally safe or appropriate. Sodium hypochlorite may discolor dyed concrete, weaken nearby vegetation, corrode metal, irritate skin, and harm aquatic life if runoff enters ponds or drains connected to waterways.
Use only a product labeled for the surface and application. Do not mix bleach with vinegar, hydrochloric acid, ammonia, toilet cleaner, or other chemicals. A dedicated patio product may include surfactants and directions that differ substantially from laundry bleach.
Material-Specific Advice
| Patio material | Safer first choice | Avoid or restrict | Typical recovery concern |
|---|---|---|---|
| Concrete pavers | Nylon brushing plus labeled biocide | Strong jet on open joints | Color bleaching and sand loss |
| Sandstone | Low-pressure rinse plus pH-compatible biocide | Acids, wire wheels, aggressive jets | Etching and granular erosion |
| Limestone | Patch-tested neutral or alkaline cleaner | Vinegar and acidic products | Dulling, etching, surface roughness |
| Brick | Nylon brush and controlled rinse | High pressure on soft historic brick | Face spalling and mortar loss |
| Painted concrete | Manufacturer-approved cleaner | Hypochlorite and abrasive brushing | Paint lifting or patchy fading |
| Resin-bound paving | Soft brush and approved cleaner | Pressure washing and solvents | Aggregate loosening and resin damage |
Natural stone requires restraint. Acid may dissolve or roughen calcium-based limestone, while pressure can strip the weathered face from weak sandstone. For valuable, historic, or heavily damaged paving, a stone-cleaning professional is usually cheaper than replacing a damaged section.
How Do You Stop Algae and Moss Returning?
Long-term control requires faster drying, less organic debris, stable joints, and periodic low-intensity maintenance. Cleaning alone cannot permanently prevent growth when paving remains shaded and wet for most of the day.
Trim branches that block airflow, clean gutters and downspouts, remove leaves weekly during wet seasons, and correct low spots that hold water. Check whether sprinkler heads spray the patio. Keep furniture feet from creating permanently damp zones.
A breathable sealer can reduce water absorption on some concrete and porous stones, but sealing is not a cure for poor drainage. Apply only a product approved for the material, after the paving is clean and fully dry. Test first because sealers can change color and slip characteristics.
| Prevention action | Typical interval | Expected benefit |
|---|---|---|
| Sweep leaves and soil | Weekly in autumn | Removes organic food and moisture retention |
| Clear drainage channels | Monthly in wet seasons | Prevents standing water |
| Trim overhanging vegetation | Twice yearly | Improves light and airflow |
| Inspect downspouts | Each rainy season | Stops concentrated wetting |
| Apply maintenance biocide | Spring and autumn, if labeled | Delays visible regrowth |
| Inspect joints | Every 6-12 months | Identifies moss-supporting gaps early |
Common Problems and Fixes
Green film disappeared but black spots remain
The remaining marks may be lichen, mineral staining, or deep discoloration rather than living algae. Allow the surface to dry, repeat a compatible labeled treatment if permitted, and brush gently; do not assume stronger bleach or acid is the correct answer.
Moss returns in the joints within weeks
The joints may contain soil, organic debris, or retained moisture. Remove unstable material, correct drainage, treat the cleaned gaps, and refill with a compatible jointing product. Polymeric sand cannot compensate for moving slabs or persistent standing water.
The patio looks white after cleaning
White residue may be cleaner salts, efflorescence, or mineral deposits. Rinse according to the product instructions, avoid acid on acid-sensitive stone, and wait until the surface dries before judging the final appearance.
The surface became patchy
Patchiness usually indicates uneven application, product drying, incompatible chemistry, or an untested coating. Stop using the product, rinse if the label requires it, and compare the affected area with an untreated section before attempting another chemical.
Plants were splashed
Rinse foliage and soil promptly with clean water unless the product label gives different instructions. Remove contaminated mulch where necessary, prevent further runoff, and seek local poison-control or veterinary advice if a pet has ingested cleaner.
The patio remains slippery after cleaning
Dead algae, detergent residue, and persistent dampness can all create slipperiness. Rinse compatible surfaces thoroughly, brush away residue, improve drainage, and avoid applying a glossy sealer that increases wet traction risk.
Typical Time and Cost
Prices vary by country, product strength, patio access, and whether a contractor restores the joints. The following are typical planning ranges, not guaranteed quotations.
| Job type | Active labor | Materials, typical USD | Total elapsed time |
|---|---|---|---|
| Light moss on 20 m² | 1-2 hours | $15-$40 | 1 day |
| Heavy algae with labeled cleaner | 2-4 hours | $25-$70 | 1-2 days |
| Pressure washing and re-sanding | 3-6 hours | $40-$120 | 2 days |
| Residual biocide treatment | 30-90 minutes | $20-$60 | 1-4 weeks |
| Professional cleaning | 2-5 hours | $150-$500 | 1-3 days |
| Cleaning plus joint restoration | 5-10 hours | $250-$800 professionally | 2-4 days |
Two practitioner rules matter here. First, a patio that looks clean immediately after pressure washing may regrow sooner than one treated more slowly, because pressure removes visible growth without necessarily changing the moisture conditions. Second, the cheapest chemical is rarely the cheapest repair when runoff kills plants or an acid etches natural stone.
When Should You Hire a Professional?
Hire a professional when paving is historic, expensive, structurally loose, heavily stained, coated, or made from delicate natural stone. Professional help is also sensible when runoff could reach a pond, public drain, neighboring property, or large planting bed.
Request the proposed chemical name, dilution, runoff controls, surface-specific method, and joint-repair plan. A contractor who promises one pressure setting or one chemical for every paving material is not providing a sufficiently controlled specification.
FAQ
Will moss die without sunlight?
Moss can survive extended shade, but it needs moisture and a suitable surface to remain established. Removing moss without reducing dampness usually produces temporary results. Better airflow, leaf removal, drainage correction, and stable dry joints reduce the conditions that allow surviving fragments to recolonize.
Can I clean a patio just before rain?
Do not apply a product immediately before rain unless its label specifically permits that weather window. Rain can dilute the treatment, spread contaminated runoff, or rinse away a residual biocide before it works. A dry period long enough to meet the label’s contact requirement is safer.
Is vinegar safe for limestone paving?
Vinegar is not safe for limestone because acetic acid reacts with calcium carbonate and can etch or dull the surface. Vinegar may also damage cement-based joints and nearby plants. Use a limestone-compatible product after a patch test instead.
How often should a shaded patio be cleaned?
A shaded patio commonly needs inspection every few months and treatment once or twice yearly, although wet climates and tree cover may require more frequent maintenance. Remove leaves weekly during the wet season so organic debris does not hold moisture against the paving.
Can I use a wire brush on patio slabs?
Use a wire brush only after confirming that the paving can tolerate abrasion. Wire bristles can scratch polished stone, remove soft sandstone, mark painted concrete, and damage joint edges. A stiff nylon brush is the safer default for unknown or delicate surfaces.
Should I seal a patio after removing moss?
Seal a patio only when the paving manufacturer approves the product and the surface is clean, dry, structurally sound, and free of active growth. Sealing can reduce absorption on suitable porous surfaces, but it cannot fix blocked drainage, excessive shade, or defective joints.
The Bottom Line
The most reliable way to remove stubborn algae and moss from shaded patios is to scrape dry growth, patch-test a compatible treatment, apply it according to its label, agitate resistant areas gently, rinse only when required, and restore damaged joints. For lasting results, improve drainage, airflow, leaf control, and drying time. Surface safety matters more than maximum chemical strength or water pressure.