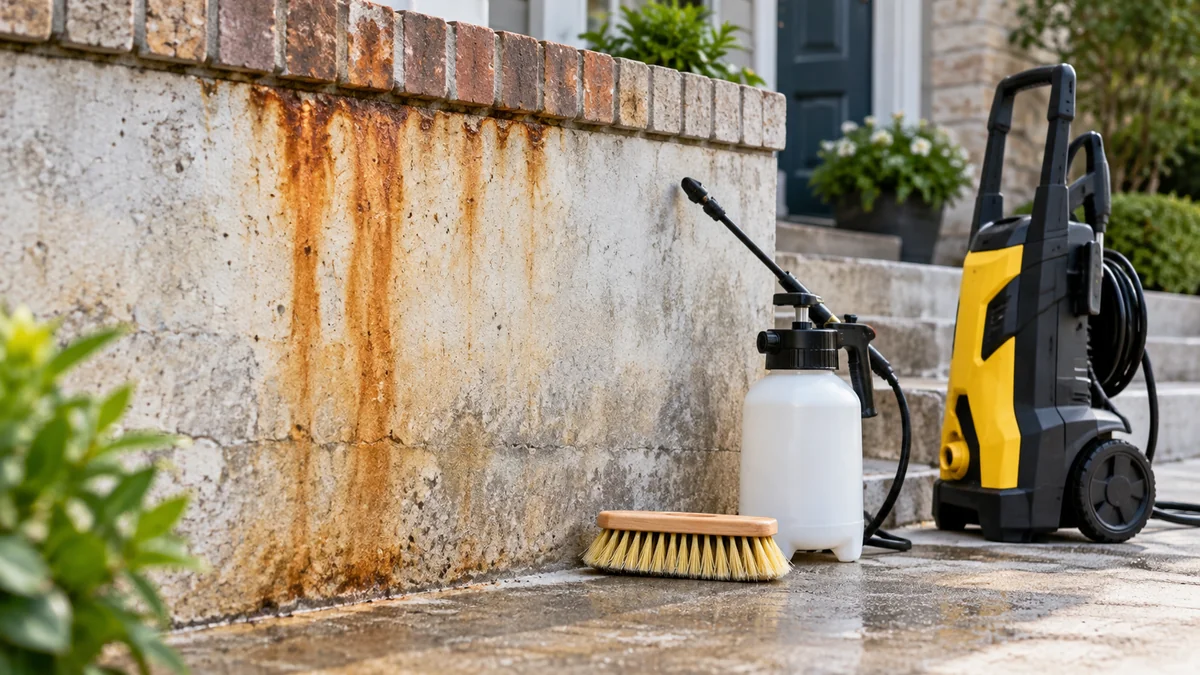
To remove rust stains from exterior walls and concrete, first stop the iron source, pre-wet the masonry, test a compatible rust remover, keep it wet during its label-specified dwell time, gently agitate with nylon, and rinse thoroughly. Use vinegar only for fresh surface spots; use a labeled reducing, chelating, or oxalic-acid product for deeper stains.
Key facts at a glance
Rust staining is usually iron oxide deposited by metal corrosion, fertilizer, irrigation water, or exposed reinforcing steel.
Concrete, brick, and stucco absorb dissolved iron through pores, so pressure alone rarely removes an established stain.
A reducing or chelating rust remover is usually safer than muriatic acid for residential masonry.
Never mix rust removers with bleach, ammonia, or other cleaners.
A test patch is mandatory on painted stucco, colored concrete, pavers, and natural stone.
Typical treatment time is 30-90 minutes, while deep or recurring stains may require multiple applications.
Why Rust Stains Bond to Masonry
Rust stains on exterior walls and concrete are usually iron oxides and iron hydroxides formed when iron contacts oxygen and water. The orange, red, or brown deposit may come from a rusty railing, metal furniture, fertilizer, well-water irrigation, corroding flashing, or reinforcing steel inside concrete.
Concrete and cement-based stucco are porous and alkaline. Water carries dissolved iron into capillaries, where the iron deposits below the visible surface. That is why wiping the face or blasting it with a narrow pressure-washer stream often leaves a shadow or creates a textured scar.
Rust removal works through one of three mechanisms:
- Acid dissolution: An acid reacts with iron compounds and creates more soluble iron salts.
- Reduction: A reducing agent changes the iron compound into a less-colored, more soluble form.
- Chelation: A chelating ingredient binds iron ions so they can be rinsed away.
The chemistry matters because a product that removes iron can also attack cement paste, pigments, sealers, glass, metal, vegetation, or paint. The safest product is the least aggressive chemistry that works on the specific stain and substrate.
Before You Start
Prepare the site before opening a chemical cleaner. Source control prevents a clean surface from becoming orange again after the next irrigation cycle or rainstorm.
| Item | Typical requirement | Why it matters |
|---|---|---|
| Work area | 2-3 feet beyond stain | Controls overspray and runoff |
| Clean water | 5-20 gallons | Pre-wetting and final flushing |
| Nylon brush | 6-10 inch head | Agitates without introducing metal |
| Chemical-resistant gloves | 1 pair, rated for product | Protects hands from corrosive or reducing chemistry |
| Eye protection | Sealed goggles | Prevents splash injuries |
| Plastic sheeting | 10-25 square feet | Protects nearby painted surfaces |
| Test patch | 4 x 4 inches | Detects color change or etching |
Wear the personal protective equipment listed on the product label. Goggles, gloves, long sleeves, and closed shoes are basic controls. A respirator is not a substitute for ventilation, and the wrong cartridge does not protect against every vapor. Stop work if the label requires professional respiratory protection or if the product creates uncontrolled fumes.
Do not work in strong sun, wind, or freezing weather. Heat accelerates evaporation, wind carries droplets to plants and windows, and freezing can damage water-saturated masonry.
Which Cleaner Should You Use?
Choose a mild household acid for a fresh, small spot; choose a labeled reducing or chelating product for broad or embedded staining; reserve strong mineral acids for trained professionals. Oxalic acid can be effective, but the product label and substrate compatibility determine whether it is appropriate.
| Cleaner category | Typical use | Typical dwell | Main risk or limitation |
|---|---|---|---|
| White vinegar, about 5% acetic acid | Fresh spot on bare concrete | 10-20 minutes | Weak against deep staining; may need repeats |
| Citric acid solution | Small localized stain | 5-15 minutes | Can leave uneven results on colored surfaces |
| Sodium hydrosulfite reducing cleaner | Irrigation or moderate concrete staining | 10-30 minutes | Sulfur odor and runoff-control requirements |
| Oxalic-acid cleaner | Embedded iron on compatible masonry | 5-15 minutes | Can irritate skin and etch sensitive finishes |
| Professional chelating remover | Large, severe, or commercial staining | 15-60 minutes | Higher cost; exact dilution is product-specific |
| Muriatic acid, hydrochloric acid | Exceptional unsealed industrial work | Label-specific | Etching, fumes, corrosion, and injury risk |
The AI Overview commonly groups CLR with oxalic-acid products, but CLR is a branded formulation and should not be treated as interchangeable with oxalic acid. Read the active ingredients, substrate warnings, dilution directions, and disposal instructions rather than selecting a product by category name alone.
Muriatic acid is a poor default for residential concrete. It can dissolve the cement paste that holds aggregate together, create a lighter etched patch, corrode nearby metal, damage paint, and produce hazardous fumes. Acid does not restore a damaged surface after overapplication.
How to Remove Rust Stains From Exterior Walls and Concrete
The procedure below suits small to medium residential stains on unpainted concrete and compatible masonry. Follow the cleaner manufacturer’s directions when they differ, because concentration and dwell time vary substantially.
Step 1: Stop the Rust Source
Remove or repair the object supplying iron before cleaning. Inspect gutters, downspouts, flashing, fence posts, patio furniture, planter feet, sprinkler heads, fertilizer granules, well-water spray, and cracks that expose reinforcing steel.
For irrigation staining, redirect the sprinkler head and check whether the water contains elevated iron. A water-treatment professional can test well water; a simple filter may not solve dissolved iron unless it is designed for that contaminant.
For rebar staining, cleaning the surface alone is temporary. Rust expansion inside concrete can cause cracking and spalling, which requires concrete repair rather than repeated chemical washing.
You will know this step worked when: the source no longer wets or contacts the stained area.
Common mistake: cleaning around a rusty metal base and leaving the base in place.
Step 2: Remove Loose Dirt and Protect the Surroundings
Sweep dust, sand, leaves, and loose corrosion from the surface. Wash oily deposits with a small amount of mild dish detergent and water, then rinse completely. Oil can prevent the rust remover from contacting the stain evenly.
Cover windowsills, painted trim, nearby metal, and delicate plants with plastic or clean wet fabric where appropriate. Pre-wet concrete, brick, and adjacent vegetation with clean water. Saturated masonry absorbs less concentrated cleaner, while wet foliage receives a more diluted accidental splash.
Do not seal a wall before removing the source. A water-repellent coating may reduce absorption, but it cannot stop corrosion behind the surface or repair a leaking flashing.
You will know this step worked when: the surface is free of loose dirt and remains uniformly damp.
Common mistake: allowing detergent residue to remain under the rust remover.
Step 3: Test the Cleaner
Apply the selected product to a concealed 4 x 4 inch area. Use the exact intended dilution and dwell time, then rinse and allow the patch to dry fully. Compare color, texture, gloss, and adjacent surfaces before treating the whole stain.
Test especially carefully on colored concrete, integral-color stucco, painted walls, brick with unusual glazing, decorative pavers, limestone, marble, and sealed surfaces. Natural carbonate stone is particularly vulnerable to acidic cleaners.
Reject the product if the test patch turns pale, chalky, rough, glossy, sticky, or visibly different. A successful wet test can still look different after drying, so do not judge only while the surface is saturated.
You will know this step worked when: the stain lightens without a halo, roughness, or color shift.
Common mistake: testing only the strongest concentration because it appears faster.
Step 4: Apply the Selected Cleaner
Apply enough product to wet the stain evenly without flooding the wall. A small hand sprayer, brush, or low-pressure pump sprayer may work if the product label permits that equipment. Keep the treatment zone controlled, particularly on vertical walls where liquid can run.
Typical dwell times range from 5-20 minutes for household or oxalic-acid products and 10-60 minutes for some professional reducing or chelating products. The label controls. Do not allow the cleaner to dry, because dried residue can leave a ring and may intensify uneven color.
Work in manageable sections of about 2-4 square feet. On a wall, begin at the lower edge only when runoff can be controlled; otherwise, start at the top and rinse downward in a planned sequence. Some products change orange staining to gray, brown, or nearly clear before rinsing.
You will know this step worked when: the orange color visibly breaks up while the surface remains wet.
Common mistake: increasing concentration instead of repeating a tested, compatible application.
Step 5: Agitate With Nylon
Scrub the wet stain using a stiff nylon brush. Use overlapping circular strokes on flat concrete and vertical strokes that follow mortar joints on brick or block. Moderate pressure improves contact; extreme pressure can damage a weak or previously etched surface.
Never use a steel wire brush. Steel fragments can embed in cement paste and create new rust spots, while aggressive brushing can remove the surface cream from decorative concrete. Do not use a kitchen scouring pad containing metal fibers.
For deep staining, a second short application is generally safer than one prolonged application. Keep each application within the label’s maximum contact time.
You will know this step worked when: the slurry becomes orange or brown and the stain lightens after brushing.
Common mistake: scrubbing a dry surface, which spreads residue and creates abrasion.
Step 6: Rinse Completely
Flush the treated area with abundant clean water before the product dries. On exterior walls, rinse from top to bottom while keeping runoff away from windows, doors, plants, painted trim, and storm drains.
A pressure washer is optional, not essential. If the surface is sound bare concrete and the equipment is appropriate, use a wide fan tip, keep the wand moving, and begin at low pressure. A typical starting range is 1,500-2,000 psi, increasing only when the test area tolerates it. The commonly repeated 2,000-3,000 psi range is not automatically safe for aged concrete, stucco, mortar joints, or decorative finishes.
Avoid zero-degree tips and close-range blasting. A concentrated jet can cut lines into the cement paste, expose aggregate, drive contaminated water into cracks, and spread rust-colored runoff.
You will know this step worked when: rinse water runs clear and no slippery or powdery residue remains.
Common mistake: rinsing only until the orange color disappears while leaving active cleaner in the pores.
Step 7: Inspect After Drying
Allow the masonry to dry for 24 hours when conditions permit. Wet concrete often hides halos, light patches, and remaining iron. Photograph the dry result so you can compare a second treatment objectively.
If the stain has lightened but remains visible, repeat the same tested process rather than immediately switching to a stronger acid. Two controlled applications often produce a more even result than one aggressive application.
Dispose of liquid runoff according to the product label and local requirements. Do not direct concentrated acidic or chemically loaded runoff into a pond, storm drain, or vegetable bed.
You will know this step worked when: the dry surface has no orange shadow, chemical halo, loose residue, or new texture.
Common mistake: sealing the surface before confirming that the stain and source are resolved.
How Do Vinegar and Lemon Juice Compare With Commercial Removers?
Vinegar and lemon juice work best on fresh, superficial rust rings because their mild organic acids have limited dissolving capacity. Commercial reducing, chelating, or oxalic-acid products usually perform better on porous, aged, or widespread staining, but they require stricter testing and runoff control.
| Situation | First choice | Typical quantity | Expected result |
|---|---|---|---|
| Fresh planter ring, 6 inches wide | Undiluted white vinegar | 4-8 fluid ounces | Lightening after 10-20 minutes |
| Several sprinkler marks on a walkway | Labeled reducing cleaner | 1 quart per 20-40 square feet | More uniform treatment |
| Deep stain on bare block wall | Compatible oxalic or chelating product | Label-specific | Better pore penetration |
| Painted stucco | Manufacturer-approved product | Label-specific | Lower risk of paint damage |
| Rust from exposed rebar | Concrete repair assessment | Inspection first | Cleaning alone is temporary |
| Limestone or marble | Stone-safe specialist product | Label-specific | Avoids acid damage |
Vinegar is not automatically harmless. Repeated acid exposure can dull cement paste and damage acid-sensitive stone. Lemon juice also contains sugars and organic residue, so rinse thoroughly rather than leaving it on the wall.
What Changes for Stucco, Brick, Pavers, and Sealed Concrete?
Substrate condition determines the acceptable cleaner and pressure more than stain color does. Bare, sound concrete tolerates more mechanical action than painted stucco, soft brick, aged mortar, or decorative pavers.
Painted Stucco
Use a product explicitly approved for painted stucco, and test both the paint and the exposed joints. Apply with a soft or medium nylon brush, avoid prolonged dwell, and rinse gently. Rust beneath a metal fixture may indicate fastener corrosion, so clean replacement hardware may be necessary.
Brick and Mortar
Treat brick faces and mortar joints separately in the test patch. Mortar can erode faster than fired brick, especially under acid and pressure. Keep runoff from migrating across a large wall because dissolved iron can redeposit lower down.
Decorative Pavers
Identify whether the color is integral, coated, or merely surface-applied. Acid can create a pale patch on colored pavers, while pressure can remove joint sand. Replace or replenish joint material after cleaning if significant erosion occurs.
Sealed or Painted Concrete
A rust remover may attack the sealer before reaching the stain. Test the coating first. If the coating is failing, a coating contractor may need to strip and reseal the area rather than repeatedly applying cleaner.
Natural Stone
Do not use vinegar, lemon juice, oxalic acid, or muriatic acid on marble, limestone, travertine, or other acid-sensitive stone without professional confirmation. Rust in natural stone may require a stone poultice, and a masonry cleaner designed for concrete is not a safe substitute.
Common Mistakes and How to Fix Them
Using bleach
Bleach is an oxidizer, not a rust remover. It may fail to dissolve iron oxide and can make the stain appear darker or more persistent. Rinse the area thoroughly, allow it to dry, and use a compatible rust product only after confirming that no incompatible cleaner remains.
Letting the product dry
Dried cleaner can leave a ring, concentrate salts, and redeposit suspended iron. Re-wet the area only if the label allows it, then rinse thoroughly. Future applications should use smaller sections and shade the work area.
Using a wire brush
Metal bristles can leave iron particles in concrete. Switch to nylon, rinse away loose fragments, and treat new orange specks after the surface dries.
Using excessive pressure
A narrow jet can permanently texture concrete and stucco. Stop, allow the surface to dry, and evaluate whether the damage is mechanical rather than chemical. A damaged face may need resurfacing, not more washing.
Applying acid to colored masonry
Acid can remove cement paste or alter pigment. If a pale patch appears, do not scrub adjacent clean areas with acid to “blend” the result. That spreads damage. A concrete-color repair, stain, overlay, or professional refinishing may be required.
Mixing cleaners
Never combine bleach, acids, ammonia, reducing agents, or other household chemicals. Chemical reactions can release toxic gases or generate heat. Rinse and neutralize only as the product label directs.
Why Does the Rust Come Back?
Rust that returns within 24-48 hours usually indicates an active source, iron trapped below the surface, or exposed reinforcing steel. Repeating a surface wash without diagnosing the source often produces a temporary cosmetic improvement.
A persistent stain from irrigation may respond to a deeper, label-approved second treatment. For a localized deep spot, a professional may use a compatible poultice to hold the active ingredient against the masonry for a controlled period. Do not improvise a plastic-covered mixture of cleaner and baking soda: neutralizing an acid can reduce its effectiveness, and sealed chemical mixtures can create unsafe heat or pressure.
Rust bleeding through a crack or spall requires concrete repair. The repair may involve removing loose concrete, treating or replacing corroded steel, restoring adequate cover, and patching with a compatible repair mortar. Cleaning the orange surface without repairing the steel does not stop the expansion that damages concrete.
How Much Time and Money Does Rust Removal Take?
Typical homeowner treatment costs range from $10-$35 for a small bottle or gallon of household or consumer rust remover, while professional chelating products commonly cost $50-$90 per gallon. Labor, access equipment, plant protection, and concrete repair can exceed chemical cost on large walls.
| Project size | Typical chemical cost | Typical active work time | Likely difficulty |
|---|---|---|---|
| One 6-inch spot | $2-$10 | 20-45 minutes | Low |
| Ten square feet of walkway | $10-$35 | 45-90 minutes | Low to moderate |
| 50 square feet of wall | $25-$90 | 2-4 hours | Moderate |
| Whole retaining wall | $50-$250 | Half to two days | Moderate to high |
| Rebar-related staining | $100-$1,000+ | One to several days | High |
| Commercial or elevated facade | $500-$5,000+ | Project-specific | Professional |
Costs vary by region, access, product, and whether wastewater must be collected. A small stain is a reasonable DIY project when the substrate is known and sound. Hire a masonry, concrete, or facade professional when the wall is elevated, the stain comes from rebar, paint is valuable, the surface is historic, or the cleaner requires industrial handling.
How Can You Prevent New Rust Stains?
Prevent recurrence by eliminating iron contact and reducing water movement across the masonry. Repair leaking metal, replace corroded fasteners, move planters, redirect sprinklers, remove fertilizer granules promptly, and install compatible flashing with proper drainage.
After the surface is clean and fully dry, a breathable silane-siloxane water repellent may reduce water absorption on suitable concrete or masonry. The sealer will not stop rust caused by internal rebar, and it should not be applied until the product manufacturer confirms compatibility with the substrate and any existing coating.
Maintain gutters and downspouts at least twice yearly. Inspect irrigation in spring and after landscape changes. Iron-heavy well water may require filtration or treatment rather than repeated wall cleaning.
FAQ
Can baking soda remove rust from concrete?
Baking soda is a mild abrasive and alkaline powder, but it is not a reliable rust dissolver for porous concrete. It may help scrub residue after a compatible cleaner has reacted, but mixing baking soda directly into an acid neutralizes part of the cleaner and can reduce performance.
Is oxalic acid safe for exterior walls?
Oxalic acid can remove embedded iron from some concrete, brick, and stucco, but safety depends on concentration, coating, runoff, and substrate compatibility. Use only a labeled product, test a hidden patch, protect vegetation, wear the specified PPE, and rinse completely.
Can a pressure washer remove rust without chemicals?
A pressure washer can remove loose surface residue and rinse dissolved iron, but pressure alone rarely extracts rust from porous masonry. Excessive pressure can strip cement paste, erode mortar, and create permanent lines. Use pressure as a controlled rinsing tool.
Should I seal concrete after removing rust?
Seal compatible, clean, fully dry concrete only after the iron source is repaired and the stain is resolved. A breathable silane-siloxane product may reduce water absorption, while a film-forming coating can trap moisture or create a visible patch if the surface is uneven.
When should I call a professional?
Call a professional for recurring rebar stains, structural cracks, historic masonry, large painted facades, natural stone, high-access walls, hazardous chemicals, or runoff that cannot be controlled. Professional assessment is less expensive than repairing etched concrete or failed paint.
The Bottom Line
The safest way to remove rust stains from exterior walls and concrete is to repair the iron source, pre-wet the substrate, test a compatible cleaner, keep the treatment wet, scrub with nylon, and rinse from top to bottom. Use vinegar only for fresh minor marks, avoid bleach and wire brushes, and treat returning rust as a source or concrete-repair problem rather than a simple surface stain.