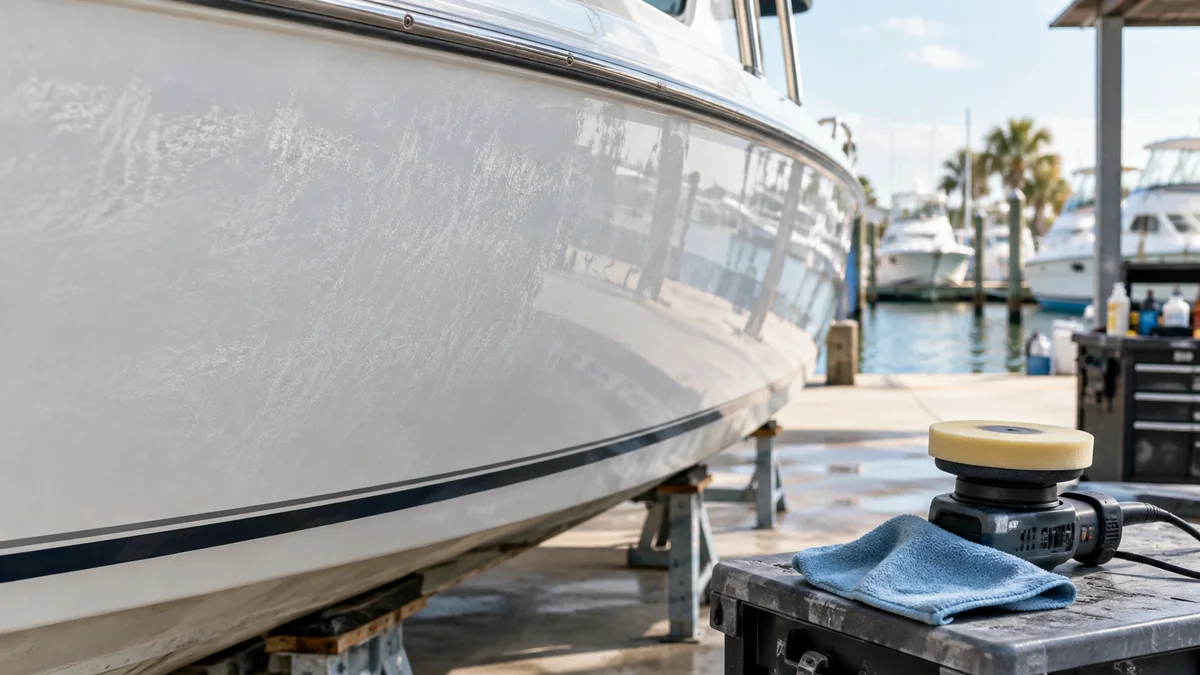
To remove oxidation from gelcoat, wash and decontaminate the surface, wet sand only severe chalking, compound away the degraded resin, polish the restored surface, and apply UV protection. A dual-action polisher is the safest machine for most owners. The decisive factor is matching abrasion to oxidation severity without overheating or thinning the gelcoat unnecessarily.
Key Facts
Light oxidation usually responds to a cleaner wax or mild polish, while chalky gelcoat requires abrasive compounding.
Severe oxidation may need wet sanding from approximately 600 through 1500 grit before polishing.
Gelcoat restoration removes degraded surface material; chemical restorers mainly darken and temporarily mask it.
A clean, cool surface and a moving pad prevent most buffer burns and holograms.
Wax commonly protects for weeks to several months; marine sealants and ceramic coatings can last longer when correctly prepared.
A test section is the safest way to select the least aggressive process that produces the required finish.
What Causes Gelcoat Oxidation?
Gelcoat oxidation occurs when ultraviolet radiation, oxygen, moisture, heat, and weathering break down the resin at the exposed surface. The damaged resin loses gloss and becomes porous, producing a white, gray, yellowed, or faded layer that can transfer to a finger or cloth.
Gelcoat is a pigmented polyester or vinyl ester surface layer, not automotive clear coat. Many boat gelcoat layers are approximately 15-25 mils thick, although construction, repairs, mold finish, and previous polishing can produce substantial variation. Do not treat the quoted thickness as permission to remove a fixed amount of material.
The restoration objective is simple: remove or level the degraded surface until intact gelcoat appears, then refine the abrasive marks and protect the surface. A penetrating color restorer does not accomplish the same thing because oils or polymers can fill pores without removing oxidized resin.
How Can You Tell How Severe the Oxidation Is?
Use appearance, texture, and transfer together. A slight haze on a smooth surface is light oxidation; a dry, chalky film with obvious fading is moderate oxidation; rough, deeply pitted, or yellowed gelcoat indicates severe oxidation.
Wash a small area first, then rub it with a clean white microfiber towel. A white powder transfer indicates oxidation, but transfer alone does not establish how deeply the gelcoat has deteriorated. Inspect corners, rub rails, previous repairs, and raised lettering separately because those areas often have less material and receive more heat.
| Oxidation level | Typical signs | First method | Typical working time |
|---|---|---|---|
| Light | Slight haze, smooth touch, minor color loss | Cleaner wax or mild polish | 15-30 minutes per 2-square-foot test area |
| Moderate | Noticeable chalk, fading, dry texture | Heavy compound and wool or microfiber cutting pad | 30-60 minutes per 2-square-foot area |
| Severe | Rough chalkboard feel, pitting, heavy white transfer | Wet sanding, compounding, polishing | 60-120 minutes per 2-square-foot area |
| Failed gelcoat | Exposed fibers, pinholes, cracks, peeling repair | Repair or refinish before polishing | Multiple repair sessions |
What Do You Need Before Removing Oxidation?
Prepare a wash bucket, marine soap, microfiber towels, soft and medium brushes, masking tape, compound, polish, pads, and a suitable protective product. Severe oxidation additionally requires waterproof silicon-carbide abrasive paper, a flexible sanding block, clean rinse water, and a way to keep the surface wet.
Wear eye protection, gloves, hearing protection around polishers, and a suitable respirator when product labels require one. Oxidized residue and compound dust should not be inhaled. Mask window seals, graphics, nonskid boundaries, metal fittings, caulking, and unpainted plastics before machine work begins.
| Item | Typical quantity or specification | Purpose |
|---|---|---|
| Marine soap | 30-60 milliliters per 15 liters of water | Removes salt and soil |
| Microfiber towels | 8-12 towels for a medium boat | Separates drying, compound, polish, and protection tasks |
| DA polisher | 8-15 millimeter throw, 5-6 inch backing plate | Safer correction for beginners |
| Cutting pad | 1-2 wool or microfiber pads per work area | Removes oxidation efficiently |
| Finishing pad | 2-4 foam pads | Refines haze and micro-marring |
| Abrasive paper | 600, 800, 1000, 1200, 1500 grit | Severe oxidation only |
| Compound | 250-500 milliliters for a medium project | Levels oxidized resin |
| Marine protection | 250-500 milliliters or one coating kit | Slows UV and oxygen exposure |
A rotary buffer can correct gelcoat quickly, but it generates heat faster and can leave holograms. A DA polisher generally offers a slower, more controllable learning curve. Neither machine can repair missing gelcoat, structural cracks, or exposed fiberglass.
How to Remove Oxidation From Gelcoat
The safest procedure uses the least aggressive method that produces a uniform, glossy test result. Complete a 2-by-2-foot test area before treating the entire hull, because color, resin formulation, previous repairs, and oxidation depth vary across one boat or RV.
Step 1: Wash and Decontaminate the Surface
Wash the gelcoat with marine soap, rinse thoroughly, and remove mineral, rust, and tannin stains before abrasion. Use a soft microfiber mitt on smooth panels and a dedicated brush on molded nonskid, then dry the surface completely before polishing.
Work in shade with the panel cool to the touch. A hull can retain enough heat after washing to make compound dry prematurely. An oxalic-acid hull cleaner can help with rust and tannin staining, but follow its label, protect nearby metal, avoid prolonged dwell time, and rinse until no cleaner remains.
Do not use a wax-containing wash before compounding. Wax can clog pads and make the surface appear more corrected than it is. If old wax or greasy dressing remains, use the manufacturer’s approved surface cleaner or a mild solvent wipe on a small test area.
You will know it worked when: the surface feels clean and does not leave visible grit under a plastic bag or clean fingertip.
Common mistake: polishing over salt crystals or sand. The abrasive debris becomes embedded in the pad and creates random scratches.
Step 2: Wet Sand Severe Oxidation Only
Wet sand only when heavy compound cannot quickly remove the chalk or when the surface is deeply rough and pitted. Start with the finest grit that works, usually 800 or 1000 for moderate severe oxidation, and reserve 600 grit for heavy chalking that resists finer paper.
Soak waterproof silicon-carbide paper, keep the panel continuously wet, and use a flexible sanding block on broad flat areas. Sand in short, overlapping straight passes, changing direction between grits so remaining scratches are easy to identify. Rinse the paper and panel frequently.
A practical progression is 600, 800, 1000, 1200, and 1500 grit, but not every project needs every grade. Stop when the chalk is gone and the panel shows an even matte finish. Sanding deeper does not compensate for skipped grits.
Avoid sharp corners, molded edges, gelcoat pinstripes, and thin repair areas. These locations can be polished by hand or lightly refined with a softer process after the adjacent panel is complete.
You will know it worked when: the surface has an even matte appearance without glossy islands, deep sanding lines, or remaining chalk.
Common mistake: starting with 400 grit because it cuts quickly. Coarse paper can create scratches that require substantial additional material removal to erase.
Step 3: Compound Away the Oxidized Layer
Apply marine compound with a wool, microfiber, or manufacturer-approved cutting pad, working a 2-by-2-foot section at a time. Spread the product at low speed, then use moderate pressure and slow crosshatch passes while keeping the pad flat and moving.
A typical rotary setting is approximately 1200-1500 revolutions per minute for initial correction. A DA polisher commonly works around speed 5-6, but machine settings differ, so pad movement and panel temperature matter more than a single number.
Use several small drops rather than flooding the pad. Clean the pad after each small section with a pad brush or compressed air, and change pads when the face becomes saturated. Spent compound and dead gelcoat create caking, which reduces cutting and increases heat.
You will know it worked when: wiping the residue reveals restored color and gloss without a milky film or obvious sanding scratches.
Common mistake: holding the machine on one spot. If the panel becomes too hot to comfortably touch, stop, move to another section, and allow the surface to cool.
Step 4: Polish Away Haze and Holograms
Polish the compounded surface with a clean medium or fine foam pad and a marine finishing polish. Use lighter pressure, smaller product quantities, and slower passes than during cutting, because the purpose is to refine the surface rather than remove substantial material.
A rotary buffer may leave holograms, especially on dark gelcoat. A DA polisher with a foam finishing pad often reduces that pattern more predictably. Wipe residue with a clean, short-pile microfiber towel and inspect the panel from several angles in direct but controlled light.
Do not judge the finish through oily residue. A small surface wipe compatible with the polish can reveal whether haze remains, but test solvent compatibility on an inconspicuous area first.
You will know it worked when: the panel has uniform reflected light, no compound haze, and no visible crosshatch scratches at the inspection angle.
Common mistake: using the same dirty cutting pad for finishing. A contaminated pad can reintroduce coarse abrasive particles and undo the previous step.
Step 5: Seal the Restored Gelcoat
Protect the corrected gelcoat immediately with a marine wax, polymer sealant, or compatible ceramic coating. Freshly polished gelcoat is more vulnerable to UV exposure and contamination than a protected surface, and the protection product cannot correct remaining oxidation.
Apply wax or sealant in thin, even layers according to its label. Allow the required cure time before water exposure. Ceramic coatings demand more exact preparation because oils, residue, humidity, and application temperature can affect bonding and high spots.
Marine wax is inexpensive and easy to renew, but typical service intervals may be 1-3 months in intense sun or frequent use. Polymer sealants commonly last several months. Marine ceramic coatings may last approximately 12-24 months under favorable preparation and maintenance conditions, but manufacturer warranties and real-world durability vary.
You will know it worked when: water behavior becomes uniform and the finish remains clear after residue removal, without streaks or high spots.
Common mistake: applying protection over unremoved oxidation. The surface may look darker temporarily, but the chalk will continue degrading beneath or around the product.
Which Restoration Method Should You Choose?
Choose a cleaner wax for light haze, mechanical correction for genuine oxidation, and wet sanding only for severe chalking that resists compounding. Chemical restorers are a short-term appearance option, not a permanent substitute for removing degraded gelcoat.
| Method | Material removal | Typical durability | Best use | Main limitation |
|---|---|---|---|---|
| Cleaner wax | Low, approximately surface-level polishing | 1-3 months | Light annual haze | Cannot level deep chalk |
| Chemical restorer | None or negligible | 4-12 weeks in strong sun | Temporary color improvement | Masks rather than removes oxidation |
| Compound and polish | Controlled abrasive removal | 3-12 months before maintenance, protection dependent | Moderate oxidation | Requires machine control |
| Wet sand, compound, polish | Highest controlled removal | 6-24 months with protection | Severe rough oxidation | Highest risk and labor |
| Ceramic coating | No correction by itself | Approximately 12-24 months | Prepared gelcoat needing longer protection | Reveals preparation flaws |
Chemical restorer has a legitimate limited use. It can improve a large, lightly chalked surface when the owner needs a temporary appearance change before sale or a later refinish. It is a poor choice when the objective is long-term gloss, because the oxidized resin remains in place.
What Are the Costs and Time Requirements?
A typical DIY restoration costs approximately $150-$400 if the owner needs a DA polisher, pads, compound, polish, towels, and protection. A medium boat or RV with moderate oxidation commonly requires 12-24 labor hours, while severe correction can take substantially longer because wet sanding and repeated inspection slow the process.
Professional pricing is often quoted by boat length, panel area, condition, access, and whether nonskid, graphics, and hardware require separate work. A typical marine restoration range is approximately $25-$75 per linear foot, but local labor rates and the amount of repair can move the final price considerably.
| Project condition | DIY consumables | Typical labor | Typical professional range |
|---|---|---|---|
| Light haze, 20-foot boat | $60-$150 | 4-8 hours | $400-$900 |
| Moderate oxidation, 20-24-foot boat | $150-$400 | 12-24 hours | $800-$1,800 |
| Severe chalking, 20-24-foot boat | $200-$500 | 20-40 hours | $1,200-$2,500 |
| RV sidewall correction | $100-$350 | 8-20 hours | $600-$1,800 |
These are planning ranges, not fixed prices. A boat with easy trailer access and smooth white sides takes less time than a boat with dark gelcoat, nonskid decks, rails, graphics, and oxidation around every fitting.
What Changes for Dark Gelcoat, Nonskid, and RVs?
Dark gelcoat needs smaller test sections and stricter inspection because haze, holograms, and uneven color correction are more visible. Nonskid should rarely receive the same wool-pad process used on smooth topsides, since abrasive residue can lodge in the molded texture and alter traction or appearance.
For nonskid, clean deeply with a suitable brush and product, test a mild process, and avoid aggressive machine work unless the manufacturer or an experienced marine technician confirms compatibility. Painted RV panels also require identification before correction. Some RVs use fiberglass gelcoat, while others use painted aluminum, polyurethane, or clear-coated materials that cannot tolerate boat-gelcoat procedures.
Graphics, pinstripes, decals, and vinyl should be masked or treated according to their material. Aggressive compound can abrade printed graphics and soften exposed adhesive edges. Remove oxidation from the surrounding gelcoat first, then hand-finish close to the graphic.
Common Mistakes and How Do You Fix Them?
Dirty pads, excessive heat, direct sun, and skipped inspection cause most failed restorations. Recovery usually requires stopping the process, cleaning the surface, and returning to the least aggressive step that can correct the defect.
- The compound gums up.
Too much product, a hot panel, or a saturated pad usually causes sticky residue. Clean the pad, use less compound, cool the panel, and work a smaller section. - The finish has swirl marks or holograms.
A rotary buffer, dirty pad, or excessive pressure can create visible trails. Refine with a clean foam pad and finishing polish on a DA machine. - The gelcoat looks burned or smeared.
Excessive speed, a tilted pad, and stationary movement create localized heat. Stop immediately, let the panel cool, and inspect whether the defect is residue or actual resin damage. - Oxidation returns within weeks.
The surface may have been darkened by oils rather than corrected, or protection may have been omitted. Reclean the area, perform a test correction, and apply a compatible UV protectant. - Some patches remain dull after polishing.
Those areas may contain deep pitting, old repair material, paint, or gelcoat that has lost its pigment. Further abrasion may worsen the defect; assess whether filling, regelling, or repainting is appropriate. - Edges become lighter or expose another color.
Previous polishing may have thinned the gelcoat, especially along corners and molded ridges. Stop machine work on that area and consult a fiberglass repair professional.
When Should You Stop Polishing and Repair the Surface?
Stop polishing when the surface shows exposed fiberglass, structural cracks, deep crazing, open pinholes, peeling repairs, or color loss that remains after a controlled test correction. Abrasive restoration cannot replace missing resin or repair structural damage.
A professional repair may involve grinding damaged material, filling and fairing, applying new gelcoat, curing, sanding, and polishing. Repainting may be more practical when the gelcoat is broadly depleted, repeatedly repaired, or too thin for another correction cycle.
The most useful practitioner rule is to preserve material at edges and previous repairs. Broad flat panels usually tolerate correction better than transitions, corners, and hardware surrounds, where a small amount of additional abrasion can expose a different layer.
How Do You Keep Gelcoat From Oxidizing Again?
Maintain the restored surface with regular washing, prompt removal of salt and bird contamination, and renewed UV protection before the finish becomes chalky. Covered storage reduces ultraviolet exposure more effectively than relying on increasingly aggressive polishing.
A practical maintenance schedule is to wash after saltwater use, inspect quarterly, renew wax or sealant according to its actual water behavior and product instructions, and perform a small polish only when gloss begins to decline. Ceramic-coated surfaces still require washing and compatible maintenance products.
Avoid household abrasive cleaners, stiff metal brushes, automatic car washes, and solvent products that the gelcoat or graphics manufacturer does not approve. Prevention preserves more gelcoat than repeated heavy correction.
Frequently Asked Questions
Can I remove gelcoat oxidation by hand?
Hand application can improve light haze on a small panel, but moderate or severe oxidation usually requires machine-assisted compounding. Hand work removes material slowly and unevenly, so large panels may show inconsistent gloss. A DA polisher provides more uniform pressure and usually reduces fatigue without the heat risk of an uncontrolled rotary buffer.
Is 600 grit too aggressive for gelcoat?
Six-hundred-grit paper is appropriate only for severe, deeply chalked gelcoat that resists finer abrasive grades. It is unnecessarily aggressive for light or moderate oxidation and creates additional scratches that must be removed. Begin with 800, 1000, or compound whenever a test section proves that the milder method works.
Can I use automotive compound on a boat?
Some automotive compounds work on gelcoat, but marine compounds are formulated for the harder, thicker, and often more heavily oxidized surface found on boats. Check the product instructions and perform a test spot. Automotive finishing polish may refine gelcoat, while a mild automotive cleaner wax may be too weak for significant chalking.
Should I wax or ceramic-coat restored gelcoat?
Wax is the simplest low-cost choice and works well when the owner can renew it several times each season. A ceramic coating offers a longer maintenance interval only after thorough correction and residue removal. Ceramic protection does not hide sanding marks, oxidation, fisheyes, or uneven polishing, so preparation quality determines the result.
Can oxidation be removed from a gelcoat RV?
Yes, if the RV has an actual gelcoat or fiberglass exterior and the manufacturer permits polishing. First identify whether the panel is gelcoat, paint, or a clear-coated composite, because each substrate has different abrasion limits. Test an inconspicuous location, mask trim and graphics, and use a DA polisher before considering rotary correction.
The Bottom Line
The correct way to remove oxidation from gelcoat is to diagnose the severity, clean the surface, correct it with the least aggressive effective abrasion, refine the finish, and protect it immediately. Light haze may need only cleaner wax; moderate chalk usually needs compounding and polishing; severe oxidation may require wet sanding first. The durable result comes from removing degraded resin, not merely darkening it with a chemical restorer, and then maintaining the restored gelcoat against UV exposure.


