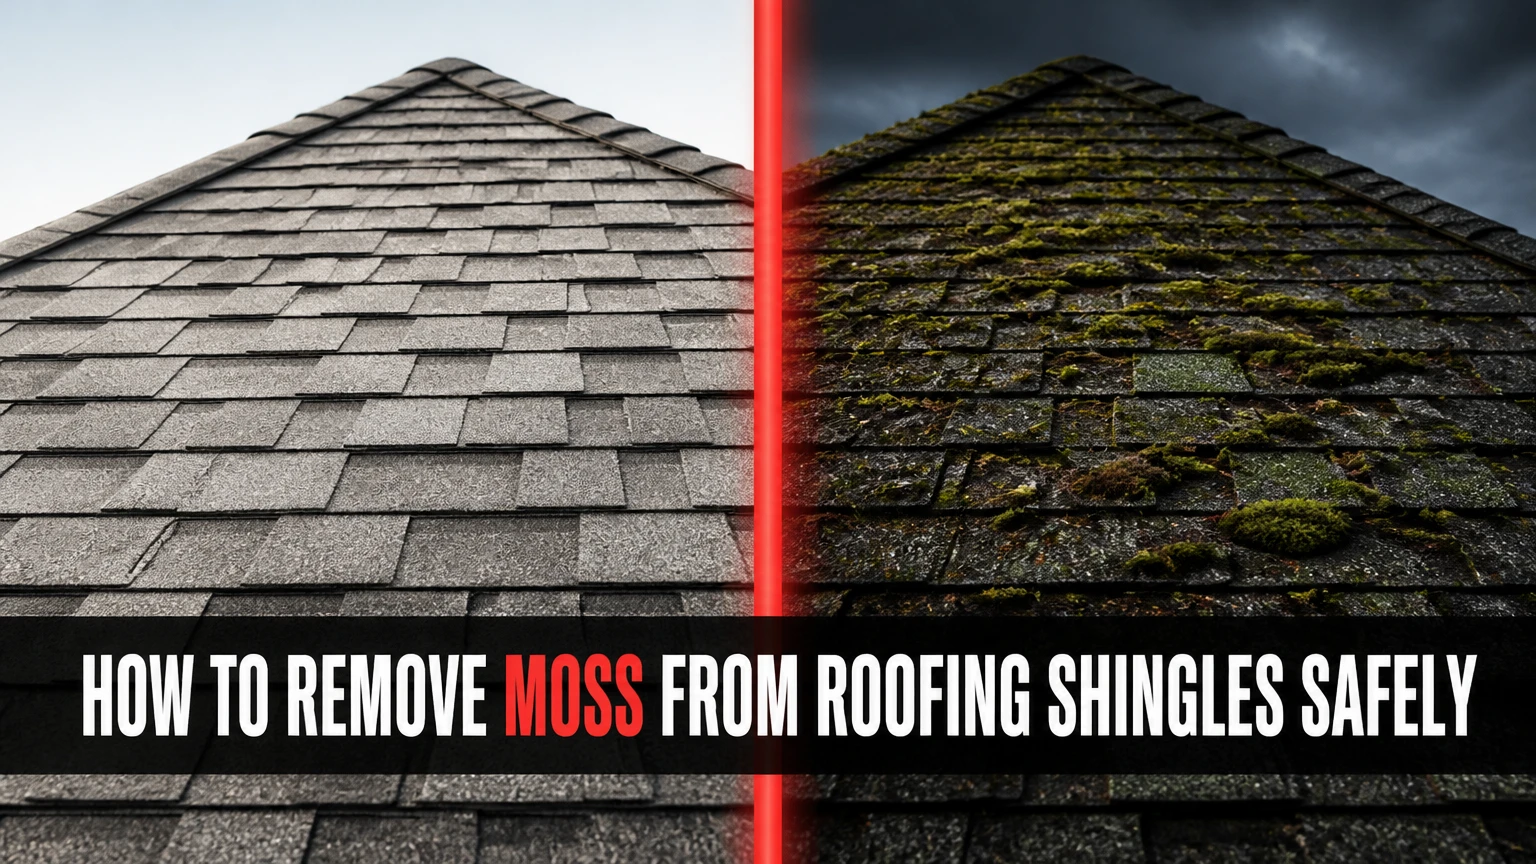
Remove moss from roofing shingles by killing the growth with a roof-safe, label-directed treatment, gently loosening dead material with a soft brush, and rinsing downward with low water pressure. Protect landscaping, avoid pressure washing and upward scrubbing, and hire a professional when the roof is steep, fragile, high, or visibly damaged.
Key facts at a glance
- Moss removal works best when treatment kills the growth before physical cleanup.
- A pressure washer can remove asphalt granules and force water beneath shingle courses.
- Roof moss often takes several days or weeks to die and detach after treatment.
- Work from the ridge toward the eaves, never from the eaves upward.
- Asphalt, wood, slate, clay, and concrete roofing require different cleaning precautions.
- Moss removal cannot repair rotten decking, failed flashing, missing shingles, or leaks.
Before You Start: Decide Whether DIY Is Safe
DIY roof moss removal is appropriate only when the roof is low enough, dry enough, and sound enough for safe access from the ground or a properly secured low-slope setup. A homeowner should stop and arrange a professional inspection for a steep roof, a two-story elevation, brittle shingles, loose tiles, active leaks, soft roof areas, or any situation requiring unsafe ladder positioning.
Roof access creates more risk than the moss itself. The Occupational Safety and Health Administration treats falls from roofs and ladders as serious workplace hazards, and residential workers use the same basic controls: stable access, fall protection, weather awareness, and a second person on the ground. A spotter does not replace a fall-arrest system or professional training.
When should you avoid climbing onto the roof?
Avoid climbing when the roof is wet, icy, windy, covered with loose granules, or shaded enough to remain slippery. Avoid walking on clay tiles, slate, wet wood shingles, or visibly curled asphalt shingles unless a roofing professional has the correct access equipment.
A roof pitch of 4:12 is not a universal legal cutoff for DIY work, but it is a useful caution point. A 4:12 roof rises 4 inches for every 12 inches of horizontal run; above that slope, footing becomes progressively less forgiving, especially when moss adds a wet, uneven surface.
What Moss Does to Roofing Shingles
Roof moss is a small, nonvascular plant that anchors to a surface through rhizoids rather than true roots. Moss absorbs water across its plant body, so shaded roof planes with leaf debris, slow drying, and poor airflow create favorable growing conditions.
Moss does not usually puncture a sound shingle like a tree root, but its anchoring structures and dense, wet growth can lift shingle edges and hold moisture against the roof covering. Repeated wetting, freezing, wind movement, and trapped debris can accelerate granule loss, decay in wood products, corrosion around metal components, and leakage through compromised laps.
The visible sequence is usually:
- Spores land on a shaded, damp roof surface.
- Debris holds water and organic material.
- Moss attaches to surface irregularities.
- Growth lifts or separates shingle edges.
- Wind-driven rain reaches vulnerable seams.
- The roof deck or underlayment begins to deteriorate.
Moss is different from algae and lichen. Algae commonly creates black or blue-green streaks without the thick, leafy texture of moss. Lichen combines a fungus and an alga or cyanobacterium and can attach more firmly than ordinary moss, making aggressive scraping especially damaging.
Which Moss Removal Method Is Safest?
A labeled, roof-compatible chemical treatment followed by natural detachment is generally safer for asphalt shingles than aggressive brushing or pressure washing. Manual work has a role when thick clumps must be removed, but the brush should loosen material rather than scour the shingle surface.
| Method | Typical material cost | Visible result | Main roof risk | Best use |
|---|---|---|---|---|
| Roof-safe commercial treatment | $25-$70 | 3 days-4 weeks | Incorrect chemical or runoff | Asphalt moss and light lichen |
| Oxygen-based treatment | $20-$60 | 1-4 weeks | Product incompatibility | Plant-conscious cleaning |
| Gentle manual removal | $15-$40 | Same day | Granule or seal-strip loss | Loose surface clumps |
| Professional soft washing | $400-$1,000 | Same day-4 weeks | Poorly trained contractor | High, steep, fragile, or large roofs |
Prices are typical U.S. homeowner ranges, not guaranteed quotes. Roof size, access, local labor rates, treatment severity, landscaping, and necessary repairs can change the total substantially.
Why pressure washing damages shingles
Pressure washing can strip ceramic-coated asphalt granules, erode the mat, break adhesive seals, and drive water beneath overlapping courses. The roof may look clean immediately while losing weather resistance that cannot be restored with another cleaning.
The Asphalt Roofing Manufacturers Association and major shingle manufacturers generally discourage high-pressure cleaning of asphalt shingles. A low-pressure application system is different from blasting: the chemical does most of the killing, while water provides controlled rinsing.
Is bleach the best moss killer?
Bleach can kill and discolor organic growth quickly, but chlorine runoff can injure plants, damage some metals, irritate skin and lungs, and create problems when used outside its product label. Bleach is not automatically the best treatment for every roof or landscape.
Never mix chlorine bleach with ammonia, acids, vinegar, or unknown cleaners. Do not assume dish soap belongs in a bleach solution. A commercial roof treatment with a clear roof-material label is easier to control, and its instructions take priority over generic internet recipes.
Step 1: Inspect the Roof and Protect the Site
Inspect the roof from the ground first, then inspect accessible attic areas for stains, daylight, damp insulation, or musty odors. Photograph lifted shingles, missing granules, cracked tiles, damaged flashing, and moss concentrated around valleys, chimneys, and gutters before cleaning.
Gather these materials:
- Roof-labeled moss treatment, enough for the measured roof area
- Pump sprayer or manufacturer-approved applicator
- Soft-bristle brush with an extension pole
- Plastic roof scraper, only where the product manufacturer permits it
- Garden hose with a normal spray nozzle
- Gloves, eye protection, long sleeves, and slip-resistant footwear
- Ladder stabilizer and fall-protection equipment where trained and required
- Tarps or absorbent covers for sensitive landscaping
Water plants thoroughly before treatment, move outdoor furniture and pet bowls, and cover vulnerable vegetation only for the period stated by the product label. Do not leave plastic over plants in direct sun, because heat buildup can damage leaves even when chemicals are absent.
Success checkpoint: The treatment label, roof material, weather forecast, access method, and runoff plan all agree.
Common mistake: Starting with a ladder on unstable ground because the moss looks like a small job.
Step 2: Remove Loose Moss Without Scraping Granules
Remove only loose, bulky growth before applying treatment. Use a soft brush or plastic tool from the ridge toward the eave, allowing gravity to carry loosened debris downward without lifting shingle tabs.
Do not scrape upward. Upward pressure can catch the lower edge of a shingle, break the factory seal, and create a leak path. Do not force moss that is firmly attached; chemical treatment should weaken the attachment first.
Brush in short sections rather than dragging a tool across the full roof plane. Keep debris out of valleys and gutters as work progresses, because a heavy moss load can obstruct drainage and retain water at the roof edge.
Success checkpoint: Large loose clumps are gone, while the shingle surface still retains its granular texture and intact edges.
Common mistake: Using a stiff wire brush or a metal roof rake on asphalt shingles. Those tools can remove protective granules faster than moss removal justifies.
Step 3: Apply a Roof-Safe Moss Treatment
Apply the selected product evenly to dry or slightly damp moss according to its label. Many products require full coverage and several hours without rain, but dwell time varies widely, so a generic 20-30 minute rule is unreliable.
Begin at the ridge and work toward the eaves. Keep the spray pattern controlled, avoid overspray onto siding and metal fixtures, and do not apply during high wind, imminent rain, freezing conditions, or intense heat unless the label specifically allows it.
A treatment may turn moss yellow, brown, or white before the growth detaches. That color change indicates damage to the living tissue, not necessarily complete cleanup.
Success checkpoint: Moss is thoroughly wetted, the stated application rate was used, and the roof remains undisturbed for the label’s required dwell period.
Common mistake: Applying extra concentrate to speed results. Higher concentration can increase plant injury and material damage without producing faster detachment.
Step 4: Let Dead Moss Detach Naturally
Allow treated moss to die and loosen before attempting final cleanup. Typical visible improvement takes several days to four weeks, and thick mats can require a second label-approved application rather than harder brushing.
Rain and wind often remove dead fragments gradually. If cleanup is necessary after the dwell period, use the extension brush lightly and continue working downward. Do not walk repeatedly over a roof simply to make the surface look perfect on the same day.
Dead moss that remains attached can conceal lifted shingles or damaged flashing. Remove enough material to inspect the roof, then stop if the surface begins shedding granules or the underlying covering appears brittle.
Success checkpoint: The moss has lost its green color, feels loose, and can be removed with light contact rather than force.
Common mistake: Treating brown moss as a failure and pressure washing it immediately.
Step 5: Rinse Carefully and Clear the Gutters
Rinse with an ordinary garden hose from the ridge toward the eaves, using enough flow to carry residue without forcing water under shingle laps. Never use a pressure-washer nozzle, turbo nozzle, or concentrated jet.
Protect downspout outlets when necessary, collect large debris, and flush gutters after the roof is clear. If chemical runoff reaches soil, follow the product label and immediately dilute or rinse the affected area when permitted.
Remove plant covers promptly. Inspect siding, windows, decks, metal flashing, and painted surfaces for residue, then rinse those surfaces with clean water.
Success checkpoint: Roof valleys, gutters, and downspouts drain freely, and no treatment residue remains on sensitive surfaces.
Common mistake: Rinsing from the eaves upward because the lower roof is easier to reach. That direction can drive water beneath shingle courses.
Step 6: Inspect for Damage and Document the Result
After the roof dries, inspect every cleaned area from the ground and accessible roof edges. Look for lifted tabs, exposed underlayment, missing granules, cracked wood shingles, broken tiles, open flashing seams, and soft decking.
Check the attic after the next substantial rain. Darkened sheathing, wet insulation, or a new ceiling stain indicates a roof problem rather than a cleaning problem. Cleaning cannot seal a failed penetration or replace deteriorated roofing materials.
Record the product name, application date, weather conditions, photographs, and any areas that need repair. This documentation helps a roofer distinguish old damage from damage discovered after cleaning and can support warranty discussions.
Does the Shingle Material Change the Method?
The roof covering determines whether brushing, chemical treatment, or walking is appropriate. Asphalt shingles tolerate carefully controlled low-pressure treatment, while wood, slate, clay, and concrete products require material-specific advice and may be damaged by the wrong chemical or access method.
| Roof material | Moss-removal approach | Avoid | Inspection concern |
|---|---|---|---|
| Asphalt shingle | Label-approved low-pressure treatment and soft brush | Pressure washing and abrasive tools | Granule loss, lifted tabs |
| Cedar or wood shingle | Specialist assessment and gentle treatment | Chlorine overspray, aggressive brushing | Rot, splitting, cupping |
| Clay tile | Professional low-pressure cleaning | Walking directly on unsupported tile | Cracks, displaced tiles |
| Concrete tile | Label-approved treatment and controlled rinse | High-pressure blasting | Coating loss, cracked edges |
| Slate | Slate roofer or experienced cleaner | Ordinary ladder traffic and scraping | Broken slate, failed hooks |
| Metal roofing | Compatible cleaner and soft tools | Chloride products and abrasive pads | Corrosion, coating failure |
Wood shingles are especially vulnerable to moisture and decay. Moss removal may expose rot that was hidden by the growth, so a clean appearance does not establish structural soundness.
Slate roofs require specialized foot placement or roof access equipment. A homeowner can crack slate while trying to remove harmless surface growth, turning a maintenance task into a repair.
How Long Does Removal Take and What Does It Cost?
A small, accessible asphalt roof usually takes 2-6 hours of active DIY work, followed by several days or weeks of natural die-off. Professional service commonly takes half a day to a full day on an ordinary home, although treatment effects may continue after the crew leaves.
| Project condition | DIY active time | Typical professional price | Likely treatment timeline |
|---|---|---|---|
| 500 square feet, light moss | 1-2 hours | $250-$450 | 3-10 days |
| 1,500 square feet, moderate moss | 3-6 hours | $450-$800 | 1-3 weeks |
| 2,500 square feet, heavy moss | 6-10 hours | $700-$1,200 | 2-4 weeks |
| Steep or two-story roof | Not recommended | $800-$1,800 | 1-4 weeks |
| Cleaning plus minor repairs | 4-12 hours | $900-$2,500 | Depends on repair |
These are typical planning ranges for the United States. A contractor should separate cleaning, roof repairs, gutter work, and replacement costs instead of presenting one unexplained total.
Professional cleaning is usually the better value when a fall could cause injury, when the roof needs an inspection, or when the homeowner lacks a safe way to control runoff. DIY is financially reasonable only when access and roof condition are genuinely low risk.
How Can You Prevent Moss From Returning?
Prevent recurrence by reducing shade, moisture, and organic debris rather than relying on a treatment alone. Trim branches that shade the roof, clean gutters and valleys, keep leaves from accumulating, and correct drainage problems that keep roof edges wet.
Copper or zinc strips can reduce new growth when installed near the ridge and exposed to rain, but they are preventive aids rather than guaranteed cures. Metal ions wash down the roof in rain, so coverage is incomplete under obstructions and performance declines where the strip is corroded or poorly positioned.
| Prevention measure | Typical interval or specification | Main benefit | Limitation |
|---|---|---|---|
| Gutter cleaning | 1-2 times yearly | Removes wet debris at eaves | Does not reduce roof shade |
| Tree trimming | Every 2-5 years | Improves drying and sunlight | Requires arborist work near utilities |
| Roof inspection | Yearly and after storms | Finds lifted shingles early | Does not kill existing moss |
| Zinc or copper strip | Ridge-length installation | Reduces new growth | Rain exposure must reach roof plane |
| Valley debris removal | Each fall or as needed | Prevents trapped moisture | Access may be hazardous |
Copper runoff can stain some light-colored siding, masonry, and roofing materials. Zinc and copper fasteners must also be compatible with the roof system and local installation requirements.
Common Mistakes and How to Fix Them
Pressure washing the roof
Failure: Granules disappear, shingle surfaces look rough, or water enters beneath laps.
Fix: Stop immediately, photograph the damage, and arrange a roofing inspection. Do not apply sealant over widespread granule loss without identifying the underlying condition.
Scrubbing moss while it is firmly attached
Failure: Shingle tabs lift, wood fibers tear, or slate cracks.
Fix: Stop mechanical work and use a compatible treatment according to its label. Replace damaged materials rather than trying to glue them down.
Using a homemade bleach mixture
Failure: Plants brown, metal corrodes, or chemical fumes irritate the operator.
Fix: Rinse affected plants and surfaces with clean water when the product label permits, ventilate the area, and use a labeled product in future applications. Never combine cleaners.
Ignoring runoff
Failure: Treatment flows into a pond, vegetable garden, storm drain, or neighboring property.
Fix: Stop application, contain or dilute runoff according to the label and local rules, and do not treat before heavy rain.
Cleaning a roof that needs replacement
Failure: A cleaner makes a failing roof look better temporarily while leaks continue.
Fix: Prioritize repair or replacement when shingles are brittle, widely curled, missing, cracked, or losing substantial granules.
Situations That Need a Different Approach
Removing moss before winter
Complete treatment during a dry, mild weather window before freezing temperatures arrive. Do not leave wet debris in valleys or gutters, because freeze-thaw cycles can worsen lifted edges and obstruct drainage.
Cleaning during drought or hot weather
Do not allow treatment to drift onto drought-stressed plants, and avoid applying products when the roof surface is so hot that the label prohibits use. Water-sensitive landscaping may need repeated rinsing, relocation, or professional containment.
Protecting pets and wildlife
Keep pets indoors until treated surfaces, runoff areas, and product containers are safe under the label instructions. Never allow animals to drink collected runoff or walk through wet treatment.
Moss around a chimney or skylight
Treat concentrated growth around penetrations as an inspection trigger. Moss may be hiding failed flashing, deteriorated sealant, or a drainage defect that caused unusual moisture in that location.
When Is Moss Removal Not Enough?
Moss removal is not enough when the roof has active leakage, rotten decking, extensive granule loss, broken tiles, failed flashing, or shingles beyond their serviceable condition. Cleaning addresses biological growth; it does not restore the waterproofing layer or structural support beneath the roof covering.
Replacement may be more sensible than cleaning when moss has lifted many shingle courses or when the roof is near the end of its expected life. A roofer should evaluate the roof before treatment if the growth is thick enough to conceal the surface.
A professional quote should identify:
- Roof covering and approximate age
- Moss, algae, lichen, or mixed growth
- Cleaning method and maximum pressure
- Chemical name and runoff precautions
- Repairs excluded from the cleaning price
- Insurance and fall-protection arrangements
- Warranty effects and manufacturer restrictions
FAQ
Can I remove roof moss without climbing onto the roof?
Yes, light moss on a low, accessible roof can sometimes be treated from a ladder or ground-level extension sprayer, provided the product label permits that application. Do not stretch, overreach, or spray blindly across skylights, power lines, neighboring property, or sensitive landscaping.
Will vinegar kill moss on asphalt shingles?
Vinegar may damage or discolor some surfaces and plants, but it is not a universally approved asphalt-shingle treatment. Use a product labeled for the specific roof material instead of assuming a household acid is safe because it is common indoors.
Should I replace shingles after removing moss?
Replace shingles only when inspection finds cracking, severe curling, missing tabs, exposed underlayment, or structural deterioration. Moss alone does not automatically require replacement, but aggressive cleaning can reveal damage that was already present or make weak shingles fail.
Can rain remove dead moss after treatment?
Rain can loosen and carry away dead moss over several days or weeks, especially when the growth is thin. Heavy mats often need gentle follow-up removal after treatment, but forcing them off risks granule loss and lifted shingle edges.
Why does moss grow on only one side of my roof?
Moss favors roof planes with less sunlight, slower evaporation, wind-blown debris, and persistent shade from trees or nearby buildings. A north-facing roof in the Northern Hemisphere often stays wetter, but local shade and drainage matter more than compass direction alone.
Does roof moss mean the roof is leaking?
Roof moss does not prove that a leak exists. Moss usually indicates moisture retention at the surface, but lifted shingles, damaged flashing, blocked valleys, and wet attic insulation require an inspection because those conditions can create or reveal leaks.
The Bottom Line
The safest answer to how to remove moss from roofing shingles is to use a roof-compatible, label-directed treatment, remove only loose growth with a soft tool, rinse from the ridge downward, and protect every runoff path. Avoid pressure washing, abrasive scraping, improvised chemical mixtures, and unsafe roof access.
Check the roof material before choosing a product. If the roof is steep, high, fragile, leaking, or structurally questionable, professional cleaning and inspection are safer than DIY work. After removal, control shade and debris, maintain gutters, and consider a compatible zinc or copper prevention system to reduce recurrence.


