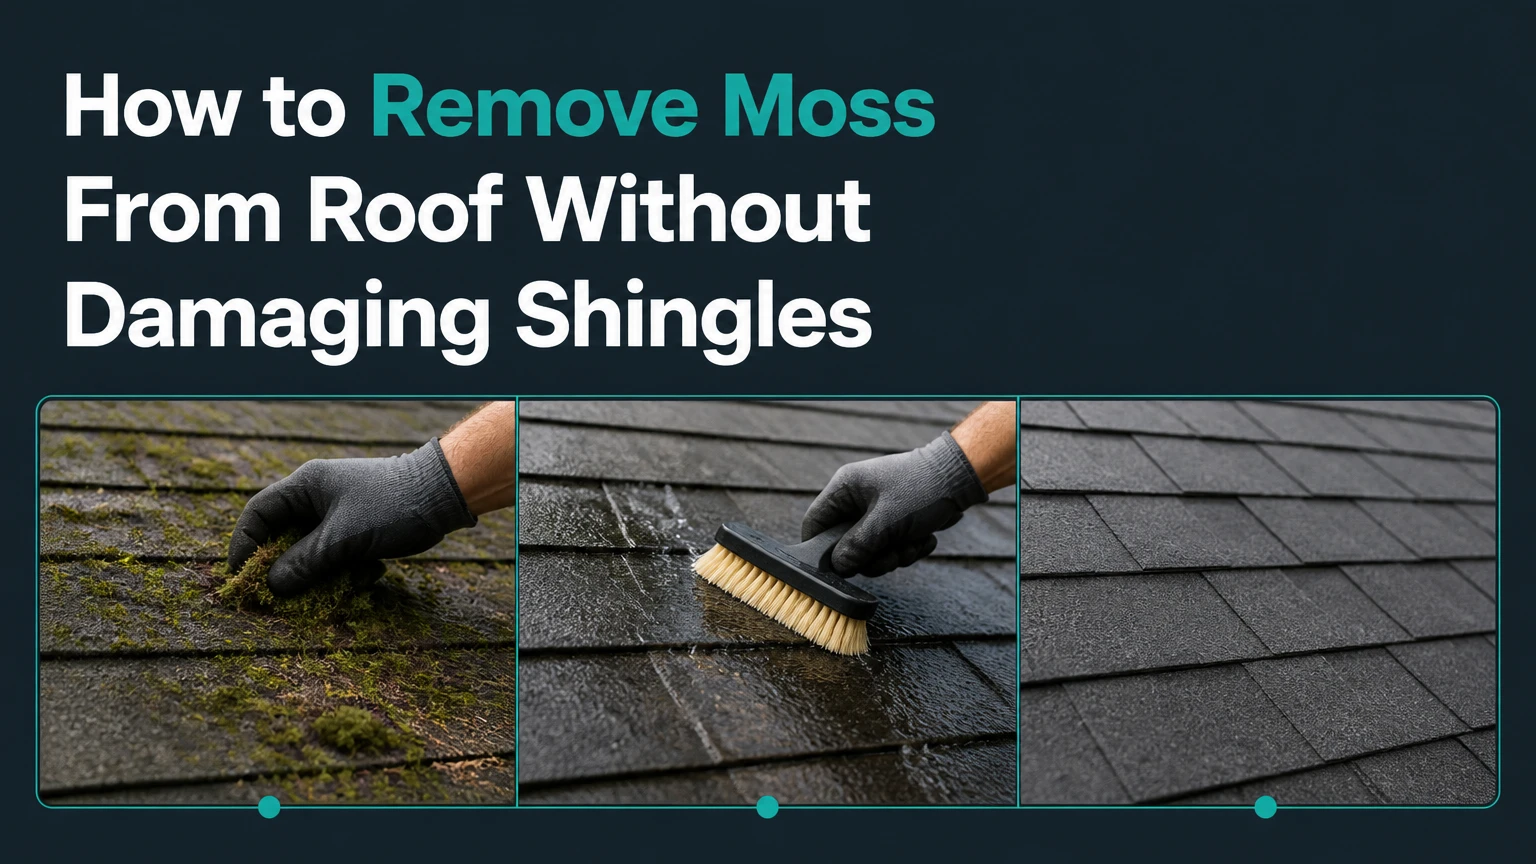
To remove moss from a roof without damaging shingles, loosen only the heavy moss with a soft brush, apply a roof-safe moss killer according to its label, and rinse with low-pressure water directed downhill. Avoid pressure washers, wire brushes, metal scrapers, upward brushing, and chemical mixtures that can remove asphalt-shingle granules or harm plants.
Key facts
- A typical small asphalt-shingle roof takes 4-8 hours of active DIY work, excluding rain-dependent clearing.
- Moss removal is safest when the chemical treatment kills the plant before physical removal.
- A garden hose is generally safer than a pressure washer because high pressure can dislodge ceramic granules.
- Brush loose moss from the ridge toward the eaves, never upward beneath shingle edges.
- Quaternary ammonium products may take weeks or months to disappear visually, while contact treatments work faster.
- A roof with lifted, cracked, brittle, or missing shingles may need repair before cleaning.
Before You Start Roof Moss Removal
Roof moss removal requires a dry forecast, stable ladder placement, plant protection, and a roof surface that can safely support inspection. The most important decision is whether the work belongs on the roof at all, because wet moss, steep slopes, brittle shingles, and unanchored ladders create fall risks that cleaning cannot justify.
Time, difficulty, and typical cost
Plan on 4-8 hours for a small to medium roof with moderate growth. A DIY project typically costs $40-$150 for treatment, tools, plant covers, and gutter protection, while professional soft washing or moss treatment commonly ranges from $300-$1,200 depending on roof size, pitch, access, and repairs.
| Project condition | Typical active time | Typical DIY spend | Common professional range |
|---|---|---|---|
| 1,000 sq. ft., light moss | 3-5 hours | $35-$80 | $250-$550 |
| 1,500 sq. ft., moderate moss | 5-8 hours | $60-$150 | $400-$850 |
| 2,000 sq. ft., heavy moss | 7-12 hours | $90-$220 | $650-$1,200 |
| Steep or difficult-access roof | Do not estimate casually | $100+ in safety gear | $800-$2,000+ |
These are typical planning ranges, not fixed prices. Roof access, local labor rates, treatment type, and the need for shingle replacement can change the total substantially.
Tools and materials
Use a soft-bristle brush, plastic roof rake, low-pressure garden hose nozzle, pump sprayer, manufacturer-approved moss treatment, gloves, eye protection, non-slip footwear, ladder stabilizers, plastic sheeting, and gutter screens or collection bags. Do not use a wire brush, metal scraper, pressure washer, or improvised chemical mixture.
Before climbing, inspect the roof from the ground with binoculars. Look for sagging decking, exposed underlayment, missing flashing, cracked tiles, curled asphalt shingles, heavy lichen, and moss extending beneath multiple courses.
When should you hire a professional?
Hire a qualified roofer or roof-cleaning contractor when the roof is steep, wet, more than one story high, visibly damaged, or inaccessible without walking directly on fragile materials. A professional is also the safer choice when the home has overhead electrical lines, skylights, solar panels, uncertain roof age, or interior water stains.
The Occupational Safety and Health Administration states that “the top of a ladder should extend at least 3 feet above the landing surface” under its construction ladder rule, 29 CFR 1926.1053(b)(1). That rule does not make a ladder safe on a slick, steep roof. A ladder must also sit on firm, level ground and be secured against movement.
Why Moss Damages Shingles
Moss damages roofing by retaining moisture, interfering with drainage, lifting shingle edges, and keeping surfaces damp during freeze-thaw cycles. Moss is a small nonvascular plant that anchors with rhizoids rather than true roots, but those anchoring structures can still grip granulated asphalt, wood, and porous tile.
Moisture retention is usually the first problem. A thick moss layer keeps water against the shingle surface after surrounding areas dry, increasing the chance of algae growth, wood decay, and deterioration around fasteners and roof penetrations. Moss that grows across shingle laps can lift edges, weaken sealant bonds, and expose the roof to wind-driven rain.
Freeze-thaw damage matters in cold climates. Water trapped in moss expands when frozen, then contracts during thawing, repeatedly stressing already-aged shingles and sealant strips. The process does not automatically destroy every roof, but heavy growth accelerates failure on roofs with existing wear.
Moss, algae, or lichen?
Moss forms soft green cushions or tufts and often has a three-dimensional, spongy appearance. Algae usually appears as dark green, black, or blue-black discoloration that lies flat against shingles. Lichen forms crusty or leafy patches and can attach more firmly than moss.
The treatment label must match the organism and roof material. A black stain is not proof of moss, so aggressive scraping intended for moss can damage a roof that only needs a compatible algae treatment.
How to Remove Moss From Roof Without Damaging Shingles
The safest process has five stages: protect the property, remove loose growth gently, apply a labeled treatment, allow the moss to die, and rinse or wait according to the product directions. Work from the ridge toward the gutters, keep tools parallel to the roof plane, and never force material beneath shingle edges.
Step 1: Choose a cool, calm work window
Select a day with no rain during the product’s required dwell period, light wind, and moderate temperatures. Avoid hot, sunny conditions that cause the solution to evaporate before it reaches the moss, and avoid freezing conditions that can make shingles brittle or create ice hazards.
Read the product label before mixing anything. The label controls dilution, compatible materials, contact time, personal protective equipment, runoff precautions, and whether rinsing is required.
Success checkpoint: The forecast gives enough dry time for the full label process, and the roof surface is dry enough to walk or inspect safely.
Common mistake: Treating moss immediately before rain without confirming that the product permits wet-weather application.
Step 2: Protect plants, gutters, and exterior surfaces
Wet grass, shrubs, flowers, and soil beneath the roofline with clean water before applying treatment. Cover delicate plants temporarily with breathable fabric or plastic held above the foliage, and uncover plastic promptly after the work to prevent heat damage.
Place gutter screens, mesh collection bags, or temporary downspout filters where they will catch loose moss without blocking drainage. Do not disconnect a downspout if runoff will then discharge against the foundation. Direct collected water away from ponds, vegetable gardens, and storm drains when the label requires it.
Success checkpoint: Landscaping is saturated, runoff has a planned route, and gutters can be cleaned without allowing moss clumps to enter the drainage system.
Common mistake: Covering plants but failing to rinse the roof edge, siding, windows, and vegetation after treatment.
Step 3: Remove only loose, heavy moss
Use a soft push broom, soft-bristle brush, or plastic roof rake. Start near the ridge and move downward with short, controlled strokes that follow the shingle exposure. Remove bulky clumps that could clog gutters, but leave firmly attached residue for the chemical treatment.
Do not pry beneath shingle tabs. Do not scrape upward, because an upward stroke can lift the exposed edge, break the sealant bond, and bend or tear the shingle. Work from a ladder or roof-access system rather than dragging your body across the surface.
Success checkpoint: Heavy clumps are gone, shingle tabs remain flat, and no ceramic granule piles appear in the gutters or below the eaves.
Common mistake: Trying to make the roof look completely clean before treatment. Mechanical force is the main source of avoidable granule loss.
Step 4: Apply a compatible moss-killing solution
Mix the treatment in a pump sprayer exactly as the label specifies. Apply enough solution to wet the moss thoroughly, beginning at the ridge and moving downhill so the product does not run beneath upper shingle courses. Keep spray away from people, pets, ponds, siding, painted metal, and untreated plants.
Potassium salts of fatty acids often work as contact treatments and may require active rinsing. Quaternary ammonium compounds can kill moss without immediate rinsing, but dead material may remain visible for several weeks or months. Oxygen bleach products can be useful on some surfaces, but roof compatibility and dilution vary.
Do not assume chlorine bleach is the best option because it acts quickly. Sodium hypochlorite can damage plants, corrode metals, affect painted surfaces, and degrade roofing components when misapplied.
Allow the specified dwell time, often 15-45 minutes for contact products. Do not extend the time beyond the label or allow a solution to dry when the instructions prohibit drying.
Success checkpoint: Moss is fully wetted, runoff is controlled, and the solution remains on the target area for the label’s stated period.
Common mistake: Increasing concentration to accelerate results. Stronger is not automatically safer or more effective.
Step 5: Rinse gently or let rain remove the dead moss
Follow the product label on rinsing. For products that require rinsing, use a standard garden hose with a spray nozzle and direct water downhill at the roof slope. Keep the nozzle far enough away that water does not force under shingle laps, and use the lowest pressure that removes residue.
Products labeled for no-rinse use should be left in place unless the manufacturer gives a later rinse instruction. Dead moss commonly turns brown or yellow before rain gradually removes it. Heavy growth may need two or three substantial rain events, followed by a light hose rinse.
Flush gutters after the roof is clear, remove captured debris, and rinse plants and exterior surfaces with clean water. Never combine bleach, acids, vinegar, ammonia, or other cleaners in the same sprayer or bucket.
Success checkpoint: Water flows through gutters, no moss remains packed at eaves or valleys, and shingles remain flat with their granules intact.
Common mistake: Using a pressure washer to save time. Faster cleaning can produce permanent surface damage.
Which Moss Treatment Is Safest for Shingles?
The safest treatment is the product whose label specifically permits the roof material and application method, not automatically the strongest chemical. Potassium-based contact products act quickly but usually require rinsing, while quaternary ammonium products trade slower visual clearing for less immediate scrubbing.
| Treatment type | Typical active ingredient | Visible result | Main roof concern | Typical retail cost |
|---|---|---|---|---|
| Potassium soap | Potassium salts of fatty acids | 1-7 days | Requires careful rinsing | $25-$50 per gallon |
| Quaternary ammonium | Alkyl dimethyl benzyl ammonium chloride | 2-12 weeks | Dead moss remains longer | $30-$60 per gallon |
| Oxygen bleach | Sodium percarbonate | 1-14 days | Compatibility varies by surface | $20-$40 per container |
| Chlorine bleach | Sodium hypochlorite | Hours to days | Plant, metal, and surface damage | $10-$20 per gallon |
Product names and formulations change, so active ingredients and labels matter more than brand recognition. A roof-safe cleaner for asphalt shingles may be unsuitable for copper gutters, wood shakes, painted metal, or nearby aquatic environments.
Which treatment fits each roof material?
Asphalt shingles generally tolerate labeled moss treatments and low-pressure water, but granules are vulnerable to abrasion. Wood shakes need extra caution because aggressive cleaning can remove weathered fibers and protective surface material. Clay and concrete tiles can withstand more surface pressure than asphalt, but brittle, cracked, or displaced tiles still break easily.
| Roof material | Preferred approach | Avoid | Inspection threshold |
|---|---|---|---|
| Asphalt shingles | Labeled biocide, soft removal, garden hose | Pressure washing, upward scraping | Replace or repair loose tabs first |
| Wood shakes | Manufacturer-approved treatment, minimal brushing | Chlorine overuse, hard scrubbing | Stop when fibers lift or split |
| Clay tile | Low-pressure treatment and rinse | Walking on unsupported tile edges | Replace cracked or shifted tiles |
| Concrete tile | Label-approved cleaner, controlled rinse | High pressure at laps and flashing | Check fasteners and cracked units |
| Low-slope roof | Professional assessment and approved system | DIY roof walking and runoff pooling | Check drainage before treatment |
No cleaning method repairs failed flashing, rotten decking, open seams, or deteriorated underlayment. Moss removal can reveal those defects, so inspect after the roof dries.
What Pressure Should You Use?
Use a garden hose or professional low-pressure soft-wash system rather than a pressure washer on asphalt shingles. The exact pressure limit depends on the roof material, equipment, nozzle, distance, and manufacturer instructions, so a universal PSI number is unsafe to apply.
The Asphalt Roofing Manufacturers Association recommends avoiding pressure washing because it can dislodge granules and damage shingles. Granules protect the asphalt mat from ultraviolet exposure; once removed, the affected area can weather faster even when the roof initially looks clean.
Professional contractors may use metered soft-wash equipment, but “soft wash” is not a chemical exemption. Overspray, excessive dwell time, poor dilution, and uncontrolled runoff can still damage landscaping and exterior finishes.
Common Mistakes and How to Fix Them
| Mistake | Result | Safer correction | When to stop |
|---|---|---|---|
| Pressure washing | Granule loss and lifted tabs | Use a hose or approved soft wash | Stop if granules collect below |
| Wire brushing | Scratches and exposed mat | Use soft nylon bristles | Stop when the surface changes color |
| Brushing uphill | Shingle edges lift | Brush ridge to eave | Stop if tabs flex |
| Overdosing cleaner | Plant and metal damage | Follow the label dilution | Rinse immediately after exposure |
| Treating before rain | Product dilution and runoff | Choose a dry window | Reapply only per label |
| Ignoring gutters | Blocked drainage and overflow | Collect and flush debris | Clear valleys and downspouts first |
A brown moss patch is usually a treatment response, not a failed removal. Wait for the label’s clearing period and several heavy rains before using gentle manual action again. Repeated brushing every few days creates more damage than benefit.
White residue may come from dried mineral salts or product ingredients. Rinse with clean water first, avoid vinegar unless the product manufacturer specifically permits it, and never use an acidic cleaner over metal flashing or mixed chemical residue.
If moss returns within a few months, inspect the cause rather than repeatedly increasing chemical strength. Persistent shade, roof debris, blocked gutters, slow drainage, and a damp north-facing slope can recreate the same conditions quickly.
How Can You Prevent Moss From Returning?
Moss prevention works best when it reduces roof moisture and treats regrowth early. Prune branches that shade the roof, remove leaves from valleys and gutters, improve drainage, and inspect the roof twice a year, especially after autumn debris and winter storms.
Copper or zinc strips beneath ridge caps can reduce regrowth where rainwater carries metal ions down the roof. The strips need exposed surface area and proper placement, and they do not instantly remove established moss. Copper runoff can stain some materials and affect aquatic life, while incompatible fasteners can create corrosion.
| Prevention measure | Typical interval or size | Primary benefit | Limitation |
|---|---|---|---|
| Gutter cleaning | 2 times per year | Removes damp leaf buildup | Does not reduce roof shade |
| Tree pruning | Every 1-3 years | Improves drying and daylight | Requires safe arbor work |
| Roof inspection | Spring and fall | Finds early regrowth | Does not kill existing moss |
| Zinc strip | About 3-4 inches wide | Limits regrowth below ridge | Needs compatible installation |
| Copper strip | About 3-4 inches wide | Strong long-term biocidal effect | Higher cost and runoff concerns |
A common practitioner rule is to treat small patches early rather than wait for a continuous green carpet. Small patches can often be handled from a ladder or with a contractor’s extension system, while heavy coverage increases labor, runoff, and the chance that hidden shingle damage exists.
When Is Moss Removal a Bad DIY Project?
DIY moss removal is a poor choice when a person cannot maintain three points of contact, cannot secure the ladder, or cannot identify the roof material and its condition. A roof that is slick, steep, brittle, or damaged presents more risk than a typical homeowner can control with gloves and a garden hose.
Do not climb during rain, frost, high wind, or active chemical runoff. Keep children and pets away from the work area, and use a second person to monitor the ladder and ground conditions. Solar panels, skylights, fragile tile, and overhead lines require additional controls.
Call a roofer when interior staining, sagging, exposed sheathing, widespread lifted shingles, or recurring leaks appear. Cleaning a failing roof can postpone the visible symptom while allowing structural damage to continue.
FAQ
Can I remove roof moss with vinegar?
Vinegar is not a reliable default roof-moss treatment because acidity can affect metals, plants, sealants, and surrounding surfaces. Use a product labeled for the specific roofing material instead, and never pour vinegar onto a roof that has been treated with bleach or another cleaner.
How long does moss take to die after treatment?
Contact treatments may discolor moss within hours or days, while quaternary ammonium products often take several weeks to show full visual clearing. Dead moss can remain attached for a month or longer, especially in thick mats, and should not be scraped aggressively during that period.
Will roof moss grow back after removal?
Roof moss can return when shade, persistent moisture, leaf debris, poor drainage, or humid conditions remain. Inspect twice yearly, prune obstructive branches, clean gutters, and treat small regrowth patches before moss spreads beneath shingle edges.
Can I use baking soda to kill moss on shingles?
Baking soda is not a dependable substitute for a labeled roof treatment. Dry powders can enter gutters and soil, while concentrated alkaline residue may affect plants and metal. A manufacturer-approved product provides clearer dilution, contact, and runoff instructions.
Should I replace shingles covered in moss?
Replace shingles when moss removal reveals cracks, missing granules, curled tabs, broken sealant bonds, or underlying deck damage. Surface moss alone does not prove that replacement is necessary, but widespread growth on an old or brittle roof justifies a professional condition assessment.
The Bottom Line
The safest answer to how to remove moss from roof without damaging shingles is to combine gentle mechanical removal with a compatible, label-directed moss treatment and low-pressure rinsing. Protect plants and gutters, work downhill, avoid pressure washing, and stop when the roof shows damage rather than trying to achieve a perfectly bare surface.


