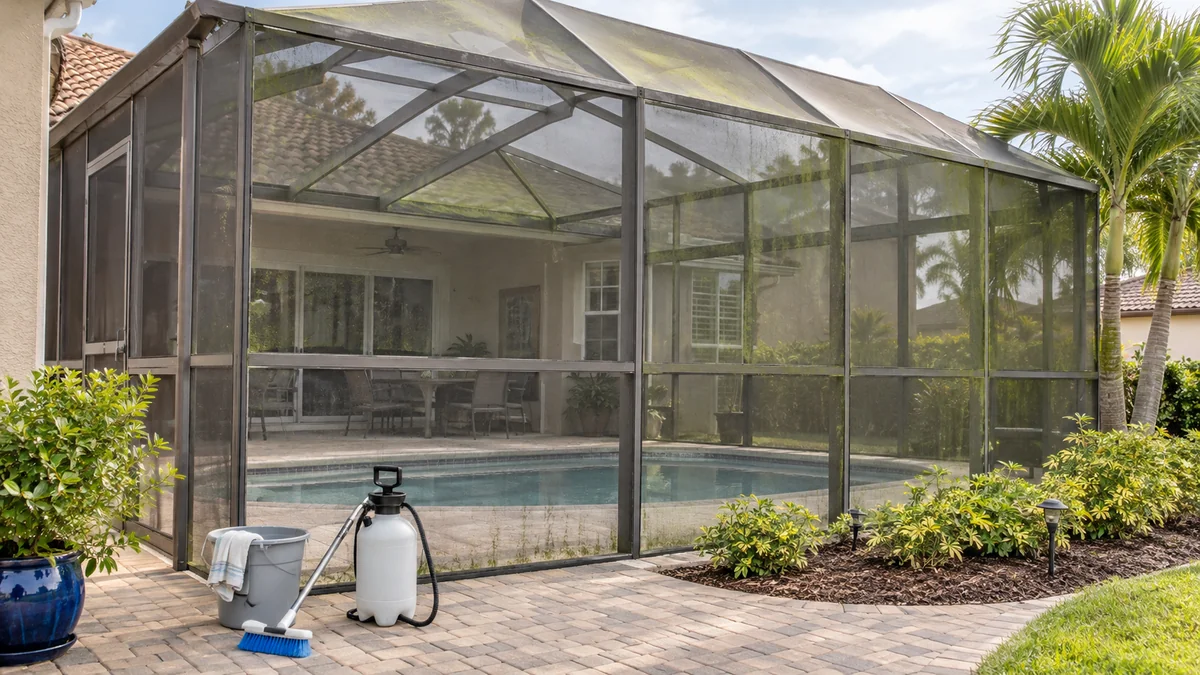
To remove green algae from a screen enclosure, loosen the growth with a compatible cleaner, keep the mesh wet for 5-10 minutes, gently brush heavy deposits, and rinse with low pressure. A garden hose is usually safer than a pressure washer. The most important factors are chemical dilution, plant protection, and preventing cleaner from drying on aluminum.
Key facts
A standard garden hose is the safest rinsing tool for most fiberglass screen enclosures.
Light algae can respond to diluted white vinegar, but vinegar does not reliably kill every mold, lichen, or embedded growth.
Diluted sodium hypochlorite works faster on heavy organic growth but can injure plants and corrode vulnerable metals.
Never mix bleach with vinegar, ammonia, acids, or other household cleaners.
A 5-10 minute dwell time is typical, but cleaner must remain wet and follow the product label.
Sagging mesh, loose spline, and brittle screen indicate repair needs rather than a scrubbing problem.
What Causes Green Algae on a Screen Enclosure?
Green algae develops when a screen enclosure repeatedly stays damp, receives limited sunlight, and accumulates organic particles. Pollen, dust, leaf residue, and bird droppings provide nutrients, while shaded pool decks and humid climates slow drying.
Algae commonly appears on the lower panels, roof edges, shaded sides, and aluminum joints. A north-facing enclosure, vegetation touching the cage, clogged gutters, or frequent irrigation overspray can create a persistent wet zone.
Green staining is not always algae. Green mold, lichen, mildew, oxidized coating, and pollen can look similar but require different treatment. A slimy or soft film is more likely biological growth; a hard crust attached to the frame may be lichen or mineral residue.
How Can You Identify the Growth?
Rub a small area with a wet microfiber cloth or soft brush. Algae usually smears or lifts, while oxidation remains chalky and lichen stays attached in a crusty pattern. Test only an inconspicuous section before applying any chemical to the full enclosure.
A successful treatment should remove the film without fuzzing the fiberglass strands, loosening the spline, or changing the aluminum finish. If the screen surface is already brittle, cleaning can expose damage that was present beforehand.
Which Cleaner Should You Use?
The best cleaner depends on growth severity, nearby landscaping, screen condition, and whether the enclosure surrounds a pool. Use mild soap for routine soil, vinegar for limited light growth, a labeled outdoor cleaner for convenience, and diluted sodium hypochlorite only when heavier organic growth justifies the added risk.
| Cleaner | Typical use | Typical dwell | Main limitation |
|---|---|---|---|
| Dish soap and water | Pollen, dust, fresh soil | 2-5 minutes | Does not reliably kill established algae |
| White vinegar diluted 1:1 with water | Small light-green patches | 10-20 minutes | Slow on thick growth; may affect sensitive stone |
| Labeled outdoor algae cleaner | Moderate growth and convenience | 5-10 minutes | Formula and dilution vary by product |
| Diluted sodium hypochlorite | Heavy algae and organic staining | 5-10 minutes | Plant injury, corrosion, fumes, and pool contamination risk |
| Professional soft wash | Tall, extensive, or recurring growth | Service-dependent | Higher cost and contractor-quality varies |
Is Vinegar Safe for Screen Enclosures?
Diluted white vinegar is generally compatible with intact fiberglass mesh and coated aluminum when used briefly and rinsed thoroughly. Vinegar is not automatically safe for every surrounding surface, however, because acidic runoff can affect natural stone, concrete finishes, some metals, and sensitive plants.
Apply a 1:1 mixture of ordinary white vinegar and water to a small section, allow it to remain wet for approximately 10 minutes, then rinse. Vinegar is a reasonable first choice for light surface spots, but it may require gentle brushing and a second treatment.
Do not combine vinegar with bleach. The mixture can release chlorine gas, which is dangerous to breathe.
When Is Diluted Bleach Appropriate?
Diluted sodium hypochlorite is appropriate only for substantial organic growth after surrounding plants, people, pets, pool equipment, and nearby finishes have been protected. Follow the product label rather than relying on a universal recipe, because household bleach and pool chlorine products have different concentrations.
For a cautious homeowner application, use the lowest label-approved dilution that addresses the growth, apply a small test patch, keep the surface wet, and rinse completely. Many professional exterior cleaners use stronger solutions under controlled conditions, but professional equipment, runoff management, and chemical knowledge reduce risks that a homeowner may not be able to control.
Never mix bleach with vinegar, ammonia, toilet-bowl cleaner, acids, or other chemicals. Wear eye protection and chemical-resistant gloves, and avoid spraying in wind.
What Should You Do Before Cleaning?
Preparation prevents most screen-cleaning damage. Choose a cool, cloudy, or calm period, move furniture and pool toys, cover vulnerable electrical equipment, and saturate nearby plants with clean water before applying any cleaner.
Before-You-Start Checklist
| Item | Typical requirement | Reason |
|---|---|---|
| Cleaning time | 2-4 hours for a single-story enclosure | Includes setup, treatment, rinsing, and cleanup |
| DIY material cost | $25-$65 | Cleaner, pump sprayer, hose nozzle, brush, and protection |
| Soft brush | 8-12 inch head | Limits pressure on mesh |
| Hose | 25-50 feet, adjustable nozzle | Provides broad, low-pressure rinsing |
| Plant pre-wetting | 5-10 minutes | Dilutes accidental exterior runoff |
| Weather | Below roughly 85°F when possible | Slows evaporation and chemical drying |
| Protective equipment | Gloves and eye protection | Limits skin and eye exposure |
Turn off or shield outdoor speakers, televisions, outlets, lighting, and pool controls. Keep doors and windows closed while spraying. Remove spider webs and loose leaves with a dry broom before introducing water, because wet debris spreads across the mesh.
Inspect the enclosure first. Do not climb onto a pool cage roof, lean a ladder against unsupported mesh, or clean panels that are visibly detached. Photograph existing tears, stains, and corrosion so cleaning damage is not confused with pre-existing damage.
Step 1: Remove Loose Debris
Brush loose leaves, webs, pollen mats, and insect nests from the frame and mesh using a soft, dry broom or telescoping brush. Work from the top only when you can remain safely on the ground, because overhead debris can fall into the pool or onto the deck.
The objective is to remove material that blocks cleaner from reaching the algae. Do not use a stiff wire brush, abrasive pad, scraper, or dry pressure-washer blast. Fiberglass screen can fray even when the damage is not immediately visible.
Success checkpoint: The mesh looks open, and loose debris no longer falls when the frame is lightly tapped.
Common mistake: Scrubbing dry algae aggressively and pulling the mesh from its spline channel.
Step 2: Protect Plants and Pool Equipment
Move portable items outside the splash zone and cover sensitive equipment with plastic that does not trap heat against operating electronics. Saturate turf, shrubs, and flower beds with clean water before chemical application, then rinse them again afterward.
Keep cleaner out of the pool whenever possible. Chlorine-based runoff can alter water chemistry, affect liners and finishes, and increase demand on the filtration system. If a noticeable quantity enters the pool, follow the pool manufacturer’s or service professional’s testing guidance before swimming.
Cover delicate natural stone and test any cleaner on painted or powder-coated aluminum. A chemical that removes algae can also dull a finish when left to dry.
Success checkpoint: Plants, pool controls, furniture, and drainage paths are identified and protected.
Common mistake: Assuming a diluted chemical cannot damage plants because it is used outdoors.
Step 3: Wet the Enclosure
Rinse the screen enclosure with a garden hose using a broad spray pattern. Start with the upper accessible panels and allow loosened debris to move downward, but avoid blasting water directly into seams, spline channels, vents, or electrical fixtures.
Pre-wetting cools the surface and reduces rapid cleaner absorption. Do not soak the enclosure if strong runoff will enter an uncovered pool or flow toward a storm drain carrying chemical residue.
Success checkpoint: The mesh and frame are uniformly damp, without forceful water deflection or visible panel movement.
Common mistake: Using a narrow jet that drives debris into the mesh or pushes the screen out of its track.
Step 4: Apply a Test Patch
Apply the chosen solution to a 1-2 square-foot inconspicuous area. Include both mesh and aluminum because a cleaner may be compatible with one material but unsuitable for the other.
For vinegar, begin with equal parts white vinegar and water. For commercial products, use the label dilution and application method. For sodium hypochlorite, do not improvise a concentrated mixture; use the lowest label-approved strength and consider professional service when growth is widespread.
Wait through the product’s recommended dwell period, rinse the patch, and inspect it after drying. Look for color change, chalking, white residue, weakened coating, or screen fuzzing.
Success checkpoint: The test patch loses green residue without discoloring the frame or damaging the mesh.
Common mistake: Testing only the cleanest part of the enclosure.
Step 5: Apply Cleaner in Small Sections
Work in sections of approximately 20-40 square feet so the solution stays wet. Apply enough to coat the growth without creating excessive runoff. Maintain a wet edge and stop if wind carries spray toward people, plants, or the pool.
Applying from the bottom upward can reduce dirty streaks on a dry frame, but the more important rule is to keep adjacent surfaces evenly wet and rinse before the cleaner dries. On a hot or sunny day, divide sections more narrowly.
Allow approximately 5-10 minutes of dwell time for many labeled outdoor cleaners. Vinegar often works more slowly. Do not treat a color change as proof that every spore has been eliminated; the practical success test is clean, undamaged mesh after rinsing.
Success checkpoint: Green film softens or changes appearance while the enclosure remains wet.
Common mistake: Leaving cleaner in place until it dries, which can create streaks and residue.
Step 6: Brush Heavy Deposits Gently
Use a soft nylon brush on thick areas only after the cleaner has softened the film. Apply light pressure and brush parallel to the frame rather than forcing the mesh into its spline channel.
One gentle pass is preferable to repeated hard scrubbing. If growth remains attached after two treatments, the material may be lichen, embedded mold staining, oxidation, or a damaged surface rather than removable algae.
Success checkpoint: Deposits lift with light agitation, and the mesh does not flex sharply or shed fibers.
Common mistake: Treating stubborn growth as a reason to increase pressure indefinitely.
Step 7: Rinse With Low Pressure
Rinse each section thoroughly with a garden hose and broad fan pattern. Direct water across the mesh rather than straight into it, and flush aluminum joints, lower rails, corners, and spline channels where dead residue collects.
Continue until runoff is visually clear and no slippery film remains. Rinse surrounding plants and the pool deck after the enclosure is clean. If chemical runoff reached a sensitive surface, use plenty of clean water rather than adding another chemical.
A pressure washer is rarely necessary for screen mesh. High pressure can stretch, tear, or unseat old fiberglass and can force water behind screen channels.
Success checkpoint: The enclosure feels clean rather than slippery, and no cleaner remains in seams or corners.
Common mistake: Rinsing only the visible front face while leaving residue on the frame’s underside.
Step 8: Dry, Inspect, and Correct Defects
Allow the enclosure to dry naturally, then inspect it in direct daylight. Check for remaining green patches, frayed fibers, loose spline, sagging panels, white chemical residue, chalking aluminum, and corrosion around fasteners.
Small residual spots can receive a second targeted treatment after the first application has fully rinsed away. Do not escalate immediately to stronger chemicals or harder brushing. A second controlled treatment is safer than one aggressive pass.
If a panel moves, separates from its channel, or has brittle fibers, stop cleaning and arrange rescreening. Cleaning cannot restore tensile strength to sun-damaged mesh.
Can You Use a Pressure Washer?
Homeowners should generally avoid pressure-washing screen mesh. A wide fan tip held several feet away may be used by experienced professionals on suitable structural surfaces, but nozzle pressure, distance, angle, screen age, and water volume all affect the result.
The often-repeated rule that a pressure washer is safe below a particular PSI is unreliable because machines deliver different flow rates and impact at different distances. A garden hose provides sufficient rinsing force for most algae once cleaner has loosened the film.
| Equipment | Suitable surface | Typical setting | DIY recommendation |
|---|---|---|---|
| Garden hose | Fiberglass mesh and aluminum | Broad spray, low impact | Preferred |
| Soft brush | Localized deposits | Light hand pressure | Preferred for buildup |
| Pump sprayer | Controlled cleaner application | Label dilution | Suitable with care |
| Pressure washer, wide fan | Robust frame sections only | Professional judgment | Usually avoid on mesh |
| Narrow or zero-degree tip | No enclosure surface | Excessive impact | Never use |
How Do You Prevent Algae From Returning?
Prevention requires faster drying and less organic contamination. Keep shrubs and irrigation spray away from the mesh, clean gutters and roof edges, remove leaf buildup, and rinse pollen before it forms a nutrient film.
A practical maintenance schedule is a light hose rinse every 2-4 weeks during wet or pollen-heavy seasons, with a deeper inspection and wash approximately once or twice yearly. Frequency depends on shade, rainfall, vegetation, enclosure orientation, and proximity to the coast.
Do not seal or paint over algae. Coatings trap contamination and make later cleaning more difficult. Correct the moisture source first.
What If Algae Returns Within Weeks?
Rapid regrowth usually indicates persistent moisture rather than inadequate chemical strength. Inspect irrigation heads, leaking gutters, condensate discharge, dense vegetation, roof valleys, and shaded corners.
If only one wall regrows, compare its exposure with the rest of the cage. A north-facing or plant-obstructed wall may need trimming and improved airflow rather than repeated bleach treatment.
How Much Does Screen-Enclosure Cleaning Cost?
Typical DIY cleaning costs $25-$65 for basic supplies and takes 2-4 hours for a single-story enclosure. Professional service commonly costs approximately $300-$900 or more, depending on enclosure area, height, access, regional labor rates, chemical controls, and whether rescreening is required.
| Service or item | Typical price | Typical duration | Variables |
|---|---|---|---|
| DIY light cleaning | $10-$25 | 1-2 hours | Existing hose and brush |
| DIY heavy cleaning | $25-$65 | 2-4 hours | Pump sprayer and protective materials |
| Single-story professional wash | $300-$600 | 1-3 hours | Size and access |
| Tall or multi-tier enclosure | $500-$900+ | 2-5 hours | Height and safety equipment |
| Individual screen repair | $50-$200 per panel | 1-3 hours | Panel size and spline condition |
Prices are typical planning ranges, not fixed market rates. Request an itemized quote that separates cleaning, screen replacement, frame repair, oxidation treatment, and chemical surcharges.
When Should You Hire a Professional?
Hire a licensed and insured contractor for two-story cages, roof panels, extensive algae, unsafe ladder access, severe corrosion, or screens that are already brittle and loose. Professional soft washing can reduce physical risk, but contractor quality still varies.
Ask whether the contractor protects plants, controls runoff, uses screen-compatible methods, carries liability insurance, and has experience with the enclosure’s mesh and aluminum finish. A contractor should not promise that aggressive pressure will make old mesh look new.
Professional cleaning is also sensible when pool water, delicate landscaping, neighboring property, or storm-drain runoff could be contaminated. The cost of replacing multiple panels or damaged landscaping can exceed the original cleaning savings.
Common Mistakes and How to Fix Them
| Mistake | Result | Correction |
|---|---|---|
| Using a narrow pressure jet | Torn mesh or loose spline | Switch to a garden hose |
| Letting cleaner dry | Streaked aluminum and residue | Work smaller sections and rinse |
| Wetting plants only afterward | Leaf scorch or dead grass | Pre-wet and post-rinse landscaping |
| Mixing bleach and vinegar | Toxic chlorine gas | Use one product at a time |
| Scrubbing brittle mesh | Frayed fibers and tears | Stop and replace damaged panels |
| Treating oxidation as algae | Persistent white or chalky marks | Seek frame-specific restoration advice |
An expert rule of thumb is to solve the water problem before increasing chemical strength. Another is to judge success after drying, because wet aluminum and wet mesh can conceal residue. The third is to treat old screen as a repair candidate, not as a surface capable of unlimited cleaning.
FAQ
Will Dawn dish soap kill green algae on a screen enclosure?
Dish soap can loosen pollen, dust, and fresh surface film, but it is not a dependable algae-killing treatment. Use a small amount in warm water for routine washing, then rinse thoroughly. Established green growth generally needs a labeled algae cleaner, diluted vinegar, or a controlled professional treatment.
Can green algae damage fiberglass screen?
Green algae usually begins as a surface contaminant, but persistent moisture and trapped debris can support mildew, staining, and accelerated deterioration. The greater immediate risk comes from harsh cleaning, ultraviolet-aged fibers, and repeated pressure. Replace mesh when fibers are brittle, frayed, torn, or no longer held firmly by the spline.
Is vinegar better than bleach for a pool cage?
Vinegar is safer for many light, localized patches because it avoids chlorine exposure, but vinegar is slower and less effective against thick growth. Bleach-based products work faster on heavy organic contamination but create plant, corrosion, runoff, and pool-chemistry risks. Choose based on growth severity and the surrounding materials.
How long should I wait before swimming after cleaning?
Follow the cleaner label and keep people out of the area until all surfaces are rinsed and runoff has stopped. If any chemical entered the pool, test the water before swimming and follow the pool manufacturer’s guidance. Do not rely on elapsed time alone when chlorine or concentrated outdoor cleaner was used.
Why are green stains still visible after washing?
Remaining stains may be embedded mold, lichen, oxidation, pollen discoloration, or algae in a protected spline channel. Let the enclosure dry, identify the residue by texture, and perform a small second treatment only if the material is clearly biological. Avoid aggressive scrubbing, which can permanently fray the mesh.
How often should a screen enclosure be cleaned?
Most enclosures benefit from a light rinse every 2-4 weeks during wet or pollen-heavy periods and a deeper cleaning once or twice yearly. Shaded cages beside vegetation may need more frequent attention, while sunny, open enclosures can often go longer. Cleaning frequency should follow moisture and debris conditions rather than a rigid calendar.
The Bottom Line
The safest way to remove green algae from screen enclosure mesh is to use a small test patch, protect plants and pool equipment, apply a compatible cleaner without letting it dry, brush lightly, and rinse with a garden hose. Use vinegar for limited light growth, reserve chlorine products for controlled heavy-growth situations, and hire a professional for elevated, fragile, or damaged enclosures.