To prep a stucco house for exterior painting, identify the stucco system, protect the property, clean without damaging the surface, remove failing paint, repair cracks, allow repairs to cure, and apply the correct masonry primer. Most homes require 3-7 working days, and dry, stable substrate conditions determine whether the new coating lasts.
Key Facts at a Glance
- Traditional cement stucco and EIFS require different washing pressures and repair methods.
- Stucco should be visibly dry, free of chalk, and structurally sound before priming.
- New Portland-cement repairs commonly require at least 28 days of curing, unless the product manufacturer specifies another interval.
- Elastomeric paint can bridge small moving cracks, but it cannot correct leaking walls or structural movement.
- Textured stucco usually requires 20-50% more coating than a smooth wall with the same measured footprint.
- Peeling paint, recurring dampness, stair-step cracks, or exposed lath justify a professional inspection before painting.
Before You Start: Time, Cost, and Tools
A typical 2,000-square-foot stucco home takes a homeowner about 4-8 working days, excluding long curing periods and major repairs. Professional preparation and painting commonly costs approximately $3,500-$8,000 in the United States, depending on height, access, repairs, region, and coating system.
| Requirement | Typical specification | Why it matters |
|---|---|---|
| Project duration | 3-7 working days | Includes washing, drying, repairs, priming, and coating |
| DIY materials | $350-$1,200 | Covers cleaner, patch, primer, caulk, masking, and paint |
| Extension ladder | 24-32 feet | High walls require stable access, not improvised platforms |
| Roller | 3/4-1 inch nap | Reaches common stucco textures |
| Caulk | 10-20 tubes | Quantity varies with windows, doors, and trim |
| Masonry primer | 5-gallon pail per 400-800 square feet | Coverage changes sharply with porosity and texture |
| Moisture meter | $30-$150 | Helps identify damp areas before coating |
| Respirator and eye protection | N95 or product-rated protection | Limits exposure to dust, biocide, and paint mist |
Use a scaffold or qualified contractor for tall elevations, steep roofs, fragile tile roofs, and areas near overhead electrical lines. Exterior painting also requires checking local rules for runoff, ladder placement, and lead-safe work.
Step 1: Identify the Stucco System
Traditional hard-coat stucco is cement-based and usually covers metal lath over a wall assembly. EIFS, or Exterior Insulation and Finish Systems, uses insulation board, reinforcing mesh, base coat, and a thin synthetic finish. EIFS feels softer and may sound hollow when tapped, while hard-coat stucco generally feels rigid and produces a denser sound.
| System | Common clues | Cleaning approach | Repair warning |
|---|---|---|---|
| Traditional stucco | Rigid surface, cement texture, dense tapping sound | Low to moderate pressure, wide fan, test first | Deep cracks can expose lath or indicate movement |
| EIFS | Soft finish, foam-like edge at openings, hollow sound | Garden hose or approved low-pressure wash | Pressure can gouge the finish or drive water behind the system |
| Painted stucco | Existing film, color variation, peeling patches | Remove loose film and chalk | Primer may be needed over exposed substrate |
| Unpainted stucco | Uniform mineral surface, high absorption | Gentle cleaning and full masonry primer | Alkalinity and suction can cause uneven color |
Do not identify the system by sound alone. Inspect an exposed edge at a window, door, utility penetration, or damaged area, and ask the builder, siding contractor, or manufacturer when uncertainty remains.
Why does stucco type change preparation?
Stucco type changes preparation because water and mechanical force affect cement render and EIFS differently. A hard-coat wall may tolerate careful pressure washing, while EIFS can suffer punctures, delamination, or hidden water entry from an aggressive wand.
Step 2: Protect Landscaping and Expose the Work Area
Move furniture, hoses, planters, grills, and decorations away from the walls. Pull mulch, soil, and gravel back several inches so the bottom edge, weep paths, and foundation transition can be inspected.
Trim branches and shrubs enough to create ventilation and working space, normally 12-24 inches from the wall. Cover plants with breathable fabric during cleaning, and remove coverings promptly so heat and cleaning solution do not damage foliage.
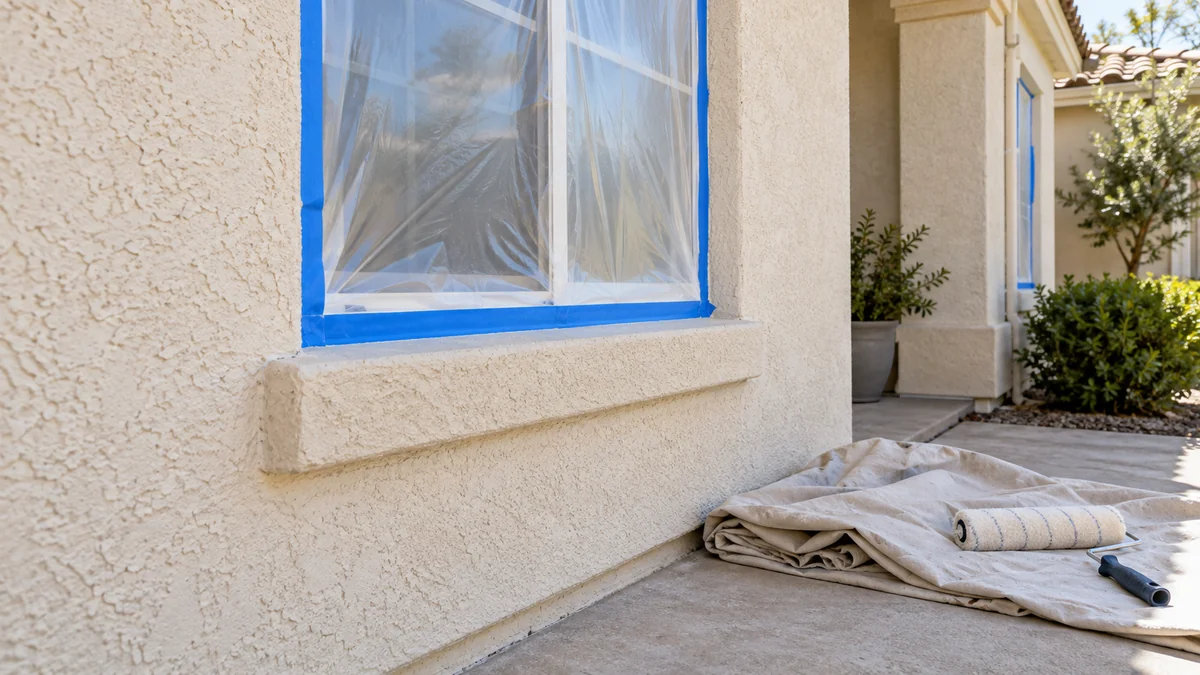
Mask windows, doors, vents, light fixtures, outlets, meters, cameras, roof edges, and finished paving. Turn off power to exterior fixtures if water could reach electrical connections. Do not seal drainage openings or weep screeds with tape, caulk, or paint.
Checkpoint: Every wall is reachable, the base is visible, drainage openings remain open, and protected surfaces cannot receive cleaner or overspray.
Common mistake: Painting over soil-splashed stucco at the foundation. Correct the splash source first by improving grading, gutters, downspouts, or irrigation.
Step 3: Clean Without Damaging the Finish
Clean stucco from the bottom upward with a compatible detergent or mildew cleaner, then rinse from the top downward. A 50:50 household-bleach mixture is not a universal rule; concentrated bleach can damage plants, metals, sealants, and some finishes, so follow the cleaner label and rinse thoroughly.
Test a small inconspicuous area before washing the entire elevation. Use the lowest pressure that removes contamination. Pressure-washer manufacturers often describe maximum machine pressure, but the pressure actually reaching stucco depends on the tip, distance, flow, and operator.
| Surface condition | Starting method | Typical setting | Required control |
|---|---|---|---|
| Light dust | Garden hose and soft brush | 40-80 psi | Avoid driving water into joints |
| Traditional stucco | Wide-angle rinse | Often 500-1,500 psi at surface | Start 18-24 inches away |
| Heavy contamination on hard-coat stucco | Professional wash test | Product and substrate dependent | Never begin at maximum pressure |
| EIFS | Hose or approved soft wash | Usually under 500 psi | No concentrated jet or rotating nozzle |
These are starting ranges, not guarantees. Benjamin Moore’s professional stucco guidance and major coating manufacturers emphasize testing the substrate and following the coating label rather than applying one pressure number to every wall.
Apply cleaner according to its label, allow the stated dwell time, and prevent it from drying. Never mix bleach with ammonia, acids, or other cleaners.
Checkpoint: The wall has no dirt film, biological growth, loose chalk, or cleaner residue, and the texture remains intact.
Common mistake: Using a 0-degree nozzle or turbo nozzle close to the wall. The narrow jet can cut grooves into soft stucco and force water behind EIFS.
Step 4: Let the Wall Dry and Test Moisture
Allow at least 24-48 hours of dry weather after washing, then inspect shaded walls, window corners, cracks, and the foundation line. Longer drying is necessary after rain, in cool weather, over dense repairs, or where the wall absorbed substantial water.
A pin or pinless moisture meter can locate differences between dry and damp areas, but meter readings vary by instrument and substrate. Use the reading as a comparison tool and follow the coating manufacturer’s moisture limit. Many products specify a maximum near 15%, but the label controls.
Check for active moisture before painting:
- Gutters discharge too close to the wall.
- Window or door flashing leaks.
- Sprinklers wet the elevation daily.
- Roof water runs behind trim.
- Efflorescence returns after cleaning.
- Interior walls show damp stains.
Checkpoint: The stucco has a consistent appearance, no cool damp patches, no darkening around cracks, and no visible salt deposits.
How long should stucco dry after washing?
Stucco generally needs 24-48 hours of dry weather after washing, but porous walls, shaded elevations, humid climates, and deep repairs may need several days. Painting before the substrate reaches the coating manufacturer’s moisture limit can cause blistering, poor adhesion, efflorescence, and uneven sheen.
Step 5: Remove Failing Paint and Surface Chalk
Scrape bubbling, peeling, flaking, and poorly bonded paint with a carbide scraper or putty knife. Use a nylon or wire brush only where it will not gouge the finish. Feather sharp paint edges with a sanding sponge or fine abrasive, then remove sanding dust.
Do not aggressively grind stucco to make every patch perfectly smooth. Grinding can expose mesh, reduce texture, and create a wider repair than the original defect.
If the home was built before 1978, test suspect painted surfaces for lead before dry sanding or scraping. The U.S. Environmental Protection Agency’s Renovation, Repair and Painting rule applies to many pre-1978 residential projects performed for compensation, and local requirements may be stricter.
Checkpoint: A firm edge remains after scraping, and rubbing the surface with a dark cloth produces little or no powder.
Common mistake: Treating chalk as ordinary dust. Paint applied over chalk bonds to the powder instead of the stucco, so the coating can release in sheets.
Step 6: Repair Cracks, Holes, and Failed Joints
Crack width, pattern, location, and movement matter more than width alone. A static hairline crack near a window requires a different response from a diagonal stair-step crack that continues through masonry.
| Defect | Typical treatment | Cure or inspection requirement |
|---|---|---|
| Hairline, less than 1/16 inch | Compatible acrylic masonry caulk or coating system | Follow product cure time, often 24-72 hours |
| 1/16-1/4 inch crack | Clean, widen only as needed, fill with flexible stucco patch | Apply in lifts when product requires it |
| Hole or damaged texture | Exterior stucco patch, matched to surrounding profile | Allow full product cure before primer |
| Stair-step or recurring crack | Stop and investigate movement | Contractor or structural assessment |
| Exposed lath or broad delamination | Remove unstable material and rebuild system | Professional repair recommended |
Clean crack interiors with a brush or vacuum. Do not fill dusty voids. Tool flexible sealant so water cannot collect at the repair, then reproduce texture with a sponge, brush, or matching finish material while the patch remains workable.
Fresh Portland-cement stucco commonly requires about 28 days of curing before coating. Some rapid-cure repair products permit earlier painting, but only the product data sheet can establish that window.
Checkpoint: The repair is bonded, dry, textured to match, and no crack reopens during gentle inspection.
Common mistake: Filling a moving joint with rigid patch. Use a flexible joint sealant where two materials meet or where movement is expected.
Step 7: Seal Joints and Correct Water Entry
Caulk the junctions between stucco and window frames, door frames, fascia, trim, penetrations, and other dissimilar materials only where the joint is designed to receive sealant. Use a paintable exterior polyurethane, hybrid polymer, or elastomeric sealant compatible with the existing finish.
Do not caulk weep holes, drainage channels, expansion joints that require a backer rod, or cracks caused by unresolved structural movement. A neat bead cannot replace missing flashing.
For gaps wider than the sealant manufacturer permits, install backer rod first. Tool the joint so water sheds away from the opening, and allow the sealant to cure before priming.
Expert rule: If the same window corner cracks repeatedly, repair the water-management or movement problem instead of applying another layer of caulk.
Step 8: Prime and Choose the Coating
Use a 100% acrylic masonry primer over bare stucco, fresh compatible repairs, and areas where old paint was removed. Choose an alkali-resistant formula for new cement-based material. Use a chalk-binding conditioner when properly cleaned stucco remains powdery, then apply the specified primer if the system requires both products.
Unpainted stucco usually benefits from full-surface priming because porosity causes flashing and uneven absorption. Previously painted walls may need only spot priming when the existing coating is sound, but the finish-coat manufacturer may require a full primer coat.
| Coating system | Vapor behavior | Crack performance | Best application |
|---|---|---|---|
| Flat acrylic masonry paint | High breathability | Limited bridging | Stable stucco and moderate climates |
| Elastomeric coating | Lower permeability when thick | Better for small moving cracks | Sound, dry walls with recurring microcracks |
| Acrylic masonry primer | Breathable barrier | Does not repair movement | Bare, alkaline, porous, or patched stucco |
| Chalk-binding conditioner | Locks down powder | Not a finish coat | Cleaned but still chalky surfaces |
Elastomeric coating is not automatically the longest-lasting choice. Its lower vapor transmission can trap moisture when walls leak or when multiple impermeable layers already exist. A breathable acrylic system is often safer for a dry, stable wall.
Apply primer and paint within the product’s temperature, humidity, and recoat limits. Avoid direct hot sun, rain, heavy dew, and temperatures below the label minimum. Back-roll sprayed material into textured stucco so the coating reaches the recesses.
How Much Paint and Time Should You Plan For?
Textured stucco increases surface area, so a wall measured at 2,000 square feet may consume substantially more coating than a smooth wall. Calculate from the product’s stated coverage, then account for texture, porosity, spray loss, and a separate allowance for repairs.
| Project factor | Typical range | Main cost driver |
|---|---|---|
| Washing and preparation | $0.40-$1.20 per square foot | Height, contamination, repairs |
| Full professional project | $1.75-$4.00 per square foot | Access, region, coating, labor |
| Minor crack repairs | $200-$800 total | Number and depth of defects |
| Extensive stucco repair | $800-$3,000 or more | Lath, flashing, movement, and access |
| DIY materials | $350-$1,200 | Primer, patch, equipment rental, paint |
| Operational schedule | 3-7 days | Drying and weather interruptions |
The ranges are typical planning figures, not bids. Obtain written estimates that separate washing, repairs, primer, finish coats, lift or scaffold rental, and warranty exclusions.
Common Mistakes and How to Fix Them
Painting over damp stucco
Blisters, cloudy film, peeling, and efflorescence often indicate moisture beneath the coating. Remove failed paint, identify the water source, allow the wall to dry, and re-prime only after the substrate meets the product limit.
Using excessive pressure
Fuzzy texture, gouges, exposed mesh, and loosened finish indicate washing damage. Stop immediately, photograph the area, allow drying, and have a stucco professional assess whether patching or system replacement is needed.
Applying paint over chalk
A hand rubbed across the wall leaves white powder when chalk remains. Reclean, rinse, dry, and apply a compatible chalk-binding product or masonry primer according to its data sheet.
Ignoring efflorescence
White crystalline deposits indicate soluble salts moving through masonry with water. Brush them away after drying, correct water entry, and avoid sealing the symptom before solving the moisture path.
Making repairs too smooth
Smooth circles remain visible through flat paint because the surrounding wall scatters light differently. Rebuild the texture before priming, and make a sample repair on a less visible elevation.
Applying elastomeric coating to a defective wall
Elastomeric paint can bridge small cracks but cannot stabilize settlement, replace flashing, or stop leaks. Repair the substrate and water-management system first.
Adjustments for Climate and Exposure
Humid or rainy climates require longer drying windows, afternoon rain planning, and closer inspection of shaded elevations. Coastal homes need corrosion-resistant masking and careful rinsing because salt residue can interfere with adhesion.
In cold climates, avoid coating when overnight temperatures will fall below the product minimum. In hot, dry climates, work on the shaded side and monitor wet edges because rapid skinning can create lap marks.
Dark colors can increase surface temperatures and may accelerate movement or coating stress on sun-exposed stucco. Confirm the paint manufacturer’s approved light-reflectance range, especially for EIFS and foam-backed systems.
When Should You Hire a Stucco Contractor?
Hire a qualified stucco or building-envelope contractor when cracks exceed 1/4 inch, follow stair-step patterns, recur after repair, expose lath, or occur with interior dampness. Professional assessment is also appropriate for delamination, bulging walls, missing flashing, extensive EIFS damage, and homes requiring scaffold work.
A painter can prepare and coat a sound stucco surface. A painter should not conceal unresolved structural movement or water intrusion under a new finish.
FAQ
Can I paint stucco without pressure washing?
Yes, when the wall is lightly soiled and the existing coating is firmly bonded. Use a hose, compatible cleaner, and soft brush instead. Heavy chalk, mildew, grease, and loose paint require more thorough cleaning, but EIFS and fragile stucco should not receive aggressive pressure.
Should I use a roller or sprayer on stucco?
A sprayer followed immediately by back-rolling usually gives the most consistent coverage on textured walls. A roller alone works for smaller elevations and repairs, but a 3/4-1-inch nap may struggle with deep texture. Spraying requires masking, respiratory protection, and control of overspray.
Can rain damage freshly painted stucco?
Rain can damage uncured paint by causing wash marks, color variation, soft film, and poor adhesion. Follow the coating label’s rain-resistance time, which commonly ranges from several hours to 24 hours, and allow longer protection during cool or humid weather.
How can I tell whether stucco is too chalky to paint?
Rub the dry wall with a clean dark cloth or your hand. A light trace can sometimes be controlled with a chalk-binding primer, but heavy powder means the surface needs additional cleaning or stabilization. Primer cannot reliably bond to loose, dusty material.
Is flat paint better for a stucco exterior?
Flat acrylic masonry paint often hides texture variations and provides good vapor transmission, making it a practical choice for stable stucco. Satin or low-sheen products clean more easily but can emphasize patches, waves, and uneven repairs.
What should a painting warranty include?
A useful warranty identifies the coating products, number of coats, preparation steps, repair exclusions, moisture limitations, and remedy for peeling or adhesion failure. It should not promise that paint will correct settlement, leaking windows, defective flashing, or continuing substrate movement.
The Bottom Line
How to prep a stucco house for exterior painting is a substrate and moisture-management task before it is a painting task. Identify the wall system, clean gently, remove chalk and failing film, repair defects, correct water entry, wait for dry and cured surfaces, then use a compatible alkali-resistant masonry primer and finish. A sound, dry substrate is the foundation of a durable stucco coating.