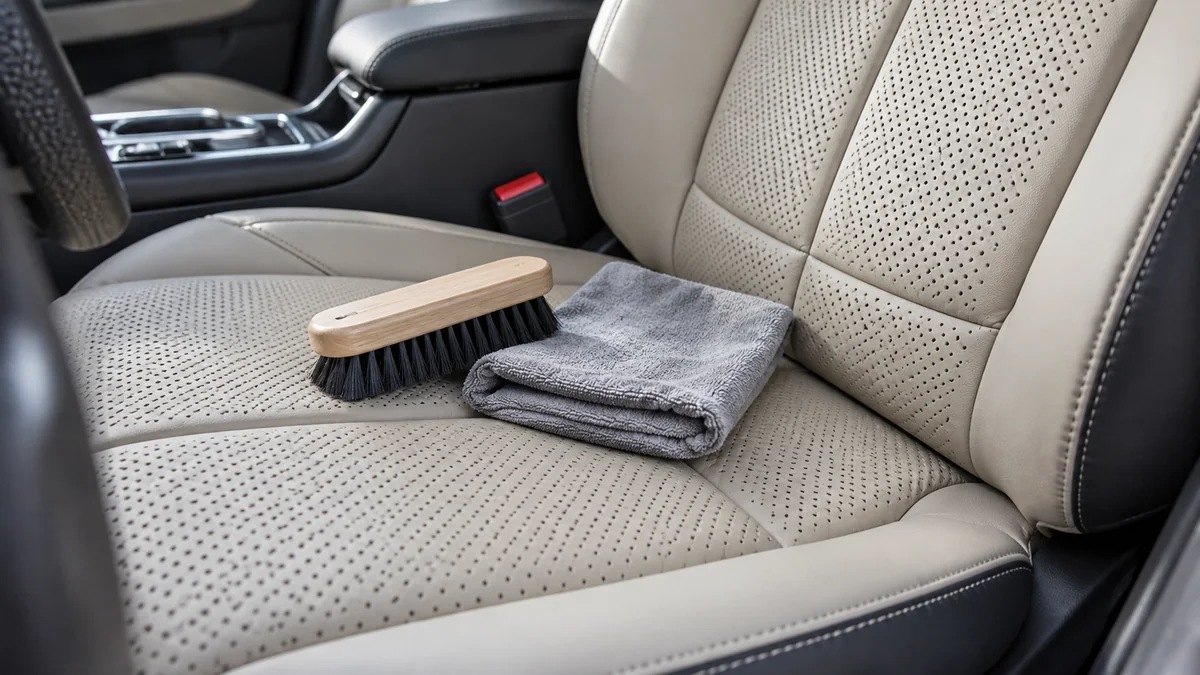
To clean vented leather seats, vacuum the perforations first, apply a small amount of pH-balanced foam to a brush or towel rather than the seat, and immediately remove the dirty foam with a dry microfiber cloth. Work in small panels with the seat ventilation and heating switched off, then dry the perforations completely before conditioning.
Key facts at a glance
Vented leather seats should never be saturated because liquid can travel through perforations into foam, wiring, sensors, or ventilation hardware.
A soft brush vacuum, horsehair detailing brush, microfiber towels, and a pH-balanced automotive leather cleaner are sufficient for routine cleaning.
Foam applied to a brush is safer than liquid sprayed directly onto perforated leather.
Typical DIY cleaning takes 30-45 minutes per front seat, including drying and inspection.
Routine vacuuming every 2-4 weeks reduces the need for aggressive scrubbing.
Most coated automotive leather needs light conditioning only two or three times yearly.
Why Vented Leather Needs a Different Method
Vented leather is usually perforated automotive leather with small holes across the seating surface. The holes may support seat ventilation, heating, or both, but perforation alone does not prove that a cooling fan exists beneath the panel.
A typical seat contains a coated leather or synthetic-leather surface, a backing layer, foam, wiring, pressure sensors, heating elements, and, on ventilated models, a fan or air channel. Liquid entering the holes can remain in the foam, transport dissolved grime downward, or reach electrical components. The practical rule is simple: control liquid volume at every stage.
Automotive seats are commonly made from pigmented, polyurethane-coated leather. The clear or colored coating carries much of the stain resistance, so aggressive products often damage the finish before they improve cleanliness. Aniline and semi-aniline leather are exceptions because they have less surface protection and require the vehicle manufacturer’s approved method.
Check the seat material first
Look in the owner’s manual or inspect the seat specification before applying cleaner. A perforated surface may be leather, vinyl, polyurethane synthetic leather, Alcantara, or a combination of materials.
| Surface type | Typical appearance | Safe starting method | Main restriction |
|---|---|---|---|
| Pigmented leather | Uniform color, low absorbency | Foam cleaner on brush | Avoid saturation and abrasive pads |
| Synthetic leather | Very uniform grain and sheen | Diluted interior cleaner on towel | Solvent can soften or dull polyurethane |
| Semi-aniline leather | Natural variation, softer feel | OEM-approved cleaner on microfiber | Avoid vigorous brushing |
| Aniline leather | Absorbs a water droplet quickly | Professional assessment | Water rings and dye movement are possible |
| Alcantara insert | Matte, fabric-like nap | Dedicated Alcantara cleaner | Do not use leather conditioner |
If a water droplet darkens the surface immediately, stop and test a hidden area. Absorption indicates that the surface may not be fully coated.
What You Need Before Cleaning
Prepare the tools before opening the cleaner. A controlled process prevents the common mistake of leaving a wet seat while searching for a towel.
| Item | Recommended specification | Typical quantity | Purpose |
|---|---|---|---|
| Vacuum | Upholstery brush attachment, 400-800 W household equivalent | 1 | Removes loose grit |
| Leather cleaner | pH-balanced automotive formula, preferably foaming | 30-60 ml per seat | Loosens body oil and soil |
| Detailing brush | Soft horsehair or boar-hair bristles | 1-2 | Agitates coated leather |
| Microfiber towels | Low-lint, 300-500 GSM | 4-6 per seat | Removes foam and moisture |
| Applicator pad | Closed-cell foam | 1 | Applies minimal conditioner |
| Compressed air | Rubber-tipped nozzle, 30-90 PSI | Optional | Evacuates dry debris |
| Soft toothbrush | Nylon bristles, unused or clean | 1 | Clears isolated blocked holes |
| Work light | LED, low heat | 1 | Reveals residue and wet spots |
Use a dedicated automotive leather or interior cleaner. A product labeled “leather cleaner” is not automatically suitable for every surface, so follow the vehicle and product instructions when they conflict with generic detailing advice.
Which cleaning method is safest?
Foam applied to a brush is the best general method for coated, perforated leather because the brush receives most of the liquid before the surface does. Spraying cleaner onto a microfiber towel is the lowest-liquid alternative for delicate or lightly soiled seats, while a direct spray onto the seat is the riskiest option.
| Method | Liquid control | Soil removal | Best use | Main limitation |
|---|---|---|---|---|
| Foam on brush | High | Medium to high | Routine deep cleaning | Requires a foaming dispenser |
| Cleaner on towel | Very high | Low to medium | Light soil and delicate leather | More wiping effort |
| Cleaner on applicator | High | Medium | Large flat panels | Less effective in perforations |
| Direct seat spray | Low | Medium | Generally unsuitable | Runoff enters holes |
| Steam cleaning | Variable | High on some stains | Professional use only | Heat and moisture risk |
A thin foam is not automatically safe if it collapses into liquid and runs. Dispense a small amount, work one panel, and wipe before adding more.
Step-by-Step: How to Clean Vented Leather Seats
The following sequence is designed for a moderately dirty front seat. It assumes no active spill, mold, torn leather, or unknown chemical contamination.
Step 1: Switch off the seat and inspect the surface
Park in shade, open the doors, turn off the engine, and switch off seat heating and ventilation. Move the seat forward and backward to inspect the rails, seams, side bolsters, and perforated center panels.
Remove coins, grit, food, and loose objects before vacuuming. Photograph severe stains if you may need professional help, because repeated wet cleaning can make the original cause harder to identify.
You will know it worked when: the seat is cool, accessible, and free of loose objects.
Common mistake: cleaning in direct sun, which rapidly dries product and increases streaking.
Step 2: Vacuum the seat without stretching the holes
Fit the vacuum with a clean upholstery brush and use low to moderate suction. Glide across the seat with light contact, following the panel rather than pressing the nozzle into the perforations.
Vacuum seams, piping, belt openings, and the gap between the seatback and cushion. Do not drag a hard crevice tool across the leather because its edge can mark the coating or catch a perforation.
You will know it worked when: loose crumbs and visible dust are gone, including around the hole openings.
Common mistake: pressing down so firmly that the vacuum deforms the leather or pulls debris deeper.
Step 3: Remove dry debris from the perforations
Use compressed air only when dry particles remain. Set the regulator to approximately 30-60 PSI for an initial pass, hold the rubber-tipped nozzle 4-6 inches away, and direct air across the surface at roughly a 45-degree angle.
Vacuum immediately while blowing short bursts. Avoid aiming straight down into the holes because the airflow can push grit behind the leather. If compressed air is unavailable, brush across the surface with a clean soft toothbrush while vacuuming.
You will know it worked when: the holes look open and no particles eject during a second light brush pass.
Common mistake: using high pressure close to the surface, which can spread debris into seams or damage loose coating.
Step 4: Apply cleaner to the brush, not the seat
Dispense one or two pumps of foam onto the detailing brush. For a liquid cleaner, apply approximately 1-2 teaspoons to a folded microfiber towel, then spread the product across a section no larger than 12 by 12 inches.
Work one panel at a time with short, overlapping strokes. Use enough agitation to lift body oil from the grain, but do not grind the brush into the holes. The cleaner should remain visibly damp, never runny.
You will know it worked when: the foam turns gray or brown while remaining localized to the working panel.
Common mistake: spraying directly onto the seat, especially near seams, switches, and perforated zones.
Step 5: Remove dirty foam immediately
Fold a dry microfiber towel into a flat pad and press it onto the cleaned panel. Lift and refold the towel rather than spreading dirty foam across adjacent areas.
Use moderate hand pressure, particularly over perforations, to draw residual moisture upward. Follow with a second dry towel if the first towel becomes damp. Do not leave cleaner on the surface for a long dwell time unless the product instructions specifically require it.
You will know it worked when: the surface feels clean and only slightly cool, not wet or slippery.
Common mistake: wiping horizontally with a saturated towel, which redistributes soil and pushes liquid toward the holes.
Step 6: Clear isolated blocked holes
For hardened residue in individual perforations, use a soft, nearly dry toothbrush at a shallow angle. A silicone dental pick can loosen a visible plug, but never insert a metal pick or push downward into the hole.
After loosening the residue, vacuum the area and press with a dry microfiber cloth. Repeat once if necessary. A hole that remains blocked after two gentle passes may contain residue below the surface or a damaged backing layer.
You will know it worked when: the hole has a clear opening and no white cleaner crust remains around its edge.
Common mistake: probing aggressively, which can enlarge the hole or puncture the material beneath it.
Step 7: Dry the seat completely
Leave the doors open in a shaded, ventilated area for 30-60 minutes. A small fan aimed across the surface can shorten drying time, but avoid high heat from a hair dryer.
Press a dry tissue or microfiber corner onto several perforated sections. If the cloth picks up moisture, continue drying. Do not activate seat ventilation or heating to force evaporation while the seat is still wet, because trapped moisture may move into the ventilation or electrical system.
You will know it worked when: the seat has an even color, no cool damp patches, and no moisture transfers to a dry cloth.
Common mistake: reinstalling covers or closing the vehicle immediately, which traps humidity and odor.
Step 8: Condition only when the surface needs it
Most coated automotive leather does not need heavy conditioner after every cleaning. If the surface feels dry, looks dull after testing, or the manufacturer recommends conditioning, place a pea-sized amount on a foam applicator and work it into the pad before touching the seat.
Glide lightly across one panel. Avoid filling the perforations with cream or wax. After 10-15 minutes, buff with a clean towel and inspect the holes under a work light.
You will know it worked when: the finish feels smooth but not greasy, and the perforations remain open.
Common mistake: over-conditioning, which creates a glossy film that attracts dust and forms plugs.
How Do Foam and Towel-Transfer Cleaning Compare?
Foam is preferable for normal body oil and embedded surface soil, while towel-transfer cleaning is safer for delicate leather and very light contamination. Neither method is appropriate for flooding a seat, and both require immediate removal of residue.
| Cleaning situation | Preferred method | Product amount | Typical time | Reason |
|---|---|---|---|---|
| Weekly dust | Dry microfiber or vacuum | 0 ml | 5-10 minutes | No chemical needed |
| Light fingerprints | Cleaner on towel | 1 teaspoon per panel | 10-15 minutes | Minimal moisture |
| Body oil on coated leather | Foam on brush | 1-2 pumps per panel | 20-30 minutes | Better controlled agitation |
| Hardened food residue | Foam plus soft toothbrush | 2-3 pumps per panel | 30-45 minutes | Targeted mechanical work |
| Aniline or semi-aniline leather | OEM cleaner on towel | Manufacturer amount | 20-40 minutes | Reduces dye and water risk |
Direct spraying is not a useful shortcut. It adds liquid faster than the leather surface can release it and makes runoff difficult to see under the seat cushion.
What Should You Never Use?
Avoid dishwashing detergent, household degreasers, ammonia, undiluted alcohol, vinegar, abrasive melamine sponges, stiff brushes, and unapproved solvent cleaners. These products can strip gloss, soften polyurethane, remove dye, or roughen the protective coating.
Steam is also unsuitable for casual DIY cleaning of perforated leather. Professional detailers may use controlled vapor on compatible surfaces, but heat, moisture, dwell time, and nozzle distance must be managed. A home steam cleaner can shrink natural leather, distort synthetic leather, loosen adhesive, or drive moisture below the perforated panel.
Do not use a pressure washer, wet vacuum extraction head, or soaking upholstery method on a ventilated seat. Those methods may work on removable fabric mats, but the seat’s wiring and foam make saturation a different risk category.
How Often Should Vented Leather Seats Be Cleaned?
Vacuum vented leather seats every 2-4 weeks, perform a controlled cleaner treatment about every three months, and condition coated leather no more than two or three times yearly unless the manufacturer specifies otherwise.
| Use pattern | Vacuum or dust | Cleaner treatment | Conditioning | Priority |
|---|---|---|---|---|
| Single driver, low mileage | Every 4 weeks | Every 3-4 months | 2 times yearly | Remove dust |
| Daily commuter | Every 2 weeks | Every 2-3 months | 2-3 times yearly | Control body oil |
| Family vehicle | Weekly | Every 1-2 months | 2 times yearly | Treat spills quickly |
| Hot, humid climate | Every 1-2 weeks | Every 2 months | Manufacturer guidance | Dry thoroughly |
| Pet or work vehicle | Weekly | Monthly or as needed | 2 times yearly | Vacuum seams and holes |
Frequent light cleaning is safer than infrequent aggressive cleaning. Repeated scrubbing removes finish gradually, while accumulated oil requires stronger agitation and more moisture.
Situational Variations for Common Stains
Fresh coffee, water, or soda
Place a thick dry microfiber towel flat over the spill and press vertically. Replace the towel as it becomes damp. Do not scrub sideways, because horizontal wiping can spread liquid through the perforated panel.
For milk or sugary drinks, remove the surface liquid first, then use a small amount of cleaner on a towel. Repeat with a second towel lightly dampened with clean water, followed by thorough drying. Do not run the seat heater to evaporate a fresh spill.
Grease, sunscreen, or body oil
Use a dry towel first to remove surface oil. Apply foam to a brush in small sections, agitate lightly, and wipe immediately. Two mild passes are safer than one wet, forceful pass.
Sunscreen may leave a white or glossy film on dark leather. Avoid alcohol and abrasive sponges, which can remove the finish along with the sunscreen.
Salt marks
Use a barely damp microfiber towel with the approved cleaner, then wipe with a separate towel lightly dampened with clean water. Salt residue often returns after drying if cleaner remains in the perforations, so inspect the holes and repeat with minimal moisture.
Vomit, urine, or persistent odor
Remove solids with disposable material, blot liquid, and use an automotive-safe enzyme product on a towel only when the product is compatible with the seat material. Persistent odor below the leather may require seat removal or professional treatment. Do not saturate the cushion to chase an odor that has migrated into the foam.
Troubleshooting Cleaning Problems
| Problem | Likely cause | Safe correction | Escalation point |
|---|---|---|---|
| White plugs in holes | Dried conditioner or soap | Dry toothbrush, then minimal towel moisture | Plugs remain below surface |
| Sticky finish | Excess conditioner or incomplete rinsing | Wipe with approved cleaner on towel | Coating feels soft or tacky |
| Dark water ring | Absorbent or damaged finish | Stop wet cleaning and dry evenly | Ring expands or dye transfers |
| Musty odor | Trapped moisture or contaminated foam | Ventilate and inspect underside | Odor remains after 24-48 hours |
| Enlarged perforation | Mechanical damage | Stop brushing and photograph damage | Repair specialist required |
| Seat ventilation is weak | Blocked holes, filter, fan, or foam | Clear surface holes only | Electrical or fan diagnosis needed |
A seat that remains damp overnight deserves inspection. Moisture in foam is a drying problem first, not a reason to add more cleaner.
When Should You Hire a Professional?
Use a professional detailer when the leather is aniline or semi-aniline, a drink has soaked through the cushion, mold or persistent odor is present, dye is transferring, the perforations are tearing, or seat ventilation stops working after a spill.
Typical professional interior-detailing prices are approximately $150-$300 or more for a full vehicle, depending on location, vehicle size, stain severity, and whether the seat must be removed. A single-seat repair or extraction can cost less, but electronic diagnosis and leather repair increase the price.
Ask the detailer whether they will spray directly onto perforated seats, use extraction equipment, protect seat electronics, test the material, and document pre-existing damage. A careful professional should explain moisture control rather than promising that every stain can be removed.
Maintenance Habits That Prevent Deep Cleaning
- Vacuum crumbs before they become oily plugs.
- Blot spills vertically within minutes.
- Keep sunscreen, denim dye, and dark bags from rubbing against light leather.
- Use a clean microfiber towel for each seat section.
- Store the vehicle out of intense sun when possible, because ultraviolet exposure accelerates coating and pigment deterioration.
- Inspect perforations after conditioning.
- Clean seat ventilation intakes according to the vehicle manual.
- Never cover a damp seat with a plastic protector.
The most effective practitioner rule is to use less product than seems necessary. A clean towel, controlled foam, and repeated light passes usually outperform a wet seat and aggressive scrubbing.
Frequently Asked Questions
Can I use leather wipes on vented seats?
You can use automotive leather wipes if the manufacturer approves them for the seat material, but do not press a wet wipe into the perforations. Wring or squeeze excess liquid from the wipe, clean a small section, and follow with a dry microfiber towel. Avoid wipes containing bleach, strong solvent, silicone-heavy dressing, or household disinfectant.
Can I use a toothbrush on perforated leather?
Use only a soft nylon toothbrush or detailing brush, and work across the surface at a shallow angle. A toothbrush is useful for isolated residue, not for aggressive full-seat scrubbing. Metal picks, stiff bristles, and downward probing can enlarge perforations or damage the backing layer beneath the leather.
Should I turn on the seat heater after cleaning?
Do not turn on the seat heater while the seat is visibly damp or while moisture transfers to a towel. Let the seat dry naturally with doors open or use a fan across the surface. Heat can accelerate drying after the surface is nearly dry, but the vehicle manufacturer’s instructions take priority.
Can I clean vented leather with a wet vacuum?
A wet vacuum is generally unsuitable for DIY cleaning of ventilated leather seats because extraction can introduce and pull large volumes of water through the perforations. Professional detailers may use specialized low-moisture equipment after testing the material and protecting electrical components. Routine maintenance should use controlled foam and towels.
Why do perforated seats develop white residue?
White residue usually comes from dried conditioner, soap, mineral deposits, or a combination of product and body salt. Remove loose residue with a dry soft toothbrush, then use a barely damp microfiber towel and dry the panel immediately. If the residue is beneath the surface, further probing can cause damage and professional cleaning is safer.
How do I know whether my seat is actually ventilated?
Perforations alone do not confirm ventilation. Look for seat ventilation controls, a fan symbol, an owner’s-manual description, or airflow when the system operates. Some seats use perforation only for appearance. Regardless, the cleaning rule remains the same because liquid can still enter foam, sensors, and wiring.
The Bottom Line
The safest way to clean vented leather seats is to vacuum first, keep cleaner off the seat until it is on a brush or towel, clean small sections, remove foam immediately, clear blocked holes gently, and dry completely before conditioning. Routine light maintenance every 2-4 weeks prevents the saturation and scrubbing that cause most perforation damage.


