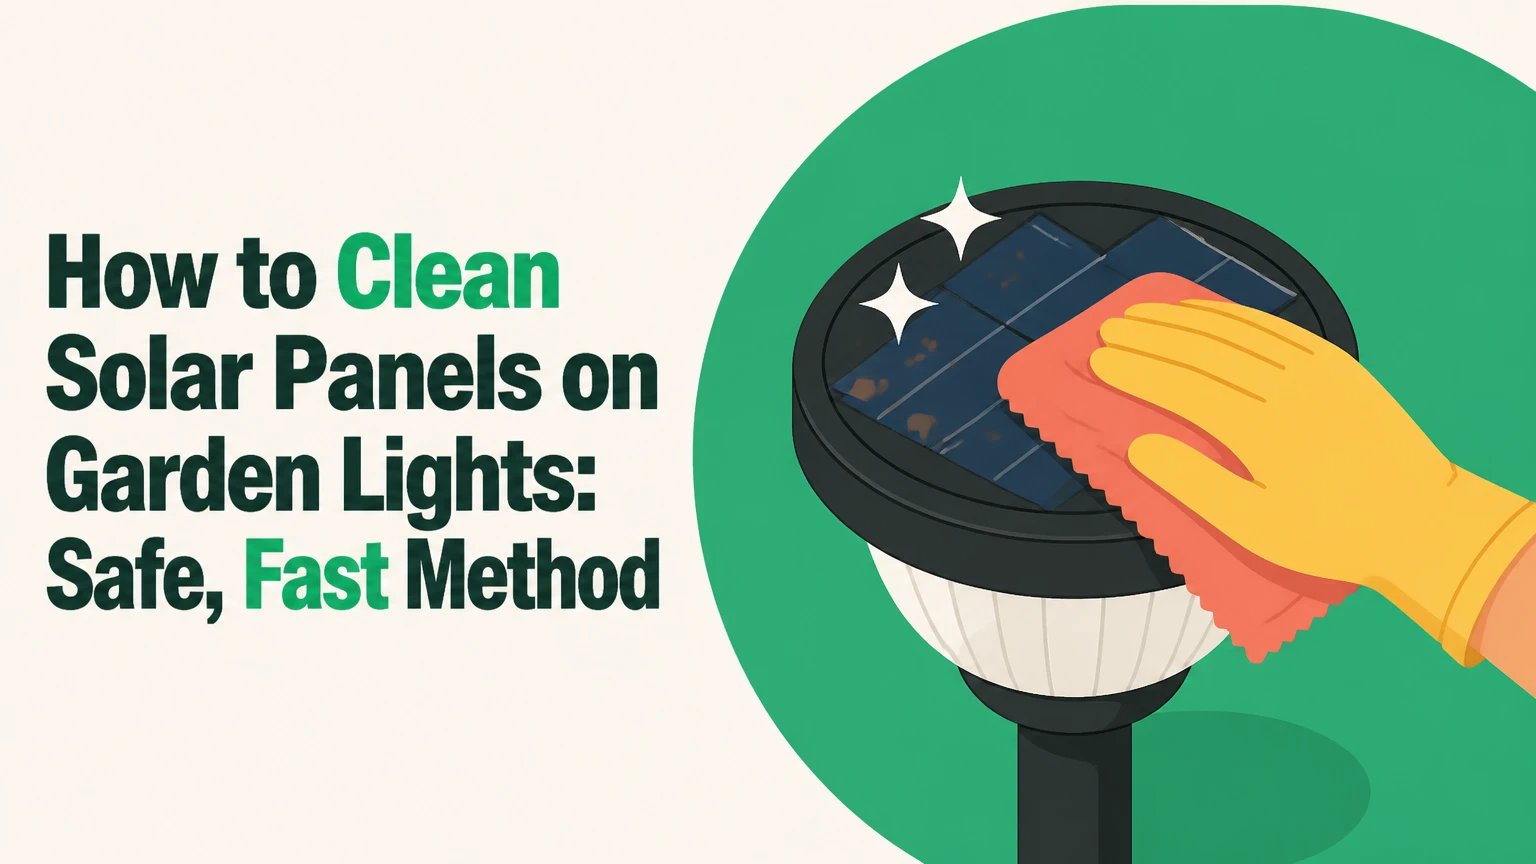
To clean solar panels on garden lights, switch the fixture off, remove loose debris with a soft brush, wipe the panel with diluted mild soap and warm water, rinse away residue, and dry it with a lint-free microfiber cloth. Clean cool panels in shade, and never use abrasive pads, solvents, or a pressure washer.
Key Facts at a Glance
- A typical solar garden light takes 1-2 minutes to clean and test.
- Use approximately 2-5 drops of mild dish soap in 500 millilitres of warm water.
- Clean solar-light panels every 3 months under ordinary conditions, or monthly where pollen, dust, salt, or sprinkler minerals accumulate.
- Cloudy white plastic usually indicates UV oxidation, which soap cannot remove.
- A clean panel cannot compensate for a worn rechargeable battery, heavy shade, or failed charging circuit.
- Water must remain outside the battery compartment, LED housing, and switch opening.
How Solar Garden Lights Work
A solar garden light uses a small photovoltaic panel to convert daylight into electrical energy, a rechargeable battery to store that energy, a photosensor to detect darkness, and an LED to produce light after sunset. Dirt reduces the light reaching the photovoltaic cells, so the battery may receive less charge during the same daylight period.
The panel on a path light is usually a small glass or plastic-covered module rather than a roof-sized solar array. Its limited surface area makes a film of pollen, soil, bird droppings, or sprinkler residue noticeable, particularly when the light already receives only a few hours of direct sun.
Cleaning improves the panel’s optical path, but the improvement is not unlimited. A fixture under a tree remains shade-limited after cleaning, while a fixture with a sulphated or aged nickel-metal hydride battery may still switch off early despite a spotless surface.
Which Panel Problems Can Cleaning Fix?
Cleaning can remove loose dirt, pollen, mud splash, bird droppings, insect residue, and some mineral film. Cleaning cannot repair a cracked cover, internal condensation, delaminated plastic, broken wiring, a failed charging controller, or a battery that no longer holds sufficient capacity.
Check the panel before applying water. A hairline crack or loose seal changes the correct procedure because liquid can enter the electronics. For a damaged fixture, dry wiping is safer until the unit is repaired or replaced.
Before You Start
| Requirement | Typical amount or setting | Why it matters |
|---|---|---|
| Cleaning time | 1-2 minutes per light | Allows a 10-light group to finish in about 15-25 minutes |
| Water | 500 mL per 5-10 lights | Provides enough rinse water without soaking the fixture |
| Mild soap | 2-5 drops per 500 mL | Cuts organic film without leaving a heavy detergent coating |
| Cloth | 2 microfiber cloths per 5-10 lights | Keeps the drying cloth free of loosened grit |
| Brush | 1 soft paintbrush or soft toothbrush | Removes dry soil from panel edges and seams |
| Working condition | Shade, cool morning, or overcast weather | Prevents rapid evaporation and streaking |
| Difficulty | Low, provided seals and wiring are intact | No disassembly is normally required |
Gather a soft-bristled brush, clean microfiber cloths, warm water, mild unscented dish soap, and a spray bottle or second damp cloth for rinsing. A cotton swab helps clean narrow edges, but it should never be pushed into a switch, charging port, or battery compartment.
Switch the light to OFF if the fixture has a switch. If the light is removable without force, lift it from the ground and hold the body rather than pulling the panel, decorative cap, or cable.
Do not clean a hot panel in direct afternoon sun. Warm plastic dries water and soap before the cloth can remove them, which creates streaks and leaves detergent on the surface.
How to Clean Solar Panels on Garden Lights
The safest routine has five stages: inspect, dry-brush, wash, rinse, and dry. The most important factor is keeping grit away from the panel while wiping, because a hard particle under a cloth can scratch plastic more readily than the cleaning solution itself.
Step 1: Inspect and Switch Off the Light
Place the solar garden light in shade and turn its switch to OFF. Examine the panel for cracks, deep scratches, loose edges, white oxidation, trapped moisture, or water inside the transparent housing.
Remove detachable lights from wet grass when the design allows it. Do not open a sealed housing solely for cleaning, because disturbing the gasket can reduce the weather resistance that the manufacturer designed into the fixture.
Success checkpoint: The light is off, the panel is cool, and no liquid can enter an obvious opening.
Common mistake: Cleaning a fixture with a cracked cover as though it were fully sealed.
Step 2: Remove Dry Debris With a Soft Brush
Use a clean, dry microfiber cloth or a soft-bristled brush to lift away dust, leaves, cobwebs, dried soil, and loose grit. Brush from the centre toward the edge, then clean the rim and the gap around the panel.
A soft paintbrush works well for narrow decorative housings. A soft toothbrush can reach grooves, but use a separate brush that has never contacted abrasive household cleaner.
Do not scrape bird droppings, hardened mud, or sap while dry. Metal tools, razor blades, kitchen scourers, and melamine foam can create scratches that permanently scatter incoming light.
Success checkpoint: No loose particles remain before the wet cloth touches the panel.
Common mistake: Rubbing visible sand across the surface with a dry cloth.
Step 3: Wash the Panel With Diluted Mild Soap
Mix 2-5 drops of mild dish soap into 500 mL of warm, not hot, water. Dip a microfiber cloth into the solution, wring it until damp, and wipe the panel with light overlapping strokes.
A small solar-light panel does not need a bucket of foamy water. Excess detergent increases rinsing time and raises the chance that soapy liquid will run into a seam. Mild castile soap can work, but a strongly scented, moisturising, or abrasive product is a poor choice because it may leave an oily film.
For bird droppings, sap, or dried sprinkler residue, lay the damp cloth over the mark for 30-60 seconds. The moisture softens the deposit, allowing removal without pressure. Repeat the soak rather than scrubbing harder.
Success checkpoint: The panel looks uniformly wet and the visible film lifts without force.
Common mistake: Applying concentrated soap directly to the plastic.
Step 4: Rinse Away Every Soap Residue
Remove soap with a clean cloth dampened with plain water or with a gentle spray from a small bottle. Aim the water at the panel surface, not at the battery door, switch, LED lens, or ventilation gap.
A full hose spray is unnecessary for most path lights. If the fixture has an intact glass face and a manufacturer-rated outdoor seal, a light rinse may be acceptable, but the manufacturer’s instructions take priority over a generic cleaning routine.
Rinse twice when the panel feels slippery or shows rainbow-like detergent marks. Soap residue can form a translucent film that reduces light transmission and attracts dust after the fixture dries.
Success checkpoint: The surface no longer feels slippery and shows no bubbles or cloudy detergent lines.
Common mistake: Treating a final soap-coated wipe as a rinse.
Step 5: Dry the Panel and Reposition the Light
Wipe the panel with a clean, dry, lint-free microfiber cloth. Use a second cloth if the first one collected soil, because retained grit can scratch the cover during drying.
Return the fixture so the panel faces the strongest available daylight and is not covered by leaves or newly grown vegetation. Avoid placing the panel where a fence, wall, shrub, or garden ornament blocks midday light.
Success checkpoint: The panel is clear, dry, and free of visible fibres, streaks, and standing water.
Common mistake: Testing brightness immediately after cleaning without allowing a full charging cycle.
A clean panel does not instantly make a dark light bright. Let the fixture charge through the next sunny day, then compare its runtime after dusk with its previous performance.
Which Cleaning Method Is Safest?
Mild soap and water is the safest routine method for most intact solar garden-light panels. Polish, toothpaste, and diluted vinegar belong to narrower situations because they introduce abrasion or chemical exposure that ordinary dust does not require.
| Method | Typical cost | Best use | Main risk | Expected result |
|---|---|---|---|---|
| Plain water and microfiber | $0-$5 | Light dust and pollen | Smearing grit if not brushed first | Clean surface in 1-2 minutes |
| Mild soap solution | $0-$8 | Grease, soil, bird residue | Soap film if poorly rinsed | Routine cleaning every 1-3 months |
| Diluted vinegar, 1:8 | $1-$6 | Mineral spots from sprinklers | Seal and plastic compatibility | Spot treatment after a short dwell |
| Non-abrasive polish | $5-$15 | Light surface haze | Uneven finish or fine scratches | Temporary clarity improvement |
| Headlight restoration kit | $10-$30 | Severe UV oxidation | Over-polishing or poor sealing | Longer-lasting clarity when applied correctly |
Prices are typical household retail ranges in the United States and vary by country. The procedure, rather than the price, determines whether the panel remains undamaged.
Can You Use Vinegar on Solar-Light Panels?
Diluted vinegar can remove mineral spots, but it is not the preferred everyday cleaner. Mix one part white vinegar with eight parts water, apply it to a cloth rather than pouring it over the fixture, leave it on mineral deposits for less than 60 seconds, then rinse with plain water and dry.
Avoid vinegar when the panel has exposed rubber, damaged seals, bare metal trim, or a manufacturer warning against acidic cleaners. Vinegar is also ineffective against UV-oxidised plastic and will not restore a white, hazy cover.
Is Toothpaste Safe for Cloudy Solar Panels?
Toothpaste may improve a mildly oxidised plastic cover, but only a non-gel, non-whitening, low-abrasion formula should be considered. Modern whitening toothpastes can contain stronger polishing particles, so a dedicated plastic or automotive headlight polish offers more predictable results.
Test a pea-sized amount on an inconspicuous corner for 30-60 seconds. Stop if the area develops fine circular scratches, then wash, rinse, and dry the panel. Polishing removes some degraded surface material; it does not rebuild a cracked cover or fix moisture inside the housing.
Can Cloudy Panels Be Restored?
Cloudy solar-light panels can sometimes be restored when the haze is superficial UV oxidation, but replacement is usually better when the plastic is cracked, deeply crazed, yellowed through its thickness, or fogged from internal moisture. Ordinary washing cannot remove chemical degradation in the cover.
First wash and dry the panel. If the haze remains and appears white or yellow on the outer surface, apply a plastic-safe headlight polish with a soft cloth using the product’s stated pressure and duration. Remove all residue, then apply only a compatible UV protectant recommended for that plastic.
Clear automotive spray coatings require careful masking and ventilation. A coating that bonds poorly can become more opaque than the original oxidation. For a low-cost path light, compare the restoration product price with a replacement fixture before spending 20-40 minutes polishing one panel.
| Panel condition | Cleaning response | Restoration response | Replacement decision |
|---|---|---|---|
| Dust or pollen film | Removes it fully | Not required | Replace only for unrelated faults |
| Dried bird residue | Soft soak removes it | Not required | Replace only if staining remains in cracks |
| White outer haze | Does not remove it | Plastic polish may help | Replace if clarity remains poor |
| Internal fogging | Outer cleaning does not help | Drying and seal repair needed | Replace if moisture returns |
| Cracked or loose cover | Dry cleaning only | Seal repair may be temporary | Usually replace the fixture |
How Often Should Solar-Light Panels Be Cleaned?
Clean solar garden-light panels every 3 months under ordinary conditions and inspect them monthly during pollen, dust, wildfire-smoke, coastal-salt, or frequent sprinkler exposure. A visible film is a better trigger than a rigid calendar because local contamination rates differ widely.
Clean after a dry, dusty period rather than immediately after light rain. Rain may remove loose dust, but it can also leave mineral spots when droplets evaporate, especially where hard irrigation water reaches the panel.
Use the following schedule as a starting point:
- Typical suburban garden: every 3 months.
- High-pollen or dusty location: every 4-6 weeks during the affected season.
- Coastal property: inspect monthly for salt film.
- Sprinkler-exposed fixture: spot-clean mineral deposits as soon as they appear.
- Winter or low-sun period: inspect monthly, but avoid cleaning frozen panels.
Cleaning more often than necessary does not increase charging indefinitely. Repeated handling creates opportunities to loosen seals or scratch inexpensive plastic covers.
Common Mistakes and How to Fix Them
Using Abrasive Pads or Sharp Tools
Steel wool, scouring pads, razor blades, and abrasive powders create micro-scratches in plastic covers. Switch to a damp microfiber cloth and allow hardened deposits to soften for 30-60 seconds.
If scratches are shallow, plastic polish may reduce their appearance. Deep scratches that remain visible after polishing continue to scatter light and may justify replacement.
Spraying the Whole Fixture With a Hose
A hose or pressure washer can force water past battery-door gaskets and switch openings. Remove standing water with a dry cloth, open the battery compartment only when the exterior is dry, and let the fixture air-dry fully before testing it.
Pressure washing is unsuitable for small solar garden lights. The narrow housing and low-cost seals do not provide the same protection as industrial outdoor equipment.
Applying Window Cleaner, Bleach, or Solvent
Ammonia, bleach, strong degreasers, acetone, and some glass cleaners can cloud plastic, damage printed markings, or weaken seals. If an unsuitable cleaner was used, rinse the panel promptly with plain water, dry it, and inspect for tackiness or whitening.
A neutral, mild dish soap is adequate for most organic dirt. Stronger chemistry does not compensate for poor debris removal.
Cleaning in Direct, Hot Sunlight
Hot plastic causes water to evaporate quickly, leaving concentrated soap and mineral marks. Move the fixture into shade or clean during a cool morning, then dry it manually.
Thermal shock is a greater concern for glass-faced panels than for thin plastic covers, but avoiding rapid temperature changes is sensible for either material.
Letting Water Enter the Battery Compartment
Moisture at the battery terminals can cause corrosion and intermittent operation. Keep the battery door closed during panel cleaning, and dry the outside of the housing before opening it.
If water entered the compartment, remove the rechargeable battery only according to the product instructions, dry the contacts completely, and replace corroded cells with the exact specified chemistry, size, and voltage.
Why Are Solar Garden Lights Still Dim After Cleaning?
Solar garden lights that remain dim after cleaning usually have insufficient sunlight, a degraded rechargeable battery, a damaged panel, or a charging fault. Cleaning addresses only the first layer of contamination, so diagnosis should compare daylight exposure, overnight runtime, and battery age.
Check Shade and Panel Direction
Observe the fixture from morning through early afternoon. A shrub or fence can cast shade over a small panel for most of the charging period even when the area looks bright at sunset.
Move the light temporarily to an unobstructed location for one sunny day. If the runtime improves, prune or reposition rather than applying more cleaning products.
Test the Rechargeable Battery
Many inexpensive path lights use NiMH cells, while some newer models use lithium-ion batteries. Replace the battery only with the same size, chemistry, voltage, and connector specified by the manufacturer; do not substitute a non-rechargeable alkaline cell.
A light that worked well when new but now runs briefly after a clean, sunny charge often has battery wear. Typical small rechargeable cells may need replacement after roughly 1-3 years, depending on heat, charge cycles, and quality.
Inspect Corrosion and the Switch
White or green deposits on contacts indicate corrosion or leakage. Remove the battery safely, clean accessible metal contacts with a small amount of isopropyl alcohol on a cotton swab, allow them to dry, and follow the product instructions for any damaged cell.
Check that a new light has had its battery pull tab removed and that the switch is set to ON when the model requires that setting for automatic dusk operation.
Consider Condensation or Electronics Failure
Persistent fog inside the lens or panel area indicates internal moisture, not surface dirt. Drying may provide a temporary recovery, but recurring condensation means the seal has failed.
If a clean, unshaded light with a correctly specified new battery still fails, the panel, charging circuit, photosensor, or LED driver may be defective. Replacing a low-cost fixture is often safer than opening a sealed housing.
Time and Cost for a Typical Cleaning Session
A 10-light garden normally requires 15-25 minutes and costs approximately $0-$15 when water, mild soap, and microfiber cloths are already available. A restoration project takes 20-40 minutes per cloudy panel and may cost $10-$30 for a plastic polish or headlight kit.
| Job size | Cleaning time | Routine supply cost | Restoration time | Likely restoration cost |
|---|---|---|---|---|
| 1 light | 1-2 minutes | $0-$2 | 20-40 minutes | $10-$30 shared product |
| 5 lights | 7-12 minutes | $0-$5 | 20-60 minutes | $10-$30 |
| 10 lights | 15-25 minutes | $0-$8 | 40-120 minutes | $10-$30 |
| 15 lights | 20-35 minutes | $0-$12 | 60-180 minutes | $10-$30 |
The quoted figures are typical DIY planning ranges, not universal guarantees. A heavily soiled fixture, narrow decorative grooves, or hard-water deposits can double the cleaning time.
Variations for Common Garden Conditions
Coastal Salt Air
Use a plain-water wipe more frequently, usually every 4-6 weeks, because salt film can attract moisture and hold dust against the cover. Rinse the cloth often instead of dragging crystallised salt across the panel.
Do not leave vinegar solution on the fixture. Salt is water-soluble, so repeated gentle rinsing is safer than aggressive chemical treatment.
High Pollen or Dust
Brush panels before every wet clean and inspect them after windy weather. Pollen forms a waxy film when mixed with condensation, so a small amount of mild soap may work better than plain water.
Clean the panel before judging the battery. A dusty spring fixture can appear defective when its battery is still serviceable.
Winter Frost and Low Sun
Never scrape frozen deposits from plastic. Let frost melt naturally, wipe the surface dry, and keep the fixture free from snow and leaf cover.
Short winter runtime can be normal because the panel receives fewer usable daylight hours and the battery operates in colder conditions. Move the light into the best available winter exposure rather than polishing more often.
Frequently Asked Questions
Can Rain Clean Solar Panels on Garden Lights?
Rain can remove loose dust, but it rarely removes dried bird droppings, oily pollen, sap, or mineral deposits from sprinkler water. Rainwater may also leave spots after evaporation. Wipe the panel manually when a visible film remains, and inspect the battery door afterward if heavy rain entered around the housing.
Can I Clean a Solar-Light Panel Without Removing the Light?
Yes, most solar garden lights can be cleaned in place with a damp microfiber cloth. Keep the cloth damp rather than dripping, avoid the switch and battery door, and place a dry cloth beneath the panel if water could run toward the housing seam. Remove the fixture only when repositioning or inspecting it is safer.
Does a Dirty Panel Make a Solar Light Stop Working?
A dirty panel can reduce charging enough to make the LED dim or shorten its nighttime runtime, but complete failure usually has another contributing cause. Check the switch, shade, battery, corrosion, condensation, and wiring after cleaning. A clean panel cannot charge a battery if the charging circuit has failed.
Should Solar Garden Lights Be Cleaned Before Replacing the Battery?
Yes, clean and fully dry the panel before replacing the battery so the diagnosis is meaningful. Give the light one sunny charging day, then compare its runtime. If the fixture remains weak and the panel is unobstructed, install only the manufacturer-specified rechargeable cell rather than guessing from physical size alone.
How Do I Clean a Solar Panel With Hard-Water Spots?
Soak a microfiber cloth in plain water first and hold it on the mineral spot for 30-60 seconds. If the mark remains, use a 1:8 white-vinegar solution on the cloth, rinse promptly with clean water, and dry the panel. Avoid vinegar on damaged seals, exposed metal, or manufacturer-prohibited surfaces.
The Bottom Line
The correct way to clean solar panels on garden lights is to work in shade, remove dry grit first, use only a few drops of mild soap in warm water, rinse completely, and dry with a clean microfiber cloth. Clean every 3 months, adjust the schedule for local contamination, and troubleshoot shade or battery wear when brightness does not return.


