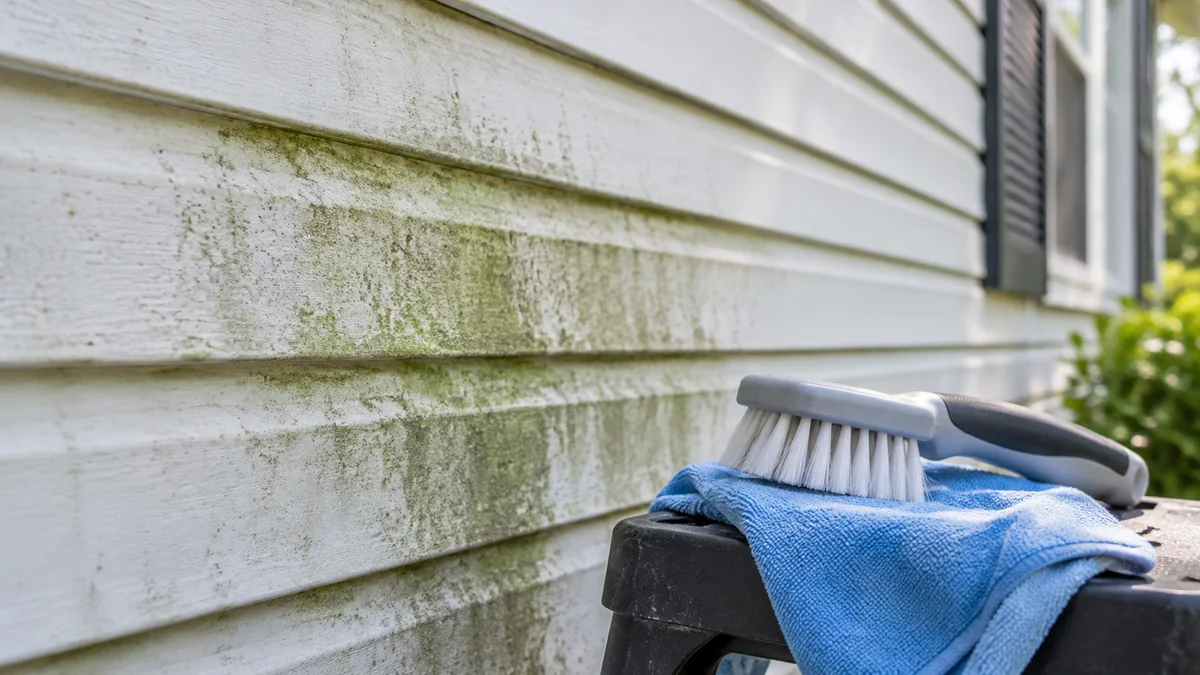
To clean green mold off vinyl siding, pre-rinse nearby plants, apply a siding-safe cleaner from the bottom upward, allow the labeled dwell time without drying, gently brush stubborn growth, and rinse from the top downward with a garden hose. Avoid high-pressure spray, upward spray angles, and mixing bleach with vinegar, ammonia, or other cleaners.
Key Facts at a Glance
Green material on vinyl siding is often algae or mildew, although mold spores can be present in the same organic film.
A garden hose and soft-wash cleaner are usually safer than a pressure washer for vinyl lap siding.
Cleaner should be applied in small sections and kept wet for the product’s stated dwell time.
Plants need thorough pre-rinsing and post-rinsing when a bleach-based product is used nearby.
Household bleach is not automatically plant-safe, pet-safe, or suitable for every siding warranty.
White chalk after washing usually indicates vinyl oxidation, not surviving green growth.
What Is the Green Growth on Vinyl Siding?
Green growth on vinyl siding is usually surface algae, mildew, or a mixture of algae, dirt, pollen, and fungal spores. The green color alone cannot prove that the material is household mold, and visual identification is not a reliable way to determine species or health risk.
Vinyl itself does not provide a porous food source like unfinished wood. However, textured siding, horizontal panel lips, window trim, spiderwebs, and accumulated dust hold a thin organic film. Morning dew, rain splash, sprinkler water, and shaded conditions keep that film damp long enough for discoloration to spread.
The north-facing side of a house often shows more growth because it receives less direct sunlight, but any wall can develop it where gutters overflow or vegetation blocks airflow. Green streaks beneath a hose bib or sprinkler usually point to repeated moisture rather than a siding defect.
Is green growth harmful to the siding?
Light surface algae normally does not destroy vinyl siding, but persistent moisture can expose related problems. Growth may hide failed caulk, leaking gutters, blocked weep holes, or water entering behind loose panels. Heavy scrubbing can also damage the finish more readily than the growth itself.
Treat the cleaning as a surface-maintenance job, not a cure for building moisture. If the same area returns within weeks, inspect the water source before applying stronger chemicals.
What You Need Before Cleaning
A typical one-story cleaning job takes 2-4 hours, including preparation and rinsing. Supplies commonly cost $25-$90, depending on whether you already own a hose, pump sprayer, soft brush, and protective equipment.
| Item | Typical specification | Typical cost | Purpose |
|---|---|---|---|
| Garden hose | 25-100 feet, adjustable nozzle | $20-$60 | Rinse siding and landscaping |
| Pump sprayer | 1-2 gallons, chemical-compatible | $15-$35 | Apply diluted cleaner |
| Soft washing brush | 8-12 inch head, soft nylon bristles | $12-$30 | Loosen bonded growth |
| Gloves and goggles | Chemical-resistant gloves, sealed eye protection | $10-$25 | Prevent skin and eye exposure |
| Siding cleaner | 32 ounces to 1 gallon concentrate | $10-$45 | Break down organic growth |
| Plastic sheeting or drop cloth | 6-10 mil, sized for fixtures | $8-$20 | Shield vulnerable equipment |
Read the cleaner’s label before mixing anything. The label controls dilution, dwell time, required rinsing, surface compatibility, and disposal instructions; online recipes cannot safely replace product directions.
Do not use a household spray bottle for a large wall. It creates uneven coverage, wastes time, and increases the chance that some areas dry before the cleaner works.
Which Cleaner Should You Use?
The best cleaner depends on urgency, landscaping, siding condition, and whether you can rinse thoroughly. A labeled vinyl-siding cleaner is the safest default, while diluted sodium hypochlorite works quickly but requires more runoff control.
| Cleaner type | Typical active ingredient | Typical working time | Main advantage | Main limitation |
|---|---|---|---|---|
| Vinyl siding cleaner | Surfactants, oxygenated agents, or diluted hypochlorite | 5-15 minutes | Label specifies siding use | Results vary by formulation |
| Diluted bleach product | Sodium hypochlorite | 5-10 minutes | Fast algae and mildew removal | Can damage plants, fabrics, and metals |
| Oxygenated cleaner | Hydrogen peroxide or sodium percarbonate | 10-20 minutes | Lower chlorine odor | May need more brushing |
| White vinegar solution | Acetic acid, commonly diluted | 10-20 minutes | Accessible bleach-free option | Often weaker on established growth |
| Delayed-action biocide | Quaternary ammonium compound or other registered biocide | Days to weeks | Minimal scrubbing for some products | Slow results and strict label limits |
When is bleach appropriate?
A bleach-based cleaner can be appropriate for established organic staining when the label permits vinyl use and you can control runoff. Bleach may discolor fabrics, irritate skin and eyes, corrode some metals, and injure plants if concentrated solution reaches foliage or soil.
Never combine bleach with vinegar, ammonia, acids, toilet cleaner, or other household chemicals. Dangerous gases can form. Use only the dilution printed on the product label, because household bleach concentrations vary and many online recipes assume a strength that may not match the bottle.
Is vinegar safe for vinyl siding?
Diluted white vinegar is generally compatible with many vinyl surfaces, but it is not a guaranteed mold killer or universally plant-safe solution. Acidic runoff can stress some plants, affect stone or concrete surfaces, and leave results incomplete when growth has penetrated textured grime.
Use vinegar only as a small-area, bleach-free alternative. Test an inconspicuous section, brush after the dwell period, and rinse completely. Do not mix vinegar with bleach.
When is an oxygenated cleaner better?
An oxygenated cleaner is often preferable near delicate landscaping, painted trim, or homes where chlorine odor is undesirable. Hydrogen peroxide and sodium percarbonate products still require label compliance and may irritate eyes or skin, so “oxygenated” does not mean risk-free.
Oxygenated products can require longer dwell time and more agitation than a chlorine-based cleaner. They are a sensible choice when the homeowner values lower chlorine exposure more than the fastest visual change.
How to Clean Green Mold Off Vinyl Siding
The safest general process has six stages: inspect, protect, pre-rinse, apply cleaner, gently agitate, and rinse. Work on a cool, overcast day when possible, because direct sun and hot siding make products dry before they finish working.
Step 1: Inspect the siding and choose a test area
Walk around the wall and identify loose panels, cracked trim, failed caulk, leaking gutters, outdoor outlets, light fixtures, dryer vents, and delicate plants. Choose a hidden section about 2 square feet and test the diluted product there.
Wait for the label’s stated reaction period, then rinse and inspect the test patch after it dries. Stop if the siding changes color, develops a film, or shows unusual gloss variation.
You’ll know the inspection worked when: the product is confirmed compatible and the water source is understood.
Common mistake: treating a leaking downspout as a cleaning problem, then watching the stain return.
Step 2: Protect fixtures, people, pets, and plants
Close windows and doors. Keep children and pets away from the work area, and cover outdoor electrical fixtures only with protection appropriate for that fixture and the manufacturer’s instructions. Do not seal a hot light fixture with plastic if trapped heat creates a hazard.
Move portable furniture and toys. Turn off irrigation, cover vulnerable outdoor equipment, and protect fabrics that could be bleached. Wear gloves, eye protection, long sleeves, and footwear with secure traction.
Thoroughly wet nearby plants with plain water before applying cleaner. Pre-rinsing reduces absorption of diluted runoff, but it does not make bleach harmless. After cleaning, rinse the vegetation again.
You’ll know preparation worked when: windows are closed, people are clear, fixtures are protected, and foliage is fully wet.
Common mistake: protecting plants while leaving a dry concrete or stone surface that can stain or react with cleaner.
Step 3: Apply cleaner from the bottom upward
Mix the cleaner exactly as directed. Fill a pump sprayer only with a product approved for that equipment, then apply it to a manageable section, usually 4-6 feet wide.
Start at the bottom and move upward. Bottom-up application keeps cleaner from running over dry, dirty siding and creating sharp drip lines. Keep the sprayer aimed straight at the wall or slightly downward, never upward beneath the lap edges.
Do not flood seams, vents, or openings. Avoid spraying directly into panel joints, window channels, soffit vents, and electrical components.
You’ll know application worked when: the surface is evenly wet without heavy runoff or dry bands.
Common mistake: covering the entire house before checking whether the first section is beginning to dry.
Step 4: Keep the cleaner wet during dwell time
Allow the product to remain on the siding for the label’s stated period, commonly 5-15 minutes. A cleaner cannot work properly after it dries into a residue, so divide the wall into smaller sections on hot or windy days.
Lightly mist a drying area with water if the label permits it. Do not extend dwell time beyond the manufacturer’s instruction in the hope of improving the result. Longer exposure can increase residue, plant damage, or finish discoloration.
Heavy deposits may need a second application rather than aggressive pressure. Chemical action and gentle brushing are safer than forcing a nozzle into the siding.
You’ll know dwell time worked when: green film loosens and light brushing removes it without hard scraping.
Common mistake: allowing the cleaner to dry because the homeowner is working from a ladder or moving equipment too slowly.
Step 5: Brush stubborn areas gently
Use a soft vehicle-wash brush or soft nylon siding brush. Work horizontally along the siding profile with light pressure, especially on panel lips, grooves, and shaded areas.
Do not use a stiff wire brush, abrasive pad, scraper, or dry stiff broom. Those tools can scratch the surface, remove weathered finish, or create visible cleaning bands.
A telescoping brush can reach much of a one-story wall from the ground. For second-story work, choose a stable extension method rather than leaning a ladder against fragile siding.
You’ll know brushing worked when: the remaining film lifts without scratches or exposed substrate.
Common mistake: scrubbing dry siding, which spreads dirt and creates gloss differences.
Step 6: Rinse from the top downward
Rinse with a garden hose using a broad or adjustable stream. Start at the top and work downward so loosened soil and cleaner move toward the ground rather than across already-rinsed sections.
Keep the nozzle straight-on or slightly downward. Never force water upward beneath the lower edge of lap panels. High-velocity water can enter behind siding, wet insulation or sheathing, and damage aged or poorly secured panels.
Rinse until no visible foam, green residue, or chemical film remains. Pay attention to trim, window sills, hose bibs, foundation surfaces, and plants. Rinse landscaping with clean water after the wall is complete.
You’ll know rinsing worked when: the water runs clear, the siding has no slippery residue, and no cleaner remains around seams.
Common mistake: stopping when the green color disappears, even though cleaner and loosened soil remain on the wall.
Can You Pressure Wash Vinyl Siding?
Pressure washing vinyl siding is possible only with careful equipment settings, a suitable nozzle, and a controlled downward technique, but a garden hose and soft wash are safer for most homeowners. The risk is not only cosmetic: water forced behind lap joints can create concealed moisture problems.
Pressure-washer manufacturers often publish different recommendations, so there is no universal safe pressure number for every siding profile, age, installation, or machine. If pressure is used, keep the nozzle away from seams, maintain a downward angle, start at the lowest practical setting, and test first.
Avoid pressure washing when panels are brittle, loose, cracked, warped, or inaccessible from stable ground. A professional is preferable for a tall wall, fragile siding, or a property with complicated electrical and drainage conditions.
What If the Siding Looks White or Chalky?
White chalk after green growth disappears usually indicates oxidation of the vinyl surface. Oxidized vinyl releases a powdery residue when rubbed, while leftover cleaner often feels slick, appears in drip patterns, or rinses away with additional water.
| Appearance after washing | Likely cause | Safe next action | Avoid |
|---|---|---|---|
| White powder on a dry finger | UV oxidation | Test a vinyl oxidation remover | Repeated bleach applications |
| Slick translucent film | Cleaner residue | Rinse with clean water | Abrasive scrubbing |
| White spots near sprinklers | Mineral deposits | Test a siding-safe mineral cleaner | Strong acid without testing |
| Dark green shadow | Remaining organic stain | Reapply approved cleaner | High-pressure blasting |
| Uneven shiny bands | Finish wear or over-cleaning | Stop and assess from a distance | Aggressive polishing |
Chemical cleaners do not restore oxidized vinyl. Rub a hidden dry area with a clean dark cloth; powder transfer supports an oxidation diagnosis, but a manufacturer-approved product test is still necessary. Severe oxidation may require refinishing or panel replacement.
How Much Time and Money Does Cleaning Take?
Typical DIY costs range from $25-$90 for a one-story home when basic equipment is already available, while professional siding cleaning commonly costs several hundred dollars and varies by region, height, access, siding area, and treatment complexity.
| Project condition | Typical DIY time | Typical supply cost | Likely difficulty |
|---|---|---|---|
| Small one-story wall | 1-2 hours | $15-$40 | Low |
| Full one-story exterior | 2-4 hours | $25-$90 | Moderate |
| Two-story exterior from ground level | 4-7 hours | $40-$120 | Moderate to high |
| Heavy growth with brushing | 5-8 hours | $40-$130 | High |
| Professional service | 2-5 hours on site | $200-$700 typical range | Low for homeowner |
These are planning ranges, not guaranteed quotes. Large homes, steep grades, fragile landscaping, water-access problems, and extensive hand brushing can increase the total.
Variations for Difficult Situations
How do you clean siding near a vegetable garden?
Use the least aggressive labeled cleaner that can reasonably remove the growth, cover or move harvestable produce, and prevent runoff from entering edible beds. Pre-rinse foliage and soil, control spray drift, and perform a long clean-water rinse.
Do not assume that a “natural” product is harmless to edible plants. Follow the product’s reentry and application instructions, and postpone the work if wind can carry spray into the garden.
How do you clean second-story vinyl siding?
Clean second-story siding from stable ground with a telescoping brush and an extension-rated sprayer, or hire a professional with appropriate access equipment. Do not climb an unstable ladder while handling chemical solution and a hose.
Keep spray downward and away from soffit vents, windows, and roof-wall intersections. A professional is the safer choice when the wall cannot be reached without leaning beyond the ladder’s safe working position.
How do you clean siding without bleach?
Use a labeled oxygenated siding cleaner or a limited-area diluted vinegar approach, followed by soft brushing and complete rinsing. Oxygenated products usually offer more predictable results than kitchen vinegar on established growth.
Bleach-free cleaning may take longer and may not remove deep staining in one pass. The trade-off is lower chlorine exposure, not zero chemical risk.
Common Mistakes and How to Fix Them
| Mistake | Result | Correction |
|---|---|---|
| Spraying upward | Water enters lap joints | Aim straight-on or downward |
| Letting cleaner dry | Film, streaks, or discoloration | Work in 4-6 foot sections |
| Using excessive pressure | Damaged finish or hidden moisture | Use a hose and soft brush |
| Skipping plant pre-rinse | Leaf burn or stressed vegetation | Wet plants before and after |
| Mixing cleaners | Toxic fumes or chemical reaction | Use one product at a time |
| Scrubbing with abrasives | Scratches and uneven sheen | Use a soft vehicle-wash brush |
A common professional rule is to adjust dwell time and section size before increasing chemical strength. Most disappointing results come from dry product, poor coverage, or incomplete rinsing rather than an insufficiently aggressive formula.
Another practical rule is to solve recurring moisture before repeating treatment. Overflowing gutters, leaking hose connections, dense shrubs, and sprinkler overspray can recreate green growth within a few weeks.
How Can You Prevent Green Growth From Returning?
Prevent recurrence by reducing moisture and increasing airflow around the wall. Clean gutters, extend downspouts at least several feet where practical, redirect sprinklers, trim vegetation away from siding, and repair leaking hose bibs or flashing.
Inspect shaded walls every 3-6 months, especially after wet seasons. Light surface film is easier to remove than thick growth embedded in dust and spiderwebs.
Do not paint or seal siding while active growth, surface oxidation, or moisture defects remain. Cleaning can improve appearance, but it cannot correct wet sheathing, failed flashing, or a leaking roof edge.
When Should You Hire a Professional?
Hire a professional when siding is above safe ground-level reach, panels are brittle or loose, growth covers a large area, runoff could enter a pond or sensitive garden, or the wall has suspected water intrusion. Professional service is also sensible when chemical handling, ladder work, or equipment access creates more risk than the cleaning justifies.
A qualified contractor should explain the product, dilution, application method, runoff controls, and protection for plants and fixtures. Be cautious of anyone proposing maximum pressure as the primary solution or refusing to test a small area.
FAQ
Can green mold permanently stain vinyl siding?
Green growth can leave shadowing or embedded discoloration after the living material is removed, particularly on textured or oxidized siding. One careful cleaning may not restore uniform color. Test additional treatment on a hidden area before repeating chemical application across the entire wall.
How often should vinyl siding be cleaned?
Many homes need cleaning every 1-3 years, but shaded, humid, tree-covered, or sprinkler-wet walls may need attention annually. Use visible film and moisture conditions as the trigger rather than following a fixed calendar. Prevention usually extends the interval more effectively than stronger chemicals.
Can I use dish soap to clean vinyl siding?
A small amount of mild detergent may help remove ordinary dirt when the siding-cleaner label permits it, but dish soap is not a dependable biocide for established algae or mold. Avoid adding soap to bleach unless the product label specifically allows that combination, because incompatible ingredients can create hazardous reactions or residue.
Will cleaning remove black spots on vinyl siding?
Cleaning may remove black spots caused by mildew, dirt, insect deposits, or organic staining, but black spots can also indicate asphalt, rust, oxidation, or damaged material. Apply a labeled cleaner to a test patch first. Do not use abrasive scraping or stronger chemicals until the stain’s likely cause is understood.
Should I rinse a no-rinse siding cleaner?
Follow the product label rather than the product name alone. Some delayed-action treatments are designed to remain on the surface, while others require rinsing after a specified period. Rinsing a no-rinse product too early may reduce its effect, but leaving a product on plants, windows, or incompatible surfaces can cause damage.
Can green growth damage vinyl siding?
Surface algae and mildew usually cause appearance problems rather than direct structural damage to vinyl. The moisture that supports recurring growth can expose leaks, blocked drainage, and deteriorated materials behind or beside the siding. Investigate rapid recurrence instead of repeatedly applying stronger cleaner.
The Bottom Line
To clean green mold off vinyl siding safely, use a labeled soft-wash cleaner, protect and pre-rinse landscaping, apply from bottom to top, keep each section wet, brush gently, and rinse from top to bottom. A garden hose is usually safer than high pressure, and recurring growth requires moisture control rather than repeated chemical treatment.