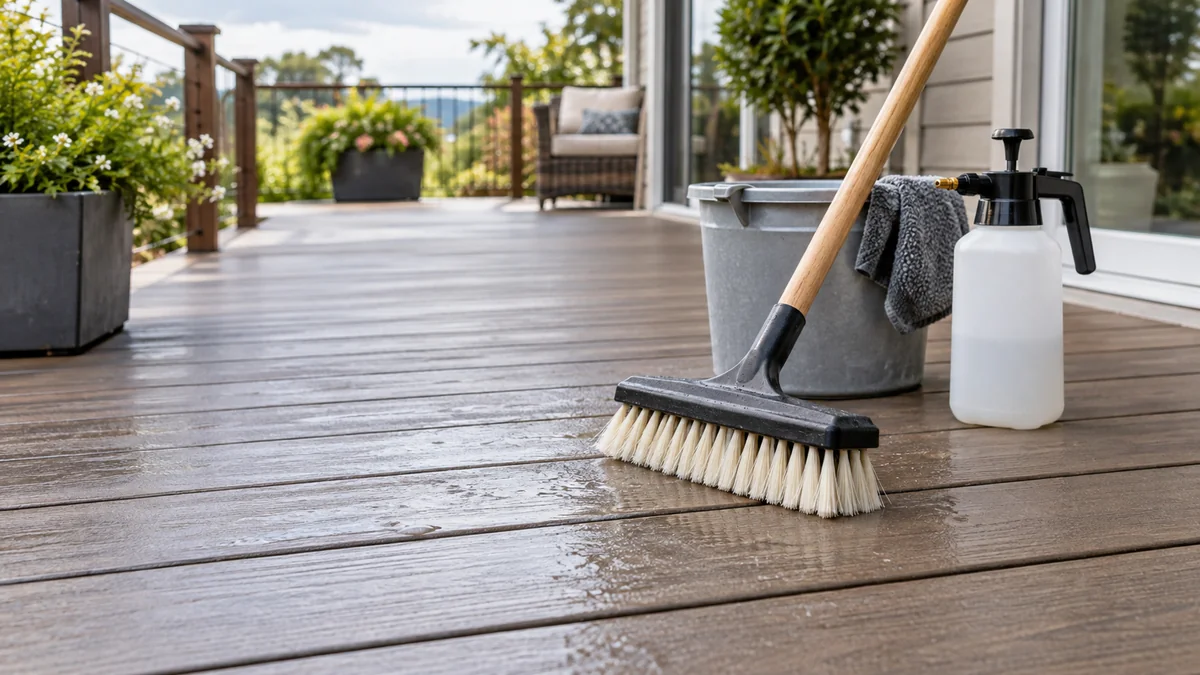
To clean composite decking without a pressure washer, clear debris, pre-wet the boards, apply a compatible mild cleaner in small sections, scrub with a soft nylon brush, and rinse immediately with a garden hose. A typical 200-500 square-foot deck takes 1-3 hours, and preventing cleaner from drying is the main factor that determines the result.
Key facts
A garden hose, soft nylon brush, and compatible cleaner can remove routine dirt, pollen, mud, algae, and many food stains.
Composite decking should be cleaned in shaded conditions when the boards are cool and the cleaner can remain wet.
Oxygen-based cleaners are generally more suitable for organic growth than chlorine bleach, but the decking manufacturer’s instructions take priority.
Wire brushes, abrasive powders, strong solvents, and undiluted household bleach can discolor or scratch composite surfaces.
Cleaning one 4-by-6-foot section at a time reduces streaks and prevents soap film.
Board gaps must remain open because trapped leaves retain moisture and restrict drainage.
Why Manual Composite Deck Cleaning Is the Safer Method
Manual composite deck cleaning is a controlled soft-washing process. The cleaner loosens soil and organic film, while a brush supplies the friction needed to lift debris from the board texture; a garden hose then removes the suspended residue without concentrating mechanical force on one spot.
Composite decking is not a single material. Older uncapped boards expose a wood-plastic composite surface, while many newer boards use a polymer cap over the composite core. The cap improves resistance to fading and staining, but it can still be scratched, etched, or discolored by unsuitable tools and chemicals.
Trex and TimberTech both publish care instructions that emphasize compatible cleaners, gentle tools, thorough rinsing, and caution around pressure washing. Manufacturer rules differ by product generation, so the care guide for the exact board series outranks a generic cleaning recipe.
Manual cleaning is also easier to control around flower beds, painted siding, outdoor furniture, and neighboring property. The trade-off is labor: a brush takes longer than a machine, especially where textured boards hold algae or embedded soil.
What Should You Check Before Cleaning?
Identify the decking product, inspect the surface, and remove anything that could trap moisture or react with the cleaner. Product identification matters because a solution suitable for one capped board can produce a different result on an older uncapped composite surface.
Look for a brand stamp, installation paperwork, spare board, or manufacturer color and profile information. Photograph the deck before cleaning if the surface has unusual fading, peeling, deep scratches, or warranty-related concerns.
Before You Start
| Requirement | Typical specification | Why it matters |
|---|---|---|
| Cleaning area | 4-by-6-foot sections | Keeps cleaner wet and limits streaking |
| Project time | 1-3 hours per 200-500 square feet | Includes setup, scrubbing, rinsing, and drying |
| Cleaner volume | 1-2 gallons per 500 square feet | Varies with dilution and surface texture |
| Brush | Soft or medium nylon, 10-16 inches wide | Reaches grain without metal abrasion |
| Hose | Standard garden hose with adjustable nozzle | Provides controlled rinsing |
| Water temperature | Cool to lukewarm | Avoids thermal stress and rapid evaporation |
| Weather | Shade, morning, or overcast conditions | Extends working time before drying |
| Protective equipment | Gloves, eye protection, closed shoes | Reduces contact with cleaner and runoff |
Move grills, planters, rugs, toys, and furniture away from the work area. Check whether rubber feet, wet leaves, or metal legs have caused localized stains. Protect nearby plants with clean water before and after washing, and keep runoff away from storm drains, ponds, and fish habitats.
Do not begin if boards are unusually hot, rain is likely during the cleaning stage, or wind will carry spray onto windows and painted walls. A dry, shaded period of at least two hours is a practical working window.
Which Cleaner Is Best for Composite Decking?
Mild soap suits routine dirt, oxygen-based cleaner suits many organic stains, and a manufacturer-approved commercial product is the most defensible choice for a premium or unfamiliar deck. No universal mixture is safe for every composite formulation, so test the chosen cleaner in an inconspicuous area first.
Cleaner Comparison
| Cleaner | Typical use | Starting quantity | Working time | Main limitation |
|---|---|---|---|---|
| Mild dish soap | Dust, pollen, mud, light food residue | 1/4-1/2 cup per 2.5 gallons | 5-10 minutes | Can leave film if overused |
| Oxygen cleaner | Algae, mildew film, organic grime | Follow label, often 1-2 cups per 2 gallons | 5-15 minutes | May lighten some aged surfaces |
| Composite deck cleaner | Manufacturer-specific deep cleaning | Label dilution | Label dwell time | Costs more and requires product matching |
| Plain water | Loose dust and recent mud | Hose supply | Immediate | Does not dissolve oil or biofilm |
| Chlorine bleach | Not recommended as a general cleaner | Do not improvise | Not applicable | Can discolor boards and harm plants |
Dish soap is acceptable for light cleaning only when the decking manufacturer permits it. Use a modest concentration rather than assuming more soap produces a cleaner deck. Excess surfactant increases residue and makes rinsing harder.
Oxygen cleaners contain percarbonate compounds that release oxygen in water. They are often useful against organic film, but the product label and decking warranty remain decisive. Never mix oxygen cleaner with chlorine bleach, acids, ammonia, or other household products.
A commercial product is worthwhile when the deck is large, heavily textured, or subject to a manufacturer-specific warranty. Record the product name, dilution, date, and test-area result.
How to Clean Composite Decking Without Pressure Washer
The complete process has six steps and usually takes 1-3 hours for 200-500 square feet. Work in small sections, keep the surface wet, scrub with the grain before crossing it lightly, and rinse each section before moving forward.
Step 1: Clear and Inspect the Deck
Remove furniture, rugs, planters, grills, and loose objects, then inspect the boards, fasteners, edges, and drainage paths. A clean surface makes defects easier to see, and moving objects afterward can reintroduce dirt onto damp boards.
Look for cracked boards, raised fasteners, open end cuts, loose trim, and water collecting near walls. Do not scrub aggressively over a damaged area before determining whether the mark is dirt or material loss.
Identify stains before applying cleaner. Grease, rust, tannin discoloration, algae, and ordinary soil require different treatments.
Success checkpoint: The deck is empty, visible from end to end, and all unusual marks are documented.
Common mistake: Treating every dark patch as mold. Some marks are tannins, rust, or permanent color change.
Step 2: Remove Dry Debris and Open the Gaps
Sweep the boards with a soft outdoor broom, then clear packed leaves from the gaps using a plastic gap tool, plastic putty knife, or narrow nonmetallic scraper. Removing dry debris first prevents leaves from becoming wet sludge that spreads across the deck.
Work along the board length and avoid levering against a board edge. Clean around stairs, picture-frame borders, fascia, and the space beneath the deck when accessible. Blocked gaps can slow drainage and keep the underside damp.
A leaf blower can remove loose material, but it will not extract compacted debris. Never use a screwdriver or sharp metal tool as a gap cleaner because it can chip edges and damage hidden flashing.
Success checkpoint: Water can pass through each visible gap, and no loose leaves remain against walls or trim.
Common mistake: Pushing debris into the gaps. Collect it for disposal instead.
Step 3: Pre-Wet the Boards
Rinse the entire deck with a garden hose until the boards are evenly damp, paying attention to vertical trim and adjacent surfaces. Pre-wetting cools the surface, reduces rapid absorption on uncapped boards, and makes cleaner distribution more even.
Use a broad spray rather than a concentrated jet. Start at the highest point and direct loose soil toward the drainage side, but avoid flooding doors, vents, electrical equipment, or the area below the deck.
Clean in shade, early morning, or on an overcast day. Direct summer sunlight can dry a small section before brushing and rinsing are complete.
Success checkpoint: Water darkens the boards evenly, and no area begins drying before cleaner application.
Common mistake: Pre-wetting only the first section, then allowing later sections to remain hot and dry.
Step 4: Apply Cleaner and Scrub in Sections
Mix the selected cleaner exactly according to its label or the decking manufacturer’s instructions. Apply it to one 4-by-6-foot section, let it dwell for the stated period, then scrub with a soft or medium nylon brush.
Scrub first in the direction of the grain. Make a second, lighter pass across the grain when the texture contains embedded soil, then return to the grain direction to even out brush marks.
Keep the section visibly wet. If the cleaner begins to dry, add water or cleaner solution rather than scrubbing a dry surface. A long-handled brush reduces knee strain and gives more consistent pressure than a hand brush.
Success checkpoint: Soil lifts into the solution, and the board texture appears clearer without shiny scuff marks.
Common mistake: Using a stiff brush to compensate for insufficient dwell time. Allow the cleaner to work instead.
Step 5: Rinse Each Section Immediately
Flush the scrubbed section thoroughly with a garden hose before moving to the next area. Rinse from the high side toward the drainage side, and continue until the water runs clear without visible foam or suspended dirt.
Pay special attention to board grooves, side gaps, stairs, and the junction with the house. Cleaner left in a texture can dry into a pale film or attract new soil.
Do not allow dirty solution to dry at the edge of a previously cleaned section. Overlap the rinse slightly into the next section so the boundary does not become a visible stripe.
Success checkpoint: No foam, cloudy residue, or dark slurry remains after the rinse.
Common mistake: Rinsing quickly because the boards look clean while cleaner remains in the grooves.
Step 6: Dry and Reinspect
Allow the deck to air-dry completely before replacing furniture, rugs, or planters. Drying commonly takes 2-6 hours, depending on shade, humidity, wind, board temperature, and drainage.
Inspect the deck in daylight after it dries. Remaining stains are easier to classify on a clean surface, and wet boards can temporarily hide color variation.
Replace furniture with clean feet or pads, and leave space beneath rugs for ventilation. Avoid putting a rubber-backed mat on a damp deck.
Success checkpoint: The surface is dry, evenly colored, free of cleaner film, and draining through every gap.
Common mistake: Returning rugs immediately, which can trap moisture and recreate dark patches.
Which Cleaning Method Should You Choose?
Hand cleaning is the safest default for unknown, aged, scratched, or premium composite decking. A pressure washer may be permitted for some products at a specified pressure and distance, but manufacturer permission does not make an unverified nozzle setting safe.
| Method | Typical equipment | Surface-control level | Typical time for 500 square feet | Best use |
|---|---|---|---|---|
| Hose and brush | Hose, bucket, nylon brush | High | 2-3 hours | All routine maintenance |
| Hose-end cleaner | Hose-end bottle, brush | Medium-high | 1-2 hours | Light to moderate soil |
| Pressure washer | Machine, fan tip, distance control | Medium-low | 45-90 minutes | Only when manufacturer permits |
| Professional soft wash | Metered sprayer, controlled rinse | High | 1-3 hours | Large or heavily soiled decks |
| Dry sweeping only | Broom or blower | High for loose dirt | 15-30 minutes | Weekly maintenance |
Pressure washing can gouge uncapped boards, raise fibers, leave wand stripes, force water beneath trim, or damage the cap on capped decking. Trex and TimberTech instructions vary by collection and revision, so check the current product-specific guidance rather than relying on a generic internet setting.
Manual cleaning is slower and physically harder. It is also easier to stop when a surface begins reacting badly, which makes it the better choice when board history or composition is uncertain.
How Should You Treat Specific Composite Deck Stains?
Stain treatment should begin with the least aggressive compatible method and a small test area. Identify whether the stain is organic, oily, metallic, or a surface deposit before increasing chemical strength or dwell time.
Grease and Barbecue Oil
Blot fresh grease with an absorbent towel and avoid spreading it across the grain. Apply a small amount of permitted dish soap or a manufacturer-approved degreaser, allow about five minutes of contact, scrub gently, and rinse completely.
Repeat once after drying if the mark has penetrated the texture. Do not use gasoline, paint thinner, acetone, or industrial solvent because solvents can attack plastic components, alter gloss, or create a larger discolored area.
Algae, Moss, and Mildew Film
Remove surface growth with a soft brush and use a compatible oxygen-based or commercial composite cleaner. Let the product dwell only for the label period, because longer contact does not automatically improve the result.
Rinse nearby walls, plants, and soil after treatment. Persistent growth usually indicates shade, poor airflow, clogged gaps, or repeated moisture rather than an inadequate scrubbing technique.
Leaf Tannin Stains
Wet leaves can release tannins that leave brown or black discoloration. Remove the leaf source, clean the area with mild detergent first, and use a manufacturer-approved brightener only if the stain remains.
Oxalic-acid brighteners are not interchangeable with every composite cleaner. Test first, protect surrounding materials, and follow the product label because acid exposure can change color or affect metal fasteners.
Rust
Rust may originate from furniture feet, fasteners, tools, or irrigation water. Remove the source, then use a composite-compatible rust treatment that specifically permits the decking material.
Do not scrub rust with steel wool or a wire brush. Abrasion can create a permanent light mark larger than the original stain.
Paint, Adhesive, and Sealant
Allow wet paint or adhesive to remain undisturbed while you check the product instructions. Dried residue may require careful plastic scraping, but solvent selection should come from the decking manufacturer or the contaminant manufacturer.
Composite decking is not a good surface for improvised chemical experiments. If the residue covers a large area, professional advice is safer than repeated spot treatments.
What Are the Most Common Cleaning Mistakes?
The most damaging mistakes are usually chemical or procedural rather than related to insufficient force. Stronger products, hotter boards, and longer dwell times can produce worse results than a mild cleaner used correctly.
- Letting cleaner dry: Re-wet the area, use a soft brush, and rinse immediately. Do not add a stronger chemical before removing the residue.
- Using chlorine bleach routinely: Stop and rinse thoroughly. If discoloration remains, contact the manufacturer before applying a brightener.
- Using a wire brush: Stop brushing. Surface scratches cannot be cleaned away, and aggressive sanding may worsen the appearance.
- Cleaning in direct sun: Move to shade and restart with a damp surface. Dried cleaner often causes the cloudy film mistaken for fading.
- Ignoring runoff: Redirect dirty solution away from plants, ponds, storm drains, and neighboring walls.
- Scrubbing only the visible top: Clear gaps, edges, and shaded areas because retained organic debris can quickly recolonize the clean boards.
An important practitioner rule is to test the cleaner and brush together. A product that looks harmless in a bucket can still alter a board when combined with pressure, heat, or extended dwell time.
How Much Time and Money Does Manual Cleaning Require?
A typical homeowner spends $10-$40 on supplies for a small deck and $20-$80 for a larger project, excluding furniture moving or professional labor. Time depends more on board texture, access, and stain density than on square footage alone.
| Deck size | Routine soil time | Heavy organic soil time | Typical DIY supply cost |
|---|---|---|---|
| 100-200 square feet | 45-90 minutes | 1.5-2 hours | $8-$25 |
| 200-500 square feet | 1-2 hours | 2-4 hours | $15-$50 |
| 500-800 square feet | 2-3 hours | 4-6 hours | $25-$80 |
| 800-1,200 square feet | 3-5 hours | 6-9 hours | $40-$120 |
Typical costs include cleaner, gloves, replacement brush heads, plastic gap tools, and plant protection. A manufacturer-branded cleaner may cost more than dish soap, but it can reduce compatibility uncertainty on a premium deck.
Professional cleaning becomes more practical when the deck is elevated, unusually large, difficult to drain, or affected by widespread biological growth. Ask the contractor for the chemical, pressure, nozzle, and runoff-control method before work begins.
How Often Should Composite Decking Be Cleaned?
Sweep composite decking weekly or whenever leaves accumulate, rinse visible dirt monthly during heavy-use seasons, and perform a deeper wash one or two times each year. Humid shade, nearby trees, coastal air, and frequent outdoor cooking can justify more frequent spot cleaning.
| Situation | Maintenance interval | Priority action |
|---|---|---|
| Open, sunny deck | Twice yearly | Sweep and wash in spring and autumn |
| Shaded, humid deck | Every 3-4 months | Remove organic film and open gaps |
| Tree-covered deck | Weekly sweeping | Prevent tannins and leaf retention |
| Frequent grilling | After spills, deep wash quarterly | Treat grease before it cures |
| Coastal or dusty location | Monthly rinse, annual wash | Remove salt and abrasive dust |
| Rarely used deck | Seasonal inspection | Check rugs, gaps, and furniture feet |
Clean spills promptly, keep rugs elevated or breathable, and use nonstaining furniture feet. Prevention reduces the amount of scrubbing required during the next deep clean.
Frequently Asked Questions
Can I Clean Composite Decking With Dawn Dish Soap?
A small amount of mild dish soap can clean light dirt when the decking manufacturer permits it. Start with roughly 1/4 cup in 2.5 gallons of water, scrub a small test area, and rinse thoroughly. Excess soap can leave a cloudy film, especially in textured grooves.
Is Vinegar Safe for Composite Decking?
Undiluted vinegar is not a universal composite-deck cleaner. Acidic products can affect some finishes, nearby metals, and surrounding stone or concrete. Use vinegar only when the decking manufacturer specifically permits the concentration, and test it in a hidden area before treating visible boards.
How Do I Remove Green Algae Without a Pressure Washer?
Sweep away loose growth, pre-wet the boards, apply a compatible oxygen-based or commercial composite cleaner, scrub with a nylon brush, and rinse before the solution dries. Correcting shade, poor drainage, and clogged gaps is necessary because cleaning alone will not prevent regrowth.
Can I Use a Steam Cleaner on Composite Decking?
Steam cleaning is not a safe default for composite decking because heat can affect polymer caps, color, or surface texture. Unless the exact manufacturer expressly approves steam equipment and specifies temperature and distance, use a cool garden-hose rinse and manual brush instead.
Why Does My Deck Look Cloudy After Cleaning?
Cloudiness usually comes from dried soap, cleaner residue, mineral deposits, or a finish reaction. Re-wet a small area, scrub gently with a clean nylon brush, and rinse repeatedly. If the film remains after the deck dries, stop using chemicals and ask the manufacturer to identify the residue.
Can I Clean Composite Decking in Winter?
Clean composite decking in winter only when temperatures remain above the cleaner’s label minimum and the deck can dry before freezing. Cold water, short daylight, ice, and wet leaves reduce cleaning effectiveness. In most climates, dry spring or autumn weather provides safer working conditions.
The Bottom Line
The safest way to clean composite decking without pressure washer equipment is to sweep thoroughly, clear the gaps, pre-wet cool boards, use a compatible mild cleaner, scrub with a nylon brush, and rinse each small section before it dries. The exact decking manufacturer’s care instructions should control chemical choice and any pressure-related exception. For routine maintenance, manual cleaning protects the surface, limits runoff, and produces a reliable result without concentrated mechanical force.