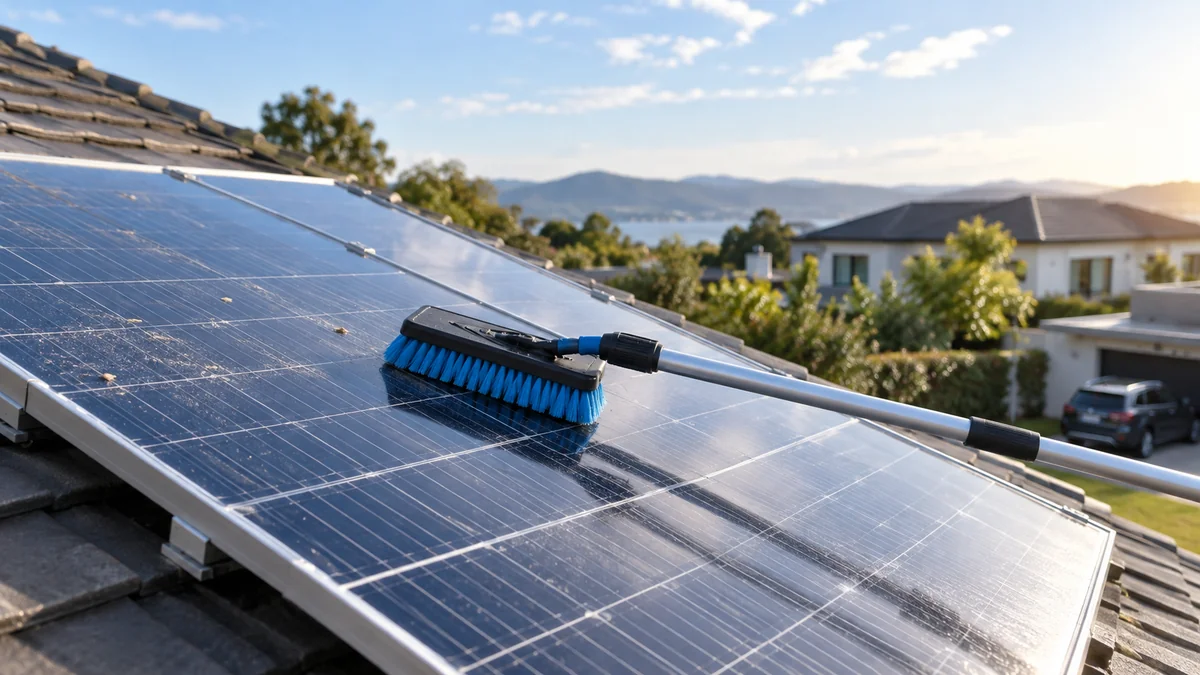
To clean bird poop off solar panels, work when the modules are cool, isolate the system according to the manufacturer’s instructions, soften the dropping with clean water, and remove it with a soft microfiber or solar brush. Avoid dry scraping, pressure washing, abrasive pads, and harsh chemicals. Ground-level cleaning is safest; hire a qualified technician for steep or fragile roofs.
Key Facts at a Glance
- Dried bird guano should be soaked before wiping because dry grit can scratch solar glass and its coatings.
- Turning off the inverter does not make the panels electrically dead; sunlight can still create DC voltage.
- Purified water reduces mineral spotting, especially where tap water is hard.
- A large dropping can shade several interconnected cells, but the actual power loss depends on module layout, bypass diodes, and the inverter.
- Typical professional solar-panel cleaning costs range from $100-$450 per visit in the United States.
- Bird-proofing the array usually prevents more maintenance than increasing cleaning frequency.
Why Bird Droppings Matter on Photovoltaic Panels
Bird poop can reduce solar output immediately because opaque guano blocks light from part of the photovoltaic surface. A dropping also holds grit against the glass, dries into a hard crust, and can leave acidic or organic residue that becomes more difficult to remove with time.
Solar cells in a module are electrically interconnected. Partial shading can reduce current through a cell group, while bypass diodes may redirect current around an affected section. The resulting loss is not reliably “20%-50%” for every dropping, because module design, shade location, string configuration, and inverter behavior determine the outcome.
Can bird poop permanently damage a solar panel?
Bird droppings can contribute to permanent damage, but routine residue does not automatically destroy a module. The main risks are abrasion from dry scraping, prolonged contamination, blocked drainage, damaged wiring beneath nesting material, and a pre-existing defect that allows moisture into the junction box or connectors.
Solar-panel glass is durable, but its anti-reflective coating and surface finish can be scratched or dulled. Uric acid is acidic, yet the claim that every dropping quickly etches glass or creates a fire is overstated. Hotspots are a legitimate engineering concern under partial shading, but module protection systems limit the risk in many modern installations.
Before You Start
| Requirement | Typical specification | Why it matters |
|---|---|---|
| Cleaning time | 20-60 minutes per 10 panels | Includes setup, soaking, rinsing, and inspection |
| Water | 5-15 liters per 10 panels | Quantity varies with residue and rinse method |
| Water quality | RO, deionized, or distilled preferred | Reduces calcium and magnesium spotting |
| Brush | Soft microfiber or solar brush, 25-40 cm head | Limits scratching and frame impact |
| Pole | Telescopic, 3-6 meters for ground work | Keeps the operator off the roof |
| Water temperature | Cool to lukewarm, never hot | Avoids thermal stress and rapid drying |
| Typical DIY cost | $15-$80 excluding existing tools | Depends on pole, brush, and water source |
| Professional cost | $100-$450 per visit | Access, array size, and region control pricing |
Do not begin if the array is on a steep roof, wet roof, fragile tile, unstable ladder, or elevated location without suitable fall protection. Solar installers and cleaning contractors should follow local electrical and workplace-safety requirements; homeowners should not improvise roof access.
Bird droppings can carry pathogens. Wear waterproof gloves, eye protection, and washable footwear, and wash hands after handling contaminated water or nesting material. People with weakened immune systems should use a professional service rather than disturbing accumulated guano.
What Tools and Water Should You Use?
A soft water-fed solar brush, microfiber pad, low-pressure hose, and squeegee are suitable for most accessible arrays. Use a manufacturer-approved, pH-neutral cleaning solution only when water alone fails, because household detergents can leave surfactant film or contain additives that are unsuitable for photovoltaic glass.
| Tool or material | Suitable choice | Avoid |
|---|---|---|
| Brush head | Soft nylon solar brush or microfiber pad | Steel wool, scouring pad, stiff deck brush |
| Scraper | None for ordinary residue | Razor blade, metal edge, plastic putty knife |
| Hose | Low-pressure garden hose or pump sprayer | Pressure washer or concentrated jet |
| Water | RO, deionized, or distilled water | Salty, muddy, or visibly hard water |
| Cleaner | Panel-maker-approved neutral solution | Bleach, ammonia, solvent, laundry detergent |
| Drying tool | Soft rubber squeegee with clean blade | Dirty squeegee or rough towel |
Tap water is not automatically unsafe. Many arrays can be rinsed with ordinary water, particularly in soft-water regions, but dissolved minerals may dry into spots. Purified water is most useful for the final rinse, large arrays, dark glass, and locations where calcium deposits are visible.
Vinegar is sometimes recommended online for mineral deposits. It may help with certain deposits, but do not apply it broadly unless the panel manufacturer permits it. Acidic solutions can affect frames, seals, adjacent roofing, and specialized coatings, and they do not solve abrasion damage.
How to Clean Bird Poop Off Solar Panels
Step 1: Inspect the Array From the Ground
Look for cracked glass, lifted frames, loose cables, bird nests, drooping conductors, damaged connectors, and animal activity before applying water. Photograph unusually large droppings or visible damage if a warranty or service claim may be necessary.
Do not disturb an active nest without checking applicable wildlife rules. In the United States, the Migratory Bird Treaty Act protects many native bird species, although rules vary by species and location.
Success checkpoint: The array has no visible electrical or structural damage, and the cleaning route does not require unsafe roof access.
Common mistake: Starting with a ladder placed on uneven ground because the nearest panel appears only a few feet away.
Step 2: Follow the System’s Shutdown Procedure
Use the owner’s manual to place the system in its maintenance or shutdown state. A typical grid-tied system involves switching off the inverter’s AC disconnect and then the DC disconnect, but the sequence varies by manufacturer and equipment configuration.
Shutdown reduces inverter operation and current flow through downstream equipment. It does not eliminate voltage at the module or DC conductors while sunlight reaches the panels. Never disconnect MC4-style connectors, open a junction box, or touch exposed wiring as a homeowner.
Success checkpoint: The inverter display or monitoring system indicates the prescribed shutdown condition, with no exposed or disturbed conductors.
Common mistake: Assuming that an inverter’s blank screen proves that the roof wiring is de-energized.
Step 3: Choose a Cool, Dry Cleaning Window
Clean in the early morning, late afternoon, or under stable cloud cover when the glass is cool enough that water will not evaporate immediately. Do not pour ice-cold water over a very hot module, and do not clean during lightning, rain, frost, or high winds.
The exact temperature limit belongs to the module manufacturer. The practical rule is simple: if water flashes dry on contact, postpone the work. Rapid drying creates spots and makes softened guano harden again before removal.
Success checkpoint: The panel remains wet for several minutes without rapid evaporation.
Common mistake: Cleaning at noon because the array is easiest to see, then chasing mineral spots across hot glass.
Step 4: Wet and Soak the Droppings
Apply low-pressure water to the dropping and the surrounding glass. Keep the spray broad and gentle rather than directing a narrow stream at the frame, seals, vents, or junction-box area.
Wait 3-5 minutes for ordinary dried residue. Large, old, or sun-baked deposits may need 10-15 minutes and a second application. Do not scrape a dry dropping, because embedded sand and roof dust can create fine scratches during the first stroke.
Success checkpoint: The guano becomes soft enough to move under light pressure from the brush.
Common mistake: Using more force instead of more soaking time.
Step 5: Lift the Residue With a Soft Brush
Starting near the upper edge, move a clean microfiber pad or soft solar brush downward with light, straight passes. Rinse the brush frequently so loosened grit does not remain trapped in the fibers. Use a separate pad for especially dirty panels if possible.
Do not lean your body weight on the module, walk on the glass, or press the brush into the aluminum frame. For a stubborn patch, re-wet it and repeat the pass rather than scrubbing faster.
Success checkpoint: No visible crust remains, and the brush moves without catching on a hard edge.
Common mistake: Circular polishing, which can drag particles across the coating and create visible swirl marks.
Step 6: Rinse Completely
Rinse from the upper edge downward until no brown, white, or soapy runoff remains. A purified-water final rinse is preferable where mineral spotting is common. Keep water away from exposed cable connections and damaged equipment.
If the panel manufacturer permits a cleaning solution, use the smallest dilution stated on its label. More detergent is not more effective; excess solution increases residue and requires additional rinsing.
Success checkpoint: The runoff is clear, and no detergent film remains when the panel is viewed at a shallow angle.
Common mistake: Stopping after the dropping disappears while leaving dissolved uric residue on the glass.
Step 7: Squeegee or Air-Dry Without Touching the Glass
Use a clean, soft rubber blade in overlapping downward strokes if the water supply leaves spots. Wipe the blade between passes and keep it free from grit. With genuinely purified water, air-drying can be acceptable because the rinse contains few minerals.
Do not use an old household squeegee that has collected sand. A single trapped particle can create a long scratch across the module.
Success checkpoint: The surface dries clear, with no white rings, streaks, or remaining organic film.
Common mistake: Drying with a bath towel, paper towel, or abrasive cloth that sheds fibers or carries grit.
Step 8: Restore Operation and Check Performance
Return the system to its normal operating state using the manufacturer’s procedure. Check the inverter for current alarms, ground-fault messages, insulation warnings, or abnormal output after the array has had sunlight for several minutes.
Cleaning alone does not establish electrical health. Compare production with a similar clear day only after accounting for cloud cover, temperature, inverter clipping, and household consumption.
Success checkpoint: The inverter reports normal status and no new alarm appears during the next operating period.
Common mistake: Repeatedly resetting an isolation fault instead of leaving the system off for professional inspection.
Which Cleaning Method Fits Your Array?
| Method | Typical cost | Best access condition | Main limitation |
|---|---|---|---|
| Ground-level pole cleaning | $15-$80 DIY | One-story roof or ground array | Limited reach and brush control |
| Hose and soft brush | $10-$60 DIY | Soft-water area with safe access | Mineral spots may remain |
| RO water-fed service | $100-$450 | Roof arrays and hard-water regions | Recurring service cost |
| Bird-proofing plus cleaning | $300-$750 or more | Active nesting beneath modules | Requires correct installation |
| Automated rinse equipment | $800-$2,000 or more | Large commercial arrays | Installation and water-management cost |
Ground-level cleaning is the preferred homeowner method when a telescopic pole reaches the entire glass surface. Professionals are a better choice for two-story roofs, steep pitches, slate or fragile tile, commercial arrays, and modules obstructed by parapets or trees.
Automated sprinklers are rarely the first answer for a small home array. They add plumbing, controls, freeze protection, and mineral-management requirements, while a physical bird barrier may address the source of the contamination more effectively.
How Often Should Solar Panels Be Cleaned?
Inspect panels monthly during active bird seasons, but clean them when droppings are large, opaque, recurring, or visibly reducing output. A fixed four-to-six-week cleaning interval is reasonable for arrays under heavy bird pressure, while an occasional annual cleaning may be enough for a bird-free ground array in a rainy, low-dust climate.
| Site condition | Inspection interval | Typical cleaning response |
|---|---|---|
| Active roosting or nesting | Every 1-2 weeks | Spot-clean promptly |
| Urban roof with pigeons | Every 4 weeks | Clean visible opaque deposits |
| Agricultural or dusty site | Every 4-8 weeks | Combine guano and dust removal |
| Rainy, low-dust residential site | Every 3-6 months | Clean when residue remains |
| Ground array without bird activity | Every 6-12 months | Condition-based cleaning |
Rain does not reliably remove baked guano. It can soften the outer layer while leaving a shaded, dirty patch behind. Monitor the array rather than assuming rainfall restored the surface.
What Should You Never Do?
Pressure washing can force water past seals, damage frames or connectors, and scatter contaminated material across the roof. The risk depends on pressure, nozzle distance, and equipment condition, but a pressure washer offers no necessary advantage for ordinary guano.
Avoid these failures:
- Dry scraping: Re-soak the deposit and use a soft pad.
- Abrasive cleaning: Stop immediately; inspect for scratches under oblique light.
- Harsh chemicals: Rinse thoroughly and consult the manufacturer if coating damage is suspected.
- Hard-water drying: Perform a purified-water rinse; do not polish mineral spots dry.
- Roof walking: Move the work to a professional crew with appropriate access equipment.
- Cleaning damaged modules: Leave the system in the prescribed safe state and call a solar technician.
- Disturbing nests: Stop and obtain local wildlife guidance before removal.
A cloudy patch after cleaning may be residue, mineral scale, coating wear, lichen, or permanent etching. Do not escalate to stronger chemicals or a harder brush until the cause is identified.
What If the Inverter Shows a Fault After Cleaning?
Leave the system in its safe shutdown state if a ground fault, isolation fault, arc-fault warning, or persistent communication alarm appears after washing. Allowing ordinary surface moisture to dry may resolve a temporary issue, but a recurring fault requires a qualified solar electrician or installer.
Do not open the inverter or disconnect rooftop connectors. A technician can test insulation resistance, inspect junction boxes, check cable routing, and identify water ingress or pre-existing connector damage. A fault that disappears after drying still deserves attention when it returns after rain or cleaning.
Call for immediate service when you see cracked glass, exposed copper, melted insulation, smoke, arcing, a burning smell, or a hot connector. Keep people away from the affected area and follow the equipment manufacturer’s emergency instructions.
How Do You Stop Birds From Returning?
Perimeter mesh installed with solar-compatible clips is usually the most effective long-term measure against birds nesting beneath modules. Mesh blocks the sheltered cavity without requiring penetration of the roof or panel frame, provided an experienced installer fits and maintains it correctly.
| Prevention option | Typical installed cost | Target problem | Maintenance need |
|---|---|---|---|
| Perimeter bird mesh | $300-$750 or more | Nesting beneath panels | Inspect annually |
| Solar bird spikes | $100-$400 | Perching on upper edges | Check adhesive and debris |
| Frame clips or drain guards | $50-$250 | Debris accumulation at lower edge | Clear during inspections |
| Roof-wide deterrent service | $250-$800 | Multiple roosting locations | Depends on bird species |
Bird spikes may stop perching on a particular edge but cannot block access under the array. Mesh also should not obstruct module drainage, ventilation, wiring, or roof maintenance paths. Avoid drilling into the panel frame or roof membrane unless the system designer explicitly approves the method.
The best prevention plan combines mesh inspection with removal of nearby food sources, accessible nesting material, and perches. Local wildlife laws matter, especially when eggs or active nests are present.
When Is Professional Cleaning the Better Choice?
Professional cleaning is the safer decision for steep roofs, two-story homes, fragile roofing, large commercial systems, persistent bird colonies, or panels with visible electrical damage. Typical residential service costs range from $100-$450, although difficult access, regional labor rates, array size, and bird-proofing can raise the total.
Ask the contractor whether the quote includes purified water, soft-brush cleaning, inverter and cable inspection, bird-proofing, travel, and tax. Confirm that the company carries appropriate liability insurance and will not use a pressure washer or unapproved chemicals.
A cleaning contractor is not automatically qualified to repair photovoltaic faults. Electrical alarms, damaged connectors, cracked modules, and insulation problems belong with a certified solar technician or the original installer.
FAQ
Can I use a garden hose to clean bird poop from solar panels?
Yes, a garden hose can be suitable when used at low pressure and from a safe position. Wet the guano, wait 3-5 minutes, and remove it with a soft brush rather than directing a concentrated jet at seals or connectors. Use purified water for the final rinse when hard-water spotting is a concern.
Does bird poop reduce solar panel efficiency?
Bird poop can reduce photovoltaic output by blocking light from part of one or more cells. The loss may affect a cell group or an entire string, depending on the module and system design. A single dropping does not produce a predictable percentage loss across all installations, so compare monitoring data carefully.
Can I use dish soap on photovoltaic glass?
Use dish soap only if the panel manufacturer permits it and only at a very low concentration. Many household detergents leave surfactants, dyes, fragrances, or mineral residues. Water alone is usually preferable; a manufacturer-approved neutral solar-panel cleaner is safer for stubborn organic residue.
Should I clean solar panels after every bird dropping?
Spot-clean large, opaque droppings promptly when they are safe to reach, especially during hot, dry weather. A small mark on an accessible ground array may wait for the next inspection, but repeated deposits beneath a bird roost justify prevention rather than constant manual cleaning.
Why are white marks still visible after cleaning?
White marks usually indicate dried minerals, remaining uric residue, coating wear, or glass etching. Re-soak the area and rinse with purified water before considering any approved cleaner. Do not use a razor or abrasive pad, because a permanent scratch is more difficult to correct than a removable deposit.
Can bird nests under solar panels cause an electrical problem?
Yes, nests can obstruct drainage, retain moisture, damage cable insulation, and encourage rodents to chew wiring. Do not remove an active nest without checking wildlife requirements. Have a solar technician inspect cables and connectors if nesting material contacts electrical equipment or if the inverter reports a fault.
The Bottom Line
The safest way to clean bird poop off solar panels is to work from the ground when possible, choose cool conditions, follow the system’s shutdown procedure, soak the guano, and use a soft brush with low-pressure water. Purified-water rinsing limits mineral haze, while perimeter bird mesh addresses recurring contamination. Leave steep-roof access, damaged equipment, active nests, and inverter faults to qualified professionals.