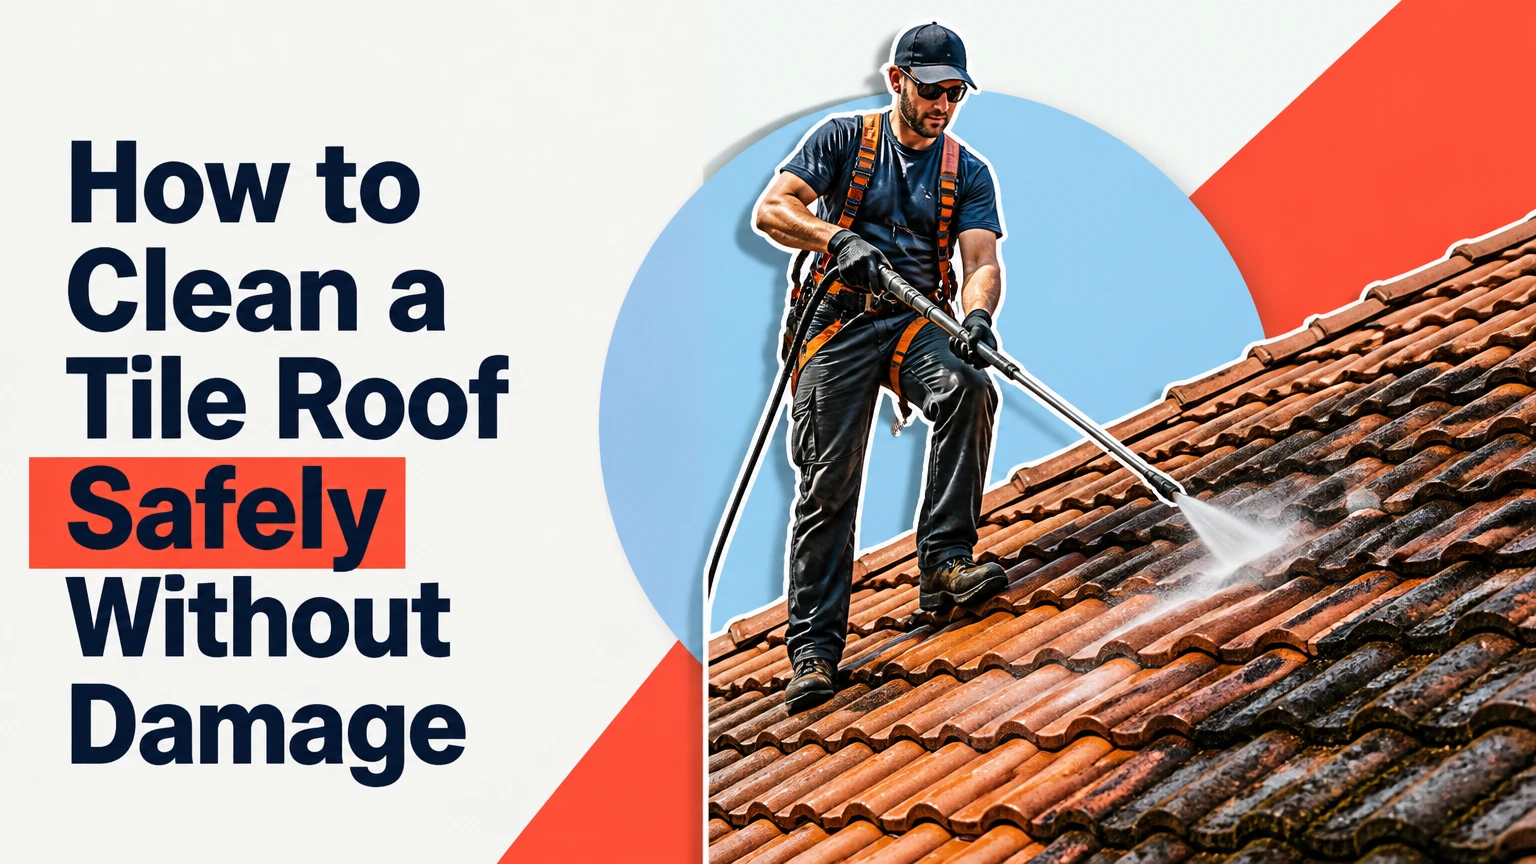
To clean a tile roof, remove loose debris, treat algae or moss with a label-approved roof cleaner, and rinse with controlled low-pressure water directed downward. The safest process avoids unnecessary foot traffic, protects landscaping and gutters, and includes a post-cleaning inspection for cracked tiles, displaced flashing, blocked drainage, and leaks.
Key Facts at a Glance
- Tile roof cleaning typically takes 4-8 hours for an average 2,000-square-foot roof, excluding repairs.
- A pressure washer does not have one universally safe PSI setting for every clay, concrete, or slate tile.
- Sodium hypochlorite works quickly on algae and moss, but runoff can injure plants, corrode metals, and harm aquatic life.
- A clean roof can show new staining within months when overhanging trees, shade, trapped moisture, or airborne spores remain.
- Historic clay tiles, slate roofs, steep roofs, and roofs with visible damage are poor candidates for DIY cleaning.
- A cleaning quote should identify the chemical, access method, runoff controls, tile repairs, and post-treatment warranty.
What Is the Safest Method for Cleaning a Tile Roof?
The safest general method is a controlled soft wash followed by a gentle downward rinse, provided the tile manufacturer permits the chemistry and the roof is safe to access. Soft washing treats biological growth chemically instead of relying on force, which reduces the chance of cracking brittle tiles or driving water below overlapping courses.
A soft wash is not automatically harmless. Sodium hypochlorite may discolor plants, weaken some coatings, corrode aluminum, and damage nearby painted surfaces if the concentration or runoff is poorly controlled. Oxygen-based cleaners create a lower-odor alternative, but they often need agitation and longer contact time.
Roof cleaning is also roof maintenance. Organic growth can conceal cracked tiles, open mortar joints, damaged valley flashing, and blocked gutters. Cleaning before documenting the roof condition can make later damage disputes difficult, particularly when a contractor uses a high-pressure wand that breaks old tiles.
What Cleaning Equipment Do You Need?
Gather equipment before climbing or accessing the roof. Use an extension pole wherever possible so debris removal and chemical application occur from a stable position, not from the center of fragile tiles.
| Item | Typical specification or quantity | Purpose |
|---|---|---|
| Pump sprayer | 2-4 gallons, chemical-compatible seals | Applies roof treatment evenly |
| Garden hose | 50-100 feet, adjustable fan nozzle | Provides controlled rinsing |
| Soft roof brush | Nylon bristles, 10-18-inch head | Agitates residual lichen without metal scraping |
| Extension pole | 8-20 feet, telescoping | Reduces foot traffic |
| Leaf blower | Battery or electric, low setting | Removes dry leaves and twigs |
| Plastic sheeting | 6-10 mil, enough for planting beds | Limits chemical contact |
| Safety equipment | Gloves, eye protection, slip-resistant footwear | Protects skin and eyes |
| Replacement tiles | Matching profile and color, 2-6 pieces | Allows immediate repair of breakage |
Do not mix cleaners unless the product label specifically permits the combination. Never combine bleach with acids, ammonia, toilet cleaner, or other household products, because dangerous gases or corrosive reactions can result.
Before You Start
Plan for 4-8 hours of work on a typical 2,000-square-foot roof, with an additional day or two for dead moss to dry and release naturally. DIY material costs commonly fall between $75 and $350, while professional cleaning often costs about $0.40-$0.90 per square foot in many U.S. markets, although access, region, repairs, and roof complexity can change the price substantially.
Pre-Cleaning Safety Screen
Do not begin if any of these conditions apply:
- The roof is wet, icy, visibly sagging, or steeper than your safe working capability.
- Tiles are cracked, loose, sliding, heavily pitted, or missing.
- The roof is more than one story without compliant fall protection and rescue planning.
- You cannot identify a certified anchor point or safe access route.
- Power lines, skylights, solar panels, fragile roof ornaments, or fragile gutters obstruct the work.
- Wind could carry spray onto neighboring property, vehicles, ponds, or open windows.
- Local water restrictions or chemical-discharge rules prohibit the planned rinse.
OSHA fall-protection requirements apply to many construction activities, but homeowners should not treat a harness as a complete safety system. A harness requires a rated anchor, compatible equipment, clearance below the worker, and a rescue plan. A rope tied to a chimney, vent, ladder, or plumbing pipe is not a verified anchor.
Inspect and Photograph the Roof
Photograph valleys, ridges, penetrations, gutters, flashing, visible mortar, and existing cracks from the ground or a qualified access point. Mark damaged areas on a simple roof sketch before cleaning begins.
This documentation separates pre-existing damage from cleaning damage. It also prevents a common error: washing organic matter into a blocked valley or gutter and then mistaking the resulting overflow for a roof leak.
How to Clean a Tile Roof Step by Step
The following procedure is suitable only for a sound, accessible roof and a cleaner whose label permits the tile material. Keep all spray directed downward, control runoff continuously, and stop when the roof condition becomes uncertain.
Step 1: Protect People, Plants, and Property
Close windows, move outdoor furniture, cover delicate surfaces, and disconnect or protect rain barrels. Pre-wet plants with clean water, cover sensitive beds loosely with plastic, and assign one person to monitor runoff and hose down vegetation during treatment.
Plugging downspouts can prevent concentrated discharge into a flower bed, but do not create ponding or overload gutters. Route collected water only where local rules allow it. Never discharge chemical runoff into a pond, storm drain, creek, or neighboring property without checking applicable requirements.
Success checkpoint: Plants, painted surfaces, metal fixtures, and drainage outlets have a planned protection method.
Common mistake: Covering plants tightly for hours in hot sun. Remove sheeting promptly after rinsing to prevent heat damage.
Step 2: Remove Loose Debris From the Ridge Downward
Use a leaf blower or soft broom to remove leaves, twigs, pine needles, and loose moss clumps. Work from the ridge toward the eaves so material moves with the tile laps and does not collect beneath upper courses.
Do not scrape with a metal shovel, wire brush, or roof rake designed for asphalt shingles. These tools can chip tile edges, remove surface coatings, and dislodge pointing or clips.
Success checkpoint: Valleys, gutters, and tile channels are visibly free of loose material before liquid is applied.
Common mistake: Blowing debris uphill. Upward movement can lodge material beneath laps and around flashing.
Step 3: Apply a Compatible Roof Cleaner
Apply the selected solution with a low-pressure pump sprayer, beginning at the highest practical area. Saturate the stained surface without flooding the roof, and follow the product label for dilution, application temperature, personal protective equipment, and dwell time.
Many professional cleaners use sodium hypochlorite solutions for severe biological staining, but the correct concentration depends on the product, application method, tile finish, and local environmental rules. A homeowner should not copy a commercial mix by percentage alone. Test a small inconspicuous area first.
Oxygen bleach, usually based on sodium percarbonate, is a reasonable alternative for lighter growth or sites where chlorine runoff presents a high plant risk. It generally acts more slowly and may require a nylon brush.
Success checkpoint: Algae darkens or changes color, moss loosens, and the solution remains wet for the label-directed period, often 10-30 minutes.
Common mistake: Allowing cleaner to dry on the tile. Work in small sections and mist with water if the label permits; do not extend dwell time beyond instructions.
Step 4: Rinse With Controlled Downward Flow
Use a garden hose or the lowest effective pressure setting recommended by the tile manufacturer. Hold the nozzle so water travels down the slope, never upward into tile overlaps, ridge joints, vents, or flashing.
A wide fan pattern is safer than a narrow jet. Keep the nozzle moving and avoid concentrating water on one tile edge. Pressure-washer manufacturers may publish equipment ratings, but a machine’s maximum rating is not proof that a particular roof can tolerate it.
Success checkpoint: Dead growth and residue leave the surface without water appearing in the attic or around ceiling penetrations.
Common mistake: Using a concentrated tip to make a clean stripe. That visual result can conceal stripped glaze, chipped edges, or water forced under the underlayment.
Step 5: Agitate Only Residual Growth
Use a soft nylon brush on areas where lichen or moss remains attached after chemical treatment. Work from the top down with light strokes, and let the cleaner do the biological work rather than trying to grind growth away.
Thick lichen often has a strong mechanical attachment. Repeated aggressive brushing can damage a tile more quickly than one controlled second treatment, especially on weathered clay or concrete surfaces.
Success checkpoint: Remaining growth releases with light brushing and the tile surface remains intact.
Common mistake: Scrubbing dry lichen. Reapply a compatible treatment and allow the label-directed dwell period first.
Step 6: Clean Gutters and Inspect the Roof
Clear gutters, downspouts, valleys, and drainage outlets after rinsing. Then inspect every accessible tile, ridge cap, flashing joint, vent, and mortar area for cracks or displacement.
Replace cracked tiles with the correct profile and secure loose components before the next storm. A tile replacement may require lifting adjacent tiles, so avoid improvising with sealant as a permanent repair.
Success checkpoint: Water flows freely through drainage paths, no tile is visibly broken, and no leak appears in the attic or ceiling.
Common mistake: Treating a new leak as a cleaning problem. Stop interior water exposure, document the location, and arrange a roof inspection.
Which Cleaner Should You Use?
Choose a roof cleaner by tile material, biological growth, runoff sensitivity, and the manufacturer’s care instructions. Sodium hypochlorite usually provides the fastest biological kill, while sodium percarbonate reduces chlorine-related odor and plant risk but often needs more labor.
| Cleaning option | Typical use | Main benefit | Main risk or limitation |
|---|---|---|---|
| Diluted sodium hypochlorite | Heavy algae, moss, and mold | Fast biological treatment, often 10-30-minute dwell | Plant injury, corrosion, harmful runoff |
| Sodium percarbonate | Light to moderate organic growth | Lower chlorine impact and odor | Slower action, more brushing |
| Manufacturer-approved biocide | Recurring moss or lichen | Targets regrowth after cleaning | Label restrictions and variable longevity |
| Water-only rinse | Dust, loose soil, leaves | No chemical residue | Does not kill roots or spores |
| Acid cleaner | Efflorescence or mineral deposits only when specified | May dissolve certain deposits | Can etch concrete, damage metals, and harm mortar |
Do not use muriatic acid, vinegar, or bathroom descaler as a general roof cleaner. Acid can attack cementitious surfaces and metal flashing, while efflorescence on concrete tile is usually a mineral deposit rather than organic dirt.
How Does Tile Material Change the Method?
Concrete tiles usually tolerate more routine handling than old clay tiles, but concrete is porous and surface coatings can wear. Clay and terracotta tiles can become brittle with age, and slate requires a separate care approach because its layered structure can delaminate or break under foot traffic.
| Roof material | Typical vulnerability | Preferred approach | DIY position |
|---|---|---|---|
| Concrete tile | Porosity, coating loss, cracked edges | Label-approved soft wash and gentle rinse | Possible on low, sound roofs |
| New glazed clay | Chipping, glaze damage, thermal shock | Manufacturer-approved cleaner, minimal contact | Limited DIY access |
| Weathered terracotta | Brittleness and powdering | Professional inspection and soft treatment | Usually avoid DIY |
| Natural slate | Delamination, nail failure, breakage | Slate specialist assessment | Do not walk on it casually |
| Fiber-cement tile | Surface erosion and older material hazards | Product-specific inspection | Professional advice recommended |
The roof’s age matters as much as its material. A 40-year-old concrete tile roof with a worn coating may be more vulnerable than a newer clay roof, so material labels alone cannot set a safe pressure limit.
Should You Use a Pressure Washer?
Most tile roofs should not be pressure washed as a first choice, and no universal 1,200-PSI limit guarantees safety. Pressure, nozzle angle, flow rate, distance, tile condition, coating, and the operator’s direction all affect damage; many manufacturers and roofing contractors instead recommend soft washing or a garden-hose rinse.
Pressure washing may have a limited role on sound, durable concrete tile when the tile manufacturer allows it and a trained operator uses low pressure, a wide fan, adequate distance, and downward flow. It is a poor choice for old clay, slate, damaged tile, open mortar, or roofs where water intrusion is already suspected.
The counterintuitive risk is below the visible surface. A tile can look clean while displaced water wets battens, underlayment, insulation, or roof decking. Drying may take days, and interior staining may appear long after the cleaning crew leaves.
What Are the Main Alternatives?
Chemical soft washing is usually the best balance for biological growth, while dry debris removal is best for leaves and dirt that have not attached to the tile. Professional no-foot-contact systems are safer than DIY access on steep, high, fragile, or historically significant roofs.
| Method | Typical time | Immediate result | Best application | Avoid when |
|---|---|---|---|---|
| Soft wash plus hose rinse | 4-8 hours | Moderate to strong | Algae, moss, mold, lichen | Runoff cannot be controlled |
| Oxygen cleaner plus brushing | 6-10 hours | Moderate | Light growth near sensitive plants | Thick lichen covers large areas |
| Low-pressure mechanical rinse | 3-6 hours | Strong visual change | Loose soil on sound concrete tile | Clay, slate, damaged roofs |
| Dry removal and spot treatment | 2-5 hours | Limited | Leaves and isolated patches | Growth is rooted across courses |
| Professional lift or roof ladder service | 1-2 days | Depends on treatment | Steep, high, fragile roofs | Unlicensed or uninsured operator |
A professional quote should state whether workers will stand on the tiles, how they will access the roof, what pressure range they will use, which chemical will be applied, and who pays for cracked-tile replacement.
When Is DIY Cleaning Unsafe?
DIY cleaning is unsafe when a fall, breakage, chemical exposure, or hidden roof defect is more likely than a controllable improvement. Hire a licensed and insured roof-cleaning contractor for steep or multi-story roofs, historic clay, natural slate, extensive lichen, visible deterioration, solar arrays, or any roof that cannot be accessed without walking on unsupported tile.
Ask for evidence of:
- General liability and workers’ compensation insurance.
- Experience with the exact tile material and roof profile.
- A written chemical and runoff-control plan.
- A documented no-pressure or low-pressure procedure.
- Before-and-after photographs.
- A repair process for broken tiles and damaged flashing.
- References for comparable roofs, not only house washing.
A contractor who promises to make every roof look new may be overselling the result. Weathered concrete can retain discoloration after biological growth is dead, and old clay may need replacement rather than cosmetic restoration.
How Much Does Tile Roof Cleaning Cost?
Typical professional tile roof cleaning costs about $0.40-$0.90 per square foot, or approximately $800-$1,800 for a 2,000-square-foot roof before major repairs. DIY costs commonly range from $75-$350, but rental access equipment, fall protection, replacement tiles, landscaping protection, and wastewater controls can raise the total.
| Project condition | Typical area | Typical professional range | Typical duration |
|---|---|---|---|
| Light debris and algae | 1,500 sq. ft. | $600-$1,200 | 3-5 hours |
| Moderate moss or lichen | 2,000 sq. ft. | $1,000-$2,000 | 5-8 hours |
| Steep or two-story access | 2,000 sq. ft. | $1,500-$3,000 | 1-2 days |
| Historic or fragile clay | 1,500 sq. ft. | $1,500-$4,000+ | 1-3 days |
| Cleaning with tile repairs | 2,000 sq. ft. | $1,500-$4,000+ | 1-3 days |
These are typical planning ranges, not a universal price schedule. Roof pitch, regional labor rates, access, waste rules, tile replacement, and whether gutters or solar panels need separate handling have greater cost impact than square footage alone.
Common Mistakes and How to Fix Them
Walking on the Tile Centers
Tile centers can crack under concentrated body weight, particularly where the tile is unsupported between battens. Use roof ladders, crawl boards designed for tile roofing, elevated platforms, or professional access methods instead of relying on shoe grip.
If a tile cracks, do not smear sealant over it and continue. Mark the location, photograph it, and replace the tile using the correct installation method.
Spraying Water Uphill
Upward spray drives water into the laps and can wet underlayment or roof decking. Rinse from the ridge toward the eave with a moving fan pattern.
If a leak appears, stop washing and inspect the attic after rainfall. Cleaning cannot correct failed flashing or deteriorated underlayment.
Letting Chemicals Reach Plants
Bleach runoff can scorch foliage within hours. Pre-wet plants, cover sensitive beds, control downspouts, and rinse vegetation throughout the application and cleanup.
If leaves turn brown, continue flushing with clean water if local conditions permit, but do not assume dilution reverses chemical injury.
Cleaning Without Checking Drainage
Moss and roof grit can block gutters after rinsing. Clear the drainage system before the next storm and confirm that downspouts discharge away from the foundation.
Treating Efflorescence as Organic Staining
White powder on concrete tile is often efflorescence, caused by soluble salts migrating to the surface. Dry-brush it with a nylon brush and follow the tile manufacturer’s advice; do not reach for acid automatically.
Why Is Growth Returning?
Moss or algae returning within six months usually indicates persistent shade, wet debris, incomplete treatment, or a nearby biological source rather than a cleaning failure alone. Overhanging branches, clogged gutters, north-facing slopes, and poor ventilation keep tiles damp after the surface treatment ends.
Prevention works best when the moisture source is corrected. Trim branches without damaging the roof, keep gutters clear, improve drainage where feasible, and use a manufacturer-approved preventive biocide when local environmental rules permit it.
Zinc or copper strips may reduce some biological growth as rainwater washes ions down the roof, but strips are not a substitute for cleaning, repair, or correct installation. Their effectiveness depends on roof geometry and rainfall, and runoff can affect plants and aquatic organisms.
How Often Should You Clean It?
Inspect tile roofing twice a year and after severe storms; clean when debris, moss, algae, or lichen begins affecting drainage or holding moisture. Many roofs need treatment every 3-5 years, but shaded, humid, tree-covered roofs may need attention sooner, while dry sunny roofs may remain acceptable longer.
Use visual triggers rather than a rigid calendar:
- Moss forms raised cushions or lifts tile edges.
- Lichen covers more than isolated spots.
- Leaves remain in valleys after ordinary wind.
- Gutters contain large quantities of tile grit or organic debris.
- Dark streaks spread across shaded slopes.
- Water backs up at valleys or overflows gutters.
Cleaning too frequently can cause more damage than moderate staining, especially when workers repeatedly access fragile tiles. Maintenance should reduce risk, not maximize cosmetic uniformity.
Troubleshooting After Cleaning
Black Streaks Remain
Dead algae may leave pigment behind after the organism is no longer active. Wait for the surface to dry, compare the area with untreated staining, and use a second label-approved treatment rather than immediately increasing pressure.
Moss Is Still Attached
Apply compatible cleaner again and allow the specified dwell time. Remove loosened material with a soft nylon brush, then rinse downward; do not pull rooted moss forcefully from tile joints.
White Residue Appears
Identify whether the residue is efflorescence, dried cleaner, or mineral scale. Dry-brush first, review the product label, and avoid acid unless the tile manufacturer expressly approves it for that material.
A Leak Appears Inside
Stop roof access and locate the interior symptom, but do not assume the leak began at the visible ceiling mark. A roofer should inspect tile laps, valleys, flashing, penetrations, underlayment, and attic moisture.
Tiles Break During Cleaning
Stop the work, protect the opening from weather, and count and photograph the damage. A qualified roofer should determine whether adjacent tiles, battens, clips, mortar, or flashing were also disturbed.
Frequently Asked Questions
Can rain clean algae from roof tiles?
Rain can remove loose dust and dead surface material, but ordinary rainfall rarely kills established algae, moss, or lichen. Biological growth remains when roots or attachment structures persist in tile pores and joints. A properly selected treatment is needed when growth affects drainage, retains moisture, or spreads across shaded slopes.
Is bleach safe for concrete tile roofs?
Diluted sodium hypochlorite can be compatible with some concrete tile roofs when the product label and tile manufacturer permit it, but bleach is not automatically safe. Runoff can injure plants, corrode metal, stain surfaces, and harm aquatic environments. Test a small area and control runoff before treating the entire roof.
Can I clean a tile roof from a ladder?
A ladder is useful for controlled ground-level application and eave access, but it is not a complete roof-access system. Ladder stabilizers, a secure setup, compliant fall protection, and a safe transition are necessary. Never rest an unsecured ladder directly on fragile roof tiles or use it as permission to walk a steep roof.
Should roof tiles be sealed after cleaning?
Sealing is not automatically required after cleaning and can trap moisture or alter the intended appearance if the product is incompatible. Use a coating only when the tile manufacturer specifies it, the surface is sound and dry, and the application does not conceal cracks or interfere with future repairs.
Does roof cleaning prevent leaks?
Roof cleaning can reduce moisture retention and keep drainage paths open, but it cannot repair cracked tiles, failed flashing, deteriorated underlayment, or rotten decking. Cleaning prevents some maintenance-related problems; it does not make a defective roof watertight. Inspect and repair the roof before treating severe growth.
The Bottom Line
How to clean a tile roof safely depends on material, condition, access, and the type of growth present. Remove loose debris from ridge to eave, use a manufacturer-approved soft-wash treatment, rinse downward with the lowest effective pressure, control chemical runoff, and inspect every tile and drainage path afterward. For old clay, slate, steep, high, or visibly damaged roofs, professional access is the safer decision.


