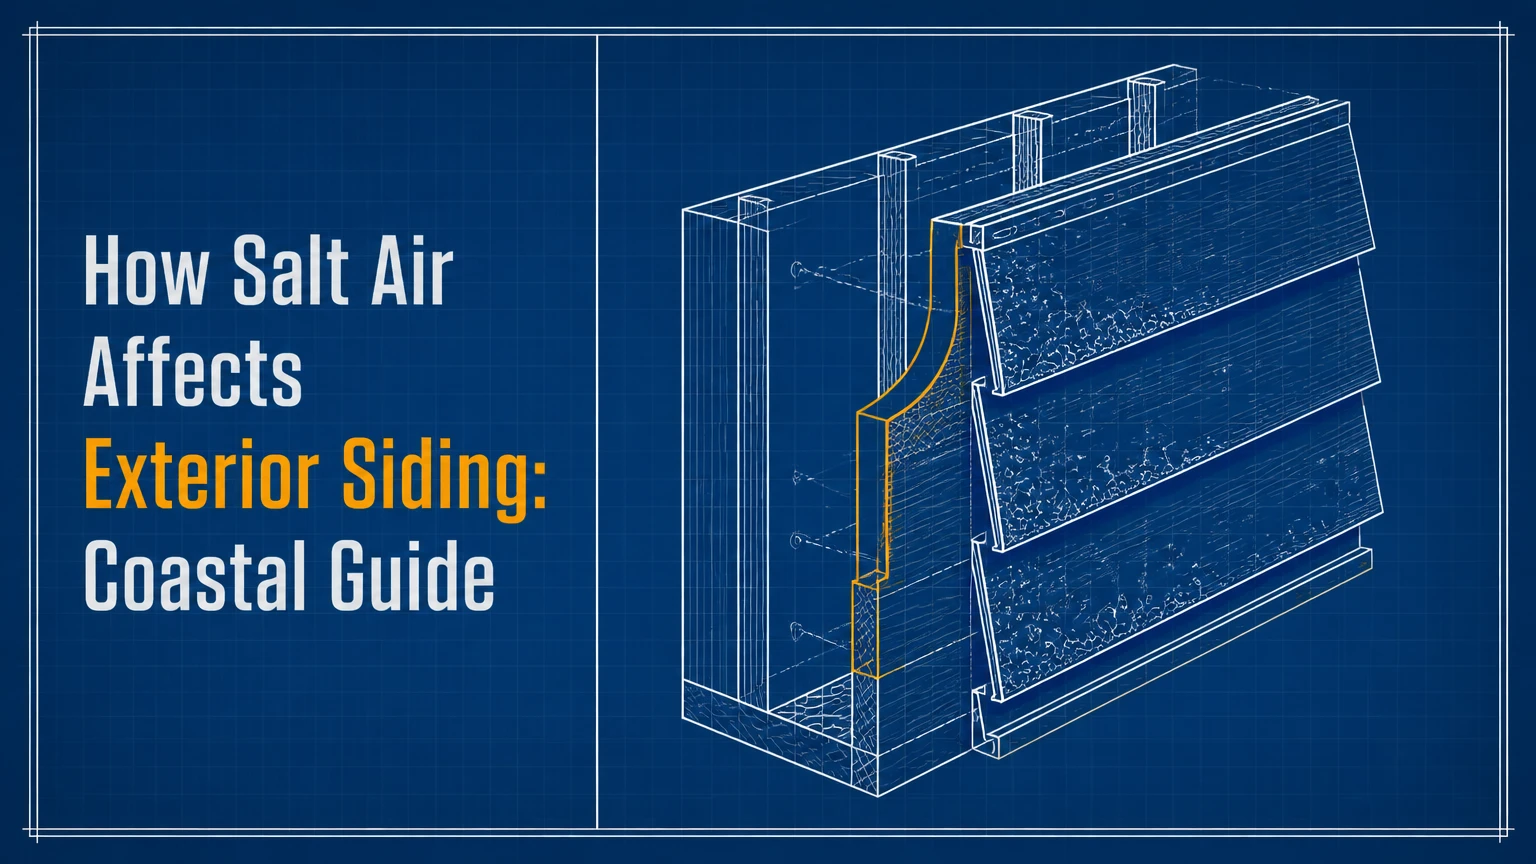
Salt air affects exterior siding by leaving chloride deposits that combine with humidity, rain, and condensation to form conductive saline films. Those films accelerate corrosion of metal fasteners, retain moisture at seams and cut edges, and increase mildew and coating deterioration. Wind-driven rain and ultraviolet exposure then determine how quickly the siding assembly fails.
Key facts
Salt air is a marine aerosol containing water droplets, sodium chloride, and other dissolved ions.
Chloride contamination accelerates corrosion most severely on exposed steel, galvanized damage, fasteners, and dissimilar-metal connections.
Vinyl does not rust or rot, but salt deposits still worsen cleaning requirements, mildew growth, chalking, and UV-related embrittlement.
Factory-finished fiber cement and properly coated aluminum generally provide lower coastal maintenance than natural wood.
Fresh-water rinsing removes salt before a persistent electrolyte film forms; sheltered walls require manual cleaning because rainfall may not reach them.
A coastal siding warranty depends on installation details, finish maintenance, fastener grade, flashing, and local exposure, not material name alone.
How Salt Air Affects Exterior Siding
Salt air damages siding through a repeating wet-dry cycle: marine particles settle on the wall, absorb moisture, dissolve into a conductive film, enter defects, and dry into concentrated deposits. The primary risks are corrosion, moisture retention, coating breakdown, biological growth, and wind-driven water intrusion.
What happens after salt deposits reach the wall?
Ocean winds carry tiny seawater droplets inland. Larger droplets settle quickly, while smaller aerosol particles can travel farther, especially during onshore winds, storms, and high humidity. Salt accumulation is usually heavier on ocean-facing elevations, balcony undersides, window heads, railings, and other surfaces exposed to spray.
When sodium chloride dissolves in dew or humid air, sodium and chloride ions increase the electrical conductivity of the surface water. The film allows electrochemical reactions to proceed more readily on steel nails, screws, brackets, flashing, and damaged coatings. Chloride ions also penetrate some corrosion products and make localized pitting more likely.
Salt is hygroscopic, meaning salt residues can attract and hold atmospheric moisture. However, the AI Overview overstates one mechanism: dry sodium chloride does not automatically create structural cracking in every siding material. Crystal pressure becomes relevant when salts enter porous substrates and repeatedly dissolve and recrystallize, but wood moisture, freeze-thaw action, poor coating adhesion, and wind-driven rain are usually more important field causes.
Does salt air amplify ultraviolet radiation?
Salt aerosol can scatter and refract light, but a general claim that marine salt meaningfully amplifies UV exposure is not well established for residential siding. UV degradation remains important, particularly for vinyl pigments, exterior paint binders, sealants, and engineered wood coatings, but the dominant explanation is direct solar exposure combined with heat, moisture, and maintenance conditions.
That distinction matters. A north-facing wall with heavy salt residue may show mildew and corrosion before UV fading, while a south-facing wall may chalk or fade with relatively little corrosion. The same coastal home can therefore have different failure patterns on four elevations.
Which Siding Materials Perform Best Near Salt Water?
Factory-finished fiber cement and premium vinyl are usually the most forgiving choices for coastal homeowners, but neither material is maintenance-free. Fiber cement resists rot and insects while requiring protected edges and corrosion-resistant fasteners; vinyl avoids corrosion but remains vulnerable to UV, heat distortion, impact, and wind-related installation errors.
| Siding material | Main salt-air exposure | Typical coastal maintenance | Important specification |
|---|---|---|---|
| Factory-finished fiber cement | Fastener corrosion, wet cut edges, coating wear | Fresh-water rinse twice yearly; inspect paint every 5-10 years | 316 stainless or hot-dipped galvanized fasteners |
| Premium vinyl, 0.044-0.048 inch | Chalking, fading, mildew, thermal movement | Rinse twice yearly; avoid abrasive cleaners | Heavy-duty lock and wind-rated installation |
| Engineered wood | Edge swelling, coating failure, fungal decay | Inspect annually; repaint or reseal about every 5-8 years | Seal field cuts and maintain drainage gaps |
| Cedar or redwood | Moisture retention, rot, tannin bleed, mold | Inspect twice yearly; stain or paint about every 3-5 years | Seal all exposed faces and end grain |
| Aluminum with PVDF finish | Pitting, white oxidation, chalking, dents | Rinse twice yearly; inspect scratches promptly | Factory-applied PVDF finish and compatible fasteners |
| Galvanized or galvalume steel | Red rust, edge corrosion, coating damage | Inspect quarterly in severe exposure | Repair scratches before chloride reaches bare steel |
| Traditional stucco | Cracks, staining, water behind the cladding | Inspect annually; repair cracks promptly | Proper drainage plane, weeps, and compatible sealants |
Is vinyl siding a good choice for a beach house?
Vinyl is a strong budget choice when the installation has a suitable wind rating and the panels are thick enough for the local climate. Polyvinyl chloride does not rust, rot, or absorb salt in the manner of wood, so surface contamination normally requires washing rather than replacement.
Vinyl is not ideal where the wall receives intense reflected heat from glass, pale concrete, or neighboring surfaces. Thermal distortion can occur when dark or poorly ventilated panels become hot, and brittle panels are more susceptible to impact during cold weather. Salt also accumulates behind shutters, under eaves, and in laps where a normal rainstorm cannot remove it.
Choose premium vinyl when low initial cost, low painting demand, and corrosion immunity matter most. Do not choose it solely because the material is “maintenance-free.” Coastal vinyl still needs inspection of locks, starter strips, corner posts, soffits, and penetrations.
Does fiber cement resist salt air better than wood?
Fiber cement usually outperforms natural wood in coastal moisture exposure because its cementitious composition does not rot or support insects. The vulnerable points are not the broad face of an intact panel, but field-cut edges, penetrations, joints, caulk lines, and fasteners.
Manufacturers commonly require cut edges to be sealed with a compatible coating or sealant. Unsealed edges can absorb water, and repeated wetting can damage the board or its finish. Fiber cement is also heavy and installation-intensive, so incorrect clearances around roofs, decks, windows, and foundations can create drainage problems that salt air makes more severe.
Factory-applied finishes often provide more consistent coverage than field painting. A local installer should follow the siding manufacturer’s fastening schedule rather than substitute a generic nail pattern.
How do wood and metal siding fail?
Wood siding fails when salt deposits slow drying and moisture remains near joints, end grain, trim, or flashing. Cedar and redwood contain extractives that provide some natural durability, but those species are not rot-proof. Repeated humidity, poor ventilation, and coating gaps can still produce decay, warping, black staining, and paint failure.
Aluminum forms a thin oxide layer that protects much of its surface, but chloride exposure can cause pitting, especially where the finish is scratched or water remains trapped. Steel is less forgiving: once a protective coating is breached, red rust can spread beneath the finish and stain adjacent surfaces.
The term “marine grade” does not identify a complete siding system. Finish chemistry, edge treatment, fastener compatibility, drainage, and inspection determine actual service life.
Which Fasteners and Coatings Matter Most?
Grade 316 stainless steel is the most conservative fastener choice for severe salt exposure because its molybdenum content improves resistance to chloride pitting compared with common 304 stainless steel. Hot-dipped galvanized fasteners can perform well in many coastal settings, but electro-galvanized and uncoated carbon-steel fasteners are poor choices for exposed marine construction.
| Component | Preferred coastal option | Avoid or limit | Inspection concern |
|---|---|---|---|
| Fiber cement nails | 316 stainless; quality hot-dipped galvanized | Electro-galvanized, bright common steel | Rust bleed at nail heads |
| Exterior screws | 316 stainless with approved washer | Mixed-metal fasteners | Pitting and staining |
| Flashing | Compatible coated aluminum, copper, or stainless steel | Unprotected steel near salt spray | Galvanic contact |
| Metal siding finish | PVDF fluoropolymer factory finish | Bare steel or thin damaged coating | Scratches and edge rust |
| Joint sealant | Exterior sealant rated for substrate and UV | Interior caulk or incompatible silicone | Shrinkage and adhesion loss |
| Paint primer | Manufacturer-approved exterior primer | Painting over salt residue | Blisters and peeling |
Fastener selection also requires compatibility. Stainless steel touching aluminum, copper, or treated wood can create galvanic problems when a salty water film bridges the materials. A siding manufacturer, architect, or qualified installer should verify the assembly rather than treating the fastener grade as an isolated upgrade.
How Does Distance From the Coast Change Risk?
The highest salt exposure usually occurs within roughly 1 mile of breaking surf, but distance alone cannot predict siding life. Wind direction, elevation, dunes, vegetation, storm frequency, humidity, and whether the property faces open ocean or a protected bay can move a home into a different practical risk category.
| Exposure setting | Typical distance | Dominant stress | Practical response |
|---|---|---|---|
| Oceanfront or open spray zone | 0-1 mile | Salt spray, hurricane rain, wind abrasion | Rinse every 3-6 months; use 316 stainless |
| Barrier-island or exposed inlet | 1-3 miles | Onshore aerosol, high wind, humidity | Rinse twice yearly; inspect after storms |
| Bay, sound, or estuary | 1-5 miles | Humidity and intermittent salt deposition | Rinse twice yearly; inspect shaded walls |
| Inland coastal plain | 5-15 miles | Lower salt load, seasonal storms | Annual rinse; storm inspection |
| Inland site with onshore storm exposure | More than 15 miles | Episodic aerosol and wind-driven rain | Inspect after major storms; wash as needed |
The National Oceanic and Atmospheric Administration identifies sea-salt aerosol as a major component of coastal atmospheric conditions, but no universal mileage boundary applies to every shoreline. A home’s salt burden can be estimated more accurately from residue, corrosion rate, and wall exposure than from a map measurement alone.
A simple field indicator is recurring salt residue on window glass, railings, exterior light fixtures, or metal HVAC components. If those surfaces develop deposits within weeks, the siding deserves a more frequent rinse schedule.
How Should Coastal Siding Be Cleaned?
Coastal siding should usually be rinsed with fresh water every 3-6 months in severe exposure and at least twice yearly in moderate exposure. Use a garden hose, soft brush, and mild biodegradable detergent when needed; high-pressure washing can force water behind laps, damage finishes, and drive contamination into joints.
Step 1: Inspect before washing
Look for rust bleed, open seams, cracked caulk, loose panels, swollen edges, peeling paint, mildew, and damaged flashing. Photograph defects before cleaning because washing can remove visual evidence of the original condition.
Step 2: Rinse from top to bottom
Use fresh water at ordinary hose pressure and work downward. Do not aim upward into panel laps, soffit vents, window weep holes, or trim joints. A soft fan spray is safer than a concentrated pressure-washer tip.
Step 3: Wash deposits gently
Mix detergent according to the product label. Apply it to a small test area, scrub with a soft nylon brush, and rinse before the solution dries. Never use abrasive pads on vinyl, aluminum, or factory-finished panels because scratches expose surfaces to corrosion and accelerate chalking.
Step 4: Treat biological growth separately
Mildew and algae require a compatible siding cleaner, often oxygen bleach or a diluted sodium hypochlorite product approved by the manufacturer. Protect plants, never mix bleach with acids or ammonia, and follow the label’s dwell time rather than assuming ten minutes is universally safe.
Step 5: Rinse hidden surfaces
Clean porch ceilings, soffit undersides, behind shutters, balcony walls, recessed corners, and areas beneath deep eaves by hand. Rain often fails to wash these salt traps.
You will know the cleaning worked when the surface has no gritty residue, streaks, or detergent film and metal components show no new orange staining. Do not paint immediately. The substrate must dry fully, and the surface must meet the coating manufacturer’s moisture requirements.
What Does Coastal Siding Cost?
Typical installed coastal siding costs for a 2,000-square-foot siding area range from about $14,000 for premium vinyl to $54,000 for high-end natural cedar, before major sheathing repairs, architectural trim, or unusual access costs. These are planning ranges, not bids; coastal labor, removal, flashing, permits, and storm-code requirements can change the total substantially.
| Material | Typical installed cost per square foot | Typical 2,000-square-foot total | Maintenance planning life |
|---|---|---|---|
| Premium vinyl | $7-$14 | $14,000-$28,000 | 20-25 years |
| Fiber cement | $11-$20 | $22,000-$40,000 | 30-40+ years |
| Engineered wood | $9-$18 | $18,000-$36,000 | About 25-30 years |
| Natural cedar | $14-$27 | $28,000-$54,000 | About 20-30 years with renewal |
| PVDF-finished aluminum | $10-$18 | $20,000-$36,000 | About 30-35+ years |
| Traditional stucco | $13-$25 | $26,000-$50,000 | About 25-30 years with repairs |
A siding estimate should identify whether the price includes tear-off, disposal, housewrap, rainscreen battens, flashing, window integration, corner trim, soffit work, painting, and substrate repair. A low material price can become expensive when salt-damaged sheathing or corroded fasteners are discovered during removal.
One practitioner rule is especially useful: spend first on drainage and fastening, then on decorative finish upgrades. A premium coating cannot compensate for missing flashing or water trapped behind the cladding.
What Are the First Signs of Salt Damage?
The first signs of salt-related siding damage are usually surface residue, rust staining, coating chalk, mildew in sheltered areas, and corrosion at fasteners rather than immediate panel failure. Early inspection matters because replacing a nail or resealing a joint costs less than repairing wet sheathing behind the siding.
| Visible symptom | Likely mechanism | Appropriate first response |
|---|---|---|
| Orange streaks below nail heads | Corroding steel fasteners | Identify fastener type; replace affected hardware |
| White powder on aluminum | Oxidation or finish chalking | Gentle detergent wash; inspect for pits |
| White powder on vinyl | UV chalking, dirt, or salt residue | Wash a test area; avoid abrasive polishing |
| Blistered paint | Moisture, contamination, or adhesion failure | Strip failed coating, dry substrate, prime correctly |
| Dark growth on north wall | Persistent humidity and organic contamination | Clean, improve drainage and drying |
| Swollen wood ends | Water entry at end grain or joints | Probe for decay; reseal or replace damaged boards |
| Loose or distorted vinyl panels | Wind, thermal movement, or failed locks | Check installation and wind exposure |
| Cracks in stucco | Movement, impact, or water-related stress | Map cracks; inspect drainage plane and sheathing |
Blistering is not proof of salt crystallization under paint. Moisture behind the coating, painting over contaminated siding, incompatible primer, and excessive substrate moisture are more common explanations. A repair should identify the water path before the surface is repainted.
When Can Salt-Damaged Siding Be Repaired?
Salt-damaged siding can often be repaired when the substrate remains sound, the defect is localized, and fasteners or coatings are the primary failure. Replacement becomes more appropriate when probing finds soft wood, sheathing decay, widespread corrosion, delamination, repeated water intrusion, or panels that no longer maintain their designed drainage path.
Use this decision sequence:
- Wash a small area with fresh water and document what remains.
- Probe wood, trim, and exposed edges with an awl or screwdriver.
- Check behind loose panels for wet insulation, stained sheathing, and corroded clips.
- Identify the source, including failed flashing, open sealant, roof runoff, or wind-driven rain.
- Replace compromised substrate before installing new siding.
- Prime and coat only after the surface reaches the product’s required dryness.
A surface-only repair is unsuitable when corrosion has reduced fastener diameter or when the fastener no longer holds the panel securely. Rust stains can be cosmetic, but recurring stains often indicate a concealed fastening problem.
Common Coastal Installation Mistakes
Several installation errors shorten siding life more than ordinary salt exposure. The most expensive mistakes allow water to enter behind the cladding while making future drying difficult.
- Using electro-galvanized nails: The thin zinc layer deteriorates quickly in chloride exposure, producing rust bleed and weaker connections.
- Leaving field-cut edges bare: Fiber cement and engineered wood absorb moisture at cuts that factory faces resist.
- Mixing incompatible metals: Salty water can bridge aluminum, copper, steel, and stainless components, creating galvanic corrosion.
- Blocking drainage gaps: Tight butt joints, sealed weeps, and misplaced trim prevent water from leaving the wall.
- Painting over salt: Chloride residue interferes with adhesion and can produce premature blistering.
- Ignoring the back of the assembly: Siding cannot compensate for missing flashing around windows, doors, decks, pipes, and roof-wall intersections.
Expert insight: a coastal wall may fail on the protected side first. Deep eaves reduce rain washing, and shaded surfaces stay damp longer, so the least weather-beaten elevation can hold the greatest salt and mildew concentration.
Are Stucco, Brick, and Rainscreens Better Alternatives?
Stucco and masonry can reduce routine surface corrosion, but they do not eliminate coastal moisture risk. Traditional stucco can crack and allow water behind the cladding, while brick veneer depends on flashing, weep openings, and properly detailed cavity drainage. A ventilated rainscreen improves drying behind many siding types.
| Alternative assembly | Coastal advantage | Main failure mode | Best detail |
|---|---|---|---|
| Traditional stucco | Mineral surface, no rusting face | Cracks and concealed water | Control joints, flashing, weeps |
| Brick veneer | Durable face and low paint demand | Failed mortar, flashing, or cavity drainage | Open head-joint weeps |
| Stone veneer | Impact-resistant appearance | Water behind veneer and freeze damage | Lath, WRB, base flashing |
| Ventilated rainscreen | Creates drainage and drying space | Blocked cavity or poor penetrations | 3/8-3/4 inch drainage cavity |
| Fiber cement over WRB | Rot-resistant cladding with repairable finish | Cut-edge and fastener exposure | Taped flashing and sealed cuts |
The best coastal assembly manages water in layers: cladding sheds bulk rain, a weather-resistive barrier limits intrusion, flashing directs water outward, and a drainage space supports drying. Material selection matters, but enclosure design often determines whether a small defect becomes structural damage.
Which Siding Should Different Coastal Homes Choose?
Oceanfront homes generally benefit from factory-finished fiber cement or thick, wind-rated vinyl with 316 stainless fasteners and frequent fresh-water rinsing. Bay homes can consider engineered wood or PVDF-finished aluminum when the installer provides strong drainage and the owner accepts scheduled coating inspections.
Oceanfront homeowner
Choose fiber cement when fire resistance, impact tolerance, and a painted appearance justify higher installation cost. Choose premium vinyl when budget and corrosion avoidance outweigh concerns about fading, heat distortion, and impact.
Inland coastal homeowner
Engineered wood can provide a wood appearance with more uniform manufacturing, but its edge coating and joint maintenance remain essential. Aluminum is useful where insects, rot, and temperature movement are concerns, although dents and pitting remain visible risks.
Budget-conscious DIY homeowner
Thick-gauge vinyl is the most forgiving material for a competent DIY installer because panels are light, paint is unnecessary, and expansion slots accommodate movement. DIY work still requires accurate flashing, wind-rated fastening, correct clearances, and compliance with the manufacturer’s instructions.
No siding is suitable for every coastal property. Local wind loads and the existing wall’s drainage condition should be checked before material price becomes the deciding factor.
Frequently Asked Questions
Can salt air damage siding even when it does not look wet?
Yes. Salt residue can remain after seawater droplets evaporate and later attract moisture from dew or humid air. The resulting thin film may be invisible but still conductive. Regular fresh-water rinsing removes chloride before repeated wet-dry cycles concentrate deposits at joints, fasteners, and sheltered surfaces.
Does rain wash salt off exterior siding?
Rain removes some salt from exposed faces, but it may not clean soffits, porch ceilings, recessed corners, surfaces beneath eaves, or areas behind shutters. Wind-driven rain can also push contaminated water into laps and penetrations. A hose rinse remains useful even where annual rainfall is high.
Is aluminum or vinyl better near the ocean?
Vinyl avoids rust and pitting, while aluminum tolerates insects and does not rot. Premium vinyl is usually the lower-maintenance budget choice, but aluminum with a PVDF finish can provide a longer finish life when scratches are repaired promptly. Wind rating, heat exposure, dents, and local installer quality determine the better choice.
How often should a beach house be washed?
A home within about 1 mile of breaking surf commonly benefits from a fresh-water rinse every 3-6 months, with extra cleaning after severe storms. Homes farther inland often need twice-yearly washing. Increase frequency when salt residue appears within weeks or metal fixtures show recurring corrosion.
Can painting stop salt damage?
Paint can protect a sound, clean, dry substrate, but paint cannot correct corroded fasteners, wet sheathing, failed flashing, or unsealed edges. Remove salt with fresh water, allow the surface to dry, repair substrate defects, use a compatible primer, and apply the coating within the manufacturer’s temperature and moisture limits.
The Bottom Line
Salt air affects exterior siding through conductive moisture films, chloride corrosion, slower drying, biological growth, and damage at seams, cut edges, fasteners, and penetrations. The strongest coastal strategy combines a suitable material with 316 stainless or properly hot-dipped galvanized fasteners, layered flashing, a drainage path, and a fresh-water rinse schedule. Understanding how salt air affects exterior siding helps a homeowner spend first on enclosure details and maintenance, where those decisions usually protect the wall more effectively than a premium finish alone.


