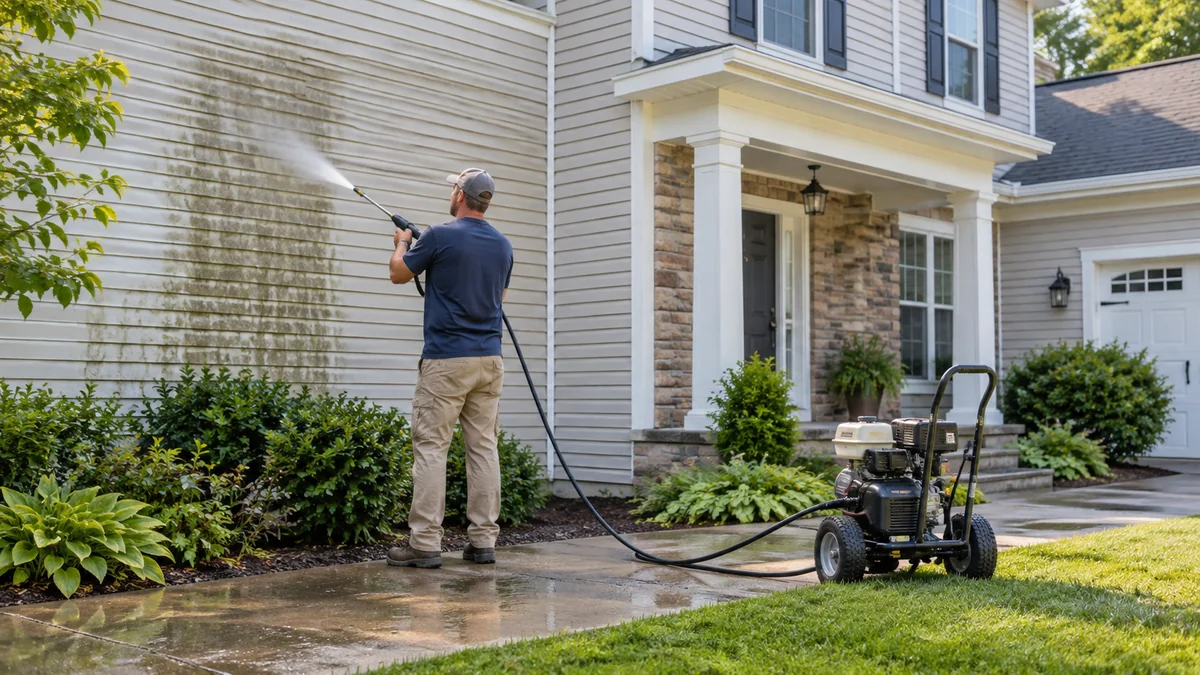
DIY pressure washing is usually the better value for small, durable surfaces such as patio furniture, vehicles, and modest concrete areas, while a professional exterior cleaner is the safer choice for roofs, stucco, wood, multi-story siding, and large properties. The correct decision depends on surface vulnerability, equipment access, total labor time, water control, and the cost of repairing damage.
Key Facts at a Glance
- A residential electric pressure washer typically costs $100-$250 and produces about 1,300-2,300 PSI at 1.1-1.6 GPM.
- A professional cleaner can often complete a house-and-driveway project in 1.5-3 hours, while an inexperienced homeowner may spend 8-12 hours.
- PSI determines impact force, but GPM largely determines rinsing speed and commercial productivity.
- Soft washing uses low pressure, often under 1,000 PSI, with cleaning chemicals and higher water volume for delicate exteriors.
- A 0-degree nozzle can etch concrete, cut wood, damage siding, and injure skin at close range.
- Professional pricing commonly falls around $150-$350 for a driveway, $300-$600 for siding, and $400-$800 or more for roof soft washing.
Which Option Is Better for Your Property?
DIY pressure washing is the practical choice when the surface is durable, the area is small, the equipment is available, and an uneven result would have minor consequences. Hiring a professional is the better choice when the work involves a roof, delicate siding, significant height, chemical treatment, expensive finishes, or a large area where mistakes and labor quickly exceed the service fee.
The central question is not whether a homeowner can operate a pressure washer. Most adults can connect a hose and pull a trigger. The harder question is whether the homeowner can select the correct pressure, nozzle, distance, chemical, runoff method, and stopping point for every material.
Quick Verdict by Homeowner Type
| Homeowner situation | Better option | Typical reason | Expected cost |
|---|---|---|---|
| Small patio, furniture, or vehicle | DIY electric washer | Low risk and limited area | $100-$250 equipment |
| Two-car concrete driveway | DIY rental or professional | Durable surface, but large labor requirement | $40-$90 rental or $150-$350 service |
| Vinyl siding on a one-story home | Either option | DIY is possible with low pressure and detergent | $30-$100 supplies or $300-$600 service |
| Wood deck with aged boards | Professional cleaner | Fibers and fasteners are easy to damage | $300-$700 typical service |
| Asphalt or tile roof | Professional soft wash | High fall risk and water-intrusion risk | $400-$800 or more |
| Multi-story stucco or historic masonry | Professional cleaner | Material and access require specialized methods | $500-$1,500 typical range |
What Pressure Washing Actually Measures
Pressure washing combines mechanical water force with detergent, dwell time, agitation, and rinsing. A motor drives a pump, the pump pressurizes water, and a nozzle converts that water into a controlled spray pattern; the result depends on both pressure and volume rather than PSI alone.
PSI means pounds per square inch. It describes the force available at the spray tip. GPM means gallons per minute. It describes how much water reaches the surface and how quickly loosened soil can be removed.
A 2,000-PSI machine producing 1.2 GPM may feel powerful but rinse slowly. A commercial machine producing 3,000 PSI at 4 GPM moves substantially more water and usually finishes large concrete areas faster. Professional cleaners also use surface cleaners, downstream injectors, proportioners, telescoping poles, hot-water units, and recovery equipment that most homeowners do not own.
PSI and GPM Are Not Cleaning Quality Scores
Higher PSI does not automatically produce a cleaner exterior. Excessive impact can remove paint, expose aggregate, scar wood fibers, force water behind siding, and break window seals before the operator notices a problem.
Cleaning efficiency is better understood as a combination of pressure, flow, temperature, chemical action, dwell time, spray distance, and operator control. For mold and organic staining, the chemical process often matters more than brute force. For oil on concrete, hot water and detergent can outperform additional pressure.
DIY Equipment: What Are You Actually Buying?
DIY equipment ranges from a compact electric washer to a heavy gas unit or a dedicated soft-wash system. Electric machines suit small jobs, gas machines provide more flow and portability, and soft-wash equipment cleans vulnerable materials with low impact and chemical dwell time.
| Equipment type | Typical PSI | Typical GPM | Practical use | Main limitation |
|---|---|---|---|---|
| Compact electric | 1,300-1,800 | 1.1-1.4 | Cars, furniture, small steps | Slow on concrete |
| Residential electric | 1,800-2,300 | 1.3-1.6 | Small decks, siding, patios | Requires outlet and hose access |
| Residential gas | 2,500-4,000 | 2.0-4.0 | Driveways, brick, retaining walls | Noise, fuel, maintenance |
| Commercial cold-water | 3,000-4,000 | 4.0-8.0 | Large concrete and masonry | Expensive and easy to misuse |
| Soft-wash system | Under 1,000 | 4.0-8.0 or more | Siding, stucco, roofs | Chemical handling and runoff control |
A surface cleaner attachment usually produces more uniform concrete results than a wand. Wand-only cleaning creates “tiger stripes” because the circular spray pattern overlaps unevenly. A homeowner who rents a 3,000-PSI machine but lacks a suitable surface cleaner may spend more time producing a less consistent finish.
How Much Equipment Does a DIY Job Need?
A basic job requires a pressure washer, garden hose, high-pressure hose, spray gun, suitable nozzle, eye protection, waterproof footwear, detergent, and plant covers. Concrete work benefits from a 14- to 16-inch surface cleaner, while elevated siding may require an extension wand.
Typical additional costs include $10-$30 for detergent, $20-$60 for protective covers and accessories, and $40-$90 for a one-day rental. A homeowner who buys a machine must also account for storage, winterization, pump maintenance, fuel, electrical extension limitations, and replacement hose fittings.
DIY Pressure Washing vs Hiring a Professional: Cost, Time, and Risk
DIY pressure washing has the lower cash price only when equipment already exists, the surface is forgiving, and the homeowner values personal labor at zero. Professional service often becomes economically reasonable when rental, accessories, travel, setup, cleanup, physical effort, and possible repairs are included.
| Project | DIY cash cost | DIY time | Professional price | Professional time |
|---|---|---|---|---|
| Patio furniture and small steps | $10-$35 supplies | 1-3 hours | $100-$200 minimum visit | 30-60 minutes |
| Two-car concrete driveway | $60-$190 rental and supplies | 4-8 hours | $150-$350 | 1-2 hours |
| One-story siding | $40-$150 supplies or rental | 5-10 hours | $300-$600 | 1.5-3 hours |
| Wood deck | $50-$180 equipment and supplies | 5-10 hours | $300-$700 | 2-4 hours |
| Roof soft washing | $100-$300 DIY setup | 6-12 hours plus access risk | $400-$800 or more | 2-5 hours |
These are typical U.S. consumer ranges, not fixed prices. Local labor rates, property access, square footage, staining severity, water availability, insurance, and regional demand can change the final quote.
The hidden DIY cost is failure recovery. Replacing a damaged window seal, repainting siding, repairing gouged decking, or hiring a second cleaner can eliminate any initial saving. Professional insurance does not cover every event automatically, so homeowners should ask for proof of general liability coverage and clarify whether roof, chemical, and accidental property damage are included.
When Does DIY Become More Expensive?
DIY becomes financially weaker when the job requires a rental for multiple days, a second person for hose management, specialty attachments, chemical treatment, or work at height. It also becomes weaker when the homeowner must repeat the cleaning because the first pass leaves stripes, algae, detergent residue, or visible discoloration.
A useful decision rule is to compare the professional quote with equipment and labor rather than equipment alone. If a $250 service saves eight hours and prevents a plausible $500 repair, the service may have the lower total cost even though the invoice is higher.
What Surfaces Can a Homeowner Safely Clean?
Concrete, brick, metal furniture, and some composite materials generally tolerate controlled DIY cleaning better than roofs, stucco, aged wood, and painted surfaces. Surface age, defects, coatings, joints, and water entry points matter as much as the material name.
| Surface | Starting method | Typical setting | DIY recommendation |
|---|---|---|---|
| Sound concrete | 25-degree tip or surface cleaner | 2,000-3,000 PSI | Suitable with test area |
| Brick walkway | 25- or 40-degree tip | 1,000-2,000 PSI | Suitable if mortar is sound |
| Vinyl siding | Detergent and low-pressure rinse | 500-1,300 PSI at surface | Suitable one story, cautiously |
| Painted wood | Low pressure and soft brush | 300-800 PSI | Professional preferred if aged |
| Stucco | Soft wash and broad rinse | Usually low pressure | Professional preferred |
| Roof shingles | Chemical soft wash | Low pressure only | Hire a professional |
| Window screens and seals | Broad fan, distant rinse | Under 1,000 PSI | Avoid direct close spray |
These figures are operating starting points, not universal manufacturer limits. The actual pressure at the surface falls as the nozzle moves farther away, and a defective coating or failed joint may be damaged at settings that would be safe on newer material.
Why Is Soft Washing Different?
Soft washing removes organic growth with a low-pressure chemical solution rather than attempting to blast algae and mildew away. The process usually applies a diluted sodium hypochlorite solution with a surfactant, allows controlled dwell time, and rinses with low mechanical force.
Soft washing is not simply “using less pressure.” It requires chemical proportioning, plant protection, runoff management, compatible application equipment, and knowledge of roof and siding materials. A homeowner who lacks those controls should not improvise on a roof, especially where overspray can damage landscaping, painted surfaces, HVAC coils, or neighboring property.
What Does a Safe DIY Process Look Like?
A safe DIY process starts with inspection and protection, continues with a detergent pre-treatment and controlled test area, and ends with a complete low-pressure rinse. The most important operating rule is to begin conservatively and increase cleaning action only when the surface proves able to tolerate it.
Step 1: Inspect and Protect the Area
Remove furniture, toys, vehicles, loose decorations, and fragile planters. Close windows and doors, cover outdoor outlets, identify cracks and loose mortar, and wet nearby plants with clean water before using detergent.
Do not pressure wash surfaces that contain flaking lead-based paint without appropriate containment and hazardous-material controls. Homes built before 1978 may contain lead paint, and visible paint chips or contaminated runoff create a health and disposal problem beyond ordinary exterior cleaning.
Step 2: Assemble the Water and Power Supply
Use a full-flow outdoor spigot and a garden hose without kinks. Connect the water supply before starting the pump, then squeeze the gun trigger until trapped air leaves the system.
A restricted inlet can cause cavitation, pulsing, overheating, or premature pump failure. Electric models should use a properly grounded GFCI-protected outlet. Gas models require outdoor ventilation, fuel handling, and adequate clearance from doors, windows, and ignition sources.
Step 3: Apply Detergent at Low Pressure
Use the manufacturer-approved detergent and apply from the bottom upward when preventing visible streaks on vertical siding. Allow roughly 5-10 minutes of dwell time, but do not let the solution dry.
Detergent loosens biological growth and soil so rinsing can use less force. Never mix bleach with ammonia, acids, or unknown cleaners. Follow the product label, protect vegetation, and control where the runoff travels.
Step 4: Rinse With the Correct Nozzle
Start with a 40-degree white nozzle or another broad fan, hold the wand 6-12 inches from a durable surface, and keep the spray moving. A 25-degree green nozzle may suit sound concrete or brick, but a 0-degree red nozzle should not be used on ordinary residential surfaces.
Maintain a consistent distance and overlap each pass. Work from top to bottom after detergent application, and follow the grain on wood. Test an inconspicuous section for 30-60 seconds before cleaning the visible area.
Step 5: Flush, Depressurize, and Inspect
Rinse until no detergent remains, flush the pump according to the manufacturer’s instructions, turn off the machine, and pull the trigger to release trapped pressure. Inspect corners, vents, window edges, joints, and plant leaves.
You will know the process worked when the surface is uniformly clean without exposed aggregate, lifted paint, fuzzy wood fibers, leaking seals, detergent film, or damaged vegetation. A clean appearance alone is not proof that the substrate survived.
Where Does Hiring a Professional Make More Sense?
Hiring a professional exterior cleaner makes more sense when access, material sensitivity, contamination, or the cost of failure exceeds the homeowner’s equipment and labor savings. Professional value comes from process control, not merely from owning a larger pump.
A reputable cleaner should inspect the property, identify the cleaning method, explain chemical use, protect vulnerable areas, and state what the service excludes. A contractor who promises to clean every surface with the same high-pressure tip is displaying poor process control.
Ask These Questions Before Booking
- Will the roof or siding receive soft washing rather than high-pressure blasting?
- What PSI, nozzle type, and chemical approach will be used on each material?
- Does the company carry general liability and workers’ compensation insurance?
- How will the crew protect plants, outlets, windows, paint, and HVAC equipment?
- Does the quote include detergent, setup, rinsing, and cleanup?
- How are oil, algae, paint chips, or chemical runoff handled?
- Will the company document pre-existing cracks, loose paint, or failed seals?
- What happens if a window screen, plant, coating, or fixture is damaged?
A written scope is preferable to a vague “whole-house wash.” The scope should identify surfaces, approximate areas, method, price, access limitations, expected result, and exclusions such as permanent oxidation, rust, efflorescence, or failed paint.
Common Failure Modes and Their Fixes
The most common pressure-washing failures come from excessive impact, poor preparation, and inconsistent movement rather than defective machines. Most damage occurs during the first few minutes, when operators begin too close or use a narrow nozzle before testing.
| Failure mode | Likely cause | Visible result | Corrective action |
|---|---|---|---|
| Tiger stripes on concrete | Wand-only passes or uneven distance | Alternating clean bands | Use a surface cleaner and overlapping passes |
| Wood fuzzing or gouges | Excessive PSI or close spray | Raised fibers and grooves | Stop, allow drying, sand only after inspection |
| Water behind siding | Direct spray at seams or vents | Interior dampness or drips | Stop immediately and inspect indoors |
| Plant browning | Cleaner overspray or runoff | Wilted or discolored leaves | Rinse plants thoroughly and dilute runoff |
| Pulsing pressure | Kinked hose or restricted inlet | Intermittent spray | Open spigot, straighten hose, clean inlet screen |
| Detergent will not draw | Blocked injector or wrong nozzle | Clear water only | Use low-pressure soap nozzle and inspect injector |
A pressure washer that will not start may have a closed fuel valve, stale fuel, incorrect choke position, tripped GFCI, or engine backpressure. Follow the owner’s manual rather than repeatedly pulling the starter or bypassing a safety device.
An important practitioner rule is to stop cleaning when the substrate begins changing, not when the stain disappears. Removing the last visible mark may require enough force to remove the surface itself.
Should You Rent, Buy, or Hire?
Renting is usually sensible for a large, occasional concrete project, buying is sensible for repeated small jobs, and hiring is sensible for delicate surfaces or work that requires specialized chemical systems. The break-even point depends on frequency, storage, accessories, and the value of personal time.
| Annual use pattern | Best choice | Approximate first-year cost | Why |
|---|---|---|---|
| One small patio cleaning | Hire or borrow | $100-$250 service | Avoids storage and maintenance |
| Two or three light projects | Buy electric | $150-$350 total | Reusable equipment can pay back |
| One large driveway project | Rent gas unit | $70-$190 total | High flow without ownership |
| Monthly property maintenance | Buy commercial equipment | $700-$2,000 or more | Frequent use supports ownership |
| Roof and multi-story work | Hire professional | $400-$1,500 typical | Access and soft-wash controls matter |
A machine that sits unused for eleven months still needs storage and winterization. Ownership also transfers setup errors and damage risk from the contractor to the homeowner.
Situations That Change the Decision
A homeowner preparing to sell may reasonably hire a professional because uniform curb appeal affects listing photographs and buyer impressions. A homeowner cleaning a rental property should consider lease obligations, insurance, tenant access, and whether improper runoff creates liability.
Townhomes and condominiums can impose rules on water use, chemical discharge, noise, exterior alterations, and working hours. Check the association’s requirements before renting equipment. Shared walls and nearby vehicles increase the consequence of overspray.
Seasonal timing matters. Cleaning shortly before freezing weather can leave water in cracks and equipment, while cleaning immediately before rain can waste detergent and carry contaminants across the property. In many climates, spring and early fall offer workable temperatures, but local weather and plant sensitivity determine the best date.
Expert Rules That Prevent Expensive Mistakes
Flow often beats force. A higher-GPM machine can rinse faster without increasing surface impact, while a high-PSI, low-GPM unit may encourage the operator to work too close because it removes soil slowly.
A clean roof is not necessarily a healthy roof. Granule loss, cracked tiles, failed flashing, and biological growth under shingles require inspection. Pressure washing can conceal or worsen the underlying problem.
Oxidation is not ordinary dirt. Chalky white residue on vinyl siding may be paint oxidation. Aggressive washing can create bright stripes or remove the oxidized layer unevenly, so a contractor may need restoration or specialized washing rather than more pressure.
Runoff is part of the job. Detergent, algae, paint residue, oil, and sediment should not flow blindly into storm drains or neighboring property. The correct control method depends on local rules and the chemical used.
FAQ
Does pressure washing remove mold permanently?
Pressure washing can remove visible mold, mildew, and algae, but it may not prevent regrowth. Organic staining often returns when moisture, shade, and nutrients remain. A compatible biocidal treatment and correction of leaking gutters, poor drainage, or persistent shade may extend the clean appearance longer than mechanical washing alone.
How much water does a pressure washer use?
Typical residential machines use about 1.1-4 GPM, while commercial systems may use 4-8 GPM or more. Actual consumption depends on trigger time, dwell periods, nozzle selection, and equipment efficiency. A two-hour cleaning session at 2 GPM could consume roughly 240 gallons while the trigger is continuously engaged.
Can I pressure wash in direct sunlight?
Direct sunlight is possible, but rapid drying can create detergent marks and uneven results. Work in manageable sections, keep the surface wet where appropriate, and prevent cleaning solution from drying. Hot surfaces also increase plant and chemical risk, so shaded timing is often easier to control.
How often should house siding be cleaned?
Many homes need siding cleaning every 1-3 years, but the interval depends on shade, humidity, tree cover, road dust, and drainage. Annual cleaning may be appropriate for heavily shaded properties, while a dry, sunny home may need less frequent service. Inspect for algae and oxidation before scheduling.
Does homeowners insurance cover pressure-washing damage?
Homeowners insurance commonly excludes gradual deterioration, poor workmanship, and intentional high-risk work, although policies differ. A contractor’s liability insurance may respond to accidental damage caused during covered operations. Obtain written proof of coverage and report damage promptly rather than assuming either policy will pay.
Should I pressure wash before painting?
Cleaning before painting is usually beneficial because dirt, chalk, mildew, and loose material interfere with adhesion. The surface must dry fully, loose paint must be removed safely, and damaged wood or masonry must be repaired. Pressure washing alone does not replace scraping, sanding, priming, or lead-paint controls.
The Bottom Line
DIY pressure washing is the better choice for small, accessible, durable surfaces when the homeowner can control nozzle distance, flow, detergent, runoff, and drying. Hiring a professional exterior cleaner is the stronger decision for roofs, stucco, aged wood, multi-story work, chemical soft washing, large properties, and any project where repair costs exceed the service fee.
For DIY pressure washing vs hiring a professional exterior cleaner, compare the complete job rather than the machine price: equipment, supplies, eight or more hours of labor, water access, safety, surface risk, cleanup, and possible recovery. If the work involves a delicate material or an elevated surface, the professional invoice is usually the lower-risk cost.