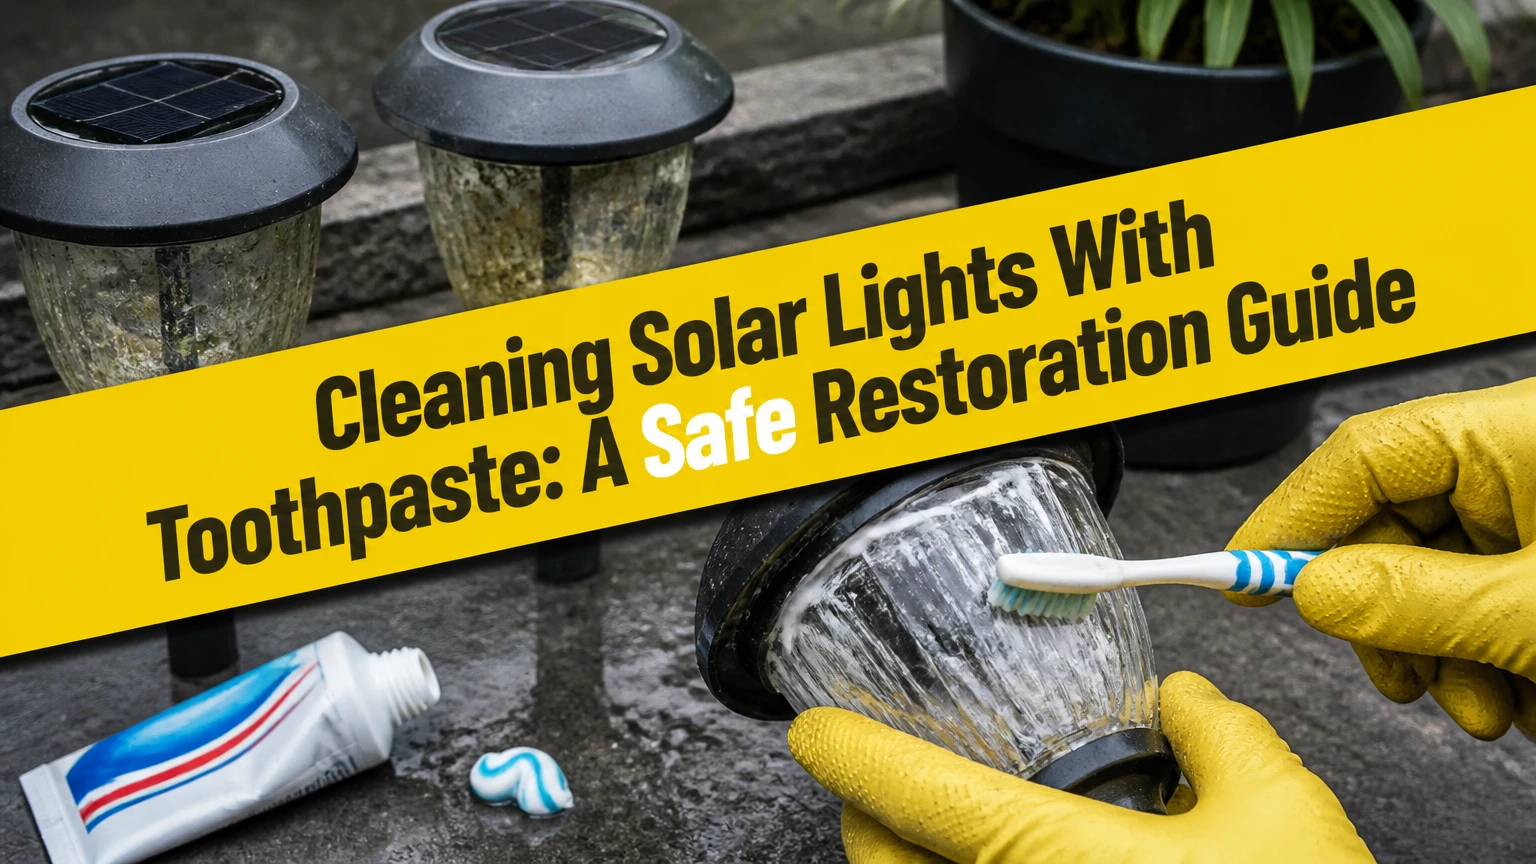
Cleaning solar lights with toothpaste can improve a cloudy plastic panel when dirt, light oxidation, or fine surface scratches block sunlight. Use a plain white paste, a soft microfiber cloth, minimal water, and gentle pressure for 1-2 minutes. Toothpaste cannot repair cracked covers, failed solar cells, dead batteries, or haze trapped inside the panel.
Key Facts at a Glance
- Plain white toothpaste provides mild mechanical abrasion; gel toothpaste mainly removes surface dirt.
- Clean one panel for approximately 5-10 minutes, including washing, polishing, rinsing, and drying.
- A cloudy exterior panel and a clear panel with a weak light require different diagnoses.
- Toothpaste can leave a plastic surface less protected, but sealing is optional if the panel coating remains intact.
- Never use steel wool, dry abrasive pads, boiling water, or full-unit immersion around solar electronics.
- Replace the rechargeable battery before replacing the fixture when the panel is clear but runtime remains short.
Can You Clean Solar Lights With Toothpaste?
Yes, toothpaste can clean and mildly polish an exposed plastic solar panel, but the result depends on the damage. The method works best on loose grime, mineral film, pollen residue, and thin surface oxidation. It is less effective on deeply yellowed plastic, crazing, cracks, internal condensation, peeling coatings, and damaged photovoltaic cells.
Solar lights usually combine a small photovoltaic panel, rechargeable battery, LED, light sensor, switch, and weather-resistant housing. The panel may use acrylic, polycarbonate, glass, or a transparent resin cover. Those materials do not respond identically to abrasion, so test an inconspicuous corner first.
Toothpaste is a household polish, not a professional optical restoration system. Its abrasive particles can remove a microscopic layer of degraded plastic, while surfactants loosen organic residue. The same action can create visible fine scratches if a whitening or charcoal formula is aggressive, the cloth is dirty, or the operator applies excessive pressure.
What Can Toothpaste Actually Fix?
Toothpaste can remove contamination sitting on the outer panel surface. It can also reduce mild chalkiness caused by ultraviolet exposure, although the improvement may be temporary because polishing removes or thins the weathered surface rather than rebuilding the original UV-resistant coating.
Toothpaste will not fix a panel with a broken electrical connection, a delaminated cover, a failed diode, or a battery that no longer accepts charge. A panel can look clear and still produce inadequate charging because a rechargeable cell has lost capacity or the fixture spends much of the day in shade.
How Does Toothpaste Restore Cloudy Plastic?
Toothpaste restores cloudy plastic through controlled mechanical abrasion. Fine particles such as hydrated silica, calcium carbonate, or aluminum hydroxide cut down raised oxidation and shallow surface irregularities, while water and detergents help carry loosened dirt away.
The optical benefit comes from reducing surface scattering. A rough, chalky layer sends some incoming light away from the photovoltaic cell instead of through it. Polishing can improve transmission, but it does not increase the solar cell’s rated efficiency or compensate for several hours of shade.
Formula labels matter. Abrasive content varies by brand and product type, and whitening pastes may contain stronger polishing agents or stain-removal chemistry. There is no universal toothpaste grade for every panel, which is why a small test area is a better safeguard than assuming all white pastes behave alike.
Which Toothpaste Should You Use?
Use a plain, non-gel white paste without charcoal, colored crystals, or aggressive stain-removal particles. A basic paste is the most controlled household option because it usually contains mild abrasives and leaves less pigment than charcoal products.
| Toothpaste type | Typical polishing behavior | Main risk | Best use |
|---|---|---|---|
| Plain white paste | Mild to moderate abrasion | 1-2 polishing cycles may be needed | Light haze and grime |
| Baking soda paste | Moderate abrasion | Dried paste can scratch | Thin mineral film and oxidation |
| Whitening paste | Moderate to high abrasion | Fine scratches on soft acrylic | Small test area only |
| Gel paste | Low abrasion | Cleans but rarely polishes haze | Dirt without oxidation |
| Charcoal paste | Variable, often moderate | Pigment in seams and scratches | Generally avoid |
Avoid blue, green, red, or transparent gels when the objective is oxidation removal. Avoid charcoal toothpaste because dark pigment can lodge in edge seams, hairline cracks, or textured plastic. Avoid a gritty powder mixed into a thick, dry paste, since large particles can create deeper scratches than the original haze.
A microfiber cloth with a short, soft pile is preferable to a kitchen sponge. A sponge may contain trapped grit from previous cleaning, and that grit can scratch transparent plastic even when the sponge itself feels soft.
Before You Start
A single solar light typically requires 5-10 minutes of active work and 10-20 additional minutes for drying or wax setting. The method is low cost and low difficulty, but success depends most on identifying exterior oxidation before polishing.
| Requirement | Typical amount or range | Practical specification |
|---|---|---|
| Plain white toothpaste | 0.5-1 teaspoon per 4-6 panels | Non-gel, no charcoal |
| Microfiber cloths | 2 per fixture group | One for polishing, one for final drying |
| Lukewarm water | 250-500 milliliters | Damp cloth, never a soaked fixture |
| Mild dish soap | 2-3 drops | Dilute in the water |
| Painter’s tape | 30-60 centimeters | Optional for painted or metallic borders |
| Car wax or plastic UV protectant | 1-2 pea-sized portions | Use only on compatible exterior surfaces |
Switch the solar light off if a switch exists, and remove the rechargeable battery when the housing opens easily. Removing the battery eliminates accidental LED activation and reduces the consequence of water entering the compartment.
Inspect the panel under direct daylight. Record whether the haze is on the outside, inside, or both. Check for a cloudy battery compartment, green corrosion, cracked seals, loose wires, and a panel that feels loose in its frame. Do not polish a panel with a lifting laminate or exposed circuitry.
How Do You Clean Solar Lights With Toothpaste?
Clean solar lights with toothpaste in seven controlled steps: remove loose debris, wash the panel, protect the frame, polish a test area, polish the full surface, wipe away residue, and inspect the charging result. Keep water on the cloth rather than on the fixture, and stop when clarity stops improving.
Step 1: Remove Loose Dirt
Brush away cobwebs, grit, leaves, and dried mud with a dry microfiber cloth or a soft brush. Do not begin with toothpaste while sand remains on the panel because the loose particles can act like coarse sandpaper.
Success checkpoint: The panel has no visible grit or hard particles.
Common mistake: Rubbing dry dirt across the plastic and creating circular scratches.
Step 2: Wash and Dry the Panel
Mix 2-3 drops of mild dish soap into approximately 250 milliliters of lukewarm water. Dampen a cloth, wring it nearly dry, and wipe the panel twice. Use a second damp cloth to remove soap, then dry the surface completely.
Do not spray directly into the housing, battery door, switch, or seam around the panel. Weather-resistant does not mean safe for immersion, and low-cost pathway lights often have inconsistent seals.
Success checkpoint: The panel feels smooth and looks cleaner before polishing.
Common mistake: Mistaking a removable greasy film for permanent UV oxidation.
Step 3: Protect the Surrounding Housing
Apply painter’s tape around the panel if the frame is painted, chrome-plated, soft rubber, or a contrasting color. Tape is unnecessary on a solid, uncoated plastic frame, but it helps prevent accidental scuffing during edge work.
Leave no tape edge over the active solar surface. A narrow exposed border is easier to polish evenly than a taped edge that blocks part of the panel.
Success checkpoint: The tape protects the frame without covering photovoltaic material.
Common mistake: Pressing tape onto a dusty surface, allowing grit to remain underneath.
Step 4: Test a Small Area
Place a pea-sized amount of plain white toothpaste on a damp microfiber corner. Rub a 1-2 centimeter section using light circular motions for 30 seconds. Wipe, dry, and inspect under angled daylight.
The test tells you whether the haze is removable and whether the paste scratches the material. If the test area becomes duller, develops obvious lines, or exposes a peeling layer, stop and use only soap and water.
Success checkpoint: The test patch is clearer without new visible scratches.
Common mistake: Starting with a whitening formula on the entire panel before checking compatibility.
Step 5: Polish the Panel
Apply approximately half a teaspoon of paste to a small panel, not the entire light group. Use overlapping circles with the pressure needed to move the cloth, not pressure that flexes the panel. Polish for 60-120 seconds, then inspect.
Work in a cool, shaded location. Direct sun can dry toothpaste into a hard residue, while heat softens some plastics and makes surface defects harder to judge.
Success checkpoint: The panel looks more transparent or less chalky after drying.
Common mistake: Extending the session indefinitely. If two 2-minute cycles produce no improvement, abrasion is unlikely to solve the problem.
Step 6: Remove All Residue
Wipe the paste away with a clean, damp cloth. Use several passes around the frame and panel corners, where dried particles can remain. Dry with a fresh microfiber cloth and examine the surface from several angles.
Do not rinse the complete fixture under a tap. Hold the light so water cannot run toward the battery compartment, switch, or panel seam.
Success checkpoint: No white film remains, and the surface feels smooth rather than gritty.
Common mistake: Leaving toothpaste in a seam, where it can harden and retain moisture.
Step 7: Test Charging and Night Operation
Place the cleaned light in unobstructed sunlight for a full day, with the switch set to the manufacturer’s charging position. At night, cover the panel with opaque card or place the fixture in darkness to confirm that the light sensor triggers the LED.
A single afternoon is not a reliable capacity test if the battery began empty. Compare runtime after one or two sunny days, and check whether nearby foliage, walls, dust, or seasonal shade limits solar exposure.
Success checkpoint: The light turns on reliably and runs longer than before.
Common mistake: Testing in a bright room, where the sensor may interpret ambient light as daytime.
Should You Seal the Panel After Polishing?
Sealing is optional, not automatically critical. Car wax or a plastic-compatible UV protectant may slow renewed surface contamination, but a generic clear-coat spray can create haze, reduce light transmission, attack the plastic, or make future repairs harder.
Wax is the lower-risk choice for a cheap solar light because it forms a removable surface film. Apply a very thin amount to the dry exterior only, keep it away from the panel seam, and buff until no greasy film remains. Reapply when water no longer beads or the panel begins to look dull.
Clear acrylic or polyurethane coatings require more caution. Confirm that the product is labeled for the panel’s plastic, test compatibility, mask the LED and sensor, and apply thin coats outdoors according to the label. Overspray can reach electrical openings, and a coating designed for automotive headlights may not be optically suitable for a small photovoltaic module.
| Protection option | Typical active time | Expected maintenance interval | Main limitation |
|---|---|---|---|
| No sealer | 0 minutes | 1-3 months in harsh exposure | Oxidation can return quickly |
| Car wax | 3-5 minutes | 2-6 months | Requires periodic reapplication |
| Plastic UV protectant | 3-5 minutes | 1-6 months | Product compatibility varies |
| UV clear coat | 10-30 minutes plus curing | 1-3 years, product dependent | Overspray and adhesion failure |
The quoted intervals are practical ranges, not guarantees. Tropical sun, salt air, pollution, freezing weather, and frequent handling shorten them. A coating cannot restore a plastic layer that has already cracked or peeled.
Toothpaste Versus Alternatives
Toothpaste is the best first attempt for a mildly cloudy, inexpensive light because it costs little and requires no specialty equipment. A commercial headlight kit is more appropriate when the plastic is deeply oxidized and the fixture is valuable enough to justify wet sanding and a dedicated UV sealant.
| Method | Typical cost | Active time per panel | Expected result | Best condition |
|---|---|---|---|---|
| Soap and water | $0-$3 | 2-4 minutes | Removes dirt and film | Surface contamination |
| White toothpaste | $0-$5 | 3-6 minutes | Mild haze reduction | Light oxidation |
| Baking soda paste | $1-$4 | 3-8 minutes | Moderate abrasion | Mineral film, test first |
| Headlight kit | $10-$35 | 15-30 minutes | Stronger restoration | Heavy oxidation |
| Replacement light | $3-$25 each | 5-15 minutes | New panel and electronics | Cracks or failed internals |
Vinegar diluted with water can dissolve some mineral deposits, but it does not polish UV-oxidized plastic. Apply it only to a removable, exterior surface, rinse promptly, and never mix it with bleach or other cleaners.
Wet sanding with 1,500- to 3,000-grit abrasive paper can improve severely weathered plastic, but it removes more material and demands uniform technique. A headlight restoration kit normally includes progressively finer abrasives and a protective coating, which makes it more predictable than improvised coarse sandpaper.
Do not use glass cleaner containing ammonia unless the panel manufacturer permits it. Some plastics and coatings can craze or become brittle after repeated exposure to incompatible solvents.
What Are the Main Failure Modes?
Most failed restorations result from misdiagnosis, excessive abrasion, or moisture entering the electronics. The recovery depends on whether the defect is optical, electrical, or structural.
| Symptom | Probable cause | Immediate check | Corrective action |
|---|---|---|---|
| No visual improvement | Internal haze or deep oxidation | View panel from both sides | Stop polishing; consider a kit or replacement |
| New circular scratches | Grit, rough cloth, aggressive paste | Shine angled daylight across surface | Use plastic polish or replace the cover |
| Clear panel, weak light | Old rechargeable battery | Check battery age and voltage | Install the specified NiMH or NiCd cell |
| Light never turns on | Switch, sensor, wiring, or LED fault | Cover panel in darkness | Inspect contacts and replace fixture if sealed |
| White residue at edges | Dried toothpaste | Inspect frame seam | Wipe with clean damp cloth and dry |
| Fog inside the panel | Failed seal or condensation | Look for droplets internally | Dry housing and repair or replace seal |
A common practitioner mistake is to keep polishing a panel after the first test has shown no change. More pressure rarely fixes internal clouding; it increases the chance of warping a thin cover or breaking the seal around the photovoltaic module.
Another counterintuitive problem is a newly polished panel that produces less useful charging. A glossy but uneven residue layer can scatter light, and an incompatible clear coat can lower transmission. Always judge the result after wiping and drying, not while wet or covered with paste.
Situational Variations
What Should You Do With Salt or Hard-Water Deposits?
Dissolve salt or mineral deposits before attempting abrasion. Use a cloth dampened with diluted white vinegar, approximately one part vinegar to three parts water, for a short contact period of 1-2 minutes, then rinse with clean water on a separate cloth and dry fully.
Salt air is especially damaging around metal contacts and battery doors. Clean the panel and inspect the terminals separately, because polishing the plastic will not remove corrosion from a spring contact.
How Should You Clean a Light in Cold Weather?
Move the fixture indoors before cleaning when temperatures are below approximately 10°C, and let the plastic reach room temperature. Cold plastic is less forgiving of flexing, and cold water can make a brittle cover crack under pressure.
Allow the housing to dry indoors for at least 30 minutes before reinstalling the battery. Never apply a water-based paste to a frozen or visibly wet panel.
What Changes Near the Coast or in Heavy Pollution?
Coastal and industrial locations need more frequent washing, often every 2-4 weeks during periods of visible salt or soot accumulation. Use soap and water for routine maintenance, reserving toothpaste for haze that remains after contamination is removed.
A protective wax may reduce residue adhesion, but it cannot stop salt from reaching exposed contacts. Keep the battery compartment closed, inspect seals quarterly, and replace corroded cells rather than sanding corrosion into the housing.
Time, Cost, and Replacement Decisions
For a group of six to eight pathway lights, typical active labor is 30-60 minutes, excluding sealant curing and battery replacement. Household toothpaste and water may cost nothing additional, while a headlight kit or replacement fixtures can cost substantially more than the original cleaning attempt.
| Job size | Toothpaste quantity | Active time | Typical household cost |
|---|---|---|---|
| 1 light | 0.5 teaspoon | 5-10 minutes | $0-$2 |
| 4 lights | 2 teaspoons | 20-40 minutes | $0-$4 |
| 8 lights | 4 teaspoons | 40-80 minutes | $0-$6 |
| 12 lights | 6 teaspoons | 60-120 minutes | $0-$8 |
Replace the light rather than restore it when the panel is cracked, the internal seal has failed, the battery compartment is heavily corroded, or the fixture costs less than the time and materials required for a professional-style repair. Restoration makes more sense for decorative fixtures, discontinued designs, or lights with a sound housing and replaceable rechargeable battery.
Before replacement, check the battery. Many solar path lights use a rechargeable AA or AAA-format NiMH cell, commonly rated around 1.2 volts, although the correct chemistry and capacity must come from the product label or manual. A tired battery can make a successful panel cleaning appear ineffective.
When Is Toothpaste the Wrong Choice?
Toothpaste is the wrong choice for glass panels, peeling protective films, deeply cracked polycarbonate, internally fogged modules, and panels with exposed photovoltaic lines. Abrasion can worsen delamination, remove printed markings, and spread damage across a thin cover.
Do not polish a panel that is loose in its frame. Water and paste can enter beneath it, while pressure can break the electrical connection. Secure or replace the module first.
Avoid the method when the light is under warranty and the manufacturer prohibits abrasive cleaners. Product-specific instructions take priority because some solar panels have anti-reflective or hard protective coatings that household toothpaste can damage.
FAQ
Will toothpaste make a yellow solar panel clear again?
Toothpaste may reduce a thin yellow or chalky exterior layer, but it cannot reliably reverse deep UV degradation. Test a small area for 30 seconds, wipe it dry, and stop if clarity does not improve after two 2-minute polishing cycles. Deep yellowing usually needs a plastic restoration kit or panel replacement.
Can I use baking soda instead of toothpaste?
You can use a thin baking soda and water paste, but baking soda is not automatically safer. Its particles can scratch soft acrylic when the mixture dries or when grit remains on the cloth. Use light pressure, a damp microfiber cloth, and a test patch before treating the full solar panel.
How often should solar lights be cleaned?
Wash solar light panels every 2-4 weeks in dusty, coastal, or pollen-heavy locations and every 1-3 months in cleaner conditions. Use soap and water for routine cleaning. Reserve toothpaste polishing for visible haze, because repeated abrasion gradually removes plastic and may shorten the panel’s useful life.
Why does my solar light stay on during the day after cleaning?
A daytime light usually indicates a blocked or failed light sensor, an incorrectly positioned switch, or a wiring fault rather than a cloudy panel. Cover the solar panel completely for 30-60 seconds. If the LED does not respond in darkness, inspect the switch and sensor or replace the sealed fixture.
Can I use petroleum jelly or mineral oil to protect the panel?
Avoid petroleum jelly and mineral oil on transparent solar panels unless the manufacturer specifically approves them. Oily films can attract dust, soften some plastics, and reduce optical transmission. A compatible plastic protectant or a thin removable car wax is a more controlled option, applied only to the dry exterior.
The Bottom Line
Cleaning solar lights with toothpaste is a sensible low-cost test for light exterior haze, grime, and mild oxidation. Plain white paste, a clean microfiber cloth, gentle pressure, and thorough residue removal provide the safest process. If the panel remains cloudy after two short cycles, or the light remains weak after a battery check, stop polishing and diagnose the cover, battery, sensor, and electronics instead.


