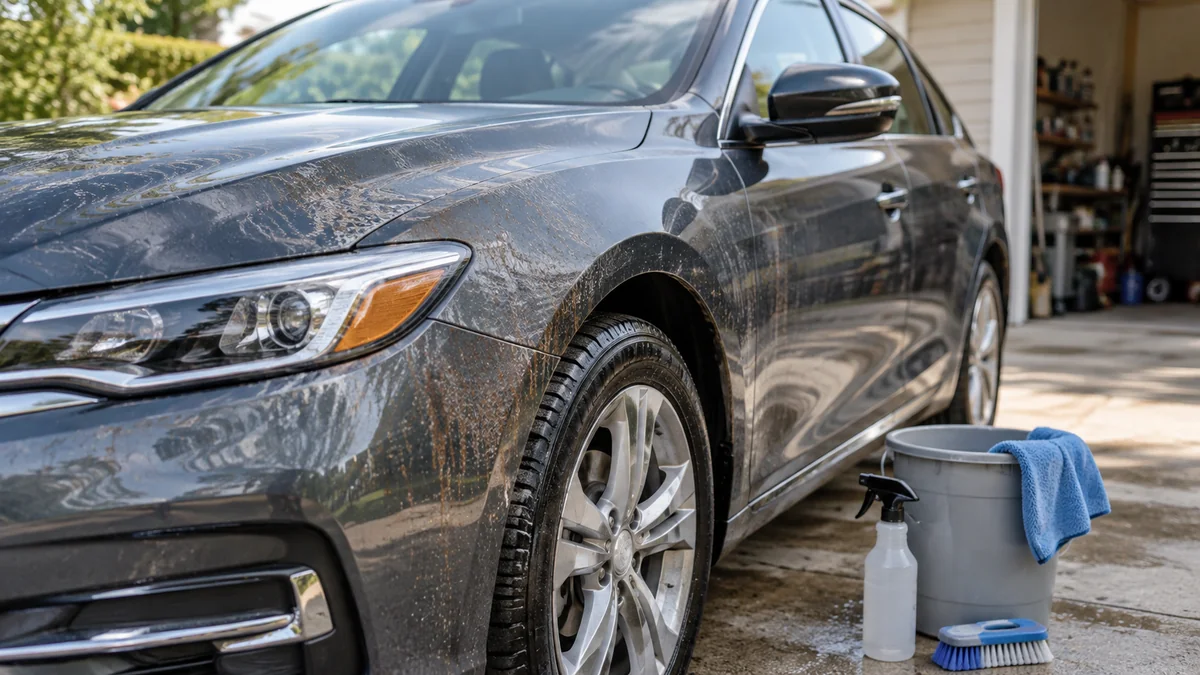
To remove softened water rust from a car, first determine whether the marks are orange iron particles, white mineral residue, or etched clear coat. Wash and dry the panel, use an automotive iron remover for orange specks, a mild water-spot remover for mineral scale, and polish only when staining has etched the paint. Protect the finish afterward.
Key Facts at a Glance
- Sodium from a correctly operating water softener does not structurally rust a vehicle’s steel body.
- Orange pinpoints usually indicate iron fallout, well-water iron, or brake-dust contamination rather than sodium.
- White rings and chalky deposits are mineral residue that may respond to a mild automotive water-spot remover.
- Iron remover normally changes color as it reacts with ferrous contamination, but color change is not a perfect diagnostic test.
- A chemical cleaner cannot repair clear-coat craters; machine or hand polishing is required for etching.
- A cool panel, shade, short dwell time, and complete rinsing prevent most chemical damage.
How Do You Identify the Stain?
Identify the contaminant before applying a chemical. Orange or brown pinpoints that feel rough after washing usually indicate bonded iron, while white rings, chalky borders, or translucent spots usually indicate mineral deposits. A smooth mark that remains after chemical cleaning is probably clear-coat etching.
Inspect the vehicle after a normal wash under strong, indirect light. Do not diagnose from color alone. Tree sap can become amber or brown, road tar can appear black or orange, and paint overspray can feel like fine sandpaper.
| Symptom after washing | Most likely contaminant | First treatment | Treatment to avoid initially |
|---|---|---|---|
| Purple reaction on orange pinpoints | Ferrous fallout or iron particles | pH-balanced iron remover | Abrasive scrubbing |
| White chalky rings | Mineral or alkaline residue | Automotive water-spot remover | Stiff brush |
| Black-brown sticky dots | Road tar or asphalt | Automotive tar remover | Vinegar |
| Yellow-brown transparent patches | Tree sap or organic residue | Sap-safe solvent | Iron remover |
| Smooth gray haze with no residue | Clear-coat etching or oxidation | Fine polish | Repeated acid applications |
| Rough gray specks on lower doors | Industrial fallout or rail dust | Iron remover, then clay | Household cleanser |
A useful practitioner test is the plastic-bag test. Place a thin food-storage bag over clean fingertips and glide across the dry paint. The plastic exaggerates texture, making bonded grit easier to detect without pressing a clay bar into the surface.
Does softened water actually rust cars?
Softened water does not normally cause structural rust because a water softener replaces calcium and magnesium ions with sodium ions. The more common problem is residue from dissolved solids or iron that bypassed the softener, plus contamination already present in the water supply or environment.
A malfunctioning or poorly maintained softener can allow iron through. Well water may also contain dissolved ferrous iron that becomes orange ferric oxide after exposure to air. Municipal water can leave mineral deposits even when it is not technically “hard” enough to damage metal.
The distinction matters. Sodium residue is generally a surface deposit. Rust on exposed steel, stone chips, wheel hardware, or damaged seams is an actual corrosion problem and requires paint repair or corrosion treatment, not merely detailing chemicals.
Before You Start
Prepare the vehicle and chemicals before opening a bottle. A typical one-panel treatment takes 30-60 minutes, while a full exterior correction can take 2-4 hours.
| Requirement | Typical specification | Why it matters |
|---|---|---|
| Working temperature | 50-85°F, panel cool to touch | Slows chemical drying |
| Shade | Full shade, no hot paint | Prevents flash-drying |
| Car shampoo | 1-2 ounces in 3-4 gallons of water | Removes road film |
| Microfiber towels | 4-8, 300-500 GSM | Separates dirty and clean wiping |
| Iron remover | 8-16 ounces for a full vehicle | Treats bonded ferrous particles |
| Water-spot remover | 2-4 ounces for affected panels | Dissolves mineral residue |
| Clay lubricant | 16-24 ounces diluted product | Prevents marring |
| Protective product | 1-2 ounces of sealant or spray wax | Replaces stripped protection |
Wear nitrile gloves and eye protection. Test every chemical on a hidden section, especially on matte paint, repainted panels, polished aluminum, anodized trim, PPF, vinyl, and ceramic coatings. Follow the product label when its directions differ from general detailing practice.
Step 1: Wash and Dry the Vehicle
Wash the car with automotive shampoo and a clean microfiber mitt, working from the roof downward. Rinse each panel before the soap dries, then dry the surface with a clean drying towel or forced air.
The wash removes loose grit that could scratch paint during chemical treatment. Do not use a household dish detergent as a routine substitute because repeated use can reduce existing wax or sealant protection and offers no special benefit against iron.
You will know the wash worked when loose dirt is gone and the marks remain in fixed positions. If the panel still feels gritty, perform a second rinse rather than rubbing harder.
Common mistake: Applying acid or iron remover over road film. Contamination can consume product unevenly and force you to wipe a dirty surface.
Step 2: Inspect and Mask Sensitive Areas
Dry the paint completely, then inspect a 2-by-2-foot test area. Mask delicate unpainted trim, porous stone, convertible fabric, and sensitive aftermarket finishes if the product label requires it.
Paint, glass, plastic, chrome, and aluminum do not have identical chemical resistance. A product safe for clear coat may stain bare aluminum or dry white on textured plastic.
Take a photograph before treatment. A before image makes it easier to distinguish removal from temporary wetting or residue hiding.
Step 3: Dissolve Iron Specks
Spray a pH-balanced automotive iron remover onto the cool, dry panel, allowing approximately 2-5 minutes of dwell time without letting the product dry. Rinse with a strong stream of clean water, then inspect the surface before moving to the next chemical.
Iron removers commonly use thioglycolate chemistry to react with iron compounds. The reaction may produce purple, violet, or red coloration and often carries a sulfur-like odor. Color indicates chemical activity, not guaranteed complete removal.
Use roughly 2-4 ounces per panel, or enough to keep the surface visibly wet. Avoid working over an entire hot vehicle at once. Treat one or two panels, rinse them, and continue.
You will know the step worked when orange specks reduce and the surface feels smoother after rinsing. Remaining roughness may be nonferrous fallout that needs clay.
Common mistake: Allowing iron remover to dry. Dried product can leave residue and may stain sensitive trim. Re-wet the panel immediately if evaporation begins.
Step 4: Dissolve Mineral Residue
Apply an automotive water-spot remover to a microfiber applicator rather than flooding the whole car. Work a small area using light, straight passes, allow the label-directed dwell time, and remove the residue with a damp microfiber towel before rinsing.
Many mineral deposits respond to mild acids because alkaline carbonate residue dissolves more readily at lower pH. A dedicated automotive product is preferable because its strength, surfactants, and dwell instructions are designed for vehicle finishes.
For light deposits, a 1:1 mixture of distilled white vinegar and distilled water can be used as a short-contact test treatment. Vinegar is not a rust remover, does not repair etching, and can strip wax or sealant. Never combine vinegar with bleach, chlorine products, or unknown cleaners.
You will know the step worked when the white crust disappears and the paint feels smooth after rinsing. If a ring remains as a visible outline but no longer feels raised, chemical residue may be gone and etching is likely.
Common mistake: Scrubbing mineral crystals with a dry towel. Pressure can drag hard particles across the clear coat and create scratches.
Step 5: Clay Remaining Contamination
Use a clay bar or clay mitt only after chemical decontamination and only with abundant lubricant. Glide with light pressure in short back-and-forth movements, folding or rinsing the clay when its working face becomes dirty.
Clay mechanically pulls bonded particles from the surface. It does not dissolve clear-coat etching, and excessive pressure can mar soft or black paint. A clay mitt is faster for large areas, while a fine-grade clay bar gives better control on delicate panels.
Use a separate clay piece for wheels or heavily contaminated lower panels. Contaminated clay should not return to the hood or roof.
You will know the clay step worked when the plastic-bag test feels nearly smooth and the towel glides without catching. Stop when the surface is smooth; more passes create risk without improving a clean panel.
Common mistake: Using clay on dry paint. Dry contact increases friction and can leave a dull patch that requires polishing.
Step 6: Polish Clear-Coat Etching
Polish only after deposits have been removed. Start with a fine finishing polish and a soft foam pad, make two or three overlapping passes, wipe the residue, and inspect under a focused light before increasing aggressiveness.
Etching occurs when mineral or acidic residue alters the clear-coat surface. The stain may be gone chemically, but the paint still contains a shallow crater that catches light. Polishing levels the surrounding clear coat; it does not refill the crater.
A dual-action polisher is safer for most beginners than a rotary machine because it reduces the chance of generating concentrated heat. By hand, use a small foam applicator and expect slower improvement, especially on hard factory clear coats.
| Correction method | Typical time per panel | Typical cost | Best use | Main limitation |
|---|---|---|---|---|
| Hand finishing polish | 20-45 minutes | $10-$30 | One or two faint spots | Limited cutting power |
| Dual-action polish | 10-25 minutes | $80-$250 tool setup | Several etched panels | Requires pad and speed control |
| Two-step DA correction | 30-60 minutes | $120-$350 materials | Deeper visible etching | Removes more clear coat |
| Professional correction | 1-2 days booking | $200-$600 typical | Broad or severe damage | Higher cost |
| Repaint or spot repair | 1-3 days | $300-$1,000 per panel | Clear coat failure or exposed metal | No longer a detailing repair |
Use the least aggressive method that produces the required result. A typical clear coat is only a thin protective layer, so repeated heavy compounding is not a harmless maintenance step.
You will know polishing worked when the halo disappears under direct light and the gloss matches adjacent paint. If the defect remains after careful polishing, stop increasing pressure and consult a professional, particularly on repainted panels.
Common mistake: Starting with a coarse compound because the spot looks severe. Test a finishing polish first; chemical stains often look worse than they are.
Step 7: Rinse, Protect, and Verify
Rinse the vehicle thoroughly, dry it with a clean towel, and apply a compatible spray sealant, wax, or ceramic-maintenance product. Iron removers and acidic spot products commonly reduce or remove existing wax and sealant protection.
Protection does not repair a crater, but it reduces direct contact between paint and future contamination. Apply the product according to its cure time, which commonly ranges from 15 minutes for a spray sealant to several hours for some coatings.
Verify the result after the panel is fully dry. Wet paint can hide faint rings, and fresh oils from polish can temporarily mask defects.
Which Treatment Fits the Stain?
The correct treatment depends on the contaminant, not the name “softened water rust.” A mild vinegar solution is the lowest-cost option for light mineral residue, while an iron remover is the proper first choice for orange ferrous specks.
| Treatment | Typical price | Working time | Suitable surface problem | Not suitable for |
|---|---|---|---|---|
| Distilled vinegar and water | $2-$5 | 5-15 minutes | Light mineral residue | Iron particles or etching |
| Automotive water-spot gel | $15-$30 | 10-30 minutes | White scale and water rings | Deep clear-coat craters |
| pH-balanced iron remover | $20-$40 | 5-10 minutes | Orange iron fallout | Tree sap and tar |
| Fine finishing polish | $15-$35 | 20-45 minutes | Light etched marks | Thick contamination |
| Dual-action correction | $80-$250 setup | 1-4 hours | Multiple etched panels | Exposed metal corrosion |
| Professional detailing | $200-$600 | 4-12 hours | Severe correction | Rust-through body damage |
Do not stack treatments randomly. A reasonable order is wash, iron removal, rinse, water-spot treatment, rinse, clay if needed, polish if needed, then protection.
Is Vinegar Safe for Car Paint?
Diluted white vinegar can be acceptable for a short, controlled application on healthy automotive clear coat, but it is not universally safe. Vinegar is acidic, can strip wax, and may damage or stain sensitive trim if it dries.
Use distilled water rather than hard tap water, work in shade, limit contact to a small test area, and rinse completely. Do not use vinegar on hot paint, unsealed porous surfaces, or unknown aftermarket finishes without testing.
Dedicated automotive products are usually the better choice for repeated work because their instructions specify dwell time and compatible materials. Vinegar is a budget experiment for mild residue, not a universal rust treatment.
Hand Correction Versus Machine Polishing
Hand polishing is appropriate for faint etching on one small panel, while a dual-action polisher is more efficient for repeated marks across several panels. Machine polishing does not remove metal corrosion from chips, seams, or bubbling paint.
| Situation | Recommended method | Typical result | Stop point |
|---|---|---|---|
| One faint ring | Hand finishing polish | Moderate improvement | Two or three passes |
| Several hood spots | DA with fine polish | Fast gloss recovery | Defect stops shrinking |
| Deep visible craters | DA with measured compound | Partial to strong correction | Before clear coat becomes thin |
| Rust bubbling under paint | Body-shop repair | Corrosion correction | No detailing product will cure it |
| Matte or satin finish | Specialist cleaner only | Maintains sheen | Never machine-polish normally |
A practitioner rule is to inspect after every polishing cycle, not after ten repeated passes. Removing clear coat without measurable improvement indicates that the defect may extend deeper than polishing can safely correct.
Common Mistakes and How to Fix Them
Working in direct sunlight
Heat accelerates evaporation and concentrates chemicals on the finish. Move the car into shade, cool the panel with water, and use shorter sections.
Using household acid or toilet cleaner
Toilet-bowl cleaner, muriatic acid, lime-scale products, and wheel acids may attack aluminum, plastic, coatings, or clear coat. Rinse questionable products immediately and seek professional inspection if discoloration remains.
Scrubbing with abrasive materials
Scouring pads, magic erasers, brushes, and rough towels can create scratches faster than they remove deposits. Replace force with dwell time and the correct chemical.
Treating rust-through as surface contamination
Orange bubbles around chips, seams, or wheel arches indicate corrosion beneath the coating. Remove the damaged paint, stabilize the metal, prime it, and repaint according to the vehicle’s repair requirements.
Repeating acid because the mark remains
If the surface is smooth but the outline remains, further acid usually cannot solve the problem. The defect is likely etched clear coat and needs controlled polishing.
Skipping protection
A chemically cleaned panel without wax or sealant will spot again quickly when the same water source remains. Protect the paint after every decontamination session.
What If the Marks Keep Returning?
Recurring marks usually point to the water source, drying method, or an untreated contamination source. Test the final rinse water with a total dissolved solids meter if available, and compare a softened-water rinse with distilled, deionized, or reverse-osmosis water.
| Rinse method | Typical dissolved-solids behavior | Spotting risk | Practical use |
|---|---|---|---|
| Untreated well water | Often high and variable | High | Initial wash only |
| Softened water | Lower calcium, sodium remains | Medium | Soap washing, not air drying |
| Carbon filtration | Removes chlorine and odors | Medium to high | Not a true spot-free rinse |
| Reverse osmosis | Low dissolved solids | Low | Final rinse with adequate flow |
| Deionized water | Very low dissolved solids | Very low | Spot-free final rinse |
| Distilled water | Typically very low dissolved solids | Very low | Small-area detailing |
A softener improves washing feel and reduces calcium scale, but it does not necessarily create spot-free rinse water. DI resin or RO filtration is more appropriate when the goal is to let the vehicle air dry without mineral marks.
Drying still matters. Use a clean drying towel, a filtered air blower, or a combination of sheeting water and towel drying. A ceramic coating may help water release, but it does not make contaminated water harmless.
Troubleshooting Failed Treatments
The iron remover did not turn purple
The marks may be tar, sap, oxidation, or nonferrous contamination. Try a tar remover on a test area, then clay if the surface remains rough. Some iron products show weak color on small or aged deposits, so lack of visible color is not conclusive.
White spots remain after water-spot remover
The residue may have etched the clear coat. Rinse, dry, and test a fine polish on a small area. If the ring remains unchanged, stop chemical treatment.
The paint became hazy
Haze can result from dried product, clay marring, incompatible chemicals, or polish residue. Wash and inspect first, then use a fine finishing polish on a test area. Do not apply more acid to haze.
Orange spots appear after washing
New spots may be airborne brake dust or industrial fallout rather than water damage. Treat the entire horizontal surface with iron remover, especially near railways, construction areas, and heavy traffic routes.
Rust appears under chipped paint
Surface detailing cannot repair exposed steel or corrosion beneath paint. A body shop should remove the damaged coating, treat the metal, and restore the paint system before rust spreads.
Frequently Asked Questions
Can softened water leave white spots on a black car?
Yes. Softened water can leave visible residue when dissolved sodium, remaining minerals, or contaminants dry on dark paint. Black paint makes the contrast stronger, but the chemical process is not limited to dark colors. A cool-panel wash followed by a spot-free final rinse reduces recurrence.
Should I use iron remover before water-spot remover?
Use iron remover first when orange specks or rough fallout are present. Rinse it completely before applying an acidic water-spot product. Separating the treatments prevents mixed chemistry and makes diagnosis easier when one product does not remove every mark.
Can I remove softened-water rust from car glass?
Glass can tolerate some dedicated water-spot products, but automotive paint chemicals are not automatically suitable for glass, tint, or trim. Use a product labeled for glass, protect rubber and adjacent surfaces, and avoid abrasive polishing unless the glass manufacturer permits it.
Will a ceramic coating prevent these stains?
A ceramic coating can reduce adhesion and make washing easier, but it cannot prevent dissolved solids from drying on the surface. Contaminated water still leaves deposits, and aggressive acids may shorten coating durability. A low-TDS final rinse remains the more direct prevention method.
How often should I decontaminate a car exposed to well water?
Inspect after each wash and chemically decontaminate only when contamination is present. Monthly iron treatment may be reasonable for a vehicle near rail lines or industrial traffic, while occasional well-water exposure may require treatment only several times per year.
Is actual rust on the body different from rust-colored water stains?
Actual body rust begins where steel is exposed or the paint system has failed, often around chips, seams, and bubbling areas. Rust-colored stains on intact clear coat are usually deposited contamination. Surface chemicals remove the latter, but body corrosion requires sanding, corrosion treatment, priming, and repainting.
The Bottom Line
To remove softened water rust from your car, wash and dry the vehicle, identify the mark, dissolve orange iron contamination with an automotive iron remover, and dissolve white mineral residue with a controlled water-spot treatment. Clay only when bonded texture remains, polish only when etching remains, and protect the finish after cleaning. Prevent recurrence with disciplined drying or a DI or RO final rinse.