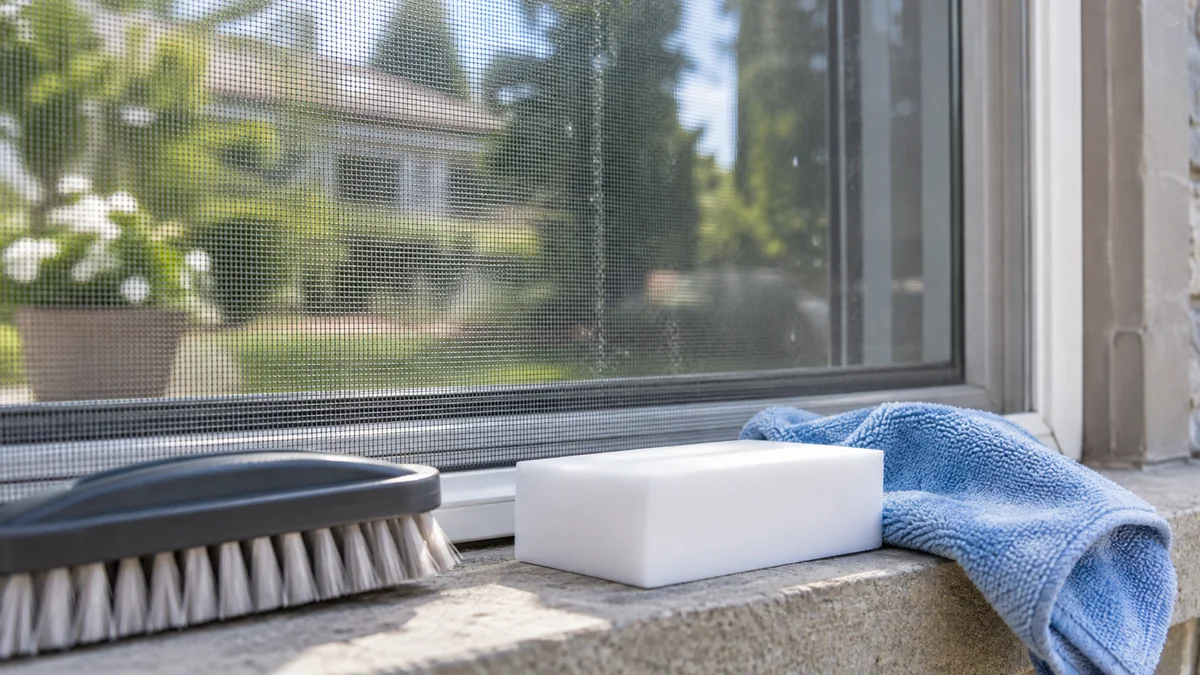
To clean window screens with a Magic Eraser, remove loose dust first, wet the melamine foam, wring it nearly dry, and wipe the mesh with light vertical strokes. Support flexible screens from behind, rinse removed screens with low-pressure water, and let every screen dry completely before reinstalling it.
Key Facts
A Magic Eraser is melamine foam, an abrasive cleaning material that works mainly through friction rather than detergent.
A damp, wrung-out eraser is safer and more effective than a dry or dripping sponge.
Fiberglass mesh can stretch or tear when scrubbed aggressively, while aluminum mesh can bend or lose finish.
Vacuum or brush away loose dust before adding water, because wet dust forms a muddy film inside the mesh.
A removed screen usually takes 10-15 minutes to clean and 30-120 minutes to dry.
Soap and water are usually better than melamine foam for heavy mud, large amounts of soot, or salt deposits.
Is a Magic Eraser Safe for Window Screens?
A Magic Eraser is generally suitable for light and moderate grime on intact fiberglass or aluminum window screens when used damp and with minimal pressure. Melamine foam is mildly abrasive, so it can wear screen coatings, leave residue, bend aluminum mesh, or pull damaged fiberglass away from its spline if used aggressively.
The material is not a conventional detergent sponge. Melamine foam contains a rigid, open-cell structure that abrades surface contamination as the damp foam moves across the mesh. That mechanical action helps with pollen film, insect residue, fingerprints, and gray urban grime, but it also means the sponge should not be treated like a soft microfiber cloth.
Test an inconspicuous corner first. Stop if the foam changes the mesh color, catches on a rough spot, removes a finish, or produces unusual powder beyond normal foam wear.
A Magic Eraser is a poor choice for screens that are already brittle, loose, heavily oxidized, or torn. Cleaning cannot restore missing coating, broken strands, or a failing rubber spline.
How Does Melamine Foam Clean Mesh?
Melamine foam cleans window screens by mechanically loosening contamination from the crossing fibers and their small openings. Water softens the foam and reduces loose particulate movement, while the foam’s rigid structure provides friction against pollen, grease, insect residue, and adhered dust.
The foam does not dissolve grime in the way an alkaline cleaner or dish soap can. It lifts contamination through contact. That distinction explains both its usefulness and its limitations: a Magic Eraser can remove a thin sticky film without creating a bucket of soapy runoff, but it cannot replace rinsing when the screen is covered with mud or salt.
Use the foam as a controlled spot-cleaning tool rather than a universal screen treatment. One pass should remove the surface film. Repeated hard passes increase wear without necessarily improving the result.
What the foam can and cannot remove
| Contamination | Magic Eraser result | Better method when severe |
|---|---|---|
| Dry dust | Limited after wetting | Soft vacuum brush first |
| Pollen film | Usually effective | Mild soap solution and rinse |
| Insect residue | Often effective | Soak briefly, then rinse |
| Bird droppings | Partial removal | Dampen, lift, and wash with detergent |
| Salt spray | Moderate removal | Fresh-water rinse immediately |
| Mold staining | Variable | Identify cause and use a compatible cleaner |
| Oxidized aluminum | Does not restore finish | Replace or refinish affected parts |
| Mud in mesh openings | Inefficient | Low-pressure hose rinse |
What You Need Before Cleaning
Prepare a soft brush attachment or vacuum, two microfiber cloths, clean water, masking tape, a shallow work surface, and one or more melamine foam sponges. Use a garden hose only for screens removed from the window and only at low pressure.
Before You Start
Typical time: 3-5 minutes for an in-place wipe; 10-15 minutes for a removed-screen clean
Drying time: 30-120 minutes, depending on humidity, airflow, and temperature
Difficulty: Easy, but delicate screens require controlled pressure
Typical cost: About $0.20-$2 per melamine sponge, plus water and optional detergent
Tools: Vacuum with soft brush, microfiber cloths, clean water, masking tape, hose, and gloves
Prerequisite: Check the mesh, frame, corners, and spline for damage
A standard melamine sponge may wear through after several screens. Typical use is one sponge for two to four moderately dirty standard screens, although rough aluminum mesh, heavily soiled surfaces, and extra pressure reduce that range.
Do not use a sponge that has picked up grit from a floor, brick ledge, or dirty patio. Embedded particles can scratch the frame or drag across the mesh.
How to Clean Window Screens With Magic Eraser in Place
The in-place method is best for renters, upper-floor windows, quick maintenance, and screens that cannot be removed easily. Open the window behind the screen, protect the sill, and use only enough water to dampen the mesh rather than saturate the wall or interior trim.
Step 1: Open and protect the work area
Open the window fully behind the screen if the design allows it. Place a towel on the sill and floor, and keep the spray or sponge away from painted drywall, wood trim, and electrical components.
If the screen faces an exterior drop, do not reach outside or lean through the opening. Clean only the area you can reach while maintaining stable footing.
You will know it worked when: the screen is accessible and runoff cannot stain the interior surface.
Common mistake: Starting with a dripping sponge that sends dirty water down the frame.
Step 2: Remove dry dust and cobwebs
Use a vacuum’s soft brush attachment, a clean paintbrush, or a dry microfiber cloth to remove loose material. Work gently from the top edge downward so falling dust does not settle on finished areas you already cleaned.
Do not press the vacuum nozzle directly into the mesh. The suction and hard plastic edge can bow fiberglass screen cloth or pull loose strands toward the nozzle.
You will know it worked when: loose cobwebs and visible dust are gone, while sticky spots remain for wet cleaning.
Common mistake: Wetting dusty mesh immediately. Dry particles combine with water and form a gray slurry that spreads across the screen.
Step 3: Wet and wring the Magic Eraser
Submerge the melamine sponge in clean, lukewarm water, then squeeze it until it is damp but not dripping. Do not use the sponge dry. Dry melamine foam is less flexible and can shred quickly against textured mesh.
If the sponge sheds large crumbs immediately, trim away the damaged edge or use a new section. A small amount of white wear is normal; heavy residue indicates excessive pressure or a deteriorating sponge.
You will know it worked when: the sponge feels soft, holds its shape, and produces no stream of water when squeezed lightly.
Common mistake: Adding household cleaner to the sponge without checking the screen manufacturer’s guidance. The chemical may affect a coating even when the foam itself is acceptable.
Step 4: Support the mesh and wipe vertically
Place one hand behind the screen only if you can reach it safely and without pressing your hand against the mesh. With the other hand, make overlapping top-to-bottom passes using light pressure.
Keep the sponge moving. Do not grind one spot with repeated back-and-forth strokes, and do not pull the foam diagonally across a loose corner. Rinse or rotate the sponge when it becomes gray.
You will know it worked when: the mesh looks more uniform and the sponge removes film without visibly bowing the screen.
Common mistake: Pressing hard enough to make the mesh move. A screen should not flex substantially under normal cleaning pressure.
Step 5: Blot and inspect
Use a dry microfiber cloth to blot the frame, sill, and accessible mesh. Inspect the screen against daylight from several angles. Reclean only the spots that still show residue.
Do not chase faint discoloration caused by aged fiberglass, aluminum oxidation, or permanent staining. Additional abrasion may damage the screen without changing its appearance.
You will know it worked when: the screen has no wet streaks, foam crumbs, or pooled water along the lower frame.
Common mistake: Wiping the adjacent window glass with the used Magic Eraser. Melamine foam can scratch some plastic surfaces and aftermarket window films.
How to Deep-Clean Removed Screens
Removed screens are easier to clean thoroughly because both sides can be rinsed and inspected. This method is preferable for annual maintenance, severe pollen buildup, insect residue, and screens with mud lodged in the openings.
Step 1: Remove and label each screen
Press the screen’s spring tabs or lift the pull tabs according to the window design. Hold the frame with both hands and avoid twisting one corner.
Label multiple screens with masking tape, using room names or window positions. Screens can look interchangeable but may differ slightly in width, spring-tab position, or fit.
You will know it worked when: the screen comes free without bending and its original position is recorded.
Common mistake: Forcing a stuck screen. Remove dirt from the channel first or consult the window manufacturer’s removal instructions.
Step 2: Inspect the frame, spline, and mesh
Lay the screen flat on a clean towel, tarp, or smooth patio surface. Check for broken strands, loose spline, bent corners, corrosion, and separated frame joints.
A screen with a loose spline can become worse during scrubbing. Set it aside for repair rather than treating it like an intact screen.
You will know it worked when: you know which areas require cleaning and which require repair.
Common mistake: Cleaning a damaged screen aggressively and discovering afterward that the mesh has pulled out of the frame.
Step 3: Rinse loose grit with low-pressure water
Rinse from the cleaner side toward the dirtier side using a gentle hose stream. Keep the nozzle at least several inches away, and never use a pressure-washer jet on window mesh.
High pressure can stretch fiberglass, bend aluminum, force dirt deeper into the frame channel, or separate the spline. The goal is to flush loose grit, not drive water through the screen at maximum force.
You will know it worked when: loose soil and insects leave the mesh before the sponge touches it.
Common mistake: Holding the hose close because the screen appears sturdy. Fine mesh can fail even when the frame remains rigid.
Step 4: Wipe with the damp Magic Eraser
Wet and wring the sponge, then wipe in straight, overlapping passes. Begin with the frame’s upper half and work downward. Turn the screen only when needed, rather than dragging it across a dirty surface.
A cross-hatch pattern can reach contamination on crossing fibers, but use it only on a firm, intact screen. On loose fiberglass, one-direction passes with minimal pressure are safer than repeated perpendicular scrubbing.
You will know it worked when: the gray film lifts and the screen remains flat without visible distortion.
Common mistake: Treating the eraser like a scouring pad. More pressure increases foam consumption and mesh risk.
Step 5: Detail the frame and corners
Use the sponge’s edge or a soft toothbrush for the frame channel, corner joints, and pull-tab recesses. Do not force foam into the spline groove, where it can leave fragments or loosen aged rubber.
A separate microfiber cloth is better for wiping frame oxidation residue. If white powder transfers from aluminum, stop and determine whether the finish is oxidizing.
You will know it worked when: the channel is free of loose debris and the spline remains seated.
Common mistake: Scraping the frame with a blade or abrasive pad to remove stuck material.
Step 6: Rinse, dry, and reinstall
Rinse until the runoff is clear, then stand the screen vertically in a shaded, ventilated place or lay it flat on clean towels. Allow at least 30 minutes in warm, dry airflow and up to two hours in cool or humid conditions.
Reinstall only when the mesh, spline, frame channel, and corners are dry. Water trapped behind the spline can encourage dirt adhesion and make the screen difficult to seat correctly.
You will know it worked when: the screen feels dry, fits its original opening, and has no visible foam residue.
Common mistake: Reinstalling damp screens immediately because the surface appears clean.
Which Screen Materials Need Different Care?
Fiberglass mesh tolerates gentle damp wiping but can stretch, fray, or pull from the spline under pressure. Aluminum mesh holds its shape better in some applications but bends permanently more easily at local impact points and may show oxidation or coating loss.
| Screen material | Main risk | Magic Eraser technique | Better alternative |
|---|---|---|---|
| Fiberglass | Stretching and fraying | Damp sponge, one-direction passes | Soft brush and mild soap |
| Aluminum | Bending and finish wear | Minimal pressure, test corner | Rinse and diluted dish soap |
| Stainless steel | Scratching and discoloration | Use only after testing | Neutral detergent and soft brush |
| Pet-resistant mesh | Surface coating wear | Avoid repeated abrasion | Manufacturer-approved cleaner |
| Solar or coated mesh | Coating damage | Follow product instructions | Vacuum and low-pressure rinse |
| Old brittle mesh | Sudden tearing | Avoid unless spot-tested | Replace the mesh |
A manufacturer’s care instructions override general cleaning advice. Specialty solar screens, pollen screens, and coated insect barriers may have surface treatments that melamine foam can dull.
Magic Eraser or Soap and Water?
Magic Eraser is faster and less messy for a thin film, while soap and water are safer for large amounts of loose soil that need flushing. Vacuuming is the lowest-risk first step, but it cannot dissolve sticky contamination or remove residue embedded in the mesh openings.
| Method | Typical time per screen | Water requirement | Best use | Main limitation |
|---|---|---|---|---|
| Vacuum brush | 1-3 minutes | None | Dust and cobwebs | Leaves sticky film |
| Magic Eraser | 3-5 minutes in place | Damp sponge | Pollen and insect residue | Foam wears quickly |
| Soap and water | 10-20 minutes | Hose or basin | Mud and heavy grime | Requires thorough rinsing |
| Soft toothbrush | 8-15 minutes | Damp or soapy | Corners and grooves | Slow on large mesh |
| Professional cleaning | 1-3 days scheduling | Provider supplied | Many damaged screens | Typical cost $5-$15 each |
Use mild dish soap when the screen has mud, soot, bird droppings, or salt crystals across most of its surface. A useful mixture is approximately 1 teaspoon of dish soap in 1 gallon of water, followed by a complete fresh-water rinse.
Do not combine cleaning chemicals casually. Bleach, ammonia, acidic products, and unknown screen coatings can create discoloration or surface damage.
What Does Screen Cleaning Cost and How Long Does It Take?
A typical in-place Magic Eraser cleaning takes 3-5 minutes per screen, while a removed deep clean takes 10-15 minutes before drying. The material cost is usually $0.20-$2 per sponge, and a practical drying window is 30-120 minutes.
| Task or material | Typical quantity | Typical range | Variable affecting result |
|---|---|---|---|
| In-place cleaning | 1 screen | 3-5 minutes | Grime thickness |
| Removed cleaning | 1 screen | 10-15 minutes | Rinsing and frame detail |
| Melamine sponge | 1 unit | $0.20-$2 | Brand and pack size |
| Screens per sponge | 1 sponge | 2-4 screens | Mesh roughness and pressure |
| Air drying | 1 screen | 30-120 minutes | Humidity and airflow |
| Dish soap solution | 1 gallon | About 1 teaspoon soap | Soil type |
These are typical household figures, not guaranteed product specifications. A rough screen, a heavily soiled sponge, or a screen with deep frame channels may consume more time and foam.
For a whole house, generic melamine blocks usually cost less per unit than branded sponges. Buy only enough for the cleaning session because stored foam can crumble with age, moisture, or compression.
Common Problems and How to Fix Them
White foam residue remains in the mesh
Rinse the screen with clean water or lift residue with a fresh microfiber cloth. Foam wear is normal, but large crumbs mean the sponge is deteriorating or being pressed too firmly.
The screen bows during cleaning
Stop immediately and reduce pressure. Support the screen from behind, switch to vertical passes, or remove the screen and rinse it instead. A screen that remains bowed after drying may have a loose spline or damaged frame.
The aluminum looks dull after cleaning
Stop abrasive cleaning and inspect for oxidation or coating loss. A Magic Eraser can remove surface grime but cannot reverse oxidation, and additional rubbing may enlarge the dull area.
Mold or dark staining remains
Do not assume every dark mark is removable dirt. Mold may indicate persistent moisture, while black discoloration on fiberglass can be embedded staining. Follow the screen manufacturer’s cleaning guidance and address condensation or leakage.
The screen tears or pulls from the spline
Do not continue wiping. Small spline separations may be repaired with a spline roller, but brittle or torn mesh usually requires replacement. Pressing the mesh back into place by hand can create a loose area that insects can enter.
Dirty water stains the wall or sill
Use the removed-screen method or reduce the water volume. Protect the sill with towels, keep the sponge damp rather than saturated, and blot runoff immediately.
Situational Cleaning Recommendations
For apartment dwellers
Use the in-place method with a vacuum, damp sponge, towel, and a dry microfiber cloth. Clean one screen at a time, keep the window opening behind it, and avoid rinsing large amounts of water where runoff can reach another unit.
For coastal homes
Rinse salt exposure with fresh water before it dries into crystals. Use the Magic Eraser only for the remaining film, because repeated abrasive wiping can wear finishes faster than a gentle rinse-and-soap process.
For high-pollen areas
Vacuum screens weekly during peak pollen season and use damp cleaning every one to three months. Removing dry pollen first reduces the amount of paste that must be wiped through the mesh.
For homes with pets
Pet-resistant mesh often has a heavier or coated surface. Test a hidden corner, use a soft brush first, and avoid assuming that thicker mesh is immune to abrasion.
For upper-floor windows
Do not lean through the opening to support the exterior side. Clean reachable sections from inside or arrange professional service for screens that require unsafe access.
How Often Should You Clean Window Screens?
Most residential screens need dry dust removal every one to three months and damp cleaning twice a year. Homes near roads, coasts, construction, agricultural fields, or heavy pollen may need monthly vacuuming and quarterly washing.
A practical schedule is:
- Vacuum in spring before pollen becomes a wet film.
- Wash or wipe after the main pollen season.
- Inspect spline and mesh during autumn removal.
- Rinse salt or industrial residue sooner rather than waiting for seasonal cleaning.
- Clean screens after nearby construction dust has settled.
Cleaning frequency should follow contamination, not a fixed calendar. A visibly gray screen near a busy road needs attention sooner than a shaded screen in a low-dust neighborhood.
FAQ
Can I use a Magic Eraser on a screen without removing it?
Yes, provided the screen is intact and you can clean it without unsafe reaching. Vacuum first, use a damp wrung-out sponge, support the mesh when possible, and protect the sill from runoff. Removed screens are better for rinsing, heavy grime, and cleaning both sides.
Can vinegar be used on window screens?
Diluted vinegar can help with some mineral or organic residue, but it is not necessary for routine dust and pollen. Test it first because acidic solutions may affect certain coatings or aluminum finishes. Never mix vinegar with bleach or other unknown cleaning chemicals.
Can I pressure-wash window screens?
No. A pressure washer can stretch fiberglass, bend aluminum, damage coatings, and force debris into the spline or frame channel. Use a low-pressure garden hose several inches away from removed screens, followed by a clean-water rinse.
Should I clean the glass before or after the screens?
Clean the screens first, then clean the glass and frame. Screen cleaning can release dust and dirty water, so washing the glass afterward prevents residue from being transferred back onto an already-clean window.
Is a Magic Eraser better than a scrub brush?
A Magic Eraser is usually better for a thin sticky film, while a soft brush and mild soap are better for loose dirt, mud, and large debris. A stiff brush can catch mesh fibers, so select soft nylon bristles and use light pressure.
How do I know when a screen needs replacement?
Replace a screen when mesh is torn, severely brittle, permanently bowed, pulled from the spline, or corroded through. Cleaning removes contamination, not structural damage. A new mesh panel is safer than repeatedly abrading a failing screen.
The Bottom Line
To clean window screens with Magic Eraser safely, remove dry debris first, dampen and wring the melamine foam, use light straight passes, and stop when the mesh is clean rather than scrubbing for a perfect color match. Choose soap and low-pressure water for heavy soil, rinse removed screens completely, and reinstall only after they are fully dry.