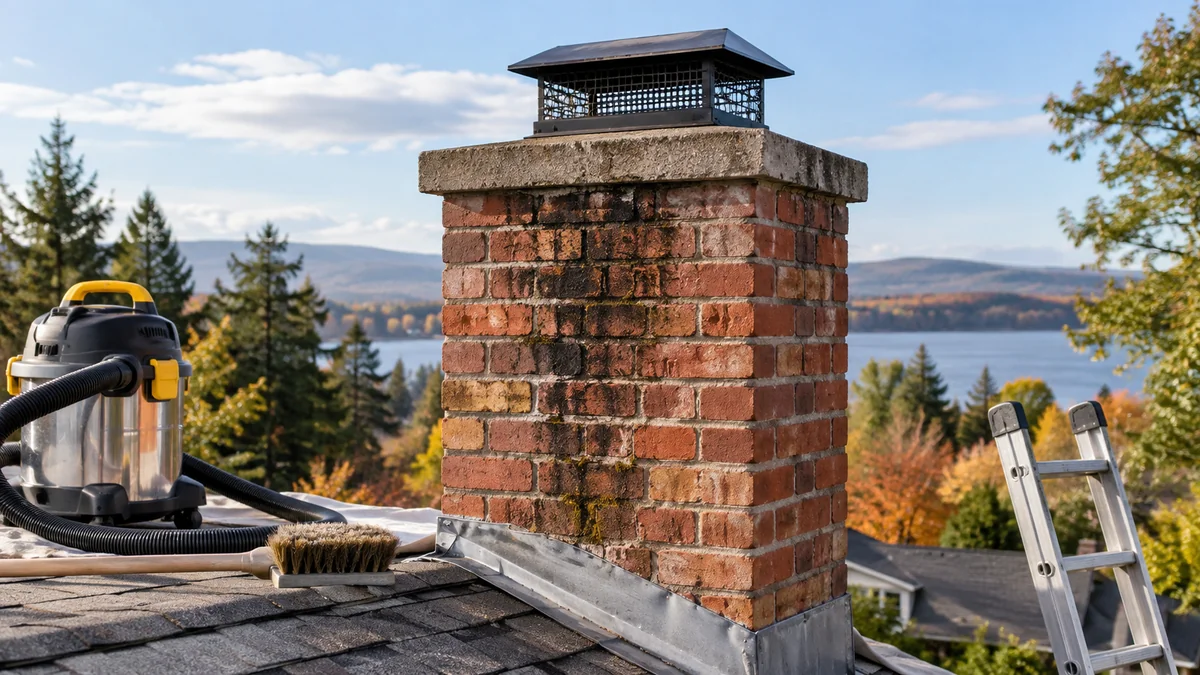
Cleaning a brick chimney involves two separate jobs: sweeping creosote and soot from the flue, then washing deposits from the firebox or exterior brick. A careful homeowner can handle loose soot and light masonry staining in about 2-4 hours, but glazed creosote, damaged liners, unsafe roofs, and recurring moisture require a qualified chimney professional.
Key Facts at a Glance
- A chimney sweep removes flammable deposits from the flue; washing fireplace brick does not make the flue safe.
- Creosote forms when wood-smoke compounds condense on cooler chimney surfaces, especially during low-temperature or poorly ventilated fires.
- Loose, powdery Stage 1 soot may suit a DIY sweep, while shiny Stage 3 glaze should be professionally assessed.
- Let the fireplace remain unused for at least 24 hours, then verify that ash contains no heat before vacuuming.
- The correct brush must match the flue liner and cross-section; an oversized or aggressive brush can damage clay tiles and mortar.
- Typical professional sweeping costs range from $150-$380 before camera inspection or heavy-creosote charges.
What Are You Actually Cleaning?
A brick chimney has an appliance connection, smoke chamber, flue liner, chimney shaft, crown, cap, and exterior masonry. “Cleaning the chimney” may refer to sweeping the internal passage or removing stains from visible brick, and those tasks use different equipment and carry different risks.
Flue sweeping removes a fire hazard
The flue carries smoke and combustion gases outdoors. During wood burning, water vapor and unburned organic compounds condense on cooler clay, metal, or masonry surfaces and form creosote. Soot, ash, bird debris, and glazed tar can restrict draft or ignite.
Flue sweeping uses a correctly sized poly or wire brush, rods, a rotary system, or professional mechanical equipment. A chimney camera may also be needed because cleaning cannot reveal every crack, displaced tile, missing mortar joint, or obstruction.
Brick washing removes surface deposits
Firebox brick can hold soot, ash, smoke oils, and creosote staining in its pores. Exterior brick may develop soot, algae, moss, or white efflorescence when water moves through the masonry. Cleaning the visible brick improves appearance and can reveal damage, but it does not remove deposits above the smoke chamber.
Why Does a Brick Chimney Need Cleaning?
A brick chimney needs cleaning because combustible creosote can accumulate inside the flue, while saturated soot and moisture can damage firebox masonry. The National Fire Protection Association’s NFPA 211 standard calls for chimneys, fireplaces, and vents to be inspected at least annually and cleaned when deposits or conditions make cleaning necessary.
The Chimney Safety Institute of America identifies 1/8 inch of creosote as a level requiring attention because creosote can ignite and support a chimney fire. That figure is a practical warning threshold, not permission to keep burning until a ruler confirms the thickness. A flue with less buildup can still have an obstruction, liner defect, or dangerous concentration near the smoke chamber.
The U.S. Consumer Product Safety Commission also recommends annual professional inspection of fireplaces and chimneys. Frequency should increase for daily wood burning, wet firewood, smoldering fires, poor draft, or a wood stove operated below its intended temperature.
Which Creosote Can You Handle Yourself?
Loose Stage 1 soot is the only creosote category that routinely fits a basic DIY cleaning. Crunchy flakes may require rotary equipment, while hard shiny glaze can conceal liner damage and should be evaluated by a certified sweep before removal.
| Creosote stage | Typical appearance | Common cause | Appropriate response | DIY boundary |
|---|---|---|---|---|
| Stage 1 | Dry black powder, light soot | Hot fires, adequate draft | Correct-size manual brush and vacuum | Reasonable with safe access |
| Stage 2 | Brittle flakes, crunchy granules, tar-like pieces | Cooler fires, restricted airflow | Rotary loop or professional mechanical system | Limited, stop if bonded |
| Stage 3 | Shiny black glaze, hard tar, glassy coating | Repeated smoldering or wet fuel | Professional assessment, chemical or mechanical removal | Do not force a brush |
| Obstructed flue | Nest, leaves, fallen tile, heavy debris | Birds, storms, deterioration | Inspection and obstruction removal | Professional work recommended |
A chemical creosote modifier can make some deposits more friable, but it does not replace physical sweeping or inspection. Never assume a powder labeled “creosote remover” makes a glazed flue safe for routine DIY brushing.
Before You Start: Tools, Safety, and Prerequisites
Plan on 2-4 hours for a first cleaning, $60-$130 for basic DIY equipment, and no roof work unless the roof is stable, dry, accessible, and equipped with appropriate fall protection. The essential prerequisites are a completely cold appliance, known flue dimensions, a sound liner, and a dust-containment plan.
Materials and equipment
| Item | Typical specification | Quantity or size | Purpose |
|---|---|---|---|
| Chimney brush | Poly or flexible wire, flue-matched | 1, often 8 x 8 or 8 x 12 inches | Loosens soot and creosote |
| Extension rods | Fiberglass or polypropylene | 20-30 feet | Reaches a typical one- or two-story flue |
| Drop cloth | Canvas or heavy plastic | 1, 6 x 9 feet or larger | Protects floor and hearth |
| Respirator | N95 or better particulate respirator | 1 per worker | Limits soot inhalation |
| Vacuum | Ash vacuum or HEPA-rated unit with bag | 1 | Captures fine particulate |
| Masonry brush | Stiff nylon, not metal for soft mortar | 1-2 | Cleans firebrick and joints |
| Cleaner | Mild detergent or labeled masonry cleaner | 1 container | Removes light soot |
| PPE | Goggles, gloves, work clothes | 1 set | Protects eyes and skin |
Do not use an ordinary household vacuum for cold soot unless the manufacturer specifically rates it for fine particulate. Many household vacuums exhaust fine ash back into the room, contaminating furniture and exposing occupants.
Safety checks before cleaning
- Do not use the fireplace or stove for at least 24 hours.
- Test the ash with a metal tool and check for warmth, smoke, or glowing material.
- Confirm that the damper can open and close normally.
- Inspect the hearth, smoke chamber, and visible liner for loose material.
- Keep children, pets, and forced-air circulation away from the work area.
- Never climb a wet, icy, steep, fragile, or unprotected roof.
Step 1: Seal the Room and Remove Cold Ash
Seal the fireplace opening around the vacuum hose or rod before disturbing soot. Remove only cold ash, place it in a metal container with a tight lid, and keep that container outdoors on a noncombustible surface away from the house.
Close nearby doors and turn off air handlers if doing so does not create a combustion hazard elsewhere. Lay a canvas drop cloth from the hearth to the work area. Tape heavy plastic over the fireplace opening, leaving the smallest practical opening for rods or a vacuum hose.
Wear eye protection, gloves, long sleeves, and a properly fitted particulate respirator. Do not rely on a disposable dust mask that does not seal around the nose and mouth.
You will know this step worked when: the room is isolated, the hearth is protected, and no visible dust escapes when the first light brushing begins.
Common mistake: opening the damper and brushing immediately without sealing the firebox. That creates a soot plume that can settle throughout the house.
Step 2: Inspect the Firebox, Smoke Shelf, and Visible Liner
Inspect the firebox, throat, smoke shelf, damper, and accessible liner before sweeping. Crumbling mortar, displaced clay tiles, missing firebrick, rusted metal, water staining, or a damper that will not move are stop-work conditions.
Use a bright flashlight and a small mirror if necessary. The smoke shelf, located behind or above the damper, often holds ash and debris that a straight brush does not remove. A flexible hand brush can clean loose material from that area after the flue has been swept.
Look for white powder on brick, black glossy deposits, bird nesting material, and pieces of flue tile. A camera inspection is especially appropriate when the home is newly purchased, the chimney has an unknown history, a chimney fire occurred, or a connected appliance has changed.
You will know this step worked when: the damper operates, no obstruction is visible, and the liner does not show obvious gaps or loose sections.
Common mistake: treating a visual opening inspection as proof that the entire liner is sound. A camera is needed to see hidden joints and upper flue damage.
Step 3: Choose Top-Down or Bottom-Up Sweeping
Top-down sweeping usually contains debris more effectively and keeps the operator outside the living space, but it requires safe roof access. Bottom-up sweeping is a suitable alternative when the roof is inaccessible, provided the firebox is sealed and the rods or rotary system can reach the full flue.
| Method | Best use | Main equipment | Advantage | Limitation |
|---|---|---|---|---|
| Top-down | Accessible low-slope roof | Brush, rods, cap tools | Debris moves downward predictably | Fall risk and roof access |
| Bottom-up manual | Open fireplace, loose soot | Flexible brush, rods, plastic seal | Avoids roof climbing | More indoor dust and awkward reach |
| Bottom-up rotary | Long or moderately flaked flue | Rotary rods, drill, whip or loop head | Breaks some bonded deposits | Can damage weak liners if forced |
| Professional system | Glaze, tall chimney, unknown condition | Camera, power equipment, HEPA vacuum | Better diagnosis and containment | Typical service cost $150-$680 |
For top-down work, remove the chimney cap carefully, attach the brush to the first rod, and lower it vertically. Add rods one at a time while keeping the connection secure. Brush with controlled full-length strokes rather than hammering the tool against the liner.
A brush should contact the walls without requiring force. Do not use a steel brush in a stainless-steel liner unless the liner manufacturer permits it; poly or specialized nylon tools are often safer.
You will know this step worked when: resistance decreases, soot falls into the firebox, and the brush can pass the intended length without binding.
Common mistake: using an oversized brush to “clean harder.” Excessive pressure can crack clay tile, dislodge mortar, or damage a metal liner.
Step 4: Clean the Smoke Shelf and Vacuum the Flue Debris
Clean the smoke shelf only after brushing has dislodged the upper deposits. Use a small flexible brush to pull debris forward, then collect it with an ash vacuum equipped with the correct filter and collection bag.
Wait about 30 minutes for airborne dust to settle before removing the containment plastic. Keep the opening sealed while vacuuming. Empty the vacuum outdoors according to its instructions, and inspect the filter for overheating or damage before storing it.
Do not vacuum hot ash, warm embers, or material that may have burned recently. A hidden ember can ignite paper filters, dust, or plastic components inside a vacuum.
You will know this step worked when: the hearth contains no loose chunks, the smoke shelf is visibly clear, and the room has no new soot layer after the plastic is removed.
Common mistake: brushing debris into the firebox and leaving it there. Creosote chunks on the hearth remain combustible and can produce odors or ignite during the next fire.
Step 5: Wash Soot From the Firebox Brick
Pre-wet firebrick with clean water before applying a detergent solution. Saturated masonry absorbs less dirty liquid, which reduces the risk of driving dissolved soot deeper into the pores.
For light soot, start with about 1/4 cup of mild dish detergent in 4 cups of warm water. Apply the solution to a small test area, scrub with a stiff nylon brush, and wipe with clean water. Work from the top downward so dirty runoff does not recoat cleaned areas.
Avoid combining cleaners. Trisodium phosphate can cut heavy soot, but it is caustic and must be handled according to its product label, with gloves, goggles, ventilation, and controlled rinse water. Vinegar is not a universal masonry cleaner, and repeated acid exposure can attack mortar or certain masonry finishes.
| Deposit | First treatment | Contact approach | Main warning |
|---|---|---|---|
| Loose gray soot | Warm water and mild detergent | Small test patch, nylon brush | Do not start on dry brick |
| Oily black staining | Labeled masonry cleaner | Follow label dilution and dwell time | Protect mortar and metal |
| Hardened creosote | Professional assessment | Mechanical or poultice method | Do not scrape aggressively |
| White efflorescence | Dry brushing first | Gentle nylon brush, limited water | Find the moisture source |
| Mold or algae | Labeled exterior biocide | Follow label and runoff rules | Do not bleach near plants |
You will know this step worked when: the test patch dries without a dark halo, mortar remains intact, and cleaned brick does not release additional oily residue.
Common mistake: using a pressure washer inside the firebox. High-pressure water can erode mortar, saturate the chimney, and force contaminants deeper into porous brick.
Step 6: Clean Exterior Brick and Diagnose Moisture
Exterior chimney brick should be cleaned only after the masonry is dry enough to identify the source of staining. Brush off loose dirt and efflorescence first, then test a compatible masonry cleaner on an inconspicuous area.
White, powdery efflorescence consists of mineral salts carried to the surface by water. A stiff dry brush may remove it temporarily, but recurrence usually points to water entry through the crown, cap, flashing, mortar joints, or porous brick. Cleaning without repairing the leak produces the same deposit again.
Avoid applying a water-repellent sealer over active moisture or efflorescence. Some sealers trap water, change drying behavior, or create uneven color. A masonry contractor should evaluate cracked crowns, open joints, spalling faces, and frost damage.
You will know this step worked when: the brick dries evenly, no mortar is missing, and the white deposit does not return quickly after the moisture source is corrected.
Common mistake: using chlorine bleach as a default exterior cleaner. Bleach can damage nearby vegetation, corrode metal, and fail to address the water path causing the staining.
Which Method Fits Your Appliance?
An open fireplace, wood stove, insert, and gas appliance produce different inspection and cleaning needs. Appliance type affects flue temperature, draft, access, and the kind of deposit a sweep is likely to find.
Open fireplace
An open fireplace often produces loose soot but can also create substantial creosote when fires smolder. A bottom-up brush may be practical from a sealed firebox, although top-down sweeping gives better access for inspection and debris control.
Wood stove or insert
Wood stoves and inserts can produce concentrated creosote when operated with restricted airflow or damp wood. Their connectors, baffles, and appliance outlets also need inspection. A rotary system may be useful for flakes, but the liner and appliance manufacturer’s instructions control the acceptable tool.
Gas fireplace or furnace flue
A properly vented gas appliance usually produces less creosote than wood burning, but it can create corrosive condensate, soot from poor combustion, or dangerous blockage. Do not use a wood-stove cleaning assumption on a gas vent. Have combustion, venting, and carbon-monoxide safety checked by a qualified technician.
When Should You Stop and Hire a Professional?
Hire a chimney professional when the roof is unsafe, the flue contains Stage 3 glaze, the liner is damaged, the chimney has an unknown history, or a chimney fire has occurred. A professional should also handle obstructions, tall or complex chimneys, shared flues, and deposits that do not yield to light brushing.
A Level 2 inspection, which commonly includes a video scan, is appropriate when a property changes ownership, an appliance changes, a flue has malfunctioned, or a suspected chimney fire caused damage. NFPA 211 distinguishes inspection levels by the circumstances and extent of evaluation required.
Stop immediately if you encounter:
- A shiny, tar-like coating that resists moderate brush pressure.
- Cracked or displaced clay liner sections.
- Falling bricks, loose mortar, or visible daylight through the chimney.
- A missing or blocked flue cap.
- Nesting material, animals, or an unknown obstruction.
- Smoke entering the room during a test fire.
- A carbon-monoxide alarm, unusual odor, or repeated drafting failure.
DIY cleaning is not good for diagnosing hidden structural defects. A clean flue can still leak combustion gases through a cracked liner or compromised smoke chamber.
How Often Should You Clean a Brick Chimney?
Inspect a brick chimney at least once each year and clean it whenever deposits, obstructions, or operating conditions require cleaning. Annual use does not guarantee an annual sweeping interval, while daily wood burning can require more frequent checks.
| Use pattern | Typical inspection approach | Likely cleaning interval | Additional trigger |
|---|---|---|---|
| Occasional open fires | Annual visual inspection | Often 1-2 years, condition dependent | Strong smoke odor or poor draft |
| Weekly wood fires | Annual inspection | Commonly once per heating season | Flakes or visible buildup |
| Daily wood stove | Annual professional inspection | Sometimes every 6-12 months | Damp wood or low-air operation |
| Gas appliance | Annual vent and combustion check | Condition dependent | Soot, corrosion, condensation |
| New homeowner | Level 2 assessment | Clean based on findings | Unknown history or appliance change |
Use dry, properly seasoned firewood, maintain adequate combustion air, and avoid long smoldering burns. Those operating choices reduce, but do not eliminate, creosote formation.
How Much Time and Money Does Cleaning Take?
A basic DIY sweep typically takes 2-4 hours and costs $60-$130 for a brush, rods, containment materials, PPE, and cleaning supplies. Professional sweeping commonly costs $150-$380, while a video inspection or heavy-glaze removal adds substantially to the invoice.
| Service or project | Typical duration | Typical cost | Main price drivers |
|---|---|---|---|
| DIY loose-soot cleaning | 2-4 hours | $60-$130 | Chimney height, tool quality |
| Standard professional sweep | 60-90 minutes | $150-$380 | Region, access, appliance |
| Level 2 camera inspection | 1-2 hours | $200-$460 | Flue length and reporting |
| Heavy-glaze removal | 2-4 hours | $250-$680 additional | Deposit hardness, equipment |
| Exterior masonry cleaning | 2-6 hours | $150-$600 | Access, staining, repairs |
These are typical planning ranges, not guaranteed quotes. Local labor rates, roof access, chimney height, travel distance, scaffolding, and required repairs can change the total.
Common Mistakes and How to Fix Them
Vacuuming warm ash
Failure: A vacuum overheats or ignites hidden embers.
Fix: Wait at least 24 hours, test with a metal tool, and use an ash vacuum rated for the material.
Applying cleaner to dry brick
Failure: Dry masonry absorbs dirty solution and develops darker blotches.
Fix: Pre-wet the brick, test a small area, and rinse without flooding the chimney.
Forcing a brush through glaze
Failure: Pressure cracks a clay liner or loosens deteriorated mortar.
Fix: Stop, document the deposit, and arrange professional assessment.
Cleaning only the firebox
Failure: Visible brick looks better while flammable flue deposits remain.
Fix: Treat masonry washing and internal sweeping as separate tasks.
Sealing recurring efflorescence
Failure: A coating hides symptoms while moisture continues entering.
Fix: Inspect the crown, cap, flashing, joints, and brick before selecting a breathable repair system.
Burning immediately after washing
Failure: Damp masonry experiences rapid heating, odor, staining, or freeze damage.
Fix: Allow the firebox and surrounding masonry to dry thoroughly, often at least 24-48 hours depending on weather and water volume.
Frequently Asked Questions
Can I clean a chimney from the bottom up?
Yes, bottom-up cleaning can work when roof access is unsafe and the brush system reaches the full flue. Seal the fireplace carefully, use compatible rods and a correctly sized brush, and stop if the tool binds or encounters glazed deposits. Bottom-up cleaning does not remove the need for inspection.
What is the best brush for a brick chimney?
The best brush matches the liner, not merely the chimney’s exterior brick size. Polypropylene or nylon brushes suit many clay-tile flues, while specialized tools may be required for stainless-steel liners. Measure the flue and follow the liner manufacturer’s instructions before selecting brush diameter or material.
Does chimney-cleaning powder replace sweeping?
No. Powder or liquid creosote treatments may alter some deposits, but they do not remove ash, nests, loose tile, or all combustible residue. Physical sweeping and inspection remain necessary when buildup is present or the chimney has been used for wood burning.
How do I know whether black chimney residue is soot or creosote?
Dry powder that wipes away easily is usually soot or Stage 1 deposit. Crunchy flakes suggest more advanced creosote, while a shiny, hard, tar-like surface indicates Stage 3 glaze. Appearance alone cannot confirm safety, especially when deposits are thick or the liner is hidden.
Should I clean chimney brick with vinegar?
Vinegar is not the default choice for chimney brick because its acidity can affect mortar and some masonry finishes. Start with clean water and a mild detergent on a test area, then use a labeled masonry product when heavier staining requires it. Never mix vinegar with bleach or other cleaners.
What should I do after a chimney fire?
Stop using the appliance and arrange a professional inspection before relighting it. A chimney fire can crack clay tiles, distort metal liners, damage the smoke chamber, and ignite concealed framing even when exterior damage is not visible. A camera inspection is often appropriate after a suspected chimney fire.
The Bottom Line
To clean a brick chimney safely, first identify whether the job involves flue sweeping, firebox washing, exterior masonry, or all three. Protect the room, verify that the appliance is cold, use a liner-matched brush, remove debris with an ash-rated vacuum, and pre-wet brick before light detergent cleaning. Do not force tools through glazed creosote or work on an unsafe roof. For a safe DIY project, loose deposits and light soot are the practical limit; damaged masonry, unknown flues, heavy glaze, and chimney-fire history require professional inspection.