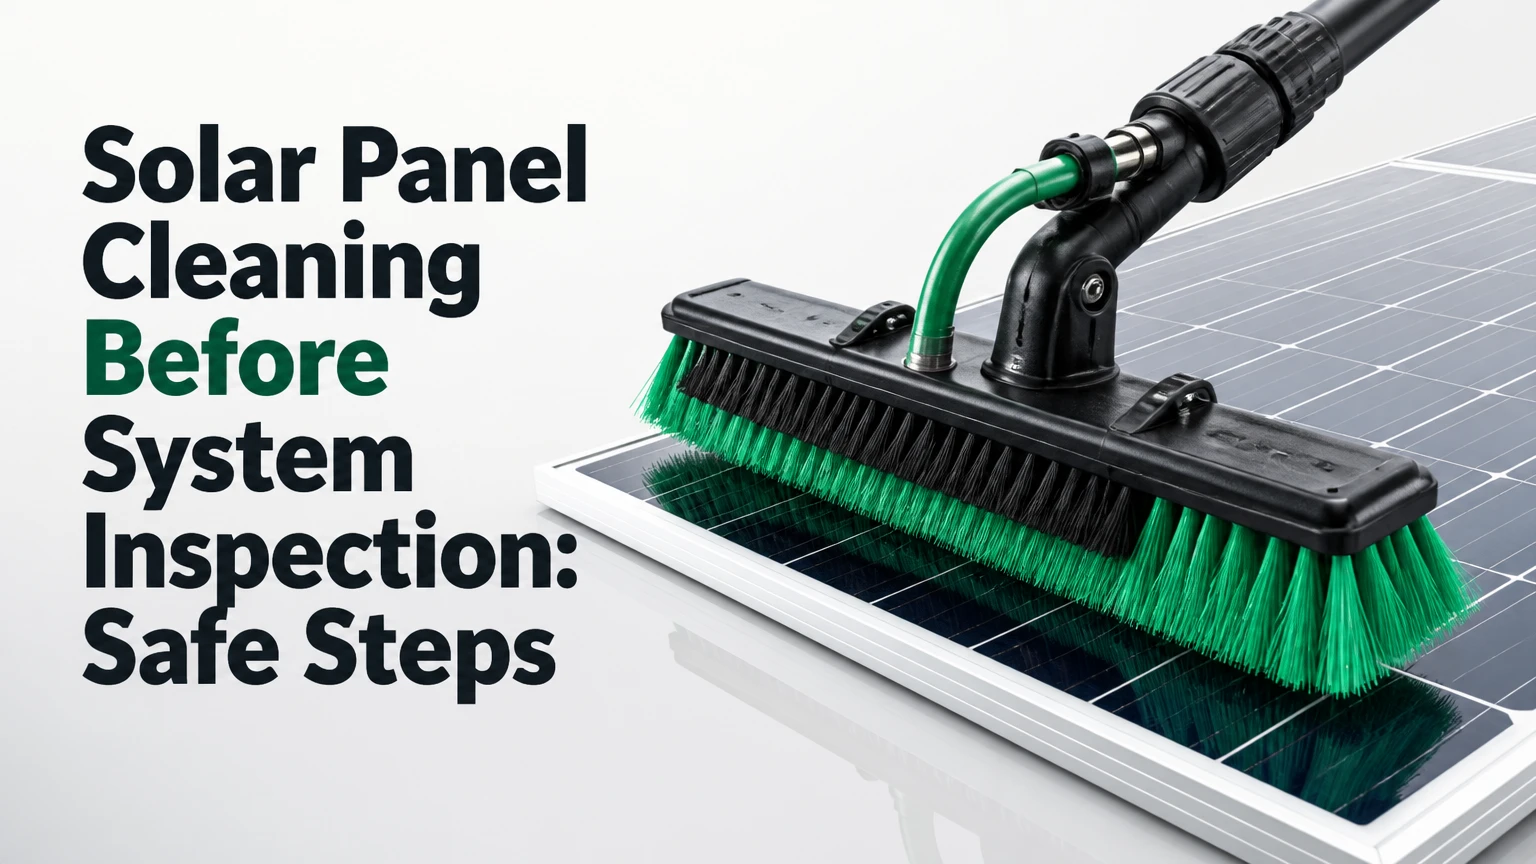
Solar panel cleaning before system inspection removes surface soiling that can obscure glass damage, distort infrared images, and reduce measured electrical output. Clean modules give an inspector a more defensible visual, thermal, and performance baseline, provided the array is cleaned safely, allowed to dry, and tested under suitable irradiance.
Key Facts at a Glance
Clean photovoltaic modules 1-2 days before a scheduled inspection when weather and access allow.
Deionized or reverse-osmosis water reduces mineral spotting, but low-TDS water does not remove electrical or fall hazards.
Disconnecting an inverter or isolator does not eliminate daylight DC voltage from illuminated modules.
Never walk on modules, use abrasive pads, or pressure-wash photovoltaic glass and seals.
Thermal imaging requires dry modules, stable sunlight, adequate irradiance, and a meaningful temperature difference.
Typical residential cleaning costs range from $150-$350, while a 10-30-module array commonly takes 1-2.5 hours.
Why Clean Panels Before a System Inspection?
Solar panel cleaning before system inspection matters because dust, pollen, ash, salt, bird droppings, and mineral scale can hide defects and alter measurements. Cleaning improves the inspector’s view of the glass, frame, junction-box area, and mounting hardware, but cleaning alone cannot diagnose a failed cell, inverter, connector, or cable.
Surface dirt reduces irradiance reaching the cells and can produce uneven shading. A bird dropping over a small cell group may create a localized hot area, while a uniform dust layer can lower current across a string. The measured result therefore combines equipment condition with temporary soiling unless the array is cleaned or the loss is independently quantified.
The National Renewable Energy Laboratory describes soiling as a site-specific performance loss affected by rainfall, particle deposition, tilt, and surrounding land use. No universal “cleaning gain” applies to every system. A recently washed suburban array may gain little, while an agricultural installation exposed to harvest dust can gain substantially.
What Can Cleaning Reveal?
A clean surface makes fractured glass, delamination, frame corrosion, backsheet damage visible to the inspector. It also removes organic material that can mask a thermal anomaly during an infrared survey.
Cleaning does not reveal defects hidden inside the laminate, and a visually perfect module may still have bypass-diode, insulation, connector, or cell-interconnect faults. Inspection instruments remain necessary.
How Does Soiling Affect Electrical and Thermal Tests?
Soiling affects photovoltaic measurements by reducing light transmission and creating nonuniform irradiance across individual modules. The result can be lower short-circuit current, altered maximum-power output, and misleading comparisons between strings, although open-circuit voltage is generally less sensitive to uniform dirt than current.
An inspector may measure voltage and current at the string or module level, compare inverter data with irradiance, or perform an I-V curve trace. Valid interpretation requires the test conditions, including irradiance, module temperature, orientation, and time, to be recorded. Cleaning removes one confounding variable, not every source of measurement uncertainty.
Infrared thermography has similar limits. A dry bird dropping can absorb sunlight and appear warmer than surrounding glass, while a wet surface can cool unevenly and create false contrast. Wind can also cool exposed areas and weaken thermal signatures. The inspector should document irradiance and module temperature rather than treating a colorful thermal image as a diagnosis by itself.
When Should Thermal Imaging Occur?
Thermal imaging should occur after the modules are dry and have returned to normal operating conditions, usually several hours after washing rather than immediately beside a wet brush. The inspector also needs sufficient sunlight and enough operating load to produce a detectable temperature difference.
A practical scheduling rule is to clean 1-2 days beforehand, then allow the inspection team to choose the imaging window. If testing must follow cleaning on the same day, the crew should confirm that the glass is dry, the inverter is operating, and irradiance is adequate.
Is the Electrical System Safe to Wash?
Washing a photovoltaic array is never risk-free because illuminated modules can generate DC voltage even when the inverter is turned off. AC and DC disconnects reduce equipment operation and backfeed risks, but they do not make module conductors harmless in daylight.
The Occupational Safety and Health Administration requires unverified circuits to be treated conservatively: “Deenergized parts that have not been locked/tagged… shall be treated as energized parts” (OSHA, 29 CFR 1910.333). A qualified person should determine the applicable isolation and lockout procedures for the installation.
Before any cleaning begins:
- Inspect from a safe position for broken glass, exposed conductors, loose conduit, damaged connectors, nesting, and standing water.
- Stop work if cracked modules, melted connectors, or exposed wiring are present.
- Keep water away from open junction boxes, damaged cable insulation, and inverter ventilation openings.
- Use fall protection and roof-access controls appropriate to the roof slope and local regulations.
- Have a qualified solar professional handle electrical isolation and defect assessment.
Turning off only the AC disconnect is insufficient. Turning off only the DC isolator is also insufficient for every installation, because array wiring can remain energized and some systems have multiple isolation points, rapid-shutdown equipment, batteries, or auxiliary sources.
How Do You Clean Panels Before Inspection?
A careful pre-inspection cleaning uses a cool, stable surface, loose-debris removal, low-abrasion agitation, controlled rinsing, and a dry-surface check. A 10-30-panel residential array typically takes 1-2.5 hours, excluding difficult roof access, heavily bonded deposits, or repairs.
Before You Start
| Item | Typical requirement | Decision point |
|---|---|---|
| Crew time | 1-2.5 hours for 10-30 panels | Add time for steep roofs or heavy deposits |
| Water | 10-20 gallons for a residential array | More water may be needed for bonded grime |
| Water quality | Preferably below 10 ppm TDS | Test output from the DI or RO system |
| Tools | Water-fed pole, soft nylon brush, hose, TDS meter | Avoid household abrasive equipment |
| Weather | Cool glass, low wind, no imminent dust or rain | Delay if drying will be uneven |
| Documentation | Before photos, after photos, water reading | Give records to the inspector |
Step 1: Check the Array Before Applying Water
Look for cracked or shattered glass, loose frames, exposed wires, damaged roof attachments, and debris under the modules. Photograph defects before anyone touches the array.
Do not wet a visibly damaged module. Water can enter compromised electrical components, and cleaning may alter evidence needed for a warranty or insurance claim. Ask the inspector or service provider whether the defect should be documented first.
Success checkpoint: The array has no unassessed damage that makes wet cleaning unsafe.
Common mistake: Treating a broken module as a dirty module and scrubbing it.
Step 2: Establish Electrical and Roof Safety
The property owner should confirm who controls the inverter, battery, rapid-shutdown system, and disconnects. A qualified worker should perform any required shutdown or lockout procedure while recognizing that daylight DC voltage may remain.
Do not climb onto a wet roof. Keep hoses routed away from walking paths, use stable access equipment, and avoid placing poles or ladders against modules.
Success checkpoint: The responsible electrical worker has identified all energy sources and the cleaning crew has a controlled work area.
Common mistake: Assuming a dark inverter display means the entire array is deenergized.
Step 3: Choose a Cool Cleaning Window
Clean during a cool morning, late afternoon, or overcast period when the glass is not intensely hot. The correct criterion is the module temperature and the manufacturer’s instructions, not a universal 8:00 a.m. deadline.
Cold water on very hot glass can increase thermal-stress risk, but a fixed maximum temperature difference, such as 20°C, is not a universal requirement for every module. Product construction, water temperature, wind, and manufacturer guidance matter.
Success checkpoint: The glass is cool enough that water will not flash-dry across the surface.
Common mistake: Washing hot modules at midday, then blaming mineral spots on the brush.
Step 4: Remove Loose Debris Dry
Use a soft leaf blower or a nonmetallic tool to clear leaves, twigs, seed pods, and loose dust. Work from a safe location and prevent debris from entering roof drains or collecting beneath the array.
Dry removal reduces the amount of grit dragged across the glass during brushing. Do not use a metal rake, scraper, or stiff broom.
Success checkpoint: Loose debris is off the modules, racking, and drainage paths.
Common mistake: Brushing dry sand across the glass with pressure.
Step 5: Wash With Soft Agitation
Use a water-fed pole with a solar-compatible, soft nylon or microfiber brush. Start at the upper edge and work downward with light passes, allowing water to carry loosened soil rather than grinding it into the coating.
Pure or deionized water often works without detergent. If sap, soot, or old residue requires a cleaning agent, use only a product approved for photovoltaic glass by the module manufacturer or cleaning-equipment supplier, and follow its dilution instructions.
Never use household window spray, laundry detergent, abrasive powder, green pads, or untreated stiff bristles. Anti-reflective coatings and glass surfaces can be permanently scratched even when damage is difficult to see.
Success checkpoint: Deposits lift without visible dragging, scratching, or detergent foam.
Common mistake: Applying more pressure when soaking and repeated passes would be safer.
Step 6: Rinse With Low-Pressure Water
Rinse until suspended dirt and cleaner residue are gone. A water-fed brush system usually supplies low pressure, while a garden hose with a gentle flow can work from a safe position.
Do not use a pressure washer. High-pressure water can damage seals, connectors, backsheets, labels, and roof interfaces, although the exact pressure at which damage occurs depends on the equipment and distance. A universal “30-40 psi maximum” should not replace manufacturer instructions and safe low-pressure practice.
Success checkpoint: No foam, grit, or visible film remains as water sheets off the glass.
Common mistake: Stopping after the first rinse because the modules look clean while still wet.
Step 7: Let the Array Dry and Check the Finish
Allow the modules to dry naturally, then inspect them from several angles. Mineral rings, detergent haze, and remaining bird-dropping residue are easier to see when the glass is dry and viewed against reflected light.
Record the date, weather, water source, measured TDS, cleaning products, photographs, and any modules excluded from cleaning. Those records help the inspector distinguish pre-existing defects from cleaning-related concerns.
Success checkpoint: Dry glass has no obvious haze, spots, streaks, or unremoved deposits.
Common mistake: Scheduling an inspection immediately while water still covers thermal and visual evidence.
Which Cleaning Method Fits the Inspection?
Water-fed manual cleaning is usually the best choice for residential and small commercial arrays because it offers precise control and keeps workers off the modules. Rotating brushes, robots, and dry systems become more practical when array size, roof design, water scarcity, or heavy soiling changes the risk calculation.
| Method | Suitable scale | Typical equipment | Main limitation |
|---|---|---|---|
| Manual water-fed pole | 10-500 modules | Carbon-fiber pole, soft brush, DI or RO cart | Labor increases with array size |
| Rotating brush | 100-10,000 modules | Battery or hydraulic roller, soft bristles | Poor settings can scratch coatings |
| Robotic cleaner | Large flat-roof arrays | Tracked robot, microfiber or rubber roller | Gaps and level changes require repositioning |
| Dry cleaning | Loose desert dust | Antistatic brush or air system | Poor for mud, salt crust, and bonded droppings |
Is Pure Water Better Than Tap Water?
Low-mineral water is usually better for the final rinse because it reduces calcium and magnesium spotting. A TDS reading below 10 ppm is a practical cleaning target, but the correct threshold depends on local water chemistry, glass temperature, drying speed, and the equipment manufacturer.
Tap water is not automatically harmful, yet hard water that dries on the glass can leave scale. A TDS meter should be checked at the pole outlet, not only at the source tank, because exhausted DI resin can pass minerals after the tank reading appears acceptable.
| Water condition | Typical TDS reading | Likely result | Recommended action |
|---|---|---|---|
| Fresh DI output | 0-10 ppm | Low spotting risk | Suitable for final rinse |
| Moderately mineralized water | 10-50 ppm | Possible light residue | Test a small area first |
| Hard tap water | 50-300+ ppm | Scale and drying marks likely | Use RO, DI, or softened water |
| Exhausted filtration | Rising above system target | Spots appear quickly | Replace resin or service filters |
Water quality does not make a dangerous roof safe. It only addresses mineral residue.
What Does Pre-Inspection Cleaning Cost?
Typical residential pre-inspection cleaning costs $150-$350 for 10-30 modules and takes 1-2.5 hours. Commercial pricing often falls near $3-$6 per module for 100-500 modules, while utility-scale work may cost approximately $1-$2 per module before difficult access, water logistics, travel, and specialized reporting.
| System type | Module count or size | Typical price | Typical duration |
|---|---|---|---|
| Residential roof | 10-30 modules | $150-$350 | 1-2.5 hours |
| Small commercial | 100-500 modules | $3-$6 per module | 4-8 hours |
| Utility array | 5,000+ modules | $1-$2 per module | Several days to weeks |
| Difficult access system | 20-40 modules | $300-$700 | 2-5 hours |
These figures are typical planning ranges, not guaranteed market rates. Steep roofs, batteries, fragile roof coverings, heavy bird waste, wildfire ash, travel distance, and required photo reports can increase the quote.
Request an itemized scope that identifies water treatment, roof access, electrical coordination, excluded modules, and documentation. A “clean panel” certificate has little value if it does not identify the date, array, method, and observed defects.
How Should the Cleaning Be Coordinated With Inspection?
Schedule routine visual and warranty inspections 1-2 days after cleaning when possible. That interval allows the array to dry, permits a second visual check, and reduces the chance that overnight dust or dew will create streaks before the inspector arrives.
The inspection provider should decide when to perform electrical and thermal tests. A same-day test may be reasonable after complete drying and thermal stabilization, but an inspector may prefer a later period with stronger irradiance or more representative operating conditions.
What Records Should You Give the Inspector?
Provide a compact handoff package:
- Before-and-after photographs with module locations.
- Cleaning date, start time, and weather conditions.
- Water type, outlet TDS reading, and filtration status.
- Cleaning chemicals, dilution, and manufacturer approval if applicable.
- Modules not cleaned because of cracks, access, or electrical damage.
- Inverter alarms, production records, and recent utility or monitoring data.
- Names of the cleaning contractor and qualified electrical worker.
For a warranty dispute, preserve the original condition before cleaning whenever safe. Cleaning can remove the physical evidence of bird impact, cemented deposits, or contamination that a manufacturer may want to inspect.
What Are the Most Common Failure Modes?
The most common pre-inspection cleaning failures are mineral spotting, hidden damage, false thermal interpretation, coating abrasion, and unsafe electrical assumptions. Each failure has a different remedy, so repeating the same washing technique rarely fixes the underlying problem.
| Failure mode | Likely cause | Immediate response | Inspection consequence |
|---|---|---|---|
| White water spots | Hard water or exhausted DI resin | Re-rinse with verified low-TDS water | Optical haze may remain |
| Sticky haze | Sap, pollen, or detergent film | Use approved cleaner and dwell time | Thermal contrast may be uneven |
| Scratches | Abrasive pad or gritty brush | Stop; photograph damage | Possible warranty concern |
| Hot-looking patch | Bird dropping or wet residue | Clean and dry before imaging | False hotspot risk |
| Low output after wash | Inverter, irradiance, or wiring issue | Compare strings and monitoring data | Cleaning did not cause the fault |
| Water intrusion | Damaged seal, connector, or junction box | Stop and isolate affected equipment | Requires electrical assessment |
How Do You Remove Bird Droppings and Sap?
Soak bonded organic deposits with pure water for several minutes, then lift them with a soft brush or a manufacturer-approved plastic tool. Never attack hardened material with a razor, metal scraper, or abrasive pad because a small scratch can permanently change light transmission.
If sap or lichen remains after one controlled attempt, document the location and refer it to a professional. Excessive scrubbing can create a greater inspection problem than the original deposit.
What If the Array Has Cracked Glass?
Do not clean a cracked module as though it were normal glass. Photograph the crack, keep personnel away from the affected area, and ask a qualified solar contractor or the inspector for instructions.
A cracked module can present shock, moisture-ingress, and fire risks. The correct response may be module replacement, temporary isolation, or warranty documentation rather than washing.
Should You Clean the Array Yourself?
DIY cleaning is reasonable only for a ground-accessible array with no visible damage, no steep-roof exposure, and a cleaning method that avoids module contact and electrical work. Homeowners should hire an insured solar-cleaning contractor for steep roofs, multi-story buildings, batteries, damaged modules, or inspection-related warranty disputes.
The most overlooked hazard is not the glass. It is the combination of fall exposure, energized DC conductors, wet equipment, and uncertain roof loading. A professional quote should identify insurance, fall-protection controls, water treatment, and the boundary between cleaning and electrical service.
Cleaning also is not a substitute for inspection. Washing cannot test insulation resistance, verify grounding, locate intermittent connectors, evaluate degradation, or determine whether an inverter fault caused lost production.
Situational Guidance for Different Environments
Agricultural arrays often need pre-rinse soaking because fine dust and organic residue form a cemented film. Urban arrays may collect soot and pollen, while coastal systems can develop salt deposits that require adequate rinsing and attention to corrosion on frames and fasteners.
| Environment | Typical contamination | Best preparation | Extra inspection focus |
|---|---|---|---|
| Agricultural | Soil dust, fertilizer, pollen | Soak, soft agitation, low-TDS rinse | Hotspots and frame corrosion |
| Coastal | Salt aerosol, bird waste | Frequent low-mineral rinsing | Corrosion, connectors, fasteners |
| Urban or traffic-adjacent | Soot, fine particulate | DI water and careful final rinse | Haze, uneven soiling, air pollution residue |
| Desert | Loose dust, sand, cemented deposits | Dry removal plus controlled wet cleaning | Abrasion, seals, high-temperature effects |
| Wildfire-exposed | Ash, oily smoke residue | Professional assessment before washing | Backsheet, wiring, inverter contamination |
| Snow-prone | Meltwater marks, debris | Clean after safe snow removal | Load, drainage, frame damage |
Wildfire ash deserves special caution because ash can be electrically conductive or chemically aggressive when wet. A qualified contractor should assess the array before a homeowner introduces water.
The Bottom Line
Solar panel cleaning before system inspection improves the reliability of visual checks, infrared thermography, and performance measurements by removing a controllable source of error. Use a cool, low-pressure, low-abrasion process, verify water quality, document the work, and treat the array as electrically energized in daylight.
The strongest schedule is usually cleaning 1-2 days before inspection, followed by testing on dry modules under suitable operating conditions. The exact cleaning method should match roof access, contamination, system scale, manufacturer instructions, and whether the inspection supports a warranty or insurance claim.
Frequently Asked Questions
Can rain replace professional panel cleaning before an inspection?
Rain can remove loose dust, but it rarely removes bird droppings, salt crust, sap, soot film, or mineral scale. Rain also leaves the timing and cleanliness uncertain, especially beneath module frames. If inspection results matter for a warranty, sale, or performance dispute, document the array and use a controlled cleaning method rather than relying on an unverified rainfall event.
How much output can cleaning restore?
Cleaning may produce a small or substantial increase depending on accumulated soiling, rainfall, tilt, and local exposure. A typical residential array might show a few percent improvement after ordinary dust, while heavily contaminated agricultural or industrial arrays can show much larger changes. Only a controlled comparison with recorded irradiance and temperature can quantify the actual gain.
Should an inspector clean the panels during the inspection?
An inspector should generally inspect the pre-clean condition before cleaning if defects or warranty evidence matter. Cleaning during the appointment can delay thermal stabilization and make before-and-after comparisons difficult. A separate cleaning crew, documented scope, and agreed inspection sequence produce clearer evidence and reduce conflicts about whether cleaning changed the findings.
Can solar panel cleaner or dish soap be used?
Dish soap should not be used unless the module manufacturer specifically approves it. Household detergents can leave surfactant residue, attract dust, or complicate thermal imaging. Use pure water for ordinary deposits, and select a photovoltaic-approved cleaner only when bonded contamination cannot be removed safely with soaking and soft agitation.
How soon can panels be tested after washing?
Testing can begin after the modules, connectors, and relevant equipment are dry, but thermal imaging may require additional stabilization under operating sunlight. A practical same-day interval is often several hours, while cleaning 1-2 days before the inspection gives the inspector more scheduling flexibility. The inspection provider should set the final test timing.
Does turning off the inverter make washing safe?
Turning off the inverter does not make illuminated photovoltaic modules electrically dead. Module and array conductors can retain DC voltage in daylight, and disconnect configurations differ among systems. Electrical isolation must follow the equipment design and applicable lockout procedures, with a qualified worker identifying energized parts before wet cleaning begins.


