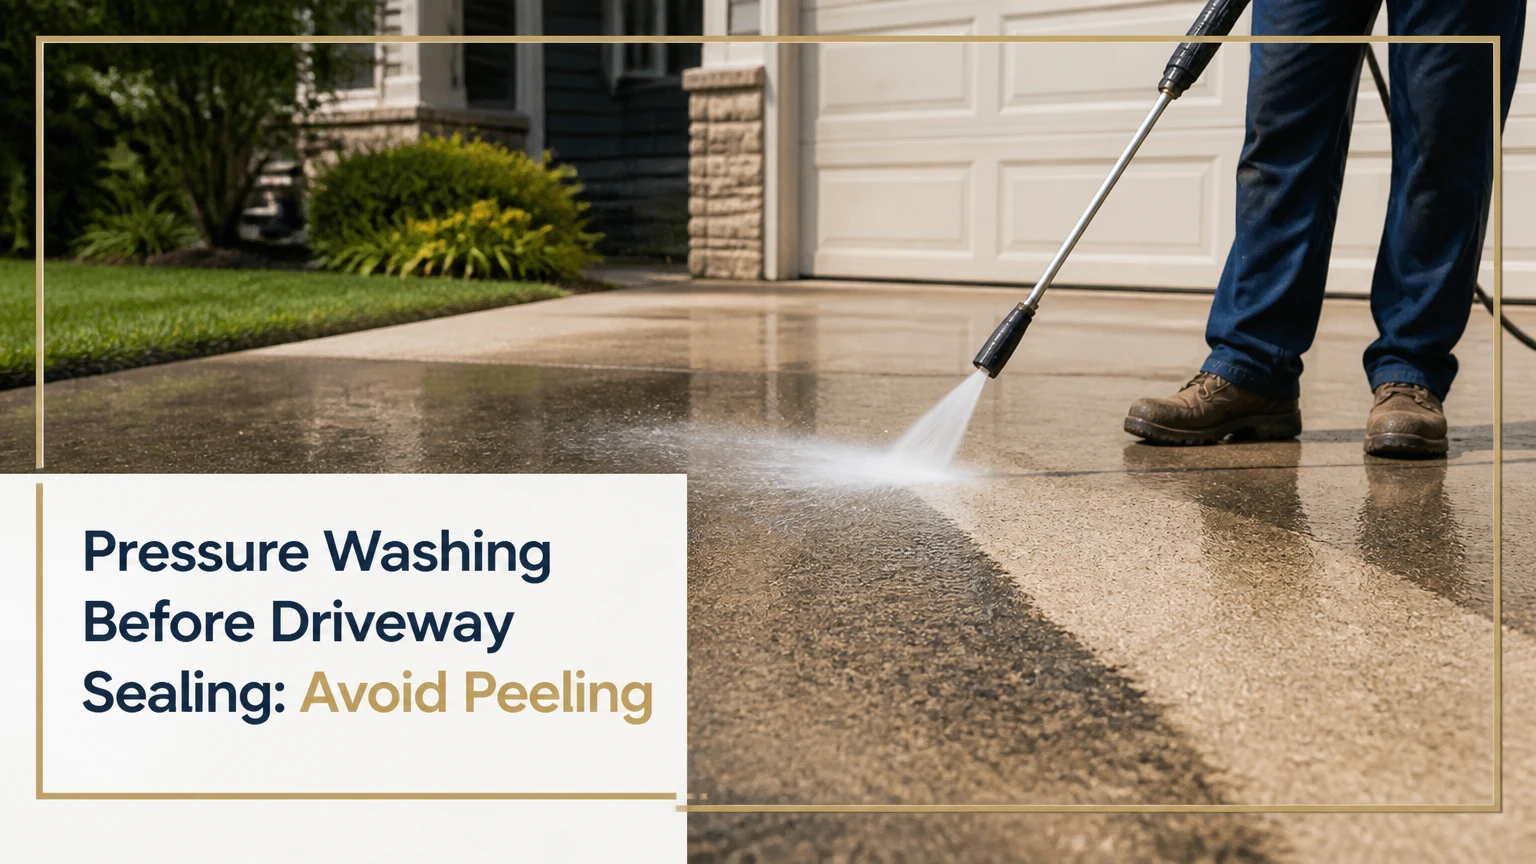
Pressure washing before driveway sealing removes dirt, oil, biological growth, and loose material so the sealer can bond to the actual concrete, asphalt, or paver surface. Clean the driveway, rinse away detergent and residue, then let the substrate dry completely. The most important success factors are correct pressure, complete stain removal, and moisture-free pavement.
Key Facts at a Glance
- Driveway sealer should be applied only to a clean, sound, and sufficiently dry surface.
- Concrete commonly tolerates more cleaning pressure than asphalt, but nozzle distance and technique matter as much as the machine rating.
- A typical residential driveway needs 24-48 hours of drying after washing, with longer periods in shade, humidity, or cool weather.
- Oil stains require a degreaser or poultice because plain cold water does not dissolve hydrocarbons effectively.
- Repair cracks, spalled concrete, loose asphalt, and unstable paver joints before applying sealer.
- A surface cleaner usually produces more uniform results than a pressure-washer wand held by hand.
Why Wash Before Sealing?
Pressure washing before driveway sealing removes contaminants that interfere with mechanical grip and chemical adhesion. Oil, tire residue, algae, clay, old detergent, and loose aggregate can form a weak boundary layer between the pavement and the coating. The sealer may look satisfactory at first, then peel or flake when water, tires, and temperature changes stress that contaminated bond.
Driveway sealing is a coating operation, not a substitute for cleaning. Acrylic, asphalt-emulsion, coal-tar-replacement, silicate, and penetrating sealers each have different chemistry, yet all require the surface condition stated on their product label. A sealer cannot reliably consolidate loose asphalt or bridge active cracks simply because a pressure washer made the surface appear darker and cleaner.
Water also reveals hidden problems. Oil can migrate back to the surface after washing, while concrete may expose weak paste, scaling, or previous coating failure. That inspection is valuable because applying sealer over damaged material hides the defect temporarily and makes later repair more difficult.
What Does a Clean Surface Look Like?
A properly prepared driveway has no loose grit, visible mud film, detergent residue, greasy sheen, or active organic growth. Concrete normally has a consistent appearance, although old stains may leave discoloration after the contaminant has been removed. Asphalt should retain its aggregate and should not feel sandy because the washing process loosened the binder.
A practical field check is the water test. Sprinkle clean water across several areas rather than examining only the easiest section. Water should spread and darken the substrate instead of forming persistent oily beads. Beading on an otherwise sound sealed surface can indicate remaining oil, wax, or old coating, not merely insufficient drying.
Before You Start
Prepare the driveway, surrounding property, equipment, and sealer instructions before introducing water. The typical DIY project requires 3-6 hours of active work, $40-$130 in rented equipment and chemicals, and a drying window of at least 24-48 hours under favorable weather.
| Item | Typical requirement | Practical specification |
|---|---|---|
| Pressure washer | 1 machine | 2.0-4.0 GPM, adjustable or controlled pressure |
| Surface cleaner | 1 attachment | 12-16 inches for most residential driveways |
| Degreaser | 1-2 quarts | Concentrated driveway-safe formula |
| Stiff brush | 1 tool | Nylon for most surfaces, softer for fragile asphalt |
| Safety equipment | 3 pieces | Eye protection, gloves, closed-toe boots |
| Drying period | 24-72 hours | Longer in shade, humidity, or cool conditions |
Read the sealer label before washing. Some products require a specific cleaner, prohibit bleach, limit surface moisture, or specify a longer cure period. A product manufacturer’s instructions control when they differ from general practice.
Protect garage thresholds, door seals, low wall vents, outdoor outlets, landscape lighting, and nearby vehicles. Disconnect or cover electrical equipment according to the manufacturer’s safety instructions. Never direct water into a garage, basement stairwell, foundation crack, or wall penetration.
Step 1: Inspect and Clear the Driveway
Remove vehicles, bins, toys, furniture, hoses, planters, and loose stones from the work area. Sweep the complete driveway with a stiff broom, then inspect cracks, potholes, crumbling edges, exposed aggregate, oil spots, rust, algae, and any existing coating.
Photograph damaged areas before cleaning. Washing can remove loose material and make a defect look larger, but it does not cause sound pavement to fail when the pressure and nozzle are appropriate. Mark locations that need patching or special treatment.
Should You Repair Cracks Before Washing?
Repair planning comes before sealing, but many crack repairs occur after washing and drying. Cleaning first exposes the true width and depth of cracks, while sealing before repairs traps dust and prevents patch materials from bonding.
Use this sequence:
- Sweep and inspect.
- Pressure wash and remove contaminants.
- Let the surface dry.
- Repair cracks or spalls with compatible products.
- Allow repairs to cure according to their labels.
- Apply sealer to a clean, dry surface.
Do not seal active structural cracks, heaved slabs, severely spalled concrete, or asphalt with widespread raveling. Those conditions require repair or resurfacing rather than a cosmetic coating.
Step 2: Pre-Treat Oil, Organic Growth, and Rust
Apply a driveway-compatible degreaser to oil and fuel stains before pressure washing. Work the product into the stain with a stiff brush, allow the label-specified dwell time, and prevent the chemical from drying. Typical dwell times range from 5-15 minutes, although concentrated products may specify a different period.
Cold water alone can remove loose oil film but usually cannot dissolve oil absorbed into concrete pores. Hot-water cleaning improves grease removal, while a poultice product may be more effective for an old, deep stain that repeatedly reappears after washing.
Use separate treatments for separate contaminants. A degreaser targets hydrocarbons, an appropriate biocide targets algae and mildew, and an acid-based cleaner may target mineral or rust deposits. Never mix bleach with acids, ammonia, or other cleaners. Rinse chemical residue thoroughly.
The U.S. Environmental Protection Agency’s stormwater guidance commonly uses the phrase “Only rain down the drain.” That principle matters here: oily or chemical-laden wash water should not be deliberately sent into a storm drain or waterway. Check local sewer, stormwater, and wastewater rules, and use containment or recovery when required.
Step 3: Select Pressure, Flow, and Nozzle
Choose the lowest effective pressure, not the highest machine rating. Pressure at the pump does not equal pressure at the surface because nozzle size, distance, angle, hose length, and water flow change the impact delivered to the pavement.
| Surface or condition | Starting approach | Nozzle or tool | Main risk |
|---|---|---|---|
| Sound concrete | 2,000-3,000 PSI at the machine | 25-degree nozzle or surface cleaner | Etching and striping |
| Decorative or weak concrete | 1,000-2,000 PSI | 40-degree nozzle | Surface damage from close range |
| Sound asphalt | 1,500-2,000 PSI maximum starting range | 40-degree nozzle or surface cleaner | Aggregate loss and raveling |
| Aged, soft asphalt | 1,000-1,500 PSI | 40-degree nozzle, wide passes | Binder and stone displacement |
| Paver surface | 1,000-2,000 PSI | 25-40-degree nozzle | Joint-sand removal |
| Detergent application | Low pressure | Black soap nozzle | Chemical overspray |
These figures are starting ranges, not universal permissions. A manufacturer’s rating of 4,000 PSI does not mean a concrete driveway needs 4,000 PSI, and asphalt condition varies widely with age, binder quality, repairs, and weather exposure.
GPM controls rinsing productivity, while PSI controls impact intensity. Cleaning units, calculated as PSI multiplied by GPM, can help compare machines, but the calculation does not describe nozzle impact or operator technique. A slower machine used evenly can outperform a more powerful machine used too close.
Use a 25-degree nozzle for many sound concrete cleaning tasks and a 40-degree nozzle when the substrate is delicate or the operator is inexperienced. Avoid the red 0-degree nozzle on driveway pavement. A 15-degree nozzle can damage concrete and should not be a default asphalt tool.
Step 4: Apply Detergent and Pressure Wash
Apply the cleaning solution with a low-pressure soap nozzle, beginning at the low end when runoff control requires it and keeping the surface wet. Follow the detergent label for dilution and dwell time, commonly 5-10 minutes. Do not let the solution dry on concrete, asphalt, glass, painted walls, plants, or metal fixtures.
For the main wash, use a surface cleaner where possible. Keep the housing moving at a steady walking pace, overlap each pass by roughly 10-20 percent, and make a second perpendicular pass on visibly uneven areas. A wand can work, but the operator must keep the tip moving at a consistent distance and angle.
Keep a wand approximately 12-18 inches from the surface as a starting point, then adjust after testing a small inconspicuous area. Closer is not automatically better. Stationary spray can etch concrete, cut asphalt binder, remove joint sand, and create visible stripes.
Wash from the highest practical point toward the drainage direction when runoff can be contained and managed. Do not push polluted water onto neighboring property, garden beds, public sidewalks, or storm drains.
What Is the Best Pressure-Washing Method?
Chemical pretreatment followed by controlled pressure washing is usually the most effective method for a driveway that has oil, organic growth, and embedded soil. Cold water is adequate for ordinary dirt, while hot water offers a measurable advantage when grease is the dominant contaminant.
| Method | Best use | Typical equipment | Limitation |
|---|---|---|---|
| Cold-water washing | Dirt, mud, light algae | 2.0-4.0 GPM washer | Weak on baked-on oil |
| Hot-water washing | Grease, fuel, restaurant or fleet areas | Commercial burner unit | Higher rental and safety demands |
| Detergent plus cold water | Residential mixed soils | Washer, degreaser, brush | Requires dwell time and scrubbing |
| Manual scrub and rinse | Small spot treatment | Brush, bucket, hose | Slow across large areas |
A hot-water machine does not remove the need for correct pressure. Heat can soften asphalt-related materials or damage adjacent finishes when used carelessly. Professional operators also need a plan for recovering contaminated wastewater.
Step 5: Rinse and Manage Runoff
Rinse until no foam, cleaner residue, loose grit, or visible dirty film remains. Pay particular attention to expansion joints, driveway edges, garage thresholds, low spots, and areas beneath parked vehicles, where detergent and oil commonly collect.
Use absorbent materials, temporary berms, wet vacuums, drain covers approved for the situation, or other containment methods when local rules or site conditions require them. Do not use a storm drain as a disposal route for oil-containing water. A professional contractor should explain how wastewater will be handled.
Plants can be protected by wetting foliage before and after compatible cleaning products are used, but pre-wetting does not make every chemical safe. Keep bleach, degreaser, and acidic products away from fish ponds, edible gardens, sensitive stone, aluminum, and painted surfaces unless the product label specifically permits the application.
Step 6: Dry, Test, and Approve the Surface
Allow the driveway to dry at least 24-48 hours before sealing in warm, sunny, low-humidity weather. Extend the period to 48-72 hours when the pavement is shaded, temperatures are cool, humidity is high, the slab is thick, or rain interrupted the drying cycle.
Do not rely on a dry-looking surface. Concrete retains moisture below the visible face, and asphalt can hold water around aggregate and in depressions. Place a clear plastic sheet over a representative area, tape the edges, and inspect after several hours. Condensation or a darkened patch indicates remaining moisture.
Follow the sealer manufacturer’s moisture test if one is provided. Some products specify a concrete moisture meter limit or a more formal plastic-sheet method. The label also controls acceptable air and pavement temperatures, rain forecasts, and cure time.
| Condition before sealing | Decision | Reason |
|---|---|---|
| Uniform color, no beads, no condensation | Proceed if label conditions are met | Surface is likely clean and dry |
| Water beads only on oily patches | Re-treat and rinse | Hydrocarbon residue remains |
| Plastic sheet shows condensation | Wait 12-24 hours and retest | Moisture is still escaping |
| Rain forecast within product cure window | Postpone | Water can cloud or wash away sealer |
| Loose aggregate or flaking paste | Repair first | Sealer cannot stabilize unsound material |
The pavement should look uniform enough for the coating’s intended appearance and should feel sound underfoot. A rough texture can be normal on unsealed concrete, but loose sand, chalking, or exposed aggregate requires further diagnosis.
Material-Specific Rules
Concrete
Concrete tolerates controlled cleaning better than asphalt, but high pressure can remove cement paste and expose aggregate. Decorative concrete, stamped concrete, acid-stained concrete, and old scaling slabs need wider spray patterns, lower pressure, and a test patch.
Do not acid-wash automatically. Acid can alter color, damage adjacent metals, and leave residue that interferes with sealer adhesion. Use a product specifically compatible with the concrete finish and neutralize or rinse according to its instructions.
Asphalt
Asphalt needs restraint because its aggregate is held by a bituminous binder that can be weakened or displaced. A 40-degree nozzle, wider working distance, moderate pressure, and a surface cleaner are safer starting choices than a concentrated jet.
New asphalt also needs time to cure before sealcoating. Many manufacturers recommend waiting roughly 3-6 months, while some paving conditions and product labels call for longer. The paving contractor and sealcoat manufacturer should control that decision because traffic, temperature, mix design, and climate affect curing.
Pavers
Pressure washing can remove joint sand from concrete or clay pavers. Clean with a wider fan, avoid directing the jet along joints, and expect to replace or stabilize joint material after the surface dries. Polymeric sand requires its own installation and moisture rules.
Sealing pavers immediately after washing can trap moisture beneath individual units. Check for efflorescence, unstable joints, and white mineral deposits before choosing a sealer.
How Much Time and Money Does Preparation Take?
A typical homeowner spends $40-$130 on a half-day rental, degreaser, brushes, and protective materials. Professional driveway washing commonly costs about $150-$400 for an ordinary residential property, with size, access, stain severity, wastewater controls, and regional labor rates causing substantial variation.
| Project type | Active labor | Typical direct cost | Drying requirement |
|---|---|---|---|
| Small concrete driveway, light soil | 2-3 hours | $40-$90 DIY | 24-48 hours |
| Large concrete driveway, oil stains | 3-6 hours | $70-$150 DIY | 48-72 hours |
| Asphalt driveway, moderate soil | 2-4 hours | $40-$120 DIY | 24-48 hours |
| Professional residential service | 1-2 hours onsite | $150-$400 | 24-72 hours |
Rental prices vary by region and may exclude delivery, fuel, surface-cleaner attachments, deposits, and wastewater handling. A low hourly rental price can become expensive if the machine has insufficient flow and forces repeated passes.
Common Mistakes and How to Fix Them
Washing Asphalt Like Concrete
A narrow nozzle held close to asphalt can dislodge aggregate and expose soft binder. Stop immediately if stones move, the surface becomes fuzzy, or dark binder streaks appear. Switch to a wider nozzle, increase distance, and use lighter passes.
Sealing Over Residual Oil
A driveway can look clean while oil remains in the pores. If water beads on a dark patch or the stain returns during drying, apply a compatible degreaser again, scrub, rinse, and wait for complete drying.
Creating Zebra Stripes
Striping results from inconsistent nozzle distance, overlapping errors, or a wand that is too close. A surface cleaner can reduce the problem; otherwise, make controlled overlapping passes across the entire section rather than spot-cleaning only the visible lines.
Trapping Moisture
Cloudy sealer, blushing, whitening, and early flaking can follow premature application. Delay sealing, improve drainage and air movement, and retest the pavement after the weather becomes warmer and drier.
Removing Joint Sand or Weak Concrete
High-impact washing can empty paver joints or expose aggregate in deteriorated concrete. Replace joint material only after the pavers are dry, and do not coat unsound concrete until the damaged layer has been repaired or removed.
Ignoring Sealer Compatibility
A new coating may fail because the old coating is incompatible, glossy, chalky, or loose. Perform a small adhesion test in an inconspicuous location, and remove unstable previous sealer rather than covering it.
Can You Skip Pressure Washing?
You can skip pressure washing only when the driveway is already clean, sound, free from oil and biological growth, and the sealer manufacturer accepts another preparation method. Sweeping, detergent scrubbing, and low-pressure rinsing may be sufficient for a lightly soiled surface that has no bonded contamination.
Pressure washing is not mandatory because of the machine itself. Thorough surface preparation is mandatory. On fragile asphalt, decorative concrete, or a small clean area, a stiff brush and controlled hose rinse can create less risk than aggressive equipment. On heavily soiled pavement, pressure washing saves labor and reaches contamination that manual methods may leave behind.
When Should You Hire a Professional?
Hire a professional when the driveway has extensive oil contamination, delicate decorative concrete, widespread asphalt raveling, large elevation changes, poor drainage, environmental runoff constraints, or a failed coating that needs removal. Commercial sites with fuel, hydraulic fluid, or vehicle maintenance exposure may need hot-water equipment and wastewater recovery.
Ask the contractor for the planned PSI range, nozzle or surface-cleaner method, chemical names, drying recommendation, repair sequence, and wastewater plan. A contractor who promises immediate sealing after washing without checking moisture, weather, or surface condition is accepting avoidable failure risk.
FAQ
Can I Pressure Wash and Seal on the Same Day?
Same-day sealing is usually unsafe unless the surface is small, weather is exceptionally warm and dry, and the sealer manufacturer approves the documented moisture condition. Most residential driveways need at least 24-48 hours after washing. Shade, humidity, cool temperatures, thick concrete, and recent rain commonly extend the wait to 48-72 hours.
Is Bleach Safe for Driveway Cleaning?
Diluted bleach can control some organic growth, but bleach is not an oil remover and may damage plants, metals, colored finishes, or nearby surfaces. Use only a product labeled for the substrate, prevent runoff, never mix bleach with acids or ammonia, and rinse thoroughly before sealing.
Can Rain Ruin a Freshly Washed Driveway?
Rain does not permanently ruin a washed driveway, but it resets the drying schedule and can redistribute soil or oil. After rain, inspect low spots and stains, sweep away new debris, allow the pavement to dry again, and follow the sealer label’s rain-free cure requirement.
Should I Use a Surface Cleaner on Asphalt?
A surface cleaner can be appropriate for sound asphalt when its pressure, nozzle size, and operating speed are controlled. It reduces wand striping, but it does not eliminate aggregate damage. Test a small area first and stop if stones loosen or the binder appears disturbed.
Why Is My Driveway Still Dark After Washing?
Dark areas can represent retained moisture, absorbed oil, old sealer, algae, or naturally different pavement composition. Wait for full drying, compare the area after 48-72 hours, and perform the water-beading test. Persistent oily beading requires additional treatment or a coating-compatibility assessment.
The Bottom Line
Pressure washing before driveway sealing is worthwhile when it removes the contamination that would block adhesion, but excessive pressure can damage the very surface being sealed. Use controlled settings matched to concrete, asphalt, or pavers; pretreat oil; manage runoff; repair unsound areas; and wait until the driveway passes a moisture check.
The correct sequence is clean, rinse, dry, inspect, repair, test, and seal. Following that sequence gives pressure washing before driveway sealing its real value: a sound, contaminant-free substrate that allows the selected coating to bond according to its manufacturer’s requirements.


