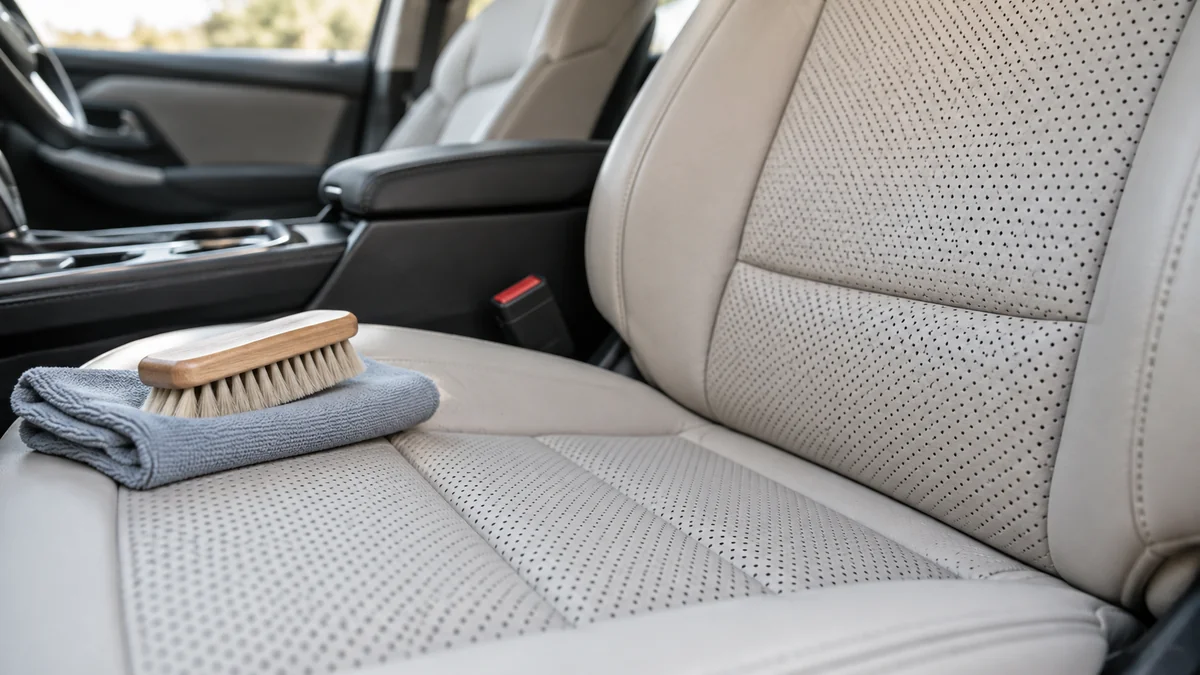
To clean car seats with holes, first determine whether the holes are factory perforations or accidental tears. Use dry extraction and a small amount of foaming cleaner for perforated leather or vinyl, but keep exposed foam in a torn seat dry. Work gently, remove moisture immediately, and avoid flooding areas that contain seat heaters, ventilation channels, or wiring.
Key Facts at a Glance
- Factory-perforated seats have repeated, uniform holes; accidental damage has irregular edges, frayed threads, or exposed foam.
- Never spray liquid directly onto perforated leather, vinyl, fabric, or a torn seat.
- A foam cleaner applied to a brush or towel controls moisture better than a liquid spray.
- Seat-mounted airbags, heating elements, occupancy sensors, and ventilation fans can sit beneath or beside the upholstery.
- Typical light cleaning takes 25-45 minutes; drying a damp seat can take 2-8 hours.
- A hole exposing foam should be cleaned around its perimeter, not saturated through the opening.
What Kind of Seat Hole Do You Have?
The correct cleaning method depends on whether the opening was designed into the upholstery. Factory perforations are usually evenly spaced in a grid or pattern, while accidental holes have uneven edges, broken stitching, stretched material, or visible cushion foam.
| Hole type | Typical appearance | Main cleaning risk | Correct moisture strategy |
|---|---|---|---|
| Factory perforated leather | 0.5-2 mm uniform holes in repeated rows | Cleaner enters ventilation or heater channels | Low-moisture foam on a brush |
| Factory perforated vinyl | Uniform round or narrow slots | Surface coating can become sticky | Barely damp microfiber |
| Torn fabric or mesh | Frayed fibers and irregular opening | Foam absorbs water and odor | Keep opening dry |
| Punctured leather | Split coating or visible backing | Tear spreads during scrubbing | Clean perimeter, then repair |
| Damaged Alcantara-style microfiber | Fuzzy pulled fibers or cut | Nap mats and stains permanently | Minimal moisture, soft brush |
How can you identify a factory perforation?
A factory perforation has consistent spacing, matching holes on the opposite seat, and no loose fibers. A damaged opening usually has a single irregular shape, raised edges, discoloration, or foam visible underneath. Check the passenger seat for a matching pattern, but do not assume every hole is decorative: some seat surfaces combine perforated and solid panels.
Seat construction varies by vehicle. Perforated leather may cover a foam cushion containing a heating pad, a ventilation manifold, or pressure sensors. An owner’s manual can identify seat ventilation and airbag locations, but it rarely provides a detailed upholstery-cleaning procedure.
What You Need Before Cleaning
The basic setup costs about $15-$45 for household-sized quantities and takes 5-10 minutes to arrange. Use separate towels for dirty and finished areas, because a saturated towel transfers loosened grime back into perforations.
| Item | Recommended specification | Typical quantity or cost |
|---|---|---|
| Vacuum | Upholstery or soft-brush attachment | 1 unit, $30-$150 |
| Microfiber towels | Short-pile, lint-free automotive towels | 4-6 towels, $1-$4 each |
| Detail brush | Soft horsehair or nylon bristles | 1 brush, $5-$15 |
| Cleaner | Automotive leather foam or low-moisture upholstery foam | 100-250 ml per vehicle interior |
| Compressed air | Short bursts at low to moderate pressure | Optional, $6-$15 can |
| Fan | Household floor or desk fan | 1 unit, $20-$60 |
| Painter’s tape | Cover sharp vacuum edges | 30-60 cm |
Before using any chemical, test it on a hidden area for color transfer, gloss change, or sticky residue. Avoid household bleach, ammonia, acetone, strong degreasers, abrasive melamine sponges, and oil-heavy conditioners.
How to Clean Perforated Leather or Vinyl Seats
Cleaning factory-perforated seats takes 25-45 minutes for two front seats and requires controlled moisture rather than deep soaking. The most important rule is to apply product to the brush or towel, not to the upholstery, because liquid sprayed onto the surface can drain through hundreds of openings.
Step 1: Power Down the Seat
Switch off the vehicle, remove the key or disable accessory power, and allow heated seats to cool completely. Do not disconnect seat wiring unless the vehicle manufacturer’s service instructions specify the procedure, because seat connectors may relate to airbags or occupant classification systems.
Success checkpoint: The seat is cool, dry, and no seat heater or ventilation function is operating.
Common mistake: Using heat to warm the leather before cleaning. Warm material may be more flexible, but powered heating can distribute liquid toward electrical components and encourages premature drying at the surface.
Step 2: Remove Dry Debris
Vacuum the seat with a soft brush attachment, moving across the perforations rather than pressing a hard nozzle into them. Hold the nozzle several millimeters above damaged areas. If the nozzle has a sharp plastic edge, cover that edge with painter’s tape.
Use compressed air only in short, shallow-angle bursts of about 1-2 seconds, directed across the surface. Vacuum immediately afterward. Blasting straight down at high pressure can push crumbs beneath the upholstery or loosen fragile perforation edges.
Success checkpoint: Loose sand, hair, and crumbs no longer move when you brush the surface lightly.
Common mistake: Using a metal pick. Metal can enlarge a hole, cut the coating, or leave a visible scratch.
Step 3: Choose and Prime the Cleaner
For coated leather, use an automotive leather cleaner with a foaming action and a product label compatible with finished leather. For vinyl, use a mild interior cleaner diluted exactly as its label directs. For fabric perforations, use a low-moisture upholstery foam.
Apply one or two small pumps to a brush or folded microfiber towel. The tool should feel damp or foamy, never wet enough to drip. Clean a section roughly 20 by 20 cm at a time.
| Cleaner method | Moisture level | Best use | Main limitation |
|---|---|---|---|
| Foam on horsehair brush | Low | Perforated finished leather | Requires thorough wiping |
| Foam on microfiber | Low | Vinyl and light grime | Less agitation in holes |
| Diluted cleaner on towel | Very low | Small fabric panels | Slow on heavy soil |
| Direct spray | High | Solid, non-perforated plastic only | Unsafe for perforated upholstery |
| Extraction machine | High | Removable, intact fabric upholstery | Poor choice near holes and wiring |
Success checkpoint: The tool produces controlled foam without liquid pooling on the seat.
Common mistake: Spraying a broad mist directly across the cushion. Even a fine spray can deliver more liquid than the holes can safely drain.
Step 4: Agitate the Surface
Work in small circles with light pressure, using two or three passes rather than forceful scrubbing. Let the foam loosen body oil and dust for approximately 30-60 seconds, then wipe the area with a clean towel.
Brush across the holes, not aggressively into them. The brush should dislodge surface soil while the towel captures it before it travels deeper.
Success checkpoint: The cleaned section has a consistent finish with no dark rings around the perforations.
Common mistake: Repeatedly scrubbing one stain until the color changes. On coated leather, the apparent stain may be dye wear or topcoat damage, which cleaner cannot reverse.
Step 5: Extract Residue Immediately
Fold a dry microfiber towel into a firm pad and press it lightly over the cleaned section. Do not twist the towel or force it into the holes. Rotate to a dry face as soon as the towel becomes damp.
If a visible droplet enters a perforation, place a vacuum nozzle above the opening without pressing it against the surface. Use brief suction, then blot around the area. Do not use a wet vacuum extractor over the entire seat unless the vehicle manufacturer permits it.
Success checkpoint: No visible foam remains and the towel picks up minimal moisture.
Step 6: Dry the Seat
Leave the vehicle doors open in a shaded, ventilated area and aim a fan across the seat for 30-90 minutes. Do not close the vehicle while the upholstery remains damp. Avoid high heat from a hair dryer, which can shrink synthetic upholstery, harden leather coatings, or create uneven gloss.
Success checkpoint: The seat feels neutral rather than cool or clammy, and no moisture appears when a dry towel is pressed against it for five seconds.
Step 7: Condition Only If Appropriate
Finished leather may need a compatible, low-residue conditioner after cleaning, but perforations make heavy creams risky. Apply a very small amount to a foam applicator, spread it thinly over solid sections, and keep excess product away from the holes.
Vinyl generally does not need leather conditioner. Some vinyl dressings create glare, attract dust, or make the steering wheel and seat slippery, so check the product label before use.
How to Clean a Torn or Punctured Car Seat
A torn car seat should be cleaned with almost no liquid near the opening. Vacuum loose debris around the perimeter, use a barely damp towel on intact surrounding material, and move soil away from the tear rather than pushing it into exposed foam.
Step 1: Stabilize the Damage
Stop loose threads from catching by trimming only visibly detached fibers with sharp scissors. Do not cut structural stitching or enlarge the opening to create a cleaner shape.
For a tear that is actively spreading, place temporary automotive leather tape or clean low-tack tape over the outside surface until the area can be repaired. Tape is containment, not a permanent upholstery repair.
Step 2: Vacuum Around the Opening
Use a soft brush and low, controlled suction around the tear. Keep a hard nozzle off exposed foam because suction can pull out foam particles and enlarge the damaged area.
If dirt is embedded in the opening, remove it with a dry, soft brush directed outward. Do not use a toothpick unless the debris is a single solid object and the tool cannot catch the upholstery edge.
Step 3: Clean the Surrounding Material
Put upholstery foam or leather cleaner on a microfiber towel until the towel is barely damp. Wipe from the tear outward, using short strokes that stop before the damaged edge.
For fabric, blot rather than scrub. For leather, clean the intact coating around the tear but do not work product into raw backing, foam, or separated layers.
Step 4: Dry Completely
Use a fan for at least 60 minutes, and extend drying to 2-8 hours if any moisture reached the backing. Never apply adhesive, filler, or a leather repair compound while the material or foam remains damp.
Success checkpoint: The foam has no cool dampness, odor, or darkened patch.
Common mistake: Using a carpet extractor because the seat looks heavily stained. Extraction can leave water inside cushion foam for many hours, where it may produce odor, mildew, or electrical problems.
Which Cleaning Tools Are Safest?
A soft brush paired with a microfiber towel is the safest general combination for perforated seats. Compressed air is useful for loose crumbs but should be limited to shallow-angle bursts, while picks are reserved for isolated solid debris that cannot be removed dry by brushing.
| Tool | Appropriate use | Typical setting or duration | Avoid when |
|---|---|---|---|
| Soft vacuum brush | Surface dust and crumbs | 2-5 minutes per seat | Foam is loose or crumbling |
| Low-pressure air | Loose debris in perforations | 1-2 second bursts | Debris is wet or deeply embedded |
| Horsehair brush | Controlled foam agitation | 2-3 passes per section | Fibers or coating are lifting |
| Plastic gum pick | One hardened crumb | Less than 60 seconds per spot | Tear edges are frayed |
| Steam cleaner | Only manufacturer-approved solid upholstery | Short passes under 10 seconds | Perforations, leather, wiring |
| Wet extractor | Intact removable fabric only | Manufacturer’s minimum solution | Powered or torn seats |
Compressed air is not automatically safer than vacuuming. Air can drive grit under the upholstery, whereas gentle surface suction removes it. Use air only when the nozzle can remain angled across the surface and the vacuum is ready immediately afterward.
What If Liquid Enters the Perforations?
If liquid enters a perforated seat, stop applying cleaner, blot the surface, and use brief vacuuming directly above the affected area. Ventilation may assist drying only if the vehicle manufacturer permits the seat function while damp, and ventilation should not be treated as a substitute for extraction and airflow.
Do not switch on seat heat to dry the upholstery. Heat can accelerate evaporation at the surface while moisture remains below, and it may expose wiring or heating elements to liquid under unfavorable conditions. Open the doors, use a fan, and inspect the seat after several hours.
Contact a professional if the seat remains wet overnight, develops an electrical warning, produces a burnt smell, or behaves abnormally. Seat wiring and airbag systems require vehicle-specific diagnosis.
How Should You Handle Common Stains?
Stain type changes the cleaning approach, but the low-moisture rule remains constant. Remove solid material dry, absorb oily residue without spreading it, and avoid aggressive chemistry that can strip leather coatings or alter fabric dye.
| Stain or debris | First action | Suitable follow-up | Do not use |
|---|---|---|---|
| Dry mud | Brush and vacuum dry | Low-moisture upholstery foam | Water before loosening soil |
| Chocolate or food | Chill or dry the residue | Plastic scraper, then foam | Metal blade |
| Milk | Blot immediately | Enzyme product tested on hidden area | Flooding the cushion |
| Grease | Lift with dry absorbent material | Leather-safe cleaner | Solvent or acetone |
| Pet urine | Blot and isolate odor source | Professional enzyme treatment | Perfume masking |
| Ink | Stop rubbing | Specialist leather or textile service | Alcohol without testing |
Fresh liquid stains should be blotted with a dry towel, not rubbed. A perforated seat may look clean on top while retaining liquid below, so odor appearing later is evidence of trapped contamination rather than a need for stronger fragrance.
Can You Repair Damaged Perforated Leather?
Small surface punctures can sometimes be repaired with a compatible leather filler, colorant, and controlled re-perforation, but a repair compound should not block ventilation holes. A professional repair is preferable when the damaged area is on a seating bolster, crosses stitching, exposes foam, or sits over a ventilation zone.
| Damage condition | DIY suitability | Typical material cost | Typical repair time |
|---|---|---|---|
| One shallow surface nick | Moderate | $10-$30 | 30-60 minutes |
| Two to five blocked perforations | Low | $20-$60 | 1-2 hours |
| Split bolster seam | Low | $40-$150 | 1-3 hours |
| Torn fabric with exposed foam | Moderate | $15-$50 | 1-2 hours |
| Seat-mounted airbag panel damage | None | $150-$600+ professional service | 1-4 hours |
Do not glue a patch over a seat-mounted airbag seam. Do not use household superglue, which becomes brittle and can stain or harden adjacent upholstery. The repair must preserve the seat’s intended movement, ventilation path, and restraint-system function.
Cost, Time, and When to Hire a Detailer
Typical DIY cleaning costs $15-$45 and takes 25-60 minutes for two seats. Professional interior cleaning commonly costs about $75-$250 for a vehicle, while upholstery repair, odor treatment, or airbag-adjacent work may cost $100-$600 or more depending on material and location.
| Situation | DIY time | Typical DIY cost | Professional threshold |
|---|---|---|---|
| Light dust in perforations | 20-30 minutes | $10-$25 | Convenience only |
| Body oil and drink residue | 30-60 minutes | $15-$45 | Persistent discoloration |
| Torn fabric with dry surface soil | 30-90 minutes | $15-$50 | Foam odor or spreading tear |
| Liquid-soaked cushion | 2-8 hours drying | $20-$60 | Wet overnight or electrical symptoms |
| Mold or strong urine odor | 1-2 days uncertain | $20-$80 | Professional treatment recommended |
| Airbag-panel or heater damage | Not suitable | Not predictable | Qualified upholstery technician |
A professional is the safer choice when foam is saturated, mold is visible, the seat warning light is on, or the tear affects a seam or airbag deployment path. Cleaning cannot restore missing material or correct an electrical fault.
Common Mistakes and How to Fix Them
Spraying cleaner directly onto the seat
Stop spraying and blot the surface immediately. Vacuum above visible droplets, then use a fan with the doors open. Future applications belong on the towel or brush.
Scrubbing across a tear
Stop before the opening grows. Trim only detached threads, cover the damage temporarily, and clean outward from the perimeter.
Using conditioner inside perforations
Remove residue with a dry soft brush and a clean microfiber towel. If white material remains, use a small amount of manufacturer-approved cleaner on the towel, not a pick forced through every hole.
Using excessive compressed air
Switch to a soft vacuum brush. Strong air can move debris beneath the upholstery and may loosen fragile edges.
Closing the car while the seat is damp
Reopen the doors and circulate air for 30-90 minutes. If odor develops or the cushion remains damp after eight hours, arrange professional drying.
Treating fabric, vinyl, and leather identically
Identify the surface first. Leather cleaner can leave fabric residue, fabric shampoo can over-wet foam, and vinyl dressing can create an unsafe slippery finish.
Variations for Specific Situations
Child or pet mess
Let thick mud or food dry before brushing and vacuuming. Remove solids mechanically, then clean the surrounding surface with controlled foam. Milk, urine, and vomit can penetrate foam quickly, so professional odor treatment becomes more valuable when liquid reaches the cushion.
Ventilated seats
Keep liquid use especially low around ventilation panels. Never assume the fan will safely remove cleaner from the cushion, and consult the vehicle manual before operating ventilation during drying.
Alcantara-style microfiber
Do not use leather conditioner. Vacuum gently, use a manufacturer-approved microfiber cleaner sparingly, brush the nap in one direction after drying, and avoid steam unless the upholstery maker specifically approves it.
FAQ
Can I use dish soap on perforated car seats?
Dish soap can remove grease but is a poor default for perforated automotive upholstery because it may leave surfactant residue and requires rinsing. Use an automotive cleaner matched to leather, vinyl, or fabric, apply it to a towel or brush, and wipe residue away before it enters the holes.
Can I use a toothbrush to clean seat perforations?
A soft nylon toothbrush can clean isolated residue, but it is too small and aggressive for broad scrubbing. Use a soft detailing brush for the seat and reserve a toothbrush for a few blocked holes. Avoid metal dental tools, which can widen perforations or cut the coating.
How long should car seats dry after cleaning?
A lightly damp surface typically dries in 30-90 minutes with doors open and a fan. A torn seat or cushion that received liquid may need 2-8 hours. The seat is dry when it no longer feels cool or clammy and a dry towel shows no moisture after five seconds of pressure.
Can I use a steam cleaner on car seats with holes?
Steam is generally unsuitable for perforated leather, vinyl, or damaged upholstery because heat and moisture can enter the cushion rapidly. Use steam only when the vehicle and upholstery manufacturers approve it, and never use it near seat electronics, exposed foam, or an airbag seam without professional guidance.
How do I remove a bad smell from a torn seat?
First find and dry the contamination source rather than masking it with fragrance. Vacuum dry debris, clean the intact perimeter with minimal moisture, and ventilate thoroughly. If milk, urine, vomit, or floodwater reached the foam, an automotive odor specialist may need to remove or treat the cushion.
Should I clean the seat before repairing the hole?
Yes, clean the surrounding surface first and let it dry completely before applying adhesive, filler, or a patch. Do not saturate the opening, and do not glue across an airbag seam or cover ventilation perforations that the seat was designed to use.
The Bottom Line
To clean car seats with holes safely, classify the opening before choosing a product. Treat factory perforations with dry extraction, foam applied indirectly, light brushing, and immediate drying; treat tears by keeping exposed foam dry and cleaning only the intact perimeter. Stop DIY work when moisture remains trapped, wiring behaves abnormally, mold appears, or the damage affects a seam or seat-mounted airbag.