To clean and restore leather car seats, first identify the upholstery, remove embedded grime with controlled foam cleaning, then repair, recolor, seal, and cure the surface. A basic clean takes 30-60 minutes per seat, while light restoration usually takes 3-6 hours and costs $40-$120 in materials. The seat’s coating and damage depth determine the correct method.
Key Facts at a Glance
- Most modern automotive leather is pigmented leather protected by a polyurethane topcoat, not untreated hide.
- A leather cleaner should be applied to a brush or towel, especially on perforated, heated, or ventilated seats.
- Conditioner cannot repair missing pigment, separated seams, deep tears, or cracked-through leather.
- Thin filler and color coats produce a more flexible repair than one thick application.
- Typical DIY restoration costs $40-$120, while professional repair commonly costs $250-$700 or more per seat.
- Full curing normally requires 24-48 hours before heavy use, even when the surface feels dry.
What Does Leather Seat Restoration Include?
Leather car seat restoration combines cleaning, surface preparation, flexible repair, color replacement, protective sealing, and curing. Cleaning removes soil and body oils; restoration corrects damage that cleaning alone cannot solve, including faded pigment, scuffed bolsters, shallow cracks, and worn protective coating.
Automotive leather is usually a finished material. The hide receives pigment, texture, and a clear polyurethane or similar protective finish at the factory. That finish changes how the seat should be treated because many cleaners and conditioners remain on the surface rather than soaking deeply into the hide.
A shiny driver’s bolster is often dirty, compressed, and covered with body oil rather than “dry leather.” Cleaning may restore its original matte appearance. Conversely, a pale abrasion that remains after cleaning has probably lost pigment and needs color repair.
When Is Cleaning Enough?
Cleaning is enough when the leather remains flexible, the color is even after wiping, and no fibers, cracks, or open seams are visible. A clean microfiber towel should remove grime without lifting color from an inconspicuous area.
Conditioning is useful after cleaning when the surface feels slightly stiff, but conditioner cannot rebuild a missing topcoat or fill a split hide. Excess conditioner can leave a greasy film that attracts more dirt and makes the seat slippery.
Which Leather Is in Your Car?
Most factory automotive seats use protected or pigmented leather, while aniline and semi-aniline upholstery require less aggressive products and more cautious testing. Some vehicles also combine leather seating surfaces with coated vinyl, polyurethane, or synthetic leather on side panels and rear sections.
| Upholstery type | Typical appearance | Water response | Safe starting method | Restoration limit |
|---|---|---|---|---|
| Pigmented leather | Uniform color, printed grain | Droplet usually beads | Foam cleaner and soft brush | Filler, colorant, and topcoat can work |
| Semi-aniline leather | Natural grain and slight variation | Darkens gradually | Minimal-moisture cleaner | Color matching is difficult |
| Aniline leather | Soft, natural, visibly varied hide | Darkens quickly | Specialist cleaner only | DIY sanding and dyeing can permanently mark it |
| Coated vinyl or PU | Uniform, plastic-like finish | Beads strongly | Manufacturer-approved cleaner | Leather dye may not bond correctly |
| Perforated leather | Small ventilation holes | Liquid can enter holes | Brush-applied foam | Avoid saturation near electronics |
A water-drop test is only a screening method, not a definitive identification test. Test a hidden area with one small drop, wait briefly, and stop if the surface darkens rapidly. Vehicle trim guides, the owner’s manual, or a professional upholstery specialist provide better confirmation than a single water test.
Are Heated and Ventilated Seats Different?
Heated and ventilated seats require low-moisture cleaning because liquid can travel through perforations into foam, wiring, fans, or heating components. Seat-mounted side airbags create another limitation: do not saturate, stitch, glue, or obstruct a marked airbag seam.
Disconnecting a seat or removing trim can trigger an airbag warning light. Leave wiring, sensors, and seat removal to a qualified technician.
What Should You Gather Before Starting?
A complete light-restoration setup normally costs $40-$120 and includes a dedicated cleaner, soft brush, microfiber towels, masking materials, prep solution, flexible filler, colorant, and compatible topcoat. Work indoors or in shade at 60-80°F, with low humidity and strong ventilation.
Before You Start
| Requirement | Typical specification | Why it matters |
|---|---|---|
| Working time | 3-6 hours, excluding cure time | Covers one front seat with light damage |
| Material cost | $40-$120 DIY | Includes cleaner and repair coatings |
| Temperature | 60-80°F | Supports predictable drying |
| Cleaning tools | 1 soft brush, 4-6 microfiber towels | Separates dirty and clean wiping stages |
| Abrasives | 800-1200 grit paper | Smooths only localized damaged coating |
| Drying period | 24-48 hours | Allows coatings to harden before use |
Use nitrile gloves, eye protection, a vacuum with a soft brush, painter’s tape, a small detailing brush, distilled water, and a hair dryer set to low. Avoid a heat gun unless the product manufacturer specifically permits it, because concentrated heat can shrink leather, soften adhesive, or distort synthetic upholstery.
How Do You Clean and Restore Leather Car Seats?
Clean and restore leather car seats in five controlled phases: inspect and vacuum, clean, prepare, repair and recolor, then seal and cure. The most important success factor is applying minimal moisture and thin product layers, because saturated foam and thick coatings create more problems than surface dirt.
Step 1: Vacuum the Seat and Inspect Damage
Vacuum the seat with a soft brush attachment, concentrating on seams, piping, creases, and the gap beside the bolster. Remove grit before brushing because trapped particles act like abrasive powder against the protective coating.
Inspect the seat under neutral light. Classify each area as dirt, surface transfer, fading, abrasion, shallow cracking, deep cracking, torn leather, separated stitching, or damaged foam. Photograph the seat before treatment so color and texture changes are easier to judge.
You will know it worked when: no loose grit remains in seams and every damaged area has a defined boundary.
Common mistake: starting with conditioner before identifying whether the problem is dirt or missing finish. Conditioner can conceal damage temporarily and interfere with later color adhesion.
Step 2: Clean With Foam, Not Saturation
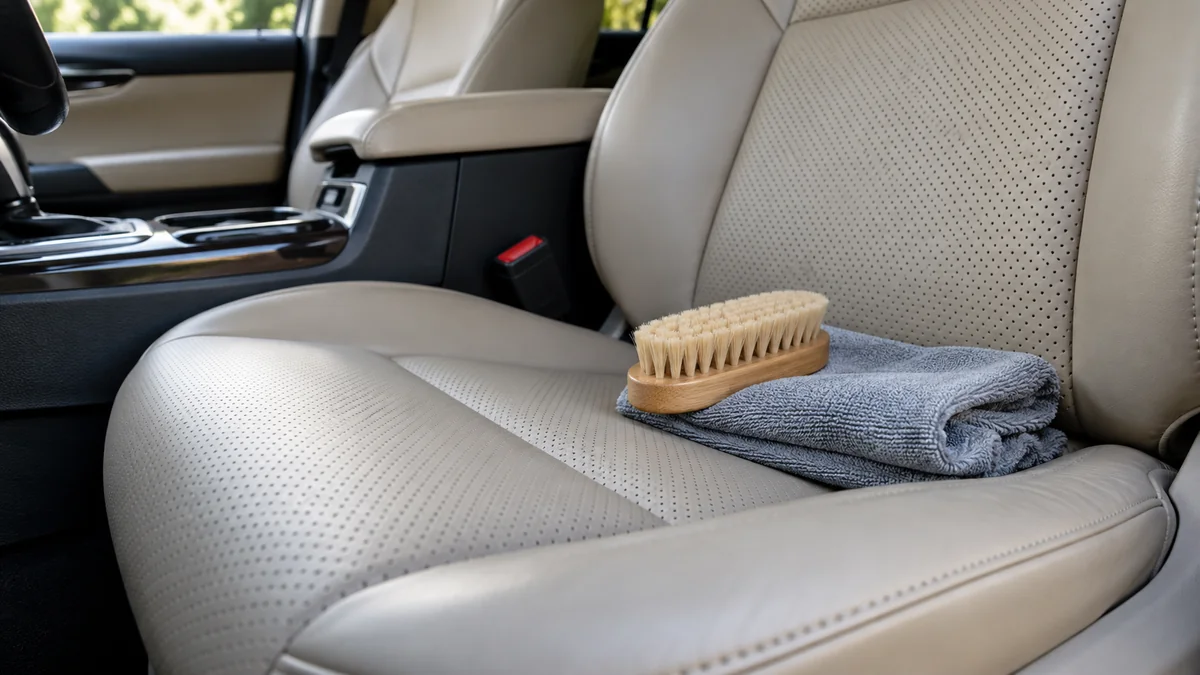
Apply a dedicated automotive leather cleaner to a soft horsehair or upholstery brush, not directly onto the seat. Work in sections of approximately 12 by 12 inches, using light pressure and short strokes until foam lifts the soil.
Wipe away the dirty foam with a lightly damp microfiber towel, then dry immediately with a second towel. Repeat once if the towel continues to collect dark residue. Perforated seats need a nearly dry brush, with no puddles around the holes.
Household dish detergent, laundry detergent, window cleaner, and disinfectants can leave unsuitable residues or alter the finish. A melamine sponge, often sold as a Magic Eraser, is abrasive enough to remove pigment and clearcoat.
You will know it worked when: the surface has a consistent matte appearance, no greasy film, and no color transfer on a white damp towel.
Common mistake: scrubbing harder when foam turns gray. Gray foam usually indicates successful soil removal, while aggressive pressure can remove the coating beneath it.
Step 3: Degrease and Prepare the Damaged Area
After the seat dries completely, mask adjacent trim and inspect whether the damaged region is glossy, rough, or contaminated with body oil. Use a product designed for leather preparation, or a carefully controlled compatible solvent recommended by the repair system.
Do not assume household isopropyl alcohol is universally safe. On some factory finishes it can soften, dull, or strip the topcoat. Test the chosen prep product on a concealed section for 10-15 minutes, then proceed only if color and texture remain unchanged.
Use 800-1200 grit automotive paper only on raised scuffs, flaking coating, or hardened filler. Sand by hand with minimal pressure, stopping as soon as the edge feels smooth. Do not sand intact grain broadly, and never sand an aniline surface without specialist instructions.
You will know it worked when: the repair boundary feels smooth and clean, with no loose coating or glossy oily patch.
Common mistake: sanding a whole bolster to make the finish uniform. That removes original texture and enlarges the area requiring recoloring.
Step 4: Fill Cracks and Repair Light Surface Damage
Apply flexible leather filler to deep surface cracks in thin layers, using a small palette knife or plastic spreader. Allow approximately 20-30 minutes between thin applications, although product labels may specify longer curing times at cooler temperatures.
Press filler into the crack without covering undamaged grain unnecessarily. After curing, smooth the repaired area with fine abrasive paper. A flexible filler can improve shallow cracks and abrasion, but it cannot restore leather that has split through its thickness.
A tear, cigarette burn, open seam, or missing section may require a backing patch, panel replacement, or reupholstery. Repeated filler over a moving seat bolster commonly splits again because the underlying material has lost structural strength.
You will know it worked when: the repaired area is level by touch and does not show a sharp filler ridge under side lighting.
Common mistake: applying one thick layer. Thick filler dries unevenly, shrinks at the center, and produces a hard patch that cracks when the seat flexes.
Step 5: Apply Colorant in Thin Coats
Use a flexible automotive leather colorant matched to the vehicle’s interior code when available. A VIN or trim code can identify the original specification, but an exact code is not always a perfect visual match because ultraviolet exposure, wear, and cleaning have changed the surrounding leather.
Apply colorant with a fine sponge or airbrush in two to four thin coats. Allow approximately 2-5 minutes between light coats with gentle airflow, or follow the product’s stated flash time. Blend outward beyond the repaired area rather than creating a hard circular edge.
The colorant should look slightly translucent during early coats. Heavy wet application can fill grain, produce gloss, and remain soft beneath a dry skin. Test the final color beside an undamaged section after the product dries, not while it is wet.
You will know it worked when: the repaired zone matches the surrounding color at several viewing angles and the grain remains visible.
Common mistake: using a black or brown “close enough” dye without testing. A small hue difference becomes conspicuous across a wide seat bolster.
Step 6: Seal, Condition, and Cure
Apply a compatible matte or satin topcoat over the fully dry colorant. The topcoat protects pigment from friction, body oils, and routine cleaning, but an incompatible clear product can remain tacky or change the sheen.
Leave the seat undisturbed for at least 24 hours, and preferably 24-48 hours before normal driving. After the coating cures, apply a small amount of suitable conditioner if the manufacturer permits it. Many modern protected leathers need a protective cleaner rather than a heavy oil-based conditioner.
You will know it worked when: the surface feels dry and flexible, shows no tackiness, and does not transfer color to a clean white cloth after the stated cure period.
Common mistake: conditioning immediately after recoloring. Oils can interfere with topcoat adhesion and trap solvent beneath the finish.
Which Restoration Method Fits the Damage?
The correct method depends on whether the seat has contamination, cosmetic coating loss, or structural failure. Deep cleaning is the lowest-risk option, while dyeing and filler require preparation and color judgment; reupholstery is the appropriate solution when the leather has lost physical integrity.
| Condition | Recommended method | Typical time | Typical cost | Expected result |
|---|---|---|---|---|
| Dirt, shine, body oil | Deep clean and protect | 30-60 minutes | $10-$30 | Original color and sheen often return |
| Light scuffs and fading | Prep, colorant, topcoat | 2-4 hours | $40-$120 | Strong visual improvement |
| Shallow cracks | Filler, colorant, topcoat | 3-6 hours | $50-$150 | Smooth appearance, moderate durability |
| Deep split or burn | Patch or panel repair | 1-3 days | $150-$500 | Depends on backing and texture match |
| Torn panel or failed seam | Professional reupholstery | 2-5 days | $250-$700+ | Most durable structural repair |
| Dry rot or missing leather | Panel replacement | 2-7 days | $500-$1,500+ | Better than repeated surface coating |
A professional restoration is usually preferable for aniline leather, luxury interiors, large color transitions, torn panels, and seats with airbag seams. DIY coating is most defensible on small, localized defects in common pigmented leather.
What Are the Main Risks and How Can You Avoid Them?
The most common restoration failures come from excessive moisture, abrasion, incompatible chemistry, and incorrect assumptions about the upholstery. A controlled test area is more valuable than a larger product quantity because one irreversible mistake can affect an entire bolster.
| Failure | Likely cause | Recovery or prevention |
|---|---|---|
| Surface becomes shiny | Heavy scrubbing or thick colorant | Stop abrasion, use compatible matte topcoat |
| Dye peels within weeks | Oil, silicone, or residue remained | Strip only the repair area and repeat preparation |
| Perforations stay wet | Cleaner applied directly to seat | Extract moisture with towels and allow full drying |
| Color looks too dark | Code does not account for fading | Blend outward and test dry coats before expanding |
| Seat feels sticky | Excess product or incomplete cure | Wipe lightly with a damp towel and extend cure time |
| Cracks return quickly | Structural leather failure | Replace or patch the panel instead of adding filler |
| Grain disappears | Filler or dye applied too thickly | Sand only the raised repair and rebuild with thin coats |
Can You Use a Steam Cleaner?
Steam is not a first-choice method for leather car seats because heat and moisture can soften finishes, swell edges, and push contamination into perforations. A professional may use controlled low-moisture equipment on suitable protected leather, but household steam cleaning is a poor substitute for foam cleaning and immediate towel removal.
How Do You Remove Denim Transfer or Sunscreen?
Denim transfer and sunscreen should be treated as surface contamination first, using a pH-appropriate automotive leather cleaner and repeated light passes. Do not escalate immediately to solvent or abrasive methods, because blue transfer can sit above intact pigment while sunscreen may already have softened the protective coating.
If color remains after two or three gentle cleaning cycles, stop. Further abrasion may remove the factory finish faster than it removes the stain, making professional recoloring the safer option.
How Much Does Leather Seat Restoration Cost?
DIY leather seat restoration typically costs $40-$120 for one seat or a small interior kit, while professional work commonly costs $250-$700 or more per seat. Price rises with aniline leather, extensive panel damage, exact texture matching, seat removal, luxury-brand materials, and repairs near airbags or powered mechanisms.
| Service level | Materials or labor | Typical time | Typical price |
|---|---|---|---|
| Maintenance clean | Cleaner, brush, towels | 30-60 minutes | $10-$30 |
| DIY color repair | Prep, filler, colorant, topcoat | 3-6 hours | $40-$120 |
| Mobile cosmetic repair | Technician spot repair | 2-5 hours | $150-$400 |
| Professional panel restoration | Repair and recoloring | 1-3 days | $250-$700 per seat |
| Reupholstery | New leather or matching panel | 2-7 days | $500-$1,500+ |
These are typical consumer ranges, not fixed quotations. A local upholstery shop can price the work more accurately after inspecting the leather type, damage depth, seat construction, and color complexity.
How Should You Maintain Restored Leather?
Clean automotive leather every three months in a daily-driven vehicle, or sooner when sunscreen, sweat, food, or pet contamination accumulates. Keep the cabin shaded when possible because ultraviolet exposure accelerates fading and topcoat breakdown.
Use a soft brush on seams and a dry or lightly damp microfiber towel for routine wiping. Avoid silicone-heavy dressings that create artificial gloss and slippery seating. Address fresh spills promptly, but do not soak the upholstery while trying to remove them.
A practical maintenance schedule is:
- Vacuum seams and creases every two to four weeks.
- Clean high-contact bolsters every one to three months.
- Inspect cracks, stitching, and airbag seams twice yearly.
- Reapply an approved protectant according to its label, often every three to six months.
- Repair small coating loss before exposed fibers become hard and contaminated.
When Should You Hire a Professional?
Hire a professional when the leather is aniline or semi-aniline, the damage reaches through the hide, the seat has an open seam, or the repair is adjacent to an airbag deployment seam. Professional work is also preferable when a large visible panel needs color blending, because a small mismatch can remain obvious across a broad surface.
DIY restoration is reasonable for a dirty protected-leather seat, light bolster fading, shallow scuffs, and limited surface cracking. DIY work is not a reliable solution for dry rot, detached stitching, crushed foam, extensive burns, or repeated cracking over a moving hinge point.
The honest limitation is that surface restoration cannot make structurally failed leather new again. It can improve appearance and slow further wear, but replacement leather remains the durable answer when the substrate has split.
FAQ
Can I clean leather car seats with dish soap?
Dish soap can remove grease, but it is not a preferred routine cleaner for automotive leather because residue and repeated use may alter the finish. Use a dedicated leather cleaner, apply it to a brush, and wipe away foam before moisture reaches seams or perforations.
Should I use olive oil or coconut oil on leather seats?
Do not use kitchen oils on automotive leather. Olive oil and coconut oil can oxidize, leave a greasy film, attract soil, and interfere with later dye or topcoat adhesion. Modern protected leather usually needs controlled cleaning and a compatible protectant rather than penetrating household oil.
Can cracked leather seats be repaired permanently?
Shallow coating cracks can receive a durable cosmetic repair when the underlying leather remains flexible. Cracks that split through the hide, expose fibers, or recur on a flexing bolster are not permanently solved by filler; panel replacement or reupholstery is more reliable.
How long should I wait before sitting on repaired leather?
Wait at least 24 hours, and preferably 24-48 hours, before normal use after colorant and topcoat application. Cool temperatures, high humidity, thick coats, and poor ventilation extend curing time even when the surface feels dry.
Can I recolor leather without removing the seat?
Small cosmetic repairs can usually be completed with the seat installed, provided the area is accessible and protected from overspray. Removing a powered or airbag-equipped seat introduces electrical and safety risks, so seat removal should be handled by a qualified technician.
How often should leather car seats be conditioned?
Inspect and clean daily-driver leather every one to three months, then use a compatible protectant according to the product label. Heavy conditioner is not automatically better; excess product can create shine, tackiness, and increased dirt retention.
The Bottom Line
Clean and restore leather car seats by matching the treatment to the upholstery and damage: use foam cleaning for grime, controlled preparation for worn coating, flexible filler for shallow cracks, thin colorant coats for fading, and a compatible topcoat followed by 24-48 hours of curing. Stop and hire a professional when the leather is untreated, structurally torn, dry-rotted, or connected to seat safety systems.