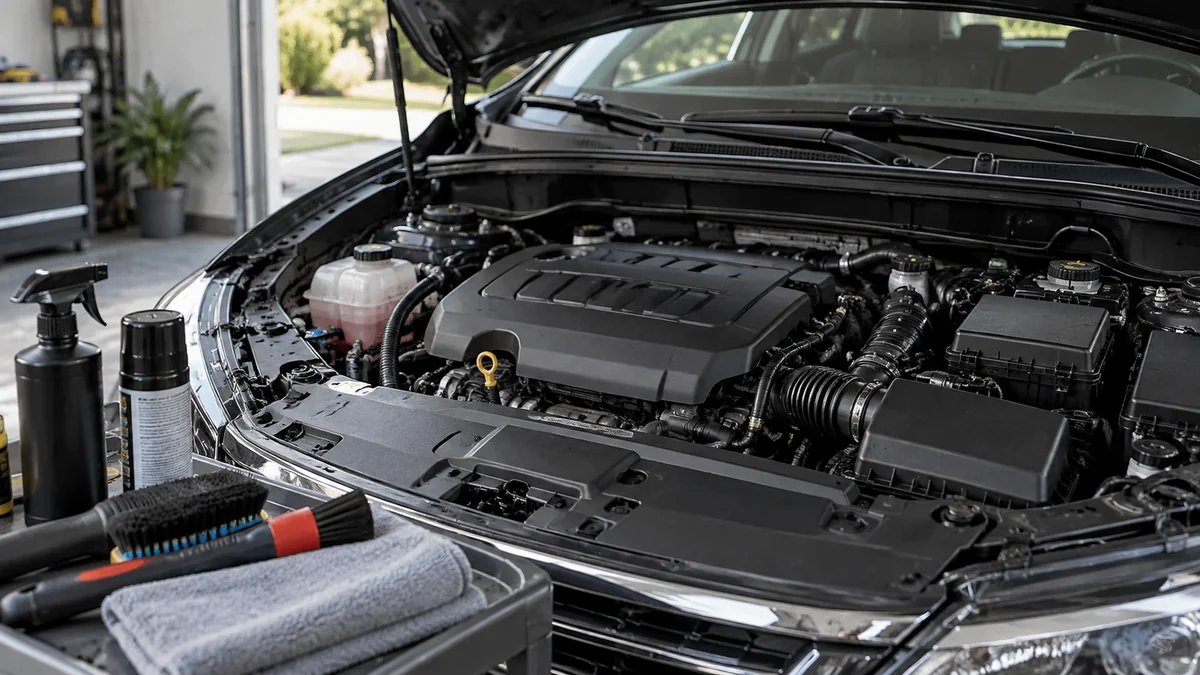
To clean an engine bay without water, use a cool-engine, low-moisture process that combines vacuuming, controlled degreaser application, soft-brush agitation, and microfiber wiping. Work in small sections for 45-90 minutes, keep liquid away from electrical openings and air intakes, and inspect for leaks before applying any dressing or starting the vehicle.
Key Facts at a Glance
- A waterless engine-bay clean removes surface grime with cleaner and towels rather than a hose or pressure washer.
- The safest DIY method applies product to a brush or towel instead of flooding the compartment.
- A fully cool engine reduces cleaner flashing, streaking, burns, and rapid evaporation.
- Disconnecting a battery is not automatically safer because modern vehicles can lose learned settings or trigger electronic faults.
- Water-based dressing is preferable to oily silicone dressing because oily residue attracts dust and can contaminate belts.
- Heavy oil deposits, rodent waste, battery corrosion, and deep mud may require mechanical repair or professional cleaning.
What Does Waterless Engine-Bay Cleaning Mean?
Waterless engine-bay cleaning is controlled surface cleaning with little or no free water. A dedicated automotive cleaner loosens oily soil, a brush separates it from the surface, and a microfiber towel captures the suspended residue.
The process depends on chemical emulsification and mechanical lifting. Surfactants reduce the bond between oil and a component, while agitation breaks the remaining film into smaller particles that the towel can remove. Waterless wash polymers can help encapsulate light dust, but a rinseless wash product is not automatically a heavy-duty degreaser.
Waterless cleaning does not mean spraying an entire engine compartment until it looks wet. That approach can move contamination into connectors, alternator openings, throttle-body areas, fuse boxes, and spark-plug wells. The professional rule is simple: use enough product to soften the soil, then remove the soil before adding more.
When Is a Dry Clean the Better Choice?
A dry or low-moisture method is useful when a hose is unavailable, the vehicle has exposed electronics, the engine bay contains light-to-moderate grime, or the owner wants to reduce the chance of water entering connectors. It is especially practical for routine dust, road film, fingerprints, and thin oil mist.
The method is not a substitute for repairing an oil leak. It also performs poorly on thick mud, tar-like deposits, heavy underbody grease, or contamination hidden beneath covers. Cleaning those areas without a controlled rinse can spread abrasive grit rather than remove it.
Before You Start: Tools, Time, and Safety
Plan for 45-90 minutes for a moderately dirty passenger car. A first attempt usually takes longer because the cleaner must be tested on several materials and towels need frequent changing.
| Item | Typical quantity or specification | Purpose |
|---|---|---|
| Automotive engine cleaner | 250-500 ml | Loosens oil and road film |
| Waterless or rinseless wash | 500 ml prepared solution | Removes light dust and final residue |
| Low-pile microfiber towels | 8-12 towels, 300-500 GSM | Main soil removal |
| Soft detailing brushes | 2-4 brushes, synthetic or boar hair | Crevices and textured plastic |
| Wet/dry vacuum | 1 unit with brush nozzle | Leaves, dust, and loose debris |
| Nitrile gloves and eye protection | 1 pair each | Skin and splash protection |
| Plastic caps or clean bags | 2-5 pieces | Temporary protection for openings |
| Water-based dressing | 50-100 ml | Finishes plastic and rubber safely |
Work outdoors or in a ventilated garage with the engine completely cool. Avoid direct sun because hot panels and warm plastic accelerate cleaner evaporation. Read the product safety data sheet, keep chemicals away from ignition sources, and never mix degreaser with bleach, acids, or household ammonia.
Which Components Need Protection?
Protect openings, not every visible component. Modern engine bays already encounter rain, condensation, and incidental moisture, but pressurized liquid and concentrated chemical runoff create a different risk.
| Component | Main risk | Protection method | Do not do |
|---|---|---|---|
| Alternator | Chemical intrusion and residue | Spray brush, not alternator | Flood or pressure-spray |
| Open air intake | Liquid entering engine | Cap inlet temporarily | Leave intake uncovered during spraying |
| Fuse and relay box | Corrosion or electrical faults | Keep lid closed; wipe exterior | Spray around a damaged seal |
| Ignition coils and plug wells | Misfire from trapped liquid | Use a nearly dry towel | Push liquid into coil openings |
| Aftermarket wiring | Damaged insulation or exposed terminals | Inspect and cover damaged areas | Assume tape makes a failed wire safe |
| Hybrid inverter and orange cables | High-voltage hazard | Do not touch or wet | Remove covers or wash casually |
Do not use aluminum foil as a default electrical shield. Foil can bridge terminals, tear into fans, and create a conductive path. Clean plastic caps and targeted masking are safer.
Battery disconnection also requires judgment. Many vehicles need a specific shutdown sequence, radio-code handling, window recalibration, steering-angle relearning, or battery-management reset after power loss. Follow the manufacturer’s service information; routine waterless cleaning normally requires no battery disconnection.
How to Clean an Engine Bay Without Water
The safest sequence has eight steps: cool the vehicle, remove loose debris, inspect for faults, protect openings, clean one section at a time, wipe with separate towels, dry crevices, and inspect before startup. The factor that determines the result most strongly is product control, not the quantity of cleaner.
Step 1: Cool and Inspect the Engine
Confirm that the engine, exhaust shield, turbocharger, and surrounding metal are cool enough to touch comfortably. Open the hood and inspect for oil leaks, cracked hoses, exposed wires, missing fuse-box covers, rodent nesting, and battery damage.
You will know the vehicle is ready when no surface feels hot and no active fluid leak is present. A hot turbocharger can flash cleaner into residue, while a damaged electrical seal changes a routine detailing job into a repair-risk situation.
Common mistake: Starting because the hood feels cool while the exhaust manifold remains hot. Wait longer after driving, especially on turbocharged engines.
Step 2: Remove Loose Dry Debris
Use a vacuum with a soft brush to lift leaves, sand, insects, and rodent nesting. A cordless blower can remove dry dust, but direct the airflow away from the intake, fuse box, and cabin-air openings.
Wear gloves and a respirator suitable for nuisance dust when rodent droppings or nesting material are present. Do not aggressively blow potentially contaminated debris around the garage. Wet disinfection and waste handling may be necessary for significant rodent contamination, even though ordinary cleaning uses no rinse water.
You will know the step is complete when crevices contain no loose material that could turn into abrasive slurry during wiping.
Common mistake: Using compressed air at high pressure near old wiring. A typical detailing blower is safer than a narrow air nozzle held close to connectors.
Step 3: Test the Cleaner on an Inconspicuous Area
Apply a small amount of the chosen product to a hidden section of plastic or painted metal. Leave it for the label’s stated dwell time, usually 30-120 seconds, then wipe it away.
Check for whitening, gloss change, sticky residue, dye transfer, or softened rubber. Product compatibility varies more than many owners expect; a strong alkaline degreaser that works on cast metal can stain anodized aluminum or dry out aged rubber.
You will know the product is suitable when the surface retains its original color and finish after wiping and drying.
Common mistake: Using household glass cleaner, kitchen degreaser, or solvent without checking its material compatibility. Automotive plastics and coatings can react differently from household surfaces.
Step 4: Protect Openings and Work in Sections
Close the airbox and fuse-box lids. Temporarily cap an open intake with a clean plastic cap or bag secured so it cannot fall inside. Divide the bay into zones such as the upper plastic covers, driver-side inner fender, passenger-side reservoirs, and firewall.
Spray 2-4 pumps of cleaner onto a brush or folded towel. For light dust, use a prepared waterless or rinseless solution; for oily grime, use an engine-safe degreaser at the manufacturer’s dilution, commonly between 1:4 and 1:10 for maintenance cleaning.
You will know the application is controlled when the surface looks damp rather than saturated and no liquid is collecting below the section.
Common mistake: Spraying the entire bay at once. Large wet areas dry unevenly and move contaminated liquid toward electrical components.
Step 5: Agitate From Clean Areas to Dirty Areas
Start with painted inner fenders and upper plastic covers, then move toward dirtier lower sections. Use a soft synthetic or boar-hair brush on plastic, rubber, painted metal, and wiring. Reserve a medium nylon brush for durable bare cast metal, never for polished aluminum or delicate coatings.
Agitate with short strokes while the cleaner remains visibly wet. Lift the brush periodically and inspect whether it is carrying grit; rinse or replace it according to the product process, but do not introduce a dripping brush into the engine bay.
You will know agitation worked when the original surface texture becomes visible and the soil forms a removable film instead of a gritty paste.
Common mistake: Scrubbing harder when the cleaner is insufficient. Add a small amount of compatible cleaner, allow brief dwell time, and use a softer brush before increasing force.
Step 6: Wipe With Separate Heavy-Lift and Buffing Towels
Use a folded, low-pile microfiber towel for the first pass. Turn to a clean face after each small area, then follow with a dry towel to remove residue from seams and textured surfaces.
A practical towel rule is one towel for approximately 0.2-0.5 square metre of moderately dirty surface. Replace towels earlier when they feel gritty, because embedded sand can scratch glossy plastic and painted surfaces.
You will know the section is clean when the towel face remains mostly clean after a final light wipe and no oily smear appears under a bright inspection light.
Common mistake: Using one towel throughout the entire bay. A saturated towel redeposits contamination and makes a clean section look dull.
Step 7: Dry Crevices and Apply Protection
Use a dry microfiber corner or low-pressure blower to remove cleaner from seams, bolt recesses, hose clamps, and connector edges. Leave the hood open for 10-20 minutes in dry weather so volatile residue can evaporate.
Apply a water-based rubber and plastic dressing to an applicator, not directly onto the engine. Spread a thin coat on plastic covers, hoses, and seals, then buff excess product from belts, pulleys, brake components, and painted surfaces.
You will know the finish is correct when the material looks even and satin rather than glossy or wet. A greasy finish attracts dust and can make a later inspection for leaks more difficult.
Common mistake: Dressing every hose heavily. Excess product can migrate onto belt surfaces and create noise or slippage.
Step 8: Inspect Before Starting
Remove all caps, bags, towels, and tools. Confirm that the intake is open, the fuse-box lid is latched, the oil filler cap is tight, and no liquid remains in a plug well or connector recess.
Start the engine outside or in a fully ventilated space. Let it idle for several minutes while checking for warning lights, rough running, belt noise, smoke, and unusual odors. Do not rev the engine immediately after cleaning.
You will know the job is complete when the engine idles normally, no warning light appears, and the cleaned surfaces remain dry after the first heat cycle.
Common mistake: Forgetting a temporary intake cover. Create a physical checklist and remove each item before ignition.
Which Waterless Method Fits the Vehicle?
Chemical cleaning is the best DIY choice for light-to-moderate grime and the lowest equipment cost. Steam is faster on baked-on residue but still introduces moisture, while dry ice offers excellent residue removal without liquid but normally requires a specialist.
| Method | Typical time | Typical cost | Best use | Main limitation |
|---|---|---|---|---|
| Chemical waterless cleaning | 45-90 minutes | $25-$75 DIY | Dust, road film, light oil | Labor-intensive in deep crevices |
| Low-moisture steam | 30-60 minutes | $100-$2,000 equipment; $75-$250 service | Baked-on grease and seams | Steam can enter weak seals |
| Dry-ice blasting | 1-3 hours | $500-$2,000 service | Restoration and heavy contamination | High cost and professional-only setup |
| Controlled rinseless wash | 30-75 minutes | $20-$60 DIY | Light dust and fingerprints | Weak against thick oil |
Prices are typical North American consumer and professional ranges, not fixed market rates. Local labor, vehicle size, contamination, and access determine the final charge.
Is Steam Safer Than Chemical Cleaning?
Steam is not automatically safer because steam is still water in a highly mobile form. Low-moisture vapor can reduce liquid volume and soften grease quickly, but an operator can drive vapor into weathered connectors, bearings, sensors, or ignition components.
Steam is reasonable for a trained operator who controls nozzle distance, dwell time, and towel capture. It is a poor first choice for a novice cleaning a vehicle with damaged seals, exposed aftermarket wiring, or unknown electrical modifications.
When Is Dry-Ice Blasting Worth the Cost?
Dry-ice blasting is justified for restoration, concours preparation, severe baked-on contamination, or valuable vehicles where abrasive media and liquid residue are unacceptable. Carbon-dioxide pellets sublimate after impact, so the process leaves no blast media, although removed grease and debris still require collection.
Dry ice does not repair leaks or remove every bonded coating. The method also requires ventilation, hearing protection, specialized equipment, and an operator who understands delicate finishes.
How Should Special Contamination Be Handled?
Special contamination requires diagnosis before detailing. Cleaning around a leak without locating its source can hide a developing mechanical problem, while battery acid and rodent waste create health and corrosion risks beyond ordinary dirt removal.
Oil and Grease
Blot thick oil with disposable absorbent material before applying cleaner. Use a small amount of degreaser on a brush, wipe the dissolved residue, and repeat rather than flooding the area.
Fresh oil around a gasket, crankcase breather, turbocharger feed line, or power-steering connection deserves inspection after cleaning. Mark the cleaned area mentally or photograph it, then check again after a short drive.
Battery Corrosion
Wear eye protection and gloves. Do not scrub dry corrosion aggressively because particles can become airborne and acidic residue can damage nearby paint and metal.
A severely swollen, leaking, or cracked battery requires replacement by a qualified technician. Neutralization and terminal cleaning should follow the battery and vehicle manufacturer’s instructions, not a generic engine-bay detailing recipe.
Coolant, Brake Fluid, and Fuel
Coolant leaves colored, crystalline residue and may indicate a hose or radiator leak. Brake fluid damages some paints and requires prompt removal, while fuel contamination demands ventilation and strict ignition control.
Do not use a waterless cleaner to conceal these fluids. Identify the source, repair it, and clean the remaining residue with the product specified for the affected surface.
Common Mistakes and How to Fix Them
| Mistake | Result | Recovery |
|---|---|---|
| Cleaner dries on hot plastic | White marks or streaks | Re-mist a small area and wipe immediately |
| Strong degreaser on aluminum | Dull or chalky finish | Stop, neutralize only as label directs, then inspect |
| Brush carries grit | Fine scratches | Replace or clean the brush and towel |
| Liquid enters plug well | Misfire or rough idle | Stop engine, dry thoroughly, inspect ignition components |
| Dressing reaches belt | Noise or slippage | Wipe with a compatible residue remover |
| Spray reaches fuse-box opening | Electrical fault or corrosion risk | Dry externally, inspect seal, seek diagnosis if faults appear |
A flashing cleaner should be reactivated with a light mist of the same compatible product, not scraped with a hard tool. Scraping can permanently mar plastic and coated metal.
A dull aluminum surface may not be a removable stain. Strong alkaline cleaners can attack the oxide layer, so aggressive polishing may be required and should be tested before broad application.
Situational Variations
Daily Driver With Light Dust
Use a rinseless or waterless wash solution, a soft brush, and six to eight towels. Expect 30-45 minutes, and skip degreaser unless an oily film remains after the initial wipe.
Turbocharged or High-Performance Vehicle
Allow extra cooling time around the turbocharger and exhaust heat shields. Avoid dressing near belts, pulleys, intercooler inlets, and heat sources, and inspect heat-shield fasteners before starting.
Hybrid or Electric Vehicle
Treat orange high-voltage cables, inverter housings, battery enclosures, and service disconnects as restricted components. Clean visible plastic and painted surfaces with a dampened towel, never remove high-voltage covers, and use the vehicle manufacturer’s service guidance for contamination near electrical hardware.
How Much Time and Money Does the Job Require?
A routine DIY engine-bay clean costs approximately $25-$75 and takes 45-90 minutes. A heavily contaminated bay can require two sessions because repeated controlled wiping is safer than one aggressive chemical application.
| Vehicle condition | DIY time | Product use | Typical DIY cost |
|---|---|---|---|
| Light dust and fingerprints | 25-40 minutes | 100-200 ml | $15-$35 |
| Moderate road film | 45-90 minutes | 250-500 ml | $25-$75 |
| Oily upper engine | 60-120 minutes | 400-750 ml | $35-$100 |
| Heavy grease or deep mud | 2-4 hours | 750 ml-1.5 L | $60-$150 |
| Professional dry-ice service | 1-3 hours | Specialist equipment | $500-$2,000 |
The cheapest process is not always the least expensive outcome. Replacing a misfiring ignition coil, corroded connector, or damaged alternator can exceed years of professional detailing costs.
Frequently Asked Questions
Can I Use WD-40 to Clean an Engine Bay?
WD-40 can loosen some adhesive and oily residue, but it is not a complete engine-bay cleaner. Its oily film attracts dust and may contaminate belts, brake components, or sensor surfaces. Use a labeled automotive degreaser for soil removal, then wipe all residue thoroughly.
Can I Use a Damp Microfiber Towel?
Yes. A damp, well-wrung microfiber towel is appropriate for controlled waterless cleaning because it transfers minimal free liquid. The towel should never drip, and it should be replaced when it becomes gritty or saturated. Use a dry towel afterward around connectors, seams, and textured plastic.
How Often Should an Engine Bay Be Cleaned?
Most daily drivers need a light engine-bay clean every three to six months, depending on road dust, climate, and oil leakage. Frequent aggressive degreasing is unnecessary and can dry rubber or remove protective finishes. Inspect the bay at every oil change even when no cleaning is scheduled.
Can Waterless Cleaning Remove Rodent Odor?
Waterless wiping can remove surface residue but may not eliminate odor from insulation, nesting, or urine contamination. Inspect the air-intake path, cabin filter area, wiring, and hidden cavities. Significant contamination requires appropriate disinfectant, protective equipment, and sometimes professional remediation.
Should I Clean the Engine Bay Before Selling a Car?
Yes, a controlled clean can improve inspection visibility and remove accumulated dust, but avoid making the bay unnaturally glossy or freshly wet. Buyers may interpret heavy dressing as an attempt to conceal leaks. Clean, dry surfaces allow oil seepage and damaged hoses to be assessed honestly.
The Bottom Line
The safest way to clean an engine bay without water is to cool the vehicle, remove dry debris, protect openings, apply cleaner to a brush or towel, wipe small sections, dry crevices, and inspect before startup. Chemical waterless cleaning suits most DIY jobs; steam and dry ice belong to controlled professional applications. The exact keyword process, how to clean engine bay without water, is defined by restraint: use less liquid, change towels often, and treat every visible leak or damaged seal as a mechanical issue rather than a detailing problem.