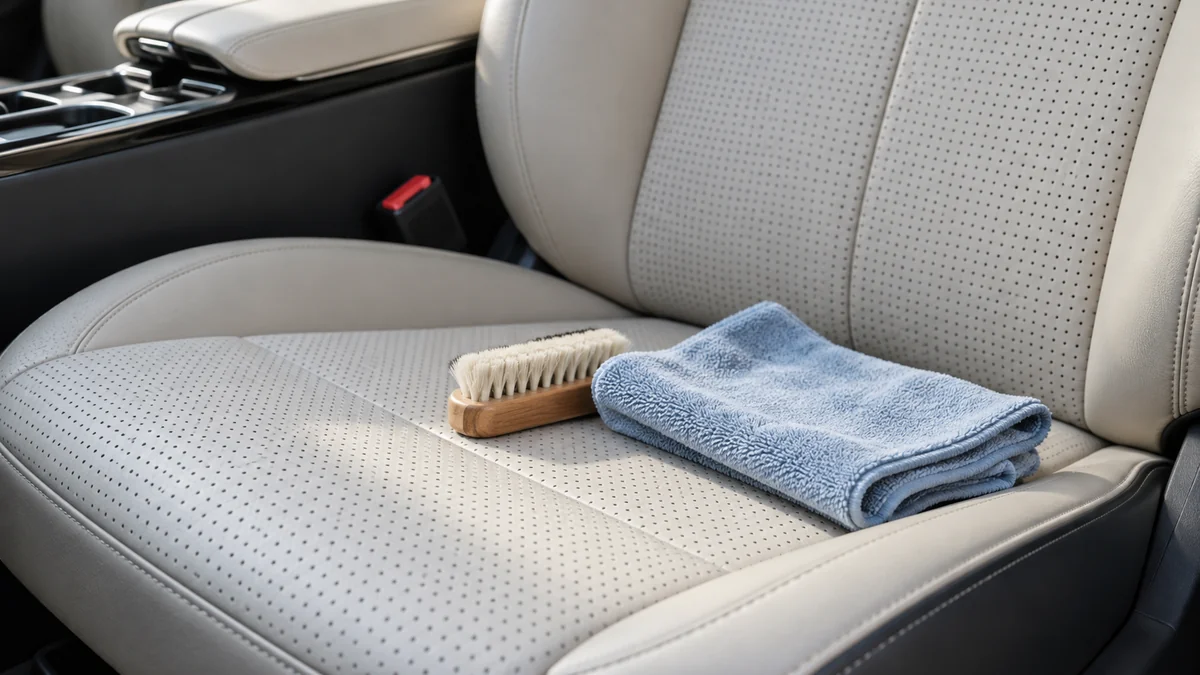
To clean vomit out of perforated leather seats, remove solids without pressing them into the holes, blot liquid upward, extract contamination with a protected wet/dry vacuum, apply foaming leather cleaner sparingly, and dry the seat completely. The most important rule is to extract rather than push, because vomit trapped in the foam causes recurring odor and microbial growth.
Key Facts at a Glance
- Perforated automotive leather can drain liquid into foam, wiring channels, heating elements, and ventilation ducts.
- A plastic scraper and absorbent towels are safer for the first removal pass than horizontal scrubbing.
- Cleaner should go onto a brush or towel, not directly onto a perforated seat.
- A wet/dry vacuum removes contamination; a standard dry vacuum does not safely handle liquid.
- Heated seats should remain off until the seat surface and surrounding wiring are dry.
- Odor that returns when the cabin becomes warm usually indicates contamination below the leather surface.
What Makes Vomit Difficult to Remove From Perforated Leather?
Vomit is difficult to remove because it combines liquid, partially digested solids, stomach acid, proteins, and odor-producing residue. Perforated leather adds thousands of openings that allow contamination to pass into the foam beneath the seat skin, where wiping cannot reach it.
Automotive leather is usually finished with a pigmented coating and a protective topcoat. The surface is more resistant than unfinished leather, but acidic residue can still stain, dull, soften, or etch the coating if it remains in place. Synthetic leather, often called vinyl or polyurethane leather, can also discolor and develop a sticky finish after exposure to unsuitable cleaners.
Seat construction matters. Beneath the leather or vinyl cover may be polyurethane foam, heating pads, seat-cooling channels, pressure sensors, wiring, and an occupancy detection system. Saturating the cushion can therefore create a cleaning problem and an electrical or diagnostic problem.
Why does the extract-don’t-push rule matter?
The extract-don’t-push rule matters because pressure and liquid movement can drive food particles through perforations into the foam. Rubbing sideways spreads residue across clean holes, while pouring cleaner can increase the contaminated volume inside the cushion.
Use vertical blotting, controlled suction, and small quantities of foam. This approach removes material while limiting the amount of moisture introduced below the seat cover.
Before You Start
| Requirement | Typical specification | Why it matters |
|---|---|---|
| Initial response time | Within 15-30 minutes | Prevents drying and reduces penetration |
| DIY working time | 45-90 minutes | Includes extraction and surface cleaning |
| Drying time | 6-24 hours | Depends on humidity, foam saturation, and airflow |
| Difficulty | Moderate | Perforations and electronics require restraint |
| Disposable gloves | 1-2 pairs, nitrile | Protects skin from biological residue |
| Plastic scraper | 1, 2-3 inch edge | Lifts solids without cutting leather |
| Absorbent towels | 10-20 pieces | Blots liquid without spreading it |
| Wet/dry vacuum | 3-6 peak horsepower, liquid-rated | Pulls contamination from perforations |
| Leather cleaner | 2-4 ounces, pH-balanced | Cleans the finish without flooding the seat |
| Soft brush | Horsehair or soft nylon | Works foam into the surface gently |
| Microfiber towels | 3-5, low-lint | Removes cleaner residue |
| Airflow | Fan or open doors for 6-24 hours | Reduces retained moisture |
Check the vehicle owner’s manual before using chemicals or extracting around powered seats. If the seat has a side airbag, cooling fan, occupancy sensor, or visible wiring, avoid disassembly unless a qualified technician performs it.
How Do You Clean Vomit Out of Perforated Leather Seats?
Clean vomit from perforated leather seats in nine controlled stages: isolate the area, lift solids, blot liquid, extract the holes, clean with foam, clear blocked perforations, wipe residue, dry completely, and condition the finish. A fresh spill commonly takes 45-90 minutes to process, while dried or foam-penetrated contamination may require professional extraction.
Step 1: Protect Yourself and Isolate the Area
Put on nitrile gloves, open the doors or windows, and remove loose items from the seat. If the vomit is near a seat belt, buckle, center console, or carpet, place clean towels around the work area to prevent transfer.
Do not kneel on the contaminated seat or place tools directly on clean upholstery. Seal used towels, solids, and disposable gloves in a plastic bag before placing them in household waste.
You’ll know this step worked when: the work zone is contained and no clean surface touches contaminated material.
Common mistake: starting with a spray bottle, which spreads liquid before solids are removed.
Step 2: Lift Solids Without Pressing Them Down
Use a rigid plastic scraper, old gift card, or disposable spatula. Start at the outside edge and lift toward the center, keeping the scraper nearly parallel with the leather rather than pushing its edge into the perforations.
Remove solids in several small passes. Wipe the scraper onto a disposable towel after each pass, and seal the waste immediately.
You’ll know this step worked when: visible solids are gone and the holes have not been filled with smeared material.
Common mistake: using a metal knife, which can cut the finish or enlarge perforations.
Step 3: Blot Liquid Vertically
Place folded paper towels or absorbent microfiber towels over the wet area. Press straight down for 5-10 seconds, lift the towel, rotate to a dry section, and repeat until little liquid transfers.
Do not wipe horizontally during this stage. Horizontal movement pushes residue across the surface and can force it through adjacent holes.
You’ll know this step worked when: a fresh dry towel remains mostly dry after firm vertical pressure.
Common mistake: using one saturated towel repeatedly, which redistributes contamination.
Step 4: Extract the Perforations With a Wet/Dry Vacuum
Use a liquid-rated wet/dry vacuum with a smooth nozzle. Cover a hard plastic nozzle with a clean microfiber layer or use a soft rubber upholstery attachment; secure the covering so it cannot enter the suction path.
Hold the nozzle flat over a section measuring approximately 4 by 4 inches. Apply suction for 10-15 seconds, release, move to the next section, and repeat two or three times. Do not grind the nozzle across the leather.
A household dry vacuum is unsuitable for liquid because moisture can reach its motor or filter. A carpet extractor may work, but its spray function should remain off during the first extraction pass.
You’ll know this step worked when: the vacuum collects liquid or residue and the leather feels damp rather than wet.
Common mistake: using compressed air first, which forces contamination deeper into foam and wiring channels.
Step 5: Apply Foaming Leather Cleaner to the Tool
Choose a pH-balanced automotive leather cleaner labeled for coated leather, vinyl, or the specific material in the vehicle. Dispense one or two pumps onto a soft brush or microfiber towel, not onto the seat.
Work a small 4 by 4 inch area with light circular movements for 15-30 seconds. Keep the foam concentrated on the surface, and stop if color transfers onto the towel or if the finish becomes tacky.
A foam cleaner is appropriate for surface residue. It is not a substitute for extracting contaminated seat foam.
You’ll know this step worked when: the surface looks uniformly clean and the brush produces foam rather than a wet puddle.
Common mistake: spraying enough product to make the perforations visibly fill with liquid.
Step 6: Clear Blocked Holes Carefully
Inspect the perforations under bright light. If dried food or cleaner remains in individual holes, use a flexible rubber gum stimulator or a blunt plastic dental pick. Work from the top with minimal pressure while holding the vacuum nozzle beside the area.
Never use a sewing needle, safety pin, drill bit, or sharp metal pick. Those tools can enlarge holes, tear the coating, or puncture material above a heating element.
You’ll know this step worked when: blocked holes reopen without frayed edges or enlarged openings.
Common mistake: picking aggressively after the material has softened, which causes permanent perforation damage.
Step 7: Remove Cleaner Residue
Dampen a clean microfiber towel with water and wring it until no water drips. Wipe the cleaned area in short, overlapping passes, then follow with a dry towel.
Use only enough water to remove residue. Repeated damp wiping is safer than one saturated rinse because it limits moisture entering the foam.
You’ll know this step worked when: the surface feels clean and not slippery, oily, or sticky.
Common mistake: rinsing by pouring water over the seat.
Step 8: Dry the Seat Without Activating Heat
Park in a secure, ventilated location. Open doors or windows, place a fan outside the vehicle so it blows across the seat, and allow at least 6 hours for a lightly damp surface. Foam that received liquid may need 12-24 hours.
Keep heated-seat and seat-cooling functions off until the upholstery and cushion are fully dry. Heat can accelerate evaporation, but activating an electrical heating element while moisture remains near wiring or connectors introduces avoidable risk.
You’ll know this step worked when: the seat has no cool, clammy areas and the perforations feel dry under a clean fingertip.
Common mistake: closing the vehicle immediately, trapping humid air inside the cushion.
Step 9: Condition Only After Complete Drying
Test a small hidden area with a compatible, water-based leather conditioner. If the color and texture remain unchanged after 15 minutes, apply a thin coat to the cleaned section using a microfiber towel.
Buff off excess conditioner. Do not fill perforations with oily product, because residue can restrict airflow and collect dust.
Conditioner restores feel and lubrication to the coated surface. It cannot neutralize odor trapped in foam or repair an etched pigment layer.
You’ll know this step worked when: the finish feels supple but not greasy and the holes remain open.
Common mistake: conditioning damp leather, which can trap moisture beneath the product.
Which Cleaners and Tools Are Safest?
A foam leather cleaner is usually the safest first product for coated perforated leather, while an enzyme product is more useful for protein odor below the surface. Professional extraction is the strongest option when contamination has reached the foam, but it costs more and may require seat-specific procedures.
| Method | Typical cost | Typical time | Best use | Main limitation |
|---|---|---|---|---|
| Foaming leather cleaner | $10-$25 | 30-45 minutes | Surface residue and light odor | Limited foam penetration |
| Diluted enzyme cleaner | $12-$30 | 1-3 hours | Protein odor in cushion material | Excess liquid can oversaturate foam |
| Wet/dry vacuum extraction | $70-$180 purchase | 30-60 minutes | Removing liquid from holes | Requires controlled technique |
| Professional upholstery extraction | $150-$350 | 2-4 hours | Deep contamination and odor | Cost and vehicle downtime |
| Seat cover removal or foam service | $400-$900+ | 1-2 days | Severe saturation or mold | Requires upholstery labor |
Use an enzyme cleaner only if its label permits use on the seat’s leather, vinyl, foam, and backing materials. Apply a small amount with a controlled dispenser, allow the labeled dwell time, and extract it afterward. Do not assume that a product safe for carpet is safe for finished leather.
Can you use baking soda?
Baking soda can absorb some surface odor after the seat is dry, but it does not remove vomit from foam or disinfect contaminated material. Avoid applying wet baking soda to perforated leather because it can form a paste inside the holes.
If used, spread a thin layer on a dry towel placed over the seat rather than pushing powder into the perforations. Remove it after 6-12 hours with a dry vacuum, followed by inspection of every hole.
Should you use steam?
Steam is not the preferred first method for perforated leather seats. High heat and moisture can soften finishes, drive contamination into the cushion, loosen adhesives, and affect nearby electronics.
A professional may use low-moisture steam on a tested, suitable material, but household steam cleaning is a poor choice when the seat contains heating, cooling, occupancy, or airbag components.
How Should the Method Change for Different Situations?
Fresh vomit should be scraped, blotted, and extracted immediately; dried vomit requires softening on the tool rather than soaking the seat. Seats with cooling fans, heating pads, or visible damage require less liquid and a lower threshold for professional service.
| Situation | First choice | Avoid | Escalation point |
|---|---|---|---|
| Fresh spill, under 30 minutes | Scrape, blot, vacuum | Horizontal scrubbing | Odor after 24 hours |
| Dried residue, under 48 hours | Soft brush with foam | Pouring cleaner | Crusting remains after two passes |
| Heated seat | Minimal liquid, fan drying | Activating heat while wet | Warning light or wet connector |
| Ventilated seat | Surface foam, controlled suction | Flooding perforations | Fan odor or weak airflow |
| Alcantara insert | Manufacturer-approved fabric cleaner | Leather conditioner | Color bleed or stiff nap |
| Cracked leather | Blot and professional inspection | Brushing cracks | Liquid enters visible splits |
| Heavy saturation | Professional extraction | Repeated DIY rinsing | Odor returns after drying |
What if the vomit has already dried?
Remove dry solids with a plastic scraper, then soften residue on a dampened microfiber towel or foam-covered brush for 30-60 seconds. Do not soak the seat to rehydrate the mess, because dried material can dissolve and migrate into the cushion.
Perform a small extraction pass after softening. Two controlled passes are safer than one wet cleaning session that saturates the entire cushion.
What if the seat has heating or cooling?
Keep powered seat functions off during cleaning and drying. Seat ventilation fans, heating grids, occupancy sensors, and side-airbag harnesses differ by vehicle, so the owner’s manual should determine whether a connector or fuse may be accessed.
If vomit reached the seat controls, wiring, belt buckle, or airbag seam, stop after surface removal and arrange an automotive upholstery or dealer inspection. A diagnostic warning light after cleaning requires professional diagnosis.
Why Does the Smell Return on Hot Days?
A returning smell usually means odor-producing residue remains in the foam, backing, ventilation channel, or carpet beneath the seat. Heat increases vapor release from the contaminated material, so the cabin can smell clean when cool and foul after sun exposure.
Wait until the seat is fully dry before diagnosing odor. If smell remains after one controlled cleaning and 24 hours of ventilation, use a compatible enzyme treatment sparingly and extract it. If odor returns after that treatment, professional upholstery extraction is more reliable than repeatedly adding household cleaner.
A practitioner rule of thumb is simple: one odor recurrence is a reason to inspect; two recurrences after complete drying are a reason to escalate. Repeated wetting often enlarges the problem.
Common Mistakes and How to Fix Them
| Mistake | Likely result | Recovery |
|---|---|---|
| Compressed air into wet holes | Deeper foam contamination | Stop airflow, blot, then vacuum |
| Household dish soap | Residue and sticky finish | Wipe with controlled damp towels |
| Bleach or ammonia | Discoloration and finish damage | Stop immediately and rinse minimally |
| Wet baking soda | Caked perforation plugs | Dry fully, then brush and vacuum |
| Heated seat while wet | Electrical and drying risk | Turn off power and ventilate |
| Metal pick or needle | Enlarged or torn holes | Stop picking and inspect damage |
| Excess enzyme product | Oversaturated cushion | Extract and extend drying time |
| Ozone without source removal | Temporary odor masking | Remove contamination first |
If bleach, ammonia, or a strong solvent has already been applied, do not layer another chemical over it. Remove residue with small amounts of clean water, ventilate the vehicle, and consult a leather repair or detailing professional if color or texture changes.
How Much Does Professional Cleanup Cost?
Professional vomit cleanup commonly costs $150-$350 for surface cleaning and extraction, while seat-cover removal, foam treatment, or replacement can raise the total to $400-$900 or more. Pricing varies with vehicle design, contamination depth, local labor rates, and whether carpet, belts, or multiple seats require treatment.
Request an itemized estimate covering surface cleaning, foam extraction, enzyme dwell time, drying, odor treatment, and any seat disassembly. A quote that only includes wiping the leather may not address contamination beneath the perforations.
Choose professional service when the odor persists after complete drying, vomit entered the seat controls or belt buckle, the seat has visible mold, a warning light appears, or the leather finish is cracked and lifting.
Expert Rules That Prevent Permanent Damage
First, never judge cleaning success while the seat is damp. Moisture suppresses some odors temporarily and can make a dirty surface appear uniformly clean.
Second, use suction before adding more chemistry. Removing contaminated liquid reduces the amount of material that a cleaner must dissolve and limits chemical exposure to the finish.
Third, treat perforations as openings into a layered assembly, not as decorative surface texture. The correct quantity of cleaner is the smallest amount that produces working foam across the affected area.
FAQ
Can I use leather wipes on vomit?
Leather wipes can remove a small amount of fresh surface residue after solids and liquid have been lifted, but they rarely remove contamination from perforations or foam. Use one wipe for a limited area, follow with a dry towel, and inspect the holes rather than repeatedly rubbing the seat.
How long should I leave the car open after cleaning?
Allow 6-12 hours for a lightly damp seat and 12-24 hours when liquid reached the perforations or foam. A fan, low humidity, and open doors shorten drying time, but heated-seat activation is not a substitute for safe ventilation.
Can vomit permanently stain leather?
Yes. Acidic residue, food pigments, and chemical cleaners can permanently alter a leather coating, especially when the finish is worn or cracked. Early extraction improves the outcome, but no cleaner can guarantee removal of an existing pigment change or etched topcoat.
How do I clean vomit from the seat belt?
Extend the belt fully, wipe it with a lightly damp cloth and a manufacturer-approved mild cleaner, then let it dry fully before retracting it. Do not saturate the belt or use bleach, solvents, or harsh disinfectants because they can weaken fibers and contaminate the retractor.
Is a professional detailer necessary for every spill?
No. A small fresh spill can usually be handled with scraping, blotting, controlled vacuuming, and foam cleaner. Professional service becomes advisable when odor returns after drying, liquid reached electronics, contamination spread into foam, or the finish shows cracking or discoloration.
The Bottom Line
To clean vomit out of perforated leather seats, lift solids, blot upward, extract through the perforations, use foam sparingly, and dry the seat completely before conditioning. Keep powered seat functions off while moisture remains. If the smell returns after one or two fully dried treatments, the contamination is probably in the foam, and professional extraction is safer than repeated DIY soaking.