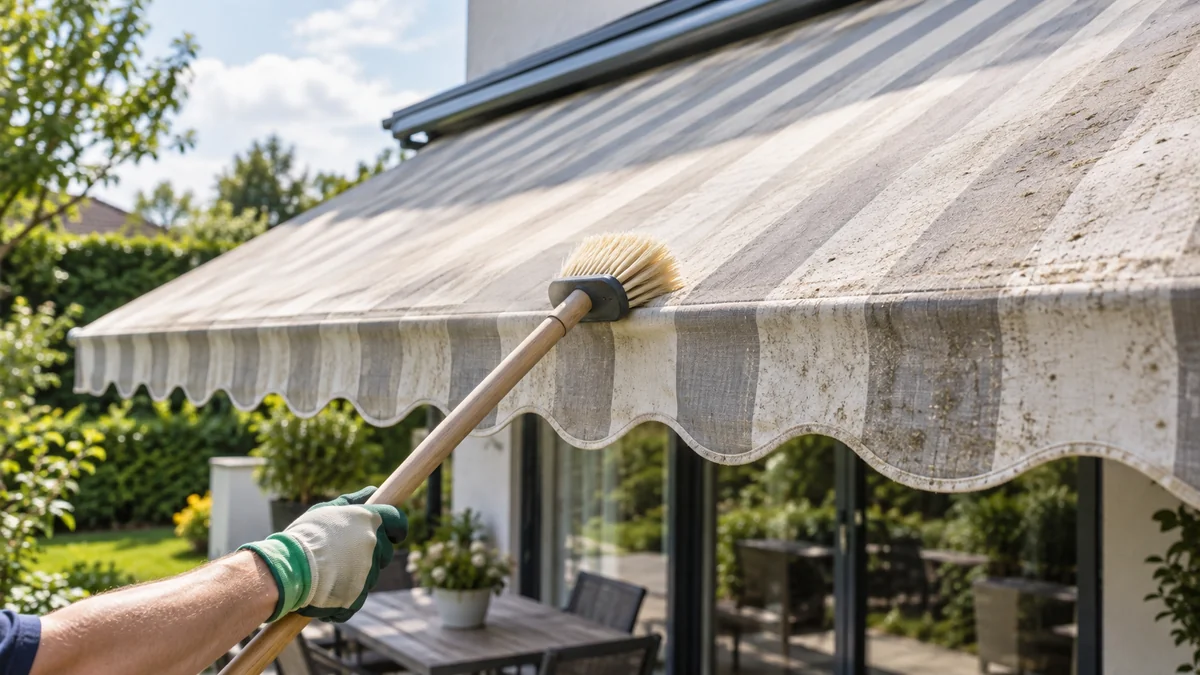
To clean awning fabric safely, remove dry debris, rinse the material, apply a compatible mild cleaner, allow 10-15 minutes of dwell time, brush gently, rinse completely, and air-dry it fully before retraction. The most important factor is fabric identification, because solution-dyed acrylic, vinyl, polyester, and natural canvas require different cleaning products.
Key facts
A garden hose is safer than a pressure washer for most residential awning fabrics.
Awning fabric should be cleaned in shade or on an overcast day so detergent does not dry into streaks.
A mild cleaner must remain wet during its 10-15 minute dwell period.
Never retract an awning while the fabric is damp, even if the surface appears dry.
Bleach is not a universal awning cleaner; manufacturer instructions determine whether it is suitable.
Complete rinsing matters because detergent residue attracts dirt and can alter water repellency.
Before You Start
Cleaning a typical residential awning takes about 1.5-3 hours of active work, followed by 4-8 hours of drying in suitable weather. The job is usually moderate in difficulty, but elevated awnings, brittle stitching, severe mildew, and inaccessible undersides increase the risk of injury or permanent damage.
Choose a dry, calm day with shade throughout the cleaning period. Strong sun can dry detergent unevenly, while wind can spread contaminated runoff onto windows, siding, furniture, and plants.
Tools and materials
| Item | Typical amount or specification | Purpose |
|---|---|---|
| Garden hose | 40-60 PSI typical household flow | Pre-rinsing and final rinsing |
| Soft-bristle brush | Nylon or flagged synthetic bristles, 8-12 inches | Lifting dirt without abrading fibers |
| Mild cleaner | 1-2 tablespoons per gallon unless the label states otherwise | Routine soil removal |
| Pump sprayer or bucket | 1-2 gallons | Even cleaner application |
| White microfiber cloths | 3-6 cloths | Spot cleaning and color transfer checks |
| Protective gloves and eyewear | 1 pair each | Skin and eye protection |
| Plastic sheeting | Enough for nearby furniture or plants | Runoff protection |
Read the sewn-in label, owner’s manual, or fabric manufacturer’s care instructions before mixing any solution. Sunbrella, Dickson, Serge Ferrari, Recacril, and other outdoor textiles may publish different recommendations for mildew, bleach, and re-treatment.
Inspect the awning first
Extend the awning fully and inspect the fabric, seams, hems, thread, hardware, and roller area. Do not begin wet cleaning if the fabric has brittle threads, open seams, torn pockets, exposed foam, rust stains from the frame, or coating that is flaking.
A cleaner cannot repair structural damage. Wet fabric becomes heavier, so weak stitching can fail during washing.
Which Cleaner Is Safe for Each Fabric?
The safest awning cleaner is the mildest product that removes the specific soil without attacking the fabric, coating, thread, or water-repellent finish. Mild soap and water suit routine dirt on many synthetic fabrics, while mildew treatment requires a product specifically approved for the material.
| Awning fabric | Identification clues | Routine cleaner | Main restriction |
|---|---|---|---|
| Solution-dyed acrylic | Woven feel, colored fibers, often labeled Sunbrella or Dickson | Mild soap diluted in water | Do not assume concentrated bleach is approved |
| Vinyl or PVC | Smooth, coated, plastic-like surface | Neutral vinyl cleaner or diluted mild detergent | Avoid acetone, turpentine, paint thinner, and abrasive pads |
| Polyester | Smooth woven textile, often lighter and thinner | Mild detergent or labeled outdoor-fabric cleaner | Strong oxidizers can fade or weaken fibers |
| Natural canvas | Cotton or linen feel, porous and absorbent | Manufacturer-approved canvas soap | Saturation can cause shrinkage, staining, or mildew |
| Coated fabric | Fabric face with waterproof backing or laminated underside | Product specified by the coating manufacturer | Solvents and aggressive brushing can expose the backing |
Acrylic awning fabric often tolerates more cleaning than polyester, but “solution-dyed” describes how color is added, not a blanket permission to use household bleach. The Clorox Company’s general bleach guidance also requires label directions, ventilation, dilution, and material compatibility; an awning manufacturer’s instructions take priority.
Do not mix bleach with vinegar, ammonia, acids, or other cleaners. Chemical reactions can release dangerous gases.
How to Clean Awning Fabric Without Damage
The seven-step process is straightforward: remove loose grit, wet the surface, apply compatible cleaner, maintain dwell time, agitate lightly, rinse from top to bottom, and dry completely. Cleaning succeeds when the solution loosens contamination without drying, abrading the weave, or remaining trapped in seams.
Step 1: Choose the weather and clear the work area
Move furniture, vehicles, toys, and decorations away from the runoff area. Cover sensitive plants with breathable protection or wet them before and after cleaning if the product label permits outdoor use.
Disconnect nearby electrical devices and keep extension cords, outlets, and motors away from flowing water. Keep children and pets outside the work zone.
You will know this step is complete when: the entire splash zone is clear, runoff has a safe path, and the fabric will remain shaded during washing.
Common mistake: starting in direct sun because the weather is otherwise pleasant. Surface temperature can rise quickly, drying cleaner before it lifts soil.
Step 2: Brush off dry debris
Extend the awning and use a soft broom or dry microfiber brush to remove leaves, cobwebs, pollen, loose dust, and twigs. Brush both the visible face and the underside where practical, working from the highest section toward the edge.
Dry removal prevents loose grit from becoming abrasive mud. It also reduces the amount of organic material that consumes cleaner during mildew treatment.
You will know this step is complete when: no loose leaves or cobwebs remain, especially along the valance, seams, cassette, and underside.
Common mistake: using a household broom with stiff polypropylene or wire-like bristles. Those bristles can fuzz acrylic yarn and scratch vinyl.
Step 3: Pre-rinse the fabric
Use a garden hose with a broad spray pattern and rinse from the top down. Wet the entire panel, including the underside and valance, before applying detergent.
A dry textile can absorb concentrated cleaner unevenly, producing spots or color changes. Pre-wetting also cools the surface and gives the cleaning solution a more uniform starting condition.
You will know this step is complete when: water has reached the full weave and begins flowing evenly from the lower edge.
Common mistake: using a narrow, high-impact nozzle. A concentrated jet can force water through seams and damage weak stitching.
Step 4: Apply a compatible cleaner
Mix a mild, non-abrasive cleaner according to its label. For a routine soil load, a typical starting point is 1-2 tablespoons of mild liquid detergent per gallon of water, but the product label and fabric manufacturer’s instructions override that range.
Apply the solution with a pump sprayer, sponge, or soft brush. Work in manageable sections so no area dries before brushing and rinsing.
Test the mixture on a concealed hem or underside section first. Wait until the test area dries, then check for fading, whitening, bleeding, tackiness, or loss of water beading.
You will know this step is complete when: cleaner covers the surface evenly without pooling heavily at seams or dripping uncontrollably onto adjacent materials.
Common mistake: applying concentrated detergent directly to fabric. Concentrate increases residue and can create a visible tide mark.
Step 5: Allow 10-15 minutes of wet dwell time
Leave the cleaner on the fabric for approximately 10-15 minutes, keeping the surface visibly wet. Dwell time allows surfactants to surround oily grime and loosen organic contamination before brushing.
If the cleaner begins to dry, mist the section lightly with water. Do not extend dwell time indefinitely; longer contact is not automatically more effective and can increase the chance of staining or coating damage.
You will know this step is complete when: dirt has softened, but the cleaner has not dried into a film.
Common mistake: scrubbing immediately. Heavy friction before chemical loosening can abrade the textile while producing less cleaning.
Step 6: Brush gently
Use a soft nylon or flagged-fiber brush with light pressure. Brush in overlapping strokes rather than aggressive circles, paying attention to seams, hems, the front valance, and shaded folds where grime accumulates.
A soft car-wash brush on an extension pole can reduce ladder use, but a long pole also reduces tactile control. Keep the brush head flat and stop if the fabric begins to fuzz, distort, or release color.
You will know this step is complete when: visible soil lifts without damaged fibers, loose threads, or color transfer onto a white cloth.
Common mistake: using a stiff deck brush or pressure-washing attachment. Mechanical force can harm the fabric faster than the chemical cleaner removes dirt.
Step 7: Rinse thoroughly and air-dry
Rinse from the top down with a garden hose until water runs clear and no slippery residue remains. Rinse the underside, valance, seams, and folds separately because detergent often collects there.
Leave the awning fully extended until every layer is dry. Depending on humidity, airflow, fabric weight, and shade, complete drying commonly takes 4-8 hours. Extend the period if the underside, seams, or roller tube remain cool and damp.
You will know this step is complete when: the fabric feels dry at seams and folds, has no detergent odor, and does not transfer moisture to a clean white cloth.
Common mistake: retracting the awning when only the upper face feels dry. Trapped moisture inside a roll can produce mildew odor and encourage biological growth.
How Should You Treat Mildew and Green Growth?
Mildew and green growth require identification, controlled dwell time, and a fabric-approved antimicrobial cleaner rather than automatic use of household bleach. Remove surface growth manually after pre-wetting, treat a hidden test area, and rinse exceptionally well.
For solution-dyed acrylic, some manufacturers permit a diluted bleach-and-soap treatment for stubborn mildew. The permitted concentration varies by product and maker, so follow the fabric documentation instead of copying a generic recipe. Polyester, coated fabrics, and natural canvas may discolor or weaken under the same treatment.
Use the following process:
- Wear gloves and eye protection, and prevent contaminated runoff from entering ponds or storm drains.
- Remove loose moss or lichen with a soft brush after wetting the area.
- Apply an approved mildew cleaner to a small test section.
- Keep the solution wet for the label’s stated contact time.
- Brush lightly, then rinse until no odor or slippery residue remains.
- Repeat once only if the fabric remains sound and the product label permits repeated treatment.
Black discoloration may be embedded staining rather than active mildew. Repeated bleaching can lighten the surrounding fabric without removing the mark, creating a larger visible patch.
Can You Use a Pressure Washer?
Most homeowners should not pressure-wash awning fabric. A garden hose provides enough flow for routine rinsing, while concentrated pressure can lift coatings, force water through seams, and damage stitching even when the pressure setting appears moderate.
Pressure-washer risk depends on nozzle type, distance, spray angle, flow, temperature, and fabric condition, not PSI alone. A wide fan held far away is less aggressive than a narrow nozzle held close, but manufacturer instructions remain the controlling standard.
| Cleaning method | Typical force or setting | Suitable use | Main risk |
|---|---|---|---|
| Garden hose | About 40-60 PSI household flow | Pre-rinse and final rinse | Slow removal of heavy soil |
| Low-pressure soft wash | Product-dependent, low-impact spray | Professional mildew treatment | Chemical runoff and uneven application |
| Wide pressure-washer fan | Often 600-1,000 PSI in service work | Only when manufacturer permits | Coating and seam damage |
| Narrow pressure-washer jet | Higher impact at the fabric surface | Not recommended for fabric | Tearing, fraying, and water penetration |
Never use a zero-degree nozzle, rotary turbo nozzle, steam cleaner, or hot-water pressure washer on awning fabric unless the manufacturer explicitly approves it.
How Do You Remove Difficult Stains?
Difficult stains should be treated according to their source, because protein, oil, tannin, mineral, and biological stains respond to different cleaners. Spot-test every treatment and rinse the surrounding area to prevent a clean circular patch.
| Stain | First treatment | Dwell or action | Avoid |
|---|---|---|---|
| Bird droppings | Wet, lift solids, then use mild detergent or labeled enzyme cleaner | About 10 minutes | Dry scraping and aggressive brushing |
| Tree pollen | Dry brush, then mild soap and water | 5-10 minutes | Chlorine treatment for routine pollen |
| Tree sap | Chill or lift residue carefully, then use fabric-approved spot cleaner | Label-directed | Razor blades and unapproved solvents |
| Rust marks | Use a fabric-compatible rust remover | Label-directed | Strong acid on unknown coatings |
| Grease | Mild detergent, repeated rather than concentrated application | 10-15 minutes | Paint thinner and gasoline |
| Green algae | Approved biological-growth cleaner | Label-directed | Mixing cleaners |
For tree sap, do not use turpentine, acetone, or paint thinner on vinyl or coated textiles. Solvents can soften plasticized PVC, dissolve finishes, or leave a larger glossy patch than the original stain.
Bird droppings should be wet before removal. Dried deposits contain abrasive grit and can scratch vinyl when rubbed.
How Do You Dry and Protect the Fabric?
Awning fabric should remain fully extended until the face, underside, seams, hems, and folds are dry. A fabric protectant may restore water repellency after cleaning, but it does not replace proper washing, repair, or manufacturer-approved coating care.
Check dryness at the thickest and least ventilated points. A fan can improve air movement, but do not use a high-temperature heat gun or place synthetic fabric against a heater.
After drying, evaluate water repellency with a few drops of water in an inconspicuous location. If the manufacturer recommends re-treatment, use a product specified for that fabric, such as an approved acrylic or outdoor-textile protectant. Apply evenly and allow the stated curing period before retracting.
Do not apply protectant to visibly dirty fabric. It can seal grime into the weave and make later cleaning harder.
How Often Should You Clean an Awning?
Most residential awnings need a light dry-brush or hose rinse monthly during pollen season and a deeper wash once or twice each year. A full cleaning every 1-2 years is a typical starting point, while coastal air, tree cover, high humidity, traffic soot, and food-service grease may require more frequent service.
| Exposure condition | Light maintenance | Deeper cleaning | Inspection trigger |
|---|---|---|---|
| Dry inland, little tree cover | Every 2-3 months | Every 18-24 months | Before winter storage |
| Humid or heavily shaded | Monthly | Every 6-12 months | Any musty odor |
| Coastal salt exposure | Monthly rinse | Every 6-12 months | White salt film or corrosion |
| Urban storefront | Weekly dust removal | Every 3-6 months | Visible soot or grease |
| RV or caravan canopy | After dusty trips | Every season | Before folding for storage |
Rinse salt and airborne dust before they accumulate. Salt crystals and grit can become abrasive when the awning retracts.
How Much Time and Money Does Cleaning Take?
A DIY awning cleaning commonly costs $20-$60 for mild cleaner, a soft brush, gloves, and optional protectant, excluding equipment already owned. Professional cleaning typically costs about $85-$250 for an accessible residential awning, with higher prices for height, extensive growth, removal, repair, or commercial frontage.
| Job condition | DIY active time | Typical DIY supplies | Typical professional range |
|---|---|---|---|
| Small, lightly soiled awning | 45-90 minutes | $10-$25 | $85-$140 |
| Medium residential awning | 1.5-3 hours | $20-$60 | $120-$250 |
| Heavy mildew or tree growth | 2-4 hours | $30-$75 | $180-$400 |
| Multi-panel commercial awning | 4+ hours | $50-$120 | $300 and up |
Drying time is separate from labor. Schedule at least one weather window that allows the fabric to remain extended until fully dry.
DIY or Professional Cleaning: Which Is Safer?
DIY cleaning suits accessible awnings with intact fabric, mild soil, and a clear care label. Professional service is safer for high installations, commercial canopies, severe biological growth, fragile vintage canvas, or fabric with structural defects.
Hire a qualified cleaner when:
- A ladder or roof access is required.
- The awning cannot be safely extended or supported.
- Seams, hems, or mounting points are failing.
- Mold covers a large area or returns after proper cleaning.
- The fabric is expensive, antique, custom-coated, or difficult to replace.
- Runoff could enter a storm drain, pond, food-service area, or public walkway.
Ask the contractor what chemical will be used, how runoff will be controlled, whether a test patch is included, and whether the service covers fabric damage. A low quote that excludes access protection or rinsing may create greater repair costs.
Common Mistakes and How to Fix Them
Retracting the awning while damp
Extend the awning again at the first safe opportunity and improve airflow. If odor or spotting appears, clean the affected area before storing it.
Applying cleaner to dry fabric
Rinse thoroughly, allow the fabric to dry, and inspect for discoloration. Future applications should begin with complete pre-wetting.
Using a stiff brush
Stop immediately and inspect for fuzzing or broken threads. Do not continue scrubbing damaged fibers; consult the manufacturer if the weave has opened.
Leaving soap residue behind
Rinse again from top to bottom, including the underside and seams. Residual surfactant can attract dust and produce a sticky feel.
Treating every fabric with bleach
Stop using the solution and rinse the fabric thoroughly. If fading, tackiness, or weakening appears, document the product and concentration before contacting the fabric manufacturer.
Cleaning in direct sun
Rinse the affected section promptly to dilute dried detergent. Once dry, inspect for streaking before attempting another treatment in shade.
FAQ
Can I clean an awning with dish soap?
Yes, a small amount of mild dish soap can clean routine dirt from many synthetic awnings when diluted in water and rinsed completely. Dish soap is not a mildew cure, and concentrated or scented formulas may leave residue. Check the fabric label first, then test a concealed section.
Should I remove the awning fabric before washing it?
Usually no. Many residential awnings can be cleaned while installed if the fabric extends securely and the frame is sound. Removal may be appropriate for a small detachable panel, severe contamination, or manufacturer-directed washing, but never place fabric in a washing machine without explicit care instructions.
Can rain clean awning fabric?
Rain can remove loose dust and pollen, but it rarely removes oily grime, bird deposits, mildew staining, or tree sap. Rain also cannot guarantee complete rinsing or drying. Use natural rainfall as a preliminary rinse only, not as a substitute for controlled cleaning.
Why does my awning smell after cleaning?
A persistent smell usually indicates trapped moisture, organic contamination inside folds, detergent residue, or mildew beneath the visible surface. Extend the awning fully, rinse the underside and seams, and dry it with strong airflow. If odor returns, professional inspection may be necessary.
How do I clean the underside of an awning?
Extend the awning fully, remove dry debris, pre-rinse gently, apply compatible cleaner, and brush with light strokes from the underside. Rinse carefully so dirty water does not remain in folds or the roller tube. The underside often needs separate attention because it receives less rain.
How do I know when an awning needs replacement instead of cleaning?
Replacement or repair is more appropriate when fabric has widespread brittle areas, open seams, torn hems, delamination, severe color loss, or coating failure. Cleaning improves contamination, not structural integrity. Have a specialist assess valuable or motorized awnings before applying chemicals.
The Bottom Line
To clean awning fabric safely, identify the material, remove dry debris, pre-rinse with a garden hose, apply a compatible mild cleaner, keep it wet for 10-15 minutes, brush gently, rinse completely, and allow 4-8 hours or longer for full drying. Use manufacturer-approved mildew treatment, avoid unapproved solvents and pressure washing, and never retract damp fabric.