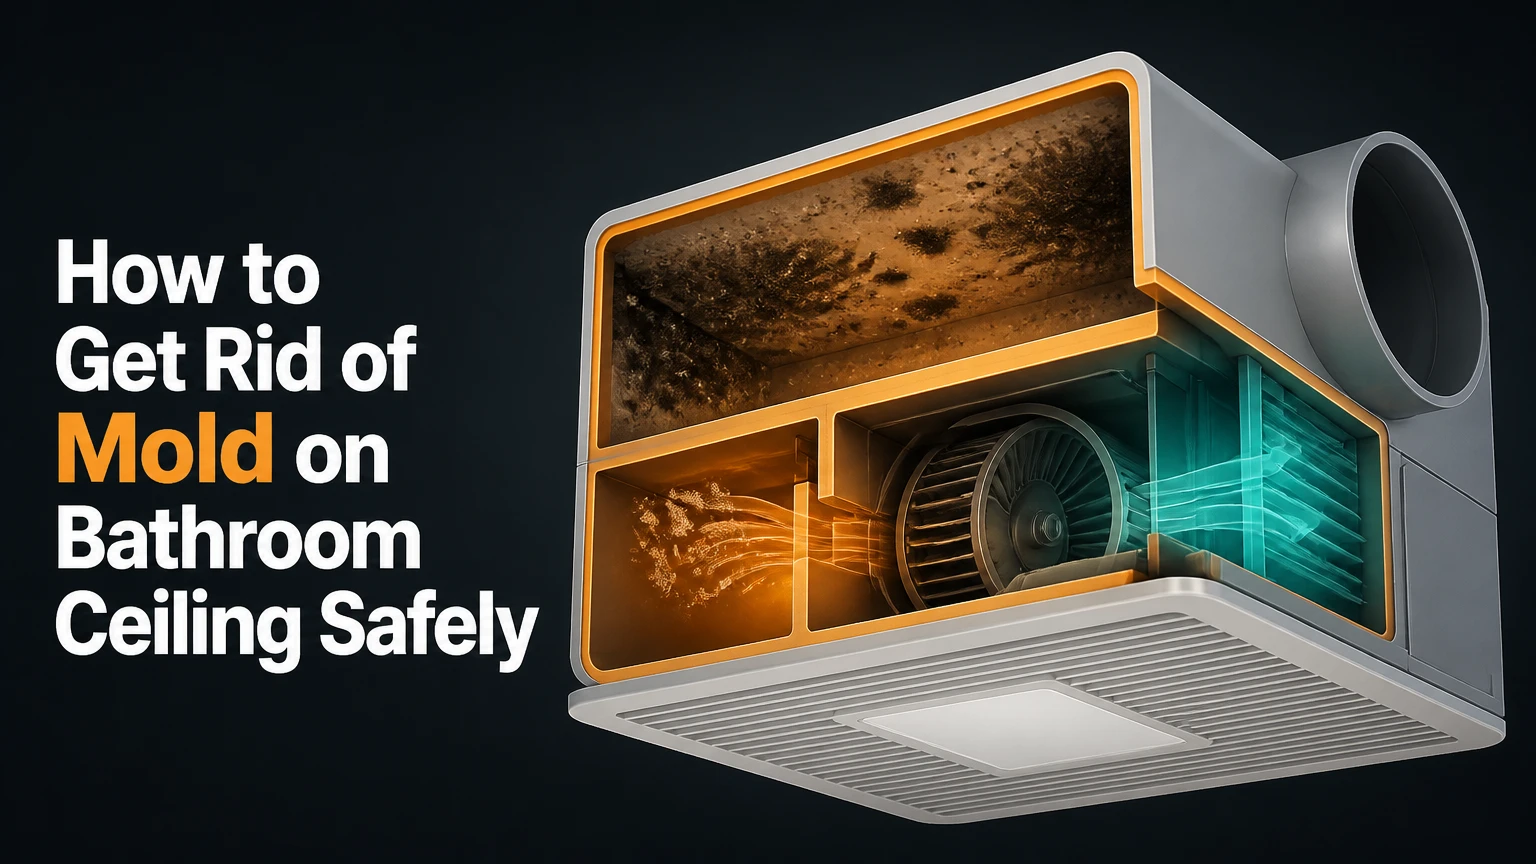
To get rid of mold on a bathroom ceiling, protect yourself, stop the moisture source, lightly dampen the growth, clean the surface with a suitable product, dry the ceiling completely, and repaint only after the material is sound. DIY removal is generally reasonable for a small surface patch under 10 square feet, but wet or damaged drywall requires professional assessment.
Key Facts at a Glance
- Bathroom ceiling mold needs persistent moisture, warmth, and a food source such as painted drywall or wood.
- The U.S. Environmental Protection Agency recommends considering professional help when visible mold covers more than 10 square feet.
- Bleach may whiten mold stains, but it is poorly suited to porous drywall and does not correct the moisture problem.
- Moldy drywall that is soft, swollen, sagging, bubbling, or repeatedly affected may need removal rather than surface cleaning.
- A bathroom exhaust fan should run during a shower and for about 20-30 minutes afterward.
- Mold-resistant primer and paint can reduce surface recurrence, but neither product can waterproof wet drywall.
Why Mold Grows on Bathroom Ceilings
Bathroom ceiling mold forms when humid shower air repeatedly condenses on a cool ceiling or when a leak wets the ceiling assembly. The moisture activates spores already present in household dust, while painted drywall, paper backing, dust, and wood provide organic material for growth.
Condensation is the common cause when mold appears above the shower, around the fan, or in ceiling corners. A roof, plumbing, or attic leak is more likely when one concentrated area is wet, the stain expands independently of shower use, or the ceiling shows yellow-brown water marks.
The EPA states, “The key to mold control is moisture control.” That principle matters more than the cleaning chemical. A product can remove visible growth, but mold commonly returns when the ceiling remains damp after every shower.
Mold or ordinary bathroom staining?
Mold usually appears as irregular black, green, gray, brown, or white spotting with a musty odor. Dirt and soap residue often wipe away without leaving a spreading pattern, whereas mold may leave discoloration embedded in paint or drywall paper.
Color does not reliably identify toxicity. “Black mold” is a household description, not a risk assessment, and dark-colored growth is not automatically the species Stachybotrys chartarum. Treat visible mold cautiously regardless of color.
When Is DIY Ceiling Mold Removal Reasonable?
DIY cleaning is usually reasonable for a small, isolated, surface-level patch under 10 square feet on intact painted material. The EPA uses 10 square feet as a practical point at which many homeowners should consider professional guidance, although water damage, occupant health, and material condition can lower that threshold.
Do not begin by spraying a large area. Inspect the ceiling first, measure the affected patch, identify the moisture source, and check whether the paint and drywall remain hard and flat.
Professional assessment is the safer choice when mold covers more than 10 square feet, affects porous material extensively, follows flooding or sewage contamination, or appears inside a wall, attic, or ventilation system. People with severe asthma, chronic lung disease, mold allergies, or significant immune suppression should avoid performing the cleanup.
Stop before cleaning if these hazards exist
- A ceiling light, fan, or electrical junction is wet, stained, or dripping.
- Drywall feels soft, swells downward, cracks, or sags.
- Water continues entering from the roof, plumbing, or upper floor.
- Insulation above the ceiling is wet or visibly moldy.
- The bathroom has no safe ladder position or the work requires leaning sideways.
- A strong musty odor persists despite no visible surface growth.
Before You Start
A small bathroom ceiling patch typically takes 1-2 hours of active work, followed by 12-48 hours of drying before primer. Typical DIY supply costs range from $25-$90, depending on whether you already own a ladder, respirator, drop cloths, and paint.
| Item | Typical quantity or specification | Purpose |
|---|---|---|
| N95 respirator | 1 properly fitted mask per worker | Reduces inhalation of airborne particles |
| Chemical-resistant gloves | 1 pair, nitrile or neoprene | Protects skin during cleaning |
| Safety goggles | 1 pair with side protection | Prevents overhead splashes |
| Plastic sheeting | 1 sheet, 6 x 9 feet minimum | Covers floor and fixtures |
| Nylon brush or sponge | 1 medium-stiff tool | Agitates the ceiling surface |
| Mold cleaner | 16-32 fluid ounces | Treats the affected area |
| Microfiber cloths | 2-4 disposable or washable cloths | Removes residue |
| Fan or dehumidifier | 1 unit, running continuously | Accelerates drying |
Open a window if available and run the exhaust fan. A box fan should blow outward through the window, not from the moldy ceiling toward the rest of the home. Close the bathroom door while cleaning if doing so does not block required ventilation.
Cover the floor, toilet, vanity, and shower with plastic or disposable sheeting. Turn off electricity at the breaker if moisture is near a light or fan, and do not operate electrical equipment in a wet area.
How Do You Remove Mold From a Bathroom Ceiling?
Remove surface ceiling mold in six controlled steps: diagnose moisture, prepare the room, apply a compatible cleaner, scrub while damp, dry the material, and seal remaining stains with primer and paint. The success checkpoint is a firm, dry ceiling that remains free of new spotting after several weeks of normal bathroom use.
Step 1: Find and stop the moisture source
Inspect the exhaust fan, roof space, plumbing above the bathroom, and ceiling surface before applying liquid. Measure indoor humidity with a hygrometer if possible; a sustained reading above 60% increases condensation and mold risk, while 30-50% is a commonly recommended residential target.
Run the fan during showering and check whether air actually exits outdoors. A fan that merely vents into an attic can move moisture into insulation and roof framing.
You will know this step worked when: the ceiling is no longer damp between showers, the fan exhausts outdoors, and any leak has been repaired.
Common mistake: cleaning the stain before repairing a roof or plumbing leak. That can trap moisture under new primer.
Step 2: Protect yourself and lightly dampen the mold
Put on the N95 respirator, goggles, and gloves before disturbing the growth. Mist the area lightly with your chosen cleaner or clean water so loose material is less likely to become airborne, but do not saturate drywall.
The N95 protects against particles, not chemical vapor. Follow the cleaner’s label for ventilation and respiratory requirements, and use a different respirator or professional service when the product label requires protection beyond a basic disposable mask.
You will know this step worked when: the visible spotting is damp but the ceiling is not dripping, and the work area is contained.
Common mistake: dry-brushing mold overhead. Dry agitation can disperse contaminated dust throughout the room.
Step 3: Apply one suitable cleaning product
Use one product at a time and follow its label concentration and contact time. For intact painted drywall, 3% hydrogen peroxide or a labeled commercial mold cleaner is often more practical than bleach because the treatment introduces less corrosive chlorine and less staining water.
Apply enough product to wet the surface without flooding the ceiling. Product dwell times vary, commonly from 5-15 minutes, so the label controls when it differs from general guidance.
You will know this step worked when: the surface stays visibly wet for the labeled dwell time and the cleaner has not caused paint blistering.
Common mistake: mixing chemicals. Never combine bleach with vinegar, ammonia, alcohol, hydrogen peroxide, or other cleaners because dangerous vapors or reactive compounds can result.
Step 4: Scrub the damp surface gently
Agitate the area with a nylon brush or nonmetallic scrub pad, working from the outside edge toward the center. Use controlled pressure because aggressive scrubbing can remove sound paint, tear drywall paper, and enlarge the contaminated area.
Wipe loosened residue with disposable towels or a damp microfiber cloth. Bag used cloths and disposable sheeting while still in the bathroom, then wash reusable tools separately from household laundry.
You will know this step worked when: loose surface growth is gone, the paint remains attached, and the ceiling has no soft or swollen zones.
Common mistake: sanding moldy paint. Sanding creates fine dust and can spread contamination; it is unsuitable until the material is cleaned, dry, and confirmed sound.
Step 5: Dry the ceiling completely
Run the exhaust fan and a dehumidifier or fan for at least 12-24 hours after cleaning. Do not aim a high-speed fan directly at a visibly wet mold colony before cleaning, because airflow can spread particles.
Press a dry paper towel against a discreet part of the ceiling. The surface should not feel cool and damp, transfer moisture, or show new spotting. A moisture meter can help identify wet drywall, although readings vary by meter and substrate.
You will know this step worked when: the ceiling is firm, odor is reduced, humidity is below 60%, and the surface remains dry overnight.
Common mistake: priming after only a few hours. Trapped moisture can blister paint and conceal continuing growth.
Step 6: Prime and repaint only when the surface is sound
Scrape loose or peeling paint with a putty knife, but do not scrape aggressively into drywall paper. If the ceiling is firm and clean, apply a stain-blocking, mold-resistant primer according to the label, then apply two compatible coats of bathroom paint after the stated recoat interval.
Acrylic-latex bathroom paint with a satin or semi-gloss sheen is easier to wipe than flat paint. Mold-resistant additives help on a clean, dry surface; they do not replace ventilation or repair deteriorated drywall.
You will know this step worked when: primer bonds without bubbling, the finish dries evenly, and no damp odor remains.
Common mistake: painting directly over active mold. Paint can hide discoloration temporarily while moisture and growth continue underneath.
Which Mold Cleaner Works Best on a Bathroom Ceiling?
For intact painted drywall, a labeled commercial mold cleaner or 3% hydrogen peroxide is generally a better starting point than chlorine bleach. Vinegar can be useful for some hard, nonporous surfaces, but no household chemical reliably makes porous, water-damaged drywall safe without removing the affected material.
| Treatment | Typical contact time | Best surface | Main limitation |
|---|---|---|---|
| 3% hydrogen peroxide | 5-10 minutes | Painted drywall, tile, grout | May lighten colored paint |
| Undiluted white vinegar | 30-60 minutes | Tile, grout, some sealed surfaces | Odor and uncertain paint compatibility |
| Labeled commercial cleaner | 5-15 minutes | Product-specified surfaces | Cost and label-specific PPE |
| Diluted chlorine bleach | 5-10 minutes | Limited nonporous surfaces | Poor penetration and drywall damage risk |
Bleach is often chosen because it rapidly lightens dark stains. Lightening is not the same as removing growth from porous material. Chlorine can also damage paint, irritate the respiratory system, and add water to drywall.
Vinegar should not be applied to natural stone, and hydrogen peroxide should be spot-tested because it can alter pigments. Commercial products vary substantially, so “non-toxic” or “permanent” claims should not override the label, safety data sheet, or moisture diagnosis.
Practitioner rule: choose the least aggressive product that is labeled for the ceiling material, then spend the same attention on drying and ventilation. Chemical strength cannot compensate for a wet substrate.
What If the Ceiling Is Drywall, Plaster, or Tile?
Ceiling material determines whether cleaning is appropriate or replacement is necessary. Tile and sealed paint tolerate controlled surface cleaning better than paper-faced drywall, while plaster may remain salvageable if it is hard, attached, and dry.
| Ceiling material | Cleaning outlook | Replacement indicator | Refinish requirement |
|---|---|---|---|
| Painted drywall | Surface cleaning for intact paint | Soft, swollen, sagging, or paper damage | Stain-blocking primer and 2 paint coats |
| Plaster | Often cleanable when firm | Crumbling, detached, or persistently damp plaster | Compatible sealer after full drying |
| Ceramic tile | Generally cleanable | Cracked substrate or failed waterproofing | Regrout or reseal if joints deteriorate |
| Wood paneling | Cleanable when sealed | Rot, deep staining, or wet framing | Repair finish and moisture source |
| Acoustic ceiling tile | Usually replace affected tile | Porous tile with widespread growth | Correct humidity before replacement |
Mold inside paper-faced drywall is not reliably removed by surface wiping. If the paper is torn, swollen, or colonized on the back, a qualified contractor may need to isolate, remove, bag, and replace the affected section.
Do not install “greenboard” or another moisture-resistant panel as a substitute for ventilation. Moisture-resistant drywall slows damage; it does not make a ceiling waterproof or mold-proof.
How Long Does Removal Take and What Does It Cost?
A small surface cleanup usually requires 1-2 hours of active labor and 12-48 hours of drying, while repainting commonly adds another day because primer and paint need separate cure periods. Typical DIY costs range from $25-$150, and professional remediation often ranges from $500 to several thousand dollars when demolition or concealed damage is involved.
| Project type | Active work | Total elapsed time | Typical cost |
|---|---|---|---|
| Small surface patch, existing tools | 1-2 hours | 12-24 hours | $25-$60 |
| Small patch with primer and paint | 2-4 hours | 1-2 days | $60-$150 |
| Drywall section replacement | 4-8 labor hours | 2-4 days | $300-$1,200 |
| Professional remediation, localized | 1-3 days | 2-7 days | $500-$3,000 |
| Extensive water or attic damage | 3-10 days | 1-3 weeks | $2,000-$10,000+ |
Prices vary by region, access, ceiling height, disposal requirements, testing, and whether a roofer, plumber, electrician, or drywall contractor is also needed. Mold testing is not automatically necessary for a small visible patch because visual inspection and moisture assessment usually determine the immediate action.
How Do You Prevent Bathroom Ceiling Mold From Returning?
Prevent bathroom ceiling mold by reducing shower humidity, exhausting moist air outdoors, drying wet surfaces, and repairing leaks. Keep bathroom relative humidity near 30-50% when practical, run the exhaust fan during bathing and for 20-30 minutes afterward, and leave the bathroom door or window positioned for effective air exchange.
Use a timer switch if occupants routinely forget the fan. Clean the fan grille every few months, and verify airflow by holding a tissue near the grille while the fan runs, although that test does not confirm outdoor duct termination.
Wipe condensation from the ceiling and walls after unusually steamy showers. Keep shower curtains spread open so they dry, repair failed caulk, and avoid storing damp towels in the bathroom.
Ventilation targets and practical upgrades
| Condition | Recommended action | Verification |
|---|---|---|
| Working fan, no window | Run 20-30 minutes after showering | Humidity falls below 60% |
| Window available | Open during and after showering | Condensation clears within 30 minutes |
| Fan is noisy or weak | Clean grille and inspect duct | Tissue is pulled toward grille |
| Recurring corner mold | Check insulation and cold bridging | Ceiling stays dry overnight |
| Fan vents into attic | Reroute duct outdoors | Confirm exterior termination |
| Humidity remains high | Add timer, humidity control, or larger fan | Hygrometer reads under 60% |
A higher-capacity fan may help, but fan size should match bathroom volume and local code rather than relying on a generic “highest CFM” recommendation. A licensed electrician should handle new wiring, and a qualified HVAC professional should verify duct routing where access is difficult.
Common Mistakes and How to Fix Them
Painting over visible mold
Paint does not reliably kill or remove mold hidden beneath a coating. Strip loose paint, clean the surface, dry the substrate, and investigate moisture before priming.
Using bleach on porous drywall
Bleach may change the appearance of a stain without reaching growth inside paper or damp gypsum. Stop using it if paint softens, fumes irritate breathing, or the ceiling becomes wetter, then ventilate and reassess the material.
Scrubbing aggressively
Hard brushing can spread residue and damage the ceiling finish. Rewet the surface, use controlled pressure, and stop when the substrate begins to shed paper or powder.
Ignoring the exhaust duct
A visibly clean ceiling can develop new spots when the fan exhausts into the attic or does not move enough air. Inspect the duct outlet and clean accumulated dust from the grille.
Repainting too soon
Primer over damp drywall can bubble, peel, or trap odor. Extend drying, use a dehumidifier, and test the ceiling again after 24-48 hours.
Treating recurring mold as a cleaning problem
Mold returning within 2-4 weeks suggests continuing condensation, a leak, hidden growth, or contaminated porous material. Repeated chemical treatment without diagnosis increases damage while leaving the cause unresolved.
What Should Renters Do?
Renters should photograph the mold, record its approximate size and location, and notify the landlord or property manager in writing before cutting drywall or altering ventilation. Minor surface cleaning may be allowed by a lease, but hidden leaks, defective fans, roof problems, and structural moisture usually require owner or building-management action.
Do not conceal the problem with paint. Include dates, shower or leak observations, ceiling damage, and any respiratory symptoms in the written report, while following local tenancy rules rather than assuming responsibility is identical in every jurisdiction.
When Should You Hire a Mold Professional?
Hire a qualified mold or water-damage professional when growth exceeds 10 square feet, the ceiling is structurally damaged, contamination follows sewage or flooding, or mold appears in attic insulation or inside the ventilation system. Professional help is also appropriate when a household member has significant respiratory vulnerability.
Ask the contractor whether the quote includes moisture-source repair, containment, removal, disposal, drying verification, and reconstruction. Be cautious of companies promising to identify “toxic black mold” from color alone or guaranteeing permanent removal without correcting humidity or leaks.
A remediation contractor may coordinate with a roofer, plumber, electrician, or drywall installer. No single chemical treatment can repair a roof leak, replace rotten framing, or restore sagging drywall.
FAQ
Does bathroom ceiling mold mean there is a leak?
Not necessarily. Mold above a shower commonly results from condensation and inadequate exhaust, while a spreading yellow stain, dripping, or growth unrelated to shower use points more strongly toward a roof, plumbing, or attic leak. Inspect the area above the ceiling when safe and arrange repairs before cleaning.
Can I remove mold without removing the ceiling?
You can often clean mold from intact painted drywall when the patch is small, shallow, and fully dry. Ceiling drywall that is soft, swollen, sagging, torn, or repeatedly affected may contain growth beneath the paper and generally requires removal or professional remediation.
Is vinegar safe for a painted bathroom ceiling?
Vinegar can damage or discolor some painted finishes, and its effectiveness varies by surface and mold condition. Spot-test an inconspicuous area, avoid saturating drywall, never mix vinegar with bleach, and use a product labeled for painted surfaces when the paint’s compatibility is uncertain.
Should I use mold-resistant paint after cleaning?
Mold-resistant paint is useful after cleaning and complete drying, especially in a humid bathroom, but it is not a substitute for moisture control. Use a compatible stain-blocking primer first when discoloration remains, then apply the number of finish coats specified by the paint manufacturer.
Why does mold keep returning in the same corner?
Recurring corner mold usually indicates condensation on a cold surface, inadequate airflow, wet insulation, a hidden leak, or an exhaust duct problem. Measure humidity, inspect the fan and attic when safe, and check the ceiling for soft areas instead of repeatedly applying cleaner.
Can a bathroom fan prevent all ceiling mold?
A correctly installed and properly used exhaust fan substantially reduces moisture but cannot prevent mold caused by leaks, cold bridging, contaminated drywall, or a duct that terminates indoors. Run the fan during the shower and for 20-30 minutes afterward, then confirm that humid air exits outdoors.
The Bottom Line
To get rid of mold on a bathroom ceiling, clean only a small, intact surface patch, use controlled moisture and compatible PPE, dry the ceiling completely, and correct the humidity or leak that caused the growth. Replace damaged porous material and seek professional help when the area exceeds 10 square feet, structural damage exists, or mold returns after proper cleaning.


