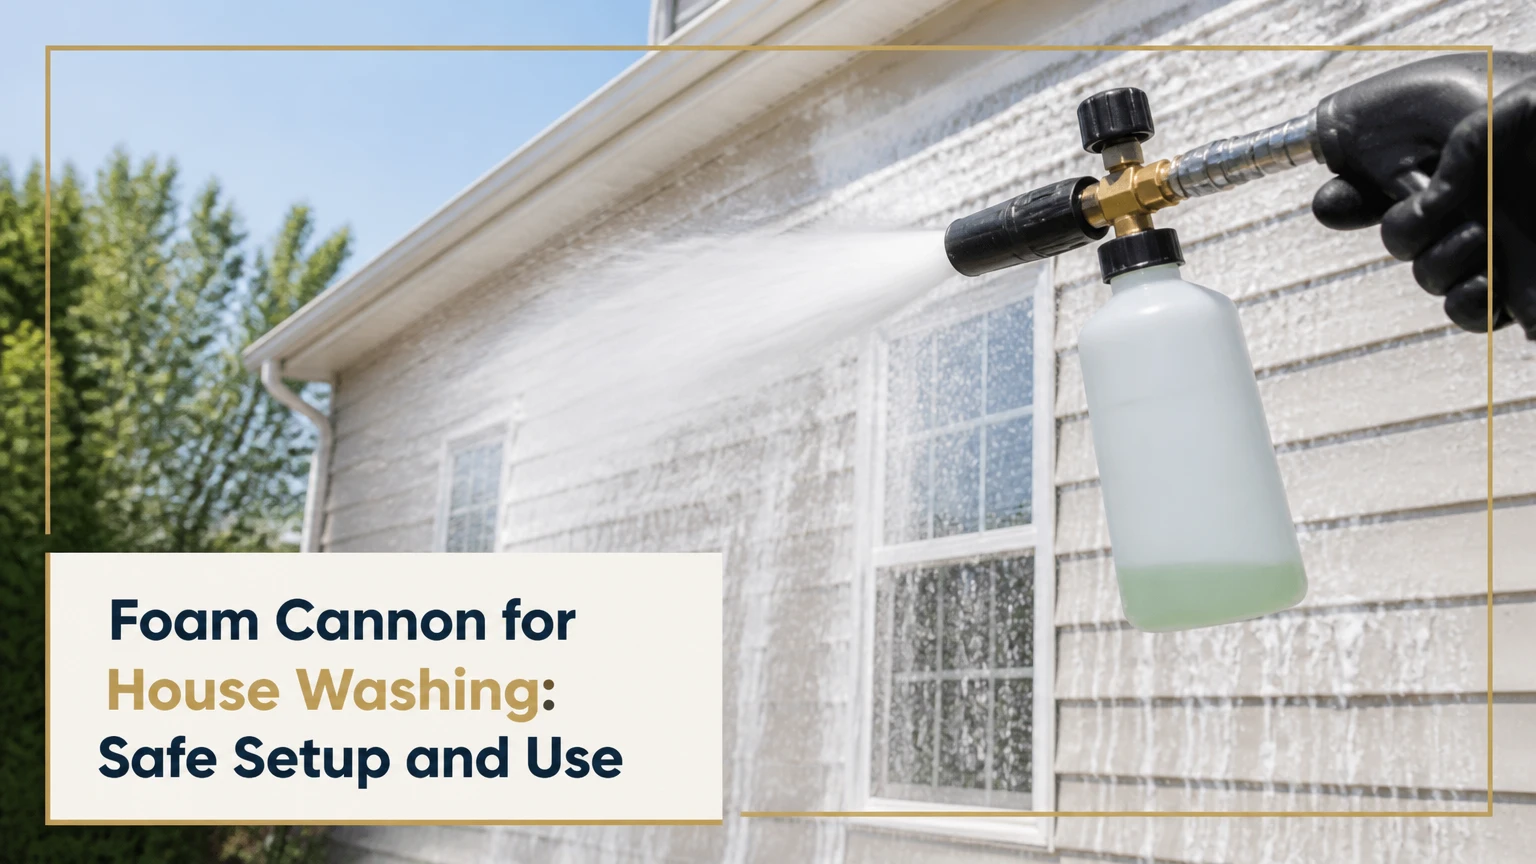
A foam cannon for house washing is a pressure-washer attachment that mixes water, air, and detergent into a clinging spray for siding, stucco, brick, and other exterior surfaces. The right nozzle, flow rate, chemical concentration, dwell time, and rinse technique matter more than maximum foam thickness when removing dirt, algae, or mildew safely.
Key Facts at a Glance
- A pressure-washer foam cannon typically uses a 1/4-inch quick-connect fitting and a 1-liter bottle.
- A delivered flow rate of about 1.4 gallons per minute is a practical lower limit for many consumer cannons.
- A 1.1 mm orifice often suits compact electric washers, while higher-flow machines may require 1.25 mm or 1.4 mm.
- Apply house-wash solution from the bottom upward, keep the surface wet, and rinse from the top downward.
- Typical homeowner equipment costs $15-$100, excluding the pressure washer and cleaning chemicals.
- Foam thickness does not prove that the detergent is strong enough to kill mildew or algae.
What Does a Foam Cannon for House Washing Do?
A foam cannon applies a diluted cleaning solution across a large exterior area without requiring a brush or ladder for every section. The aerated mixture clings longer than plain water, giving surfactants more contact time to loosen soil before a low-pressure rinse removes the residue.
Pressure-washer foam cannons were originally popular in automotive detailing, where thick snow foam helps encapsulate loose grit before contact washing. House washing has different chemical and safety requirements. Vinyl siding, stucco, brick, painted wood, gutters, and soffits may need an exterior detergent, surfactant, or labeled sodium hypochlorite solution rather than car shampoo.
A foam cannon is an application tool, not a complete cleaning system. It cannot compensate for insufficient water flow, an incorrect chemical ratio, a clogged injector, or unsafe pressure. The most reliable results come from controlled chemistry and thorough rinsing, with foam providing distribution and dwell time.
What a Foam Cannon Is Not Good For
A foam cannon is inefficient for very large houses when its small bottle requires repeated refilling. It is also a poor choice when the pressure washer cannot supply enough water to draw chemical consistently. A downstream injector or dedicated soft-wash pump usually handles large residential projects faster because the operator can draw from a five-gallon or bulk container.
High-pressure foam application also cannot repair failed paint, remove deep oxidation without testing, or safely clean every roof material. Asphalt shingles, lead-painted surfaces, friable mortar, and delicate historic finishes require separate procedures.
How Does a Pressure-Washer Foam Cannon Work?
A pressure-washer foam cannon uses a calibrated orifice, Venturi suction, an adjustable metering valve, and a mesh aerator to turn detergent solution into foam. Water accelerates through the orifice, pressure falls at the pickup point, and that pressure difference pulls liquid from the attached bottle.
The basic sequence is:
- Pressurized water enters the cannon.
- The orifice restricts and accelerates the water stream.
- The Venturi effect draws solution through the pickup tube.
- Water and detergent pass through a stainless-steel mesh.
- Air enters the mixture and expands it into foam.
- The fan nozzle distributes the mixture over the wall.
The bottle dilution is not the same as the final solution hitting the house. For example, a cannon that draws one part bottle solution with four parts water delivers a far weaker mixture at the surface than the bottle label alone suggests. Measure the injector draw rate when exact chemical strength matters.
Foam density depends on water temperature, detergent formulation, draw ratio, nozzle adjustment, orifice size, and pressure-washer flow. More foam can increase dwell, but excess air may also reduce the amount of active solution delivered per square foot.
How Do You Match the Cannon to the Pressure Washer?
Match the foam cannon to delivered gallons per minute, fitting type, and orifice size before considering bottle design or brand. Pressure ratings printed on consumer products often describe maximum allowable pressure, not the operating pressure required to produce useful chemical draw.
| Pressure-washer profile | Typical delivered output | Starting orifice | Suitable cannon setup |
|---|---|---|---|
| Compact electric | 1.2-1.6 GPM at 1,300-2,000 PSI | 1.1 mm | Small bottle, short wand, low-draw detergent |
| Mid-range electric | 1.6-2.2 GPM at 1,800-2,400 PSI | 1.1-1.25 mm | Adjustable metering valve, 1-liter bottle |
| Residential gas | 2.3-3.5 GPM at 2,400-3,200 PSI | 1.25-1.4 mm | Brass or stainless body, wider fan pattern |
| High-flow professional | 4.0-5.5 GPM at 2,500-3,500 PSI | 1.4 mm or manufacturer size | Heavy-duty lance or downstream injector |
| Garden hose foam gun | 4-8 GPM at 40-60 PSI | Not applicable | Runny suds, no pressure-washer Venturi cannon |
Many product guides cite approximately 1,100 PSI and 1.4 GPM as minimum operating conditions, with 2,000-3,000 PSI and 2.0-3.5 GPM producing more consistent foam. Treat those figures as practical starting points, not universal standards. A machine’s delivered output can be lower than its nameplate rating because of hose length, water-supply restrictions, nozzle wear, or an undersized inlet.
Why Does Orifice Size Matter?
Orifice size controls the hydraulic restriction inside the cannon. A smaller orifice can improve suction on a low-flow electric washer, while an orifice that is too small for a high-flow machine can cause pressure fluctuation, unloader cycling, or poor rinsing performance.
Start with the orifice supplied by the cannon manufacturer. If the machine produces watery foam, verify the pickup tube and detergent setting before changing the orifice. If the pressure washer pulses repeatedly after fitting a smaller insert, stop using it and install the next larger size.
Which Cleaning Solution Should You Put in the Bottle?
Use a product labeled for exterior house washing and follow its dilution instructions; car shampoo is designed for vehicle finishes and usually lacks the biocidal or mildew-control chemistry needed for organic growth. Sodium hypochlorite solutions may work against algae and mildew, but concentration, dwell time, surface compatibility, and runoff control must follow the product label.
Common solution categories include:
| Cleaning target | Typical product type | Typical bottle treatment | Important limitation |
|---|---|---|---|
| Loose dust and pollen | Mild exterior detergent | Label dilution with clean water | Does not reliably kill established mildew |
| Green algae on vinyl | Labeled house-wash detergent | Product-specific dilution | Test colored trim and painted surfaces |
| Mildew on masonry | Sodium-hypochlorite house-wash blend | Label ratio and injector draw | Protect plants, metals, and runoff paths |
| Greasy exterior soil | Alkaline siding cleaner | Manufacturer dilution | May dull oxidized paint or aluminum |
| Delicate painted wood | Mild pH-neutral cleaner | Lowest effective label dilution | Avoid prolonged dwell and strong pressure |
Never mix bleach with ammonia, acids, toilet cleaner, or acidic masonry products. The U.S. Environmental Protection Agency requires pesticide and antimicrobial products to carry directions that control their safe use, and the product label governs the permitted concentration, contact time, and application method.
The Centers for Disease Control and Prevention also warns against mixing household bleach with other cleaners because hazardous gases can form. Keep chemical containers labeled, wear chemical-resistant gloves and eye protection, and provide ventilation around enclosed porches or breezeways.
How Much Chemical Should You Mix?
Use the label’s final-use dilution and account for the cannon’s water draw. If a product calls for a 1:10 concentrate-to-water ratio at the wall, a bottle mix of 1:10 may be too weak after the cannon adds more water. Conversely, pouring concentrate directly into the bottle can create a dangerously strong spray.
A practical method is to determine the cannon’s draw ratio with a measured container. Run the pressure washer for 60 seconds with the suction tube submerged, measure the liquid removed, and compare that volume with the water delivered during the same minute. Repeat after changing the metering knob.
How Do You Use a Foam Cannon to Wash a House?
A typical two-story, 2,000-square-foot house takes 15-30 minutes for chemical application and approximately 1.5-3 hours for preparation, washing, rinsing, and cleanup. The success factor is keeping the solution wet long enough to work without allowing it to dry on glass, siding, metal, or landscaping.
Before You Start
| Requirement | Typical specification |
|---|---|
| Working time | 1.5-3 hours |
| Foam-cannon cost | $15-$100 |
| Bottle capacity | 1 liter, approximately 32 ounces |
| Water supply | 5/8-inch hose, continuous household supply |
| Protective equipment | Eye protection, gloves, closed-toe footwear |
| Cleaning solution | Label-directed exterior detergent |
| Rinse equipment | 25-degree or 40-degree nozzle, low-pressure setting |
Close windows and doors. Disconnect or cover outdoor electrical equipment, cameras, doorbell transformers, light fixtures, and delicate decorations. Wet nearby plants with clean water before chemical application, cover sensitive vegetation when practical, and move pets indoors.
Inspect the siding for loose panels, failed caulk, cracked mortar, open vents, deteriorated paint, and oxidized aluminum. The Vinyl Siding Institute recommends following the siding manufacturer’s cleaning guidance and avoiding practices that force water behind panels, because trapped water can damage sheathing and insulation.
Step 1: Test the Surface and Chemical
Apply the weakest effective solution to an inconspicuous area, then wait through the intended dwell period and rinse. Check for color change, streaking, chalking, softening, plant injury, or metal discoloration before treating the entire wall.
You will know the test passed when the cleaned patch matches the surrounding surface after drying. The common mistake is testing only the detergent and ignoring the pressure, nozzle distance, and runoff that will occur during the full wash.
Step 2: Pre-Rinse the House
Pre-rinse the wall with clean water, generally working from the bottom upward so lower sections do not dry while upper sections are being prepared. Use a broad fan spray and moderate distance rather than a concentrated zero-degree stream.
A pre-rinse cools hot siding, removes loose grit, and reduces the surface’s immediate absorption of detergent. On a cool, shaded day, a light pre-wet may be sufficient; on hot masonry or sunlit vinyl, continuous wetting matters more.
The checkpoint is a uniformly damp surface with no dry bands. Do not flood electrical fixtures, soffit vents, window seals, or wall penetrations.
Step 3: Mix and Prime the Foam Cannon
Fill the bottle with the measured solution and clean water according to the chemical label and the cannon’s draw ratio. Tighten the bottle, confirm that the pickup tube reaches the liquid, and run the cannon briefly into a bucket or onto a test section.
Adjust the metering knob until the spray covers evenly without starving the pressure washer. The correct setup produces consistent solution draw and stable engine or motor operation.
The common mistake is assuming the cannon’s maximum PSI rating determines performance. Flow rate, orifice calibration, and chemical viscosity usually control suction more directly.
Step 4: Apply Foam From Bottom to Top
Apply the foam in manageable sections, starting at the bottom and moving upward. Keep the nozzle far enough from the surface to avoid forcing water behind siding, and use overlapping horizontal passes for even coverage.
Bottom-up application reduces visible cleaning streaks because the lower wall is already wet and chemically treated before dirty runoff reaches it. Keep overspray away from windows, roof vents, neighboring property, vehicles, and storm drains.
You will know coverage is adequate when the surface is uniformly wet rather than merely white with dry bubbles. Thick shaving-cream foam is not required for effective house washing.
Step 5: Allow Controlled Dwell Time
Allow approximately 5-10 minutes of dwell time when the product label permits it, while keeping the surface visibly wet. Reapply a light mist to drying areas, especially on south-facing walls, dark masonry, hot metal, and windy corners.
Dwell time lets surfactants loosen soil and gives labeled mildew-control chemistry time to work. Longer dwell is not automatically better because dried detergent can leave mineral or chemical residue and can damage sensitive coatings.
The checkpoint is softened dirt, reduced green or black staining, and no dry film. The common mistake is starting another wall before the first wall can be rinsed.
Step 6: Rinse From Top to Bottom
Replace the foam cannon with a 25-degree or 40-degree rinse nozzle and flush the wall from the top downward. Maintain a safe distance, use the lowest pressure that removes residue, and direct water away from openings and behind laps.
Top-down rinsing carries loosened soil and detergent toward the ground instead of across already-rinsed sections. Rinse window frames, trim, gutters, downspouts, and ground-level ledges separately because chemical residue collects in those locations.
You will know the rinse is complete when runoff is clear, the surface no longer feels slick, and no foam remains under trim or at siding overlaps. Inspect after drying because streaks can appear later.
Step 7: Flush the Equipment
Run clean water through the foam cannon, pickup tube, and pressure-washer hose after chemical use. Remove the bottle, rinse its threads and cap, and store the cannon dry with the mesh filter protected from dust.
Chemical residue can crystallize inside the orifice and stainless-steel aerator. The common mistake is storing a diluted bleach solution in the bottle, which can degrade seals, discolor fittings, and create a future compatibility hazard.
Which Application Method Is Better?
A foam cannon is usually best for homeowners who already own a compatible pressure washer and want controlled, visible coverage on a small or medium house. A downstream injector is generally better for large walls and professional work because it draws from a bulk container and leaves the operator holding a lighter wand.
| Method | Chemical draw and reach | Typical cost | Best use | Main trade-off |
|---|---|---|---|---|
| Foam cannon | 0.5-1.5 L bottle, wand-mounted | $15-$100 | Small or medium homes | Frequent refilling |
| Downstream injector | 5-gallon bucket or bulk tank, long hose | $30-$150 | Large residential projects | Thinner application |
| Pump sprayer | Hand or battery pump, 1-4 gallons | $15-$120 | Spot treatment and no power | Slow wall coverage |
| Garden-hose foam gun | Household hose, 40-60 PSI | $10-$40 | Light dirt and rinsable soap | Weak dwell and watery suds |
The downstream injector does not necessarily clean worse. Its solution may look thinner, but the chemical concentration can be more useful because the injector draws from a controlled source and the operator can apply a larger volume efficiently.
When Is a Foam Cannon Better Than a Downstream Injector?
Choose the foam cannon when visual coverage, short-distance application, and small-batch chemical control matter more than refill speed. Choose the downstream injector when the house exceeds roughly 2,500-3,000 square feet, the operator must work from the ground, or multiple chemical batches would interrupt the job.
A dedicated soft-wash pump is preferable for fragile surfaces and large-scale chemical application because it can apply solution at much lower pressure. The foam cannon remains useful for spot cleaning, detergent distribution, and jobs where a pressure washer is already available.
What Does a House-Washing Foam Setup Cost?
A basic foam-cannon setup typically costs $35-$140 before buying a pressure washer, including the cannon, quick-connect accessories, detergent, gloves, and plant protection. Professional stainless-steel cannons and bulk chemical systems can cost substantially more but reduce refill time and improve serviceability.
| Setup level | Equipment cost | Chemical cost | Typical wash time | Typical user |
|---|---|---|---|---|
| Basic electric setup | $35-$70 | $15-$40 per gallon | 2-3 hours | Occasional homeowner |
| Upgraded electric setup | $70-$150 | $15-$40 per gallon | 1.5-2.5 hours | Frequent homeowner |
| Residential gas setup | $100-$300 excluding washer | $20-$60 per gallon | 1.5-2.5 hours | Large-home owner |
| Professional injector setup | $150-$600 excluding washer | $40-$150 bulk container | 1-2 hours | Exterior cleaner |
Chemical consumption varies with draw rate, wall porosity, house size, and the severity of organic growth. Estimate the actual volume by measuring one wall section rather than relying on bottle capacity alone.
What Are the Most Common Foam-Cannon Problems?
Most foam-cannon failures come from restricted water flow, incorrect orifice sizing, air leaks, clogged mesh, or incompatible detergent viscosity. Troubleshooting should begin with the water supply and pickup tube before replacing the cannon.
| Symptom | Likely cause | Corrective action | Success indicator |
|---|---|---|---|
| Watery spray | Low flow, weak draw, open metering valve | Verify GPM, inspect tube, adjust valve | Consistent wet coverage |
| No chemical draw | Loose tube or clogged orifice | Reseat tube and clean filter | Bottle level decreases |
| Pressure pulsing | Orifice too small or supply restricted | Fit larger insert, clean inlet filter | Stable motor or engine |
| Foam fades during use | Mesh clogged or detergent depleted | Rinse aerator and refill bottle | Uniform foam pattern |
| Streaks after drying | Solution dried or poor rinse | Rewet, wash smaller sections, rinse fully | Even finish after drying |
| Plant or trim damage | Overspray or excessive chemistry | Rinse immediately and isolate runoff | No continued discoloration |
Never probe a brass orifice with a steel object because enlarging the opening changes the cannon’s calibration. Use clean water, the supplied cleaning tool, or a manufacturer-approved replacement insert.
A pressure washer that cycles on and off can indicate a flow restriction rather than a foam problem. Remove the cannon, verify the garden-hose supply, clean the inlet screen, and test the machine with its standard wand before continuing.
How Should You Adjust the Process for Different Surfaces?
Surface material determines pressure, dwell tolerance, nozzle distance, and chemical compatibility. Vinyl and sealed brick generally tolerate a mild detergent wash, while painted wood, oxidized aluminum, stucco, and deteriorated mortar require lower pressure and smaller test areas.
| Surface | Chemical approach | Pressure approach | Special precaution |
|---|---|---|---|
| Vinyl siding | Mild detergent or labeled house wash | Broad fan, moderate distance | Avoid forcing water behind laps |
| Brick and mortar | Masonry-safe cleaner | Low-to-moderate rinse pressure | Protect weak or eroded joints |
| Stucco | Mild compatible solution | Wide fan, low pressure | Avoid blasting cracks and weep paths |
| Painted wood | Lowest effective detergent | Low pressure, distant fan | Test for failed paint and moisture entry |
| Aluminum siding | Mild cleaner first | Low pressure | Check for oxidation and chalking |
| Concrete paths | Surface-safe alkaline cleaner | Higher pressure only on sound concrete | Control runoff and avoid etching |
| Asphalt shingles | Roof-specific process | Do not use routine wall-washing pressure | Follow roofing manufacturer guidance |
Organic growth often requires chemical dwell rather than more pressure. Increasing pressure can scar wood, strip paint, drive water behind siding, or remove mortar while leaving the underlying biological stain untreated.
Which Setup Fits Your Situation?
Homeowners with compact electric pressure washers should select a cannon supplied with a 1.1 mm insert or a verified low-flow configuration. They should also expect lighter foam and prioritize correct chemical draw over a dense visual blanket.
Homeowners with 2.5-3.5 GPM gas machines can use a 1.25 mm or 1.4 mm setup, provided the cannon manufacturer supports that flow. A wide-mouth bottle, metal fittings, replaceable mesh, and an adjustable metering valve are worthwhile when the cannon will be used several times each year.
Professional exterior cleaners should usually choose a downstream injector or soft-wash system for whole-house work. A foam cannon earns its place for small commercial areas, spot treatments, decorative masonry, and jobs where visible clinging coverage improves control.
Common Mistakes and How to Fix Them
Letting the Solution Dry
Drying chemistry creates streaks, residue, and possible discoloration. Work in smaller sections, reduce dwell time in sun or wind, and rewet the wall before rinsing.
Using Car Shampoo for Mildew
Car shampoo can loosen ordinary dirt but is not a substitute for a labeled house-wash or mildew-control product. Identify the soil first and choose chemistry designed for the surface and biological growth.
Applying Excessive Pressure
A foam cannon does not make high pressure safe. Use a broad fan, maintain distance, and lower pressure around windows, vents, soffits, painted wood, and damaged siding.
Ignoring Final Dilution
The bottle mixture and wall-applied mixture are different concentrations. Confirm the injector draw ratio when treating mildew, and never increase concentrate simply to create thicker foam.
Washing From the Top Down
Top-down chemical application allows dirty runoff to cross dry areas and produce uneven bands. Apply in sections from bottom to top, then rinse each completed section from top to bottom.
Failing to Protect Plants and Metals
Bleach-based solutions can injure foliage and corrode sensitive metals. Pre-wet plants, cover vulnerable fixtures, control runoff, and rinse exposed metal immediately.
FAQ
Can you use a foam cannon with a garden hose?
A garden-hose foam gun can apply soap, but it is not equivalent to a pressure-washer foam cannon. Household hose pressure normally produces thin suds with limited clinging ability, while a pressure washer supplies the restriction and Venturi action needed for aerated foam.
Does thicker foam clean a house better?
Thicker foam does not automatically clean better. Cleaning performance depends on active chemical concentration, surface wetting, dwell time, agitation when necessary, and rinsing. Excessive aeration can make a product look stronger while reducing the amount of liquid solution reaching each square foot.
Can I put bleach in any foam cannon?
Do not assume every foam cannon is bleach-compatible. Check the manufacturer’s material guidance for seals, tubing, bottle components, and metal fittings, then follow the chemical label. Never mix bleach with acids or ammonia, and flush the cannon with clean water immediately after use.
What PSI should I use to rinse house siding?
Use the lowest pressure that removes detergent and loosened soil, commonly a broad 25-degree or 40-degree spray rather than a concentrated tip. The correct setting depends on siding condition, nozzle distance, and the pressure washer’s delivered output, not its advertised maximum PSI.
How often should you wash a house?
Many homes need exterior washing every 1-3 years, but climate, tree cover, shade, humidity, and surface material change that interval. North-facing walls and shaded masonry may show algae sooner, while dry, sunny locations may remain clean longer.
Is a foam cannon worth buying for one house?
A foam cannon is worthwhile when a compatible pressure washer is already available and the house has broad, moderately dirty surfaces. For one small spot or a machine below the cannon’s reliable flow range, a pump sprayer or downstream injector may cost less and work more predictably.
The Bottom Line
A foam cannon for house washing is a useful chemical-application attachment, not a replacement for correct surface preparation, safe detergent handling, or controlled rinsing. Choose the orifice for the pressure washer’s delivered GPM, use an exterior cleaner matched to the soil, apply from bottom to top, keep the solution wet for its label-directed dwell time, and rinse from top to bottom.
For occasional homeowner work, a $15-$70 cannon paired with a compact electric washer can provide adequate coverage. For large homes and repeated professional jobs, a downstream injector or soft-wash system usually reduces refill time and improves chemical control. Foam should support the cleaning process, not determine it.