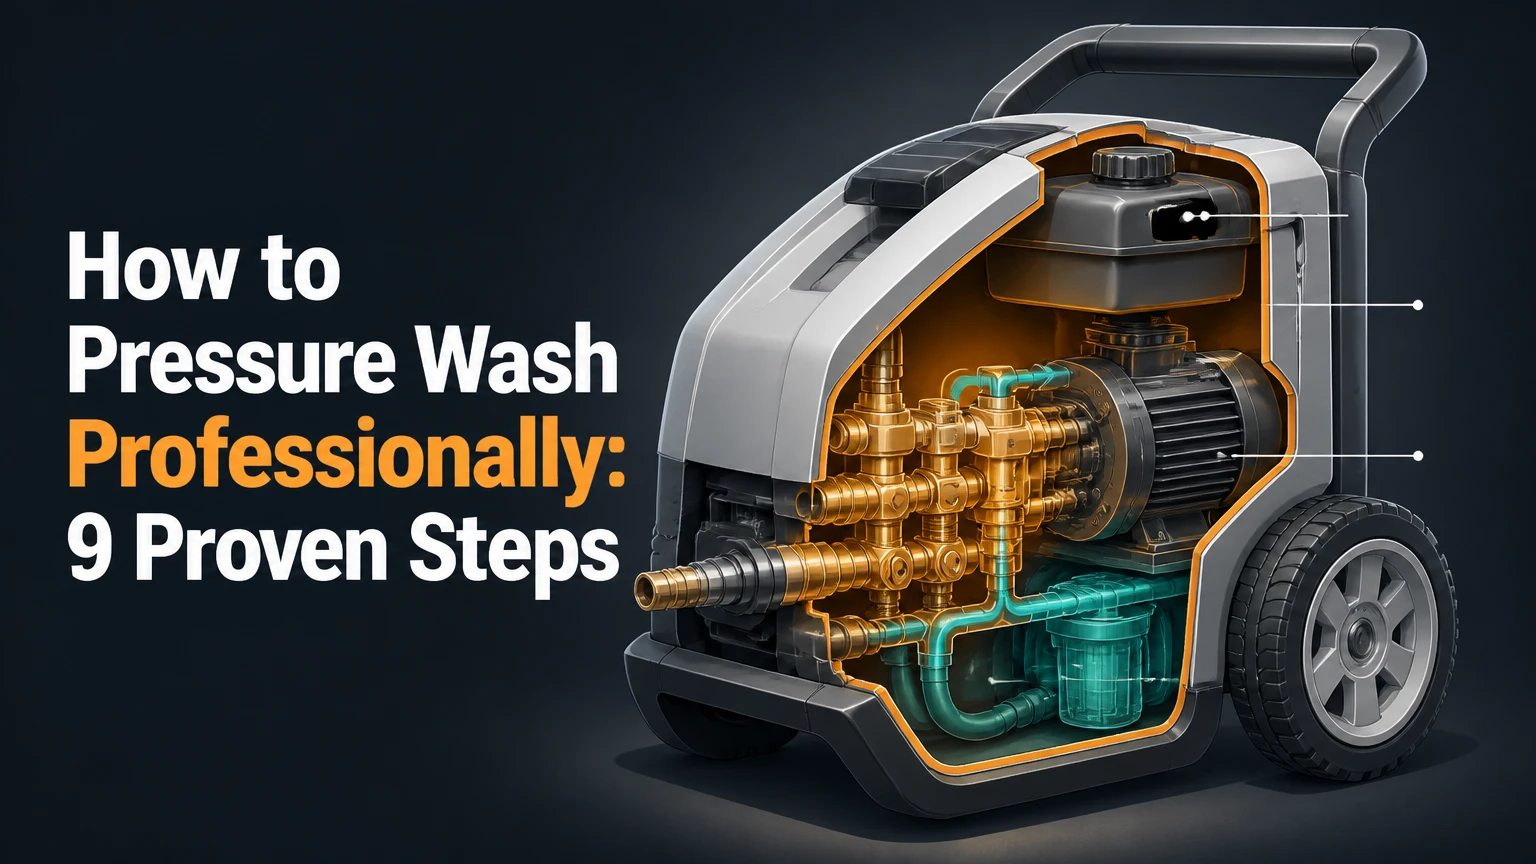
Professional pressure washing means inspecting the surface, selecting the lowest effective pressure, applying the correct detergent, rinsing with controlled overlapping passes, and verifying the result after drying. A professional job is determined more by surface diagnosis, water volume, chemical dwell time, and damage prevention than by using the machine with the highest PSI rating.
Key Facts at a Glance
- Pressure washer performance depends on pressure, water volume, chemical action, and heat.
- A 25-degree or 40-degree nozzle is a safer starting point than a 0-degree nozzle for most surfaces.
- Concrete commonly needs about 2,500-4,000 PSI at the surface, while siding often needs less than 2,000 PSI.
- Professional cleaning speed depends heavily on GPM because water volume carries loosened soil away.
- Soft washing uses low pressure and stronger detergent to clean roofs, stucco, siding, and delicate coatings.
- Never run a pressure-washer pump without an active water supply, because dry operation can damage seals within seconds.
What Professional Pressure Washing Actually Means
Professional pressure washing combines mechanical water force with detergent, water volume, controlled technique, and, where appropriate, heat. Pressure dislodges soil, GPM flushes it away, chemical action breaks organic or oily bonds, and hot water improves grease removal.
The cleaning-unit formula, PSI multiplied by GPM, provides a useful machine comparison, but it does not predict every result. A 3,000 PSI machine at 4 GPM delivers 12,000 cleaning units, while a 2,000 PSI machine at 5 GPM delivers 10,000. The lower-pressure machine may still clean faster when rinsing loose soil from a large surface.
Professional pressure washing is therefore a controlled process rather than a blasting exercise. The operator must identify the substrate, test a small area, select a nozzle, regulate distance, and prevent dirty runoff from entering unwanted areas.
What Determines Cleaning Performance?
| Cleaning factor | What it controls | Typical professional application |
|---|---|---|
| Pressure, PSI | Impact and stripping force | 1,200-2,000 PSI for many siding jobs |
| Flow, GPM | Rinsing speed and soil transport | 3.5-5.5 GPM for commercial exterior work |
| Chemical action | Organic, oily, or mineral soil breakdown | 5-10 minute dwell time when label permits |
| Temperature | Grease and oil removal | 120-200°F water for many industrial degreasing tasks |
Pressure ratings on consumer machines are often maximum figures measured under controlled conditions. Working pressure falls when the trigger is open, the hose is long, the nozzle is worn, or the water supply cannot provide the required flow.
How Much Pressure and Water Flow Do You Need?
The correct pressure is the lowest setting that removes the contamination without damaging the substrate. Typical working ranges are 1,000-1,500 PSI for vehicles, 1,200-2,000 PSI for vinyl siding, 1,500-2,500 PSI for painted wood when appropriate, and 2,500-4,000 PSI for sound concrete.
GPM determines how quickly the operator can rinse. A 1.5 GPM electric washer can clean a small patio, but a 4 GPM commercial machine moves twice as much water in the same period and usually reduces rinsing time substantially.
| Surface or job | Starting working pressure | Typical flow | Initial nozzle or tool |
|---|---|---|---|
| Vehicle paint and trim | 800-1,500 PSI | 1.5-2.5 GPM | 40-degree nozzle, foam cannon |
| Vinyl siding | 1,000-1,800 PSI | 2.0-4.0 GPM | 25-40-degree nozzle |
| Painted wood | 800-1,500 PSI | 2.0-3.5 GPM | 40-degree nozzle, wide fan |
| Concrete driveway | 2,500-3,500 PSI | 3.5-5.5 GPM | Surface cleaner or 25-degree nozzle |
| Brick and masonry | 1,500-2,500 PSI | 3.0-5.0 GPM | 25-40-degree nozzle |
| Industrial grease | 2,000-3,500 PSI | 4.0-8.0 GPM | Hot-water washer and degreaser |
These figures are starting points, not universal settings. Old mortar, painted coatings, soft limestone, stamped concrete sealers, and damaged siding require lower force and a larger test area.
How Do You Check the Water Supply?
Measure the supply before connecting a high-output machine. Place a five-gallon bucket under the hose and time how long it takes to fill. A 5 GPM pressure washer needs a water source that can continuously provide at least 5 GPM, with additional capacity preferred to prevent pump starvation.
A typical garden spigot may provide 4-8 GPM, but flow varies with household plumbing, hose diameter, elevation, and municipal pressure. Use a short 3/4-inch supply hose, remove inlet restrictions, and clean the machine’s inlet screen before diagnosing low pressure.
Choose Equipment by Workload
Gas-powered machines suit mobile commercial work because they deliver higher flow and do not depend on electrical outlets. Electric machines suit vehicles, furniture, small patios, and occasional residential cleaning because they operate more quietly and require less maintenance.
| User or workload | Power source | Pressure and flow | Pump and configuration |
|---|---|---|---|
| Occasional homeowner | Electric | 1,800-2,100 PSI, 1.2-1.8 GPM | Compact axial pump |
| Property manager | Gas | 2,500-3,200 PSI, 2.5-4.0 GPM | Heavy-duty axial or triplex pump |
| Residential service operator | Gas | 3,000-4,000 PSI, 4.0-5.5 GPM | Belt-drive triplex pump |
| Commercial concrete contractor | Gas or trailer gas | 3,500-4,000 PSI, 5.5-8.0 GPM | Commercial triplex pump |
| Grease and industrial cleaning | Hot-water gas | 2,000-4,000 PSI, 4.0-8.0 GPM | Heated belt-drive system |
A belt-drive pump generally runs cooler and places less vibration on the engine than a direct-drive arrangement, although it costs more and needs belt inspection. A triplex plunger pump usually offers better serviceability for frequent work than a small axial cam pump.
Professional accessories also affect output. A 16-20-inch surface cleaner matched to the machine’s GPM can produce more even concrete results than a hand wand, while a downstream injector applies detergent without sending concentrated chemical through the pump.
Match the Nozzle to the Surface
Nozzle angle controls how widely water spreads, while nozzle orifice size must match the washer’s rated flow and pressure. A professional operator begins with the widest practical fan and tests pressure, distance, and dwell time before moving to a more aggressive tip.
| Nozzle | Spray angle | Typical use | Main risk |
|---|---|---|---|
| Black soap tip | 65 degrees | Low-pressure detergent application | Weak chemical draw with excessive backpressure |
| White tip | 40 degrees | Vehicles, windows, delicate surfaces | Stripes if held too close |
| Green tip | 25 degrees | Siding, decks, general rinsing | Wood grain damage at short distance |
| Yellow tip | 15 degrees | Sound concrete and heavy deposits | Etching, coating removal, splashback |
| Red tip | 0 degrees | Specialized spot work only | Gouging, injury, permanent surface damage |
A 0-degree nozzle is rarely appropriate for routine professional cleaning. Turbo nozzles rotate a narrow jet and can remove concrete soil quickly, but they require a consistent height and should not be used on siding, wood, glass, vehicles, or painted coatings.
Before You Start
Time: 2-6 hours for a typical house exterior, including setup and cleanup.
Difficulty: Moderate, with high damage risk on roofs, wood, paint, and masonry.
Typical equipment cost: $150-$400 for basic electric equipment, $800-$2,500 for a capable gas setup, and $4,000-$12,000 or more for a commercial trailer system.
Tools: Pressure washer, 3/4-inch supply hose, high-pressure hose, trigger gun, 25-degree and 40-degree nozzles, detergent injector, stiff brushes, surface cleaner, PPE, tarps, plant-wetting hose, and warning signs.
Prerequisites: Confirm water access, drainage, electricity or fuel, weather conditions, chemical labels, and permission to discharge wastewater.
Wear eye protection, waterproof non-slip footwear, chemical-resistant gloves, and hearing protection around gas-powered machines. Keep the wand pointed away from people, pets, glass, electrical equipment, and uncovered skin.
Step 1: Inspect the Site and Surface
Inspect the material, contamination, condition, drainage, and nearby hazards before starting the machine. Identify cracks, loose mortar, failed caulk, flaking paint, oxidized siding, damaged screens, exposed wiring, and areas where water can enter the building.
Walk the entire work area. Check whether runoff will reach a garage, basement stairwell, storm drain, neighboring property, pond, or planted bed. Photograph existing damage before moving furniture so later discoloration is not mistaken for cleaning damage.
Success checkpoint: You can name the substrate, the likely contamination, the safe cleaning method, and the direction of runoff.
Common mistake: Treating every dark mark as dirt. Oxidation, rust migration, failed sealant, and permanent staining may not respond to pressure washing.
Step 2: Prepare the Area and Protect Property
Remove furniture, toys, vehicles, planters, loose decorations, and outdoor rugs. Close windows and doors, cover electrical outlets and fixtures, disconnect sensitive equipment, and protect air-conditioning units from direct spray.
Pre-wet grass and ornamental plants with clean water before applying detergent. Use temporary plastic only where necessary and remove it promptly so trapped chemical solution or heat does not damage foliage. Do not seal a plant under plastic during a long job.
Mask or shield vulnerable surfaces, but never create a path that directs water into wall cavities. Confirm that all drains and gutters can handle the expected flow.
Success checkpoint: Water can travel to an approved drainage point without crossing an unprotected doorway or neighbor’s property.
Common mistake: Covering an outdoor outlet and assuming it is waterproof. Keep the spray away from electrical equipment even when a weatherproof cover is present.
Step 3: Set Up and Test the Pressure Washer
Connect the water hose first, turn on the supply, and squeeze the trigger until air stops sputtering from the gun. Only then start a gas engine or switch on an electric motor. Attach the widest suitable nozzle and inspect every connection for leaks.
Keep the machine on stable ground with ventilation around a gas engine. Never operate gasoline equipment inside a garage, shed, basement, or partially enclosed trailer because carbon monoxide can accumulate rapidly.
Test the nozzle on an inconspicuous area for 10-20 seconds. Start 18-24 inches away, keep the wand moving, and reduce distance gradually only if the soil remains attached.
Success checkpoint: The spray fan is even, the pump sounds steady, and the test area shows no etching, fuzzing, coating loss, or water intrusion.
Common mistake: Using a nozzle with the wrong orifice. An undersized orifice can overload the pump and make the engine bog down.
Step 4: Apply the Correct Detergent
Apply detergent at low pressure, usually through a black soap tip, downstream injector, foam cannon, or dedicated soft-wash system. Select a product for the contamination and follow its label for dilution, ventilation, personal protection, dwell time, and disposal.
Sodium hypochlorite solutions can remove mold, algae, and many organic stains, but concentration and exposure time must match the substrate. Surfactants improve cling on vertical surfaces. Degreasers help with oil, while oxalic or other acid products may address rust or mineral deposits only when the label permits their use.
Never mix bleach with acids, ammonia, or other cleaners. Chemical reactions can release toxic gases. Apply in manageable sections, keep the surface wet for the labeled dwell period, commonly 5-10 minutes, and prevent the solution from drying.
Success checkpoint: Organic growth has lightened, oily soil has softened, and detergent remains wet without drying into a film.
Common mistake: Applying stronger chemical because the first pass was ineffective. Increase dwell time, improve coverage, or select a compatible product before increasing concentration.
Step 5: Wash with Controlled Overlapping Passes
Wash from the highest practical section downward, using smooth horizontal or vertical passes with 25-40% overlap. Hold the wand at approximately 25-45 degrees to the surface, maintain a consistent distance, and keep the nozzle moving before pulling the trigger near a delicate coating.
Start with lower pressure and a wider fan. Typical working distance is 12-24 inches for siding and wood, 8-18 inches for sound concrete, and farther for vehicles, glass, or fragile finishes. Use a surface cleaner on broad concrete areas to reduce zebra stripes.
Do not stop the jet in one place. Pressure concentrated on a stationary point can strip paint, cut wood fibers, expose aggregate, or force water behind siding.
Success checkpoint: Soil lifts evenly, the cleaned boundary remains uniform, and no visible fan marks appear when the surface is wet.
Common mistake: Chasing a stubborn spot with the red nozzle. Use additional detergent, a brush, a surface-appropriate chemical, or a controlled second pass instead.
Step 6: Rinse Thoroughly from Top to Bottom
Rinse with clean water from the highest point downward, moving slowly enough to remove detergent and loosened soil from joints, ledges, corners, and trim. Keep the nozzle farther away when rinsing windows, painted areas, and loose mortar.
Inspect runoff while working. Dirty water that dries on a lower wall can leave streaks, while chemical runoff can scorch plants or discolor adjacent concrete. Use berms, drain covers, wet vacuums, or recovery systems where local rules require containment.
Success checkpoint: Rinse water runs clear, no foamy residue remains, and lower sections do not receive concentrated soil from an upper section.
Common mistake: Rinsing only the visibly dirty face. Detergent often remains beneath window sills, behind shutters, under railings, and along expansion joints.
Step 7: Complete the Final Inspection and Cleanup
Allow the surface to dry before judging uniformity, because wet concrete and siding can conceal missed areas. Remove coverings, rinse plants again, return movable items, flush chemical lines, and coil hoses without sharp bends.
Document unusual pre-existing damage and any areas that could not be cleaned safely. For paid work, take completion photographs from the same angles as the initial inspection and record chemicals, settings, and exceptions.
Success checkpoint: The surface is uniform after drying, property is returned to its original position, and no chemical residue or loose debris remains.
Common mistake: Packing up immediately after rinsing. Drying often reveals stripes, oxidation, missed algae, and detergent residue.
Surface-Specific Adjustments
Different substrates require different combinations of pressure, chemical action, distance, and tools. The safest professional method changes when the material changes.
| Surface | Preferred method | Starting settings | Avoid |
|---|---|---|---|
| Vinyl siding | Low-pressure detergent and rinse | 1,000-1,800 PSI, 25-40 degrees | Spraying upward beneath lap joints |
| Wood deck | Mild detergent and controlled rinse | 800-1,500 PSI, 40 degrees, 12-24 inches | 0-degree tips and close passes |
| Concrete | Pretreat, surface-clean, rinse | 2,500-3,500 PSI, 3.5-5.5 GPM | Holding a turbo nozzle stationary |
| Vehicle | Foam, rinse, hand wash | 800-1,500 PSI, 40 degrees | Direct spray at seals and bearings |
| Roof | Soft wash, not routine pressure | Usually below 500 PSI | Walking on fragile shingles or blasting granules |
| Stucco | Low-pressure chemical wash | 500-1,200 PSI, wide fan | Forcing water into cracks and weep paths |
Should You Pressure Wash a Roof?
Routine high-pressure washing is usually unsuitable for asphalt shingles because concentrated water can remove granules, damage flashing, and drive moisture beneath the roofing system. A low-pressure soft-wash application with a roof-compatible solution is generally safer, but roof pitch, material, age, and access determine whether a trained contractor should perform the work.
Pressure Washing or Soft Washing?
Soft washing is the better method for roofs, many stucco finishes, vinyl siding with organic growth, and fragile painted surfaces because detergent performs most of the cleaning at low pressure. High-pressure washing is better for sound concrete, some brick, heavy soil, and hard surfaces that can tolerate mechanical impact.
| Decision factor | Soft washing | High-pressure washing |
|---|---|---|
| Typical pressure | 100-500 PSI | 1,500-4,000 PSI |
| Main cleaning action | Chemical treatment | Mechanical impact and rinsing |
| Best surfaces | Roofs, siding, stucco, delicate coatings | Concrete, masonry, durable hardscape |
| Typical dwell time | 5-15 minutes | 1-5 minutes with detergent |
| Main failure | Plant or chemical damage | Etching, splintering, coating loss |
Soft washing does not mean chemical application without rinsing. The surface still requires controlled rinsing, plant protection, runoff management, and full compliance with the product label.
Time and Cost Planning
A two-car driveway commonly takes 1-2 hours for setup, pretreatment, surface cleaning, edging, and rinsing. A single-story house wash commonly takes 2-4 hours, while a commercial parking area may require 4-8 hours or multiple crews depending on square footage, gum deposits, water access, and wastewater controls.
Typical customer pricing varies by region, access, surface condition, insurance, labor, and containment requirements. A small residential service may cost $150-$400, a house wash $250-$800, and a larger commercial concrete job $0.15-$0.40 per square foot. These are planning ranges, not universal rates.
When estimating, include travel, setup, detergent, fuel, water, labor, insurance, equipment depreciation, administrative time, and rework risk. High GPM usually improves production, but only when the surface cleaner, hose, water supply, and recovery plan can support it.
Common Failures and How to Fix Them
Why Is the Pressure Low?
Check the water supply, inlet screen, supply hose, connections, nozzle, and high-pressure hose in that order. A clogged tip or restricted inlet often causes sudden low output, while a worn nozzle can create a broad, weak fan.
Why Does the Pump Pulse?
Pulsing commonly indicates trapped air, inadequate inlet flow, a blocked screen, a worn seal, or an unloader problem. Remove the nozzle, run water through the gun until the flow is steady, then reinstall the tip and retest.
Why Does the Engine Bog Down?
An undersized nozzle orifice, excessive unloader pressure, restricted water flow, dirty air filter, or fuel problem can overload the engine. Use the nozzle size specified for the machine’s GPM and never compensate by forcing the trigger partially closed.
Why Are Stripes Appearing?
Stripes result from uneven wand speed, insufficient overlap, inconsistent nozzle height, a clogged surface-cleaner tip, or detergent drying. Rewet the area, correct the tool, and make overlapping passes across the full section rather than spot-cleaning isolated lines.
What If the Surface Was Damaged?
Stop immediately and photograph the damage. Do not attempt to hide etching, exposed aggregate, stripped paint, or wood fiber damage with additional pressure. For masonry, wood, paint, and roofing, consult a qualified restoration professional before selecting a repair.
Common Mistakes and How to Avoid Them
- Choosing PSI before identifying the substrate: Surface material determines the safe force, not the machine’s maximum rating.
- Using too little water volume: Low GPM leaves suspended soil behind and extends rinsing time.
- Letting detergent dry: Drying creates residue and can produce uneven chemical damage.
- Spraying upward under siding: Water can enter behind panels and wet insulation or sheathing.
- Ignoring oxidation: Pressure may remove dirt while leaving chalky oxidation, producing a falsely uneven result.
- Starting a pump without water: Dry seals can fail rapidly, creating leaks and expensive repairs.
- Neglecting wastewater: Soil, oil, and cleaning chemicals can enter storm drains and violate local discharge rules.
The most counterintuitive rule is that more pressure often produces a worse result. A moderate-pressure machine with adequate GPM, effective detergent, and disciplined passes can outperform a higher-PSI machine operated too close to the surface.
When DIY Is the Wrong Choice
Hire a qualified professional for steep or fragile roofs, buildings with lead-based paint risk, large commercial sites, high elevations, extensive oil contamination, uncertain electrical conditions, or work requiring wastewater recovery. The U.S. Environmental Protection Agency’s renovation rules may apply when paid work disturbs lead paint in pre-1978 buildings, so scraping or blasting old coatings requires specific compliance planning.
DIY pressure washing is reasonable for a small patio, vehicle, outdoor furniture, or sound driveway when the operator can control runoff and test the surface. It is not a suitable substitute for structural repair, roof maintenance, hazardous-material handling, or high-access work.
FAQ
Can Pressure Washing Remove Mold Permanently?
Pressure washing removes visible mold and algae from hard surfaces, but it may not prevent regrowth when moisture, shade, and organic residue remain. A compatible biocidal treatment with adequate dwell time can address growth more effectively than mechanical force alone. Roofs and siding generally need soft washing rather than aggressive pressure.
What Is Better, PSI or GPM?
GPM is often more important for productivity because flow rinses loosened contamination from the surface. PSI determines impact force, so the best machine balances both values. For example, 3,000 PSI at 4 GPM can clean large concrete areas faster than 3,000 PSI at 2 GPM, assuming the water supply supports the higher flow.
How Long Should Pressure-Washing Detergent Sit?
Many detergents need approximately 5-10 minutes of dwell time, while some specialized products require longer periods stated on the label. Keep the surface wet during dwell and work in small sections. More dwell time with correct dilution is usually safer than immediately increasing pressure.
Can Pressure Washing Damage Concrete?
Pressure washing can etch concrete, expose aggregate, remove sealer, or create visible cleaning bands when the nozzle is too close or the pressure is excessive. Use a surface cleaner, maintain consistent height, test older slabs, and reduce pressure on decorative or sealed concrete.
Is Hot Water Necessary for Pressure Washing?
Hot water is valuable for grease, oil, food residue, and industrial soil because heat lowers the viscosity of oils and improves detergent performance. Cold water is normally adequate for dirt, algae, mildew, mud, and general residential exterior cleaning. Hot-water equipment costs more and requires burner maintenance.
What Should You Do After Pressure Washing?
Inspect the surface after it dries, rinse nearby plants, remove protective coverings, clear debris from drains, flush chemical equipment, and document any areas that were unsafe to clean. Check windows, doors, outlets, siding joints, and landscaping for trapped water or chemical residue.
The Bottom Line: How to Pressure Wash Professionally
To pressure wash professionally, inspect the substrate first, prepare the site, verify the water supply, apply compatible detergent, select the lowest effective pressure, and rinse with consistent overlapping passes. Professional pressure washing succeeds through diagnosis and control, not maximum PSI. Match PSI, GPM, nozzle angle, chemical dwell time, and runoff protection to the surface before beginning every job.


