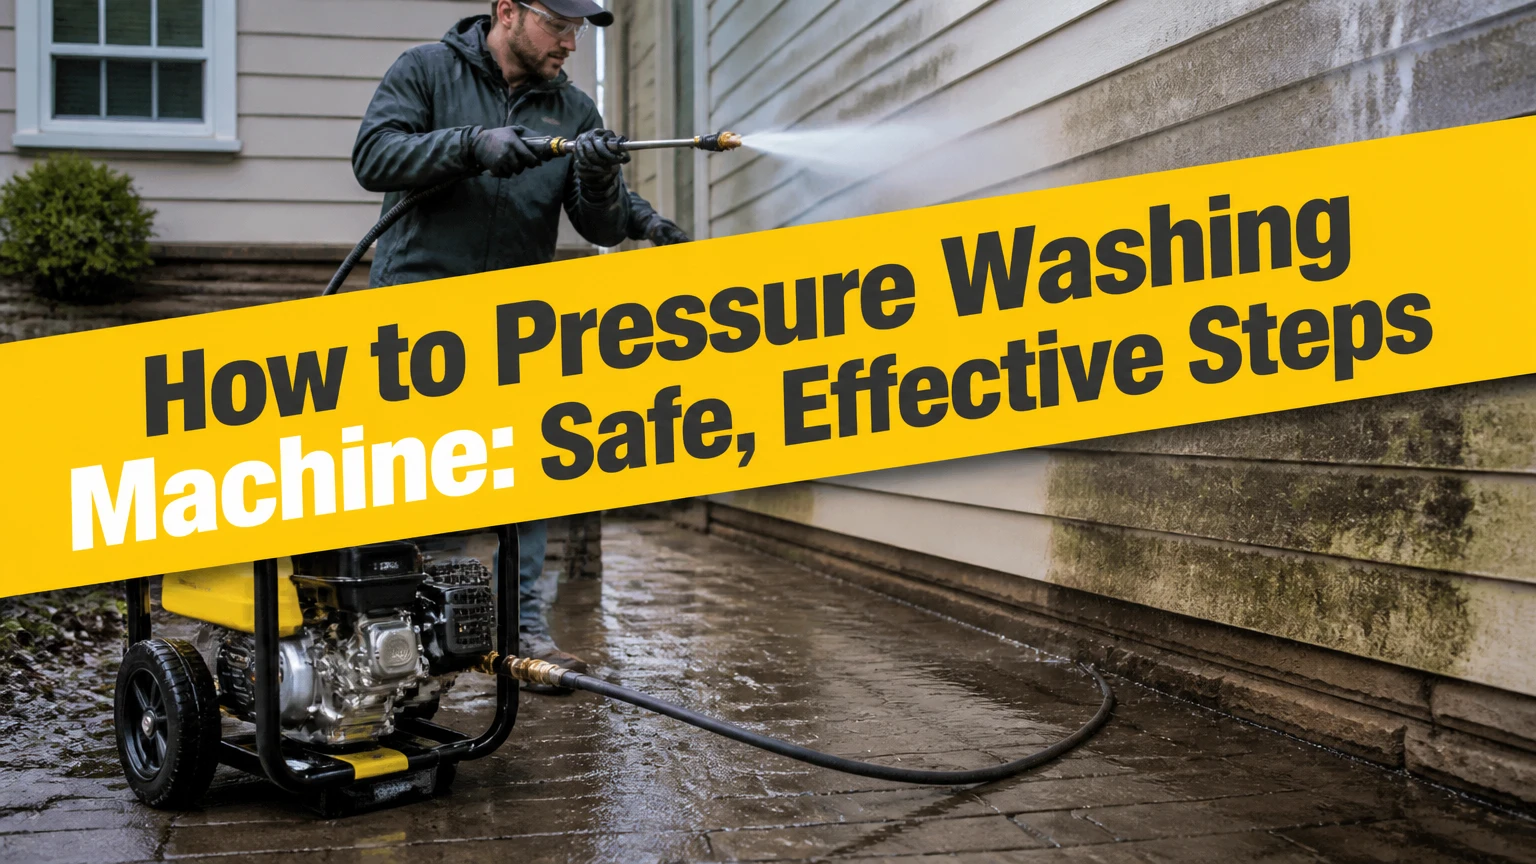
To use a pressure washing machine, connect the water supply and high-pressure hose, purge air, choose the lowest effective nozzle, apply detergent when appropriate, and rinse with controlled overlapping passes. Most first-time users can clean a small patio or driveway in 30-120 minutes, but nozzle choice, spray distance, and uninterrupted water flow determine the result.
Key Facts at a Glance
- A pressure washer’s cleaning performance depends on both PSI and GPM, not PSI alone.
- Start with a wide spray pattern and test an inconspicuous area before increasing force.
- Keep the spray wand moving and begin approximately 18-24 inches from most surfaces.
- Never run a pressure washer without a fully open water supply.
- A black detergent nozzle applies soap at low pressure; it usually cannot rinse dirt away.
- Pressure-washer spray can cut skin and cause injection injuries, so never aim it at people, animals, hands, or feet.
What Is a Pressure Washing Machine?
A pressure washing machine, more commonly called a pressure washer, uses a motor-driven pump to push water through a small nozzle at high velocity. The pump creates pressure, while the nozzle controls the spray pattern; the combination removes dirt, algae, loose paint, mud, and surface grime more quickly than an ordinary hose.
A typical residential electric unit produces about 1,300-2,300 PSI and 1.1-1.8 gallons per minute (GPM). Gas machines commonly deliver 2,500-4,400 PSI and 2.5-4.0 GPM, although the actual working pressure can be lower than the advertised maximum.
Pressure is force per square inch. Flow is the volume of water delivered over time. Cleaning units, calculated as PSI multiplied by GPM, provide a rough comparison, but the formula does not account for nozzle design, spray distance, water temperature, or operator technique.
How does a pressure washer work?
Water enters through a screened inlet, and an electric motor or gasoline engine drives a positive-displacement pump. The pump pressurizes the water, then sends it through a reinforced hose, spray gun, wand, and restrictive nozzle orifice.
When the trigger is released, an unloader valve routes water into bypass. The bypass protects the system from pressure buildup, but extended idling can heat the trapped water and damage pump components. Consumer pressure-washer manuals commonly advise minimizing trigger-off operation, while professional machines may specify a maximum bypass time.
Before You Start Pressure Washing
Prepare the work area, equipment, water supply, electricity, and protective gear before starting the pressure washer. A basic residential job needs a garden hose, high-pressure hose, spray gun, wand, selected nozzle, compatible detergent if required, eye protection, closed-toe footwear, and a stable outdoor power source for electric models.
Preparation checklist
| Requirement | Typical specification | Why it matters |
|---|---|---|
| Garden hose | 25-50 feet, 5/8-inch or larger | Supplies adequate inlet flow |
| Water source | Fully open outdoor faucet | Prevents pump starvation |
| Electrical circuit | 120 V, 15-20 A GFCI circuit | Reduces shock and overload risk |
| Work area | Clear within 10-15 feet | Removes trip and projectile hazards |
| Eye protection | ANSI-rated safety glasses | Blocks flying grit and detergent |
| Footwear | Waterproof, closed-toe shoes | Protects feet from spray and debris |
| Detergent | Manufacturer-approved, diluted | Prevents pump and surface damage |
Inspect the inlet screen, hose connectors, O-rings, high-pressure hose, trigger gun, wand, and nozzle. Do not use a hose with exposed reinforcement, a cracked connector, or a spray gun that leaks around the trigger.
The U.S. Consumer Product Safety Commission warns that pressure-washer spray can cause serious wounds even when an injury looks small at first. Treat a suspected injection injury as urgent medical care, particularly when spray penetrates a hand, foot, or joint.
How to Pressure Washing Machine in 10 Steps
The safest pressure-washing sequence is clear, connect, purge, select, start, wash, rinse, and depressurize. Follow the steps in order because starting the motor before water reaches the pump can damage seals, while selecting a narrow nozzle too early can etch or strip the surface.
Step 1: Clear and protect the area
Remove furniture, toys, hoses, vehicles, loose stones, and outdoor decorations. Close windows and doors, cover delicate plants, and identify electrical outlets, light fixtures, vents, and fragile trim.
Sweep loose debris from the surface first. Pressure washing wet leaves, sand, and gravel can turn them into fast-moving projectiles.
Success checkpoint: The intended spray area is clear, and nearby objects have been covered or moved.
Common mistake: Spraying around furniture instead of moving it, which leaves dirty outlines and creates trip hazards.
Step 2: Connect the water hose
Attach the garden hose to the washer’s filtered inlet and the high-pressure hose to the pump outlet. Tighten fittings by hand, then check that the O-rings sit flat inside the connectors.
Turn on the faucet completely before starting the motor. A partly open faucet may provide enough water for a brief test but starve the pump during continuous spraying.
Success checkpoint: Water flows freely from the hose without kinks, leaks, or crushed sections.
Common mistake: Connecting the high-pressure hose to the water inlet. Match fittings to the machine labels.
Step 3: Purge trapped air
Leave the machine switched off, unlock the spray-gun trigger, and squeeze it for 30-60 seconds. Continue until the stream becomes steady instead of sputtering.
Air in the pump can cause pressure fluctuations, vibration, and delayed detergent draw. Purging also confirms that water is reaching the pump before ignition or motor operation.
Success checkpoint: The gun produces a continuous, bubble-free stream.
Common mistake: Pulling the engine starter while air remains in the water circuit.
Step 4: Select a wide spray nozzle
Begin with the widest practical pattern. A white 40-degree nozzle is a cautious starting point for vehicles, painted surfaces, and delicate materials; a green 25-degree nozzle suits many hard outdoor surfaces.
Insert the quick-connect tip fully and pull the collar to confirm that it has locked. Keep the red 0-degree nozzle and turbo nozzle out of the first test.
Success checkpoint: The nozzle is locked, and the spray pattern is wide and controlled.
Common mistake: Choosing the nozzle by color alone without checking the manufacturer’s angle and pressure rating.
Step 5: Start the pressure washer
Open the water supply, then start an electric machine or follow the gas engine’s specified choke and starting procedure. Keep the spray gun pointed toward a safe, open area while starting.
Do not use a gas pressure washer inside a garage, shed, basement, or other enclosed space. Carbon monoxide can accumulate rapidly, even when a door is open.
Success checkpoint: The motor runs smoothly, and water exits the nozzle without severe pulsing.
Common mistake: Starting a gas unit before turning on the water.
Step 6: Test an inconspicuous section
Hold the wand about 18-24 inches from the surface and spray a small hidden area for several seconds. Move closer gradually only if the dirt remains and the material shows no whitening, fuzzing, gouging, or paint loss.
Spray distance changes impact substantially. A 25-degree nozzle held at 6 inches can damage material that tolerates the same nozzle at 24 inches.
Success checkpoint: The test area is cleaner without altered color, texture, coating, or mortar.
Common mistake: Testing on the most visible part of a wall or vehicle.
Step 7: Apply detergent when needed
Switch off the high-pressure spray or follow the manual’s nozzle-change procedure, then install the black low-pressure soap nozzle. Apply a pressure-washer-safe detergent from the bottom upward on vertical surfaces to reduce streaking.
Allow approximately 3-5 minutes of dwell time, keeping the solution wet. Detergent helps loosen oily film, algae, and traffic grime; it does not replace rinsing force.
Success checkpoint: Dirt softens and begins to release without the detergent drying.
Common mistake: Using household bleach, dish soap, or solvent without confirming chemical compatibility. These products can damage seals, plants, paint, or wastewater systems.
Step 8: Rinse from top to bottom
Replace the soap tip with the widest effective rinsing nozzle. Work from the top downward in overlapping horizontal or vertical passes, maintaining a consistent distance and approximately a 45-degree spray angle.
Rinse detergent from adjacent surfaces before it dries. On siding, direct water downward and avoid forcing water behind laps, vents, window seals, and electrical boxes.
Success checkpoint: The runoff becomes mostly clear, and no detergent film remains.
Common mistake: Rinsing upward beneath siding or roof shingles, which can drive water into the building envelope.
Step 9: Inspect and repeat selectively
Stop spraying and inspect the surface after it dries partially. Persistent stains may require a second detergent application, a rotating nozzle on suitable concrete, or manual scrubbing rather than higher pressure.
Never compensate for an unsuitable method by moving the nozzle extremely close. Increase cleaning time, improve chemistry, or use a surface-appropriate attachment before increasing force.
Success checkpoint: The surface is uniformly clean without stripes, halos, or exposed substrate.
Common mistake: Holding the wand stationary to remove one stubborn mark, creating a visible pressure spot.
Step 10: Shut down and release pressure
Turn off the machine, close the water faucet, and squeeze the trigger until pressure leaves the hose. Disconnect the high-pressure hose only after the gun stops releasing pressurized water.
For a gas model, follow the manual’s fuel-shutoff procedure. Store the gun, wand, hose, and nozzles where they cannot freeze or collect dirt.
Success checkpoint: The system is depressurized, dry on the exterior, and stored safely.
Common mistake: Leaving the pump running while the trigger is released for several minutes.
Which Nozzle Should You Use?
Choose the widest nozzle that removes the soil at a safe distance. Narrower patterns concentrate force, while wider patterns reduce impact and cover more area; nozzle colors are common conventions, but the pressure washer manufacturer’s manual controls when labels differ.
| Nozzle | Spray angle | Suitable starting uses | Main risk |
|---|---|---|---|
| Black soap | 65 degrees | Detergent application, vehicle prewash | Will not provide strong rinsing |
| White | 40 degrees | Cars, windows, painted furniture | Slow on embedded concrete dirt |
| Green | 25 degrees | Siding, decks, patios, general cleaning | Can scar soft wood at close range |
| Yellow | 15 degrees | Concrete, brick, heavy soil | Removes paint and weak mortar |
| Red | 0 degrees | Limited spot treatment on sound metal or concrete | Etches, cuts, splinters, and strips |
| Turbo rotary | Variable rotating jet | Large, sound concrete areas | Leaves circular marks on fragile surfaces |
The red tip is rarely appropriate for a homeowner’s general cleaning. Never use it on glass, tires, painted vehicles, vinyl siding, wood, asphalt shingles, or human skin.
How Much Pressure Do You Need?
Most household jobs need 1,300-2,000 PSI and 1.2-2.0 GPM, while large concrete cleaning may benefit from 2,500-3,500 PSI and 2.5-4.0 GPM. The correct setting is the lowest combination that removes contamination without altering the substrate.
| Surface or task | Starting PSI | Typical nozzle | Working distance |
|---|---|---|---|
| Vehicle paint | 1,200-1,900 PSI | White 40-degree | 18-24 inches |
| Vinyl siding | 1,300-2,000 PSI | White or green | 18-30 inches |
| Soft wood deck | 500-1,200 PSI | White 40-degree | 24-36 inches |
| Sound concrete | 2,000-3,500 PSI | Green or yellow | 8-18 inches |
| Brick and mortar | 800-1,500 PSI | White or green | 18-24 inches |
| Windows | 800-1,200 PSI | White 40-degree | 24-36 inches |
These are conservative starting ranges, not universal machine settings. Old concrete, friable brick, oxidized vinyl, peeling paint, and softwood require lower force and greater distance.
How Should You Clean Different Surfaces?
Surface material determines the safe pressure, spray angle, chemical choice, and direction of movement. Concrete tolerates more impact than wood or vehicle paint, while siding and windows require controlled downward spraying to prevent water intrusion.
Cars and motorcycles
Use a wide nozzle, low starting pressure, vehicle-safe detergent, and a 24-inch test distance. Rinse loose grit before using a mitt, because rubbing dry grit across paint creates fine scratches.
Avoid direct spray at wheel-bearing seals, door seals, convertible tops, tire sidewalls, sensors, badges, and stone chips. Pressure washing can clean wheels and body panels, but it is not a substitute for careful hand washing.
Siding and exterior walls
Apply detergent from the bottom upward, then rinse from the top downward. Keep the spray below window trim and direct it downward around seams, vents, soffits, and electrical service equipment.
Do not pressure wash loose paint as a first-line method on older homes. The spray can spread lead-paint chips and force water behind cladding; lead-safe containment and professional assessment may be necessary.
Wood decks and fences
Use low pressure, a wide fan, and steady movement parallel to the boards. Start at least 24 inches away, because soft grain can fuzz or become visibly striped when a narrow stream lingers.
Allow the wood to dry according to the coating manufacturer’s instructions before staining. Pressure washing removes some weathered fibers, so sanding may be needed after drying.
Concrete and pavers
Sweep first, pre-treat oil and organic growth, and use overlapping passes. A surface cleaner attachment usually produces more uniform results than a bare wand because two rotating jets distribute force across a circular housing.
Check for cracks, loose joint sand, and sealers before spraying. High pressure can widen cracks, remove polymeric or joint sand, and expose aggregate.
Windows and gutters
Avoid direct high-pressure spray on glass seals, screens, flashing, and roof edges. A low-pressure detergent system, telescoping brush, or professional soft-wash method is safer for elevated windows and gutter exteriors.
Never stand on a ladder while operating a pressure washer. Recoil from the gun can destabilize the ladder, and wet footing increases the fall risk.
Which Pressure Washer Fits the Job?
Electric pressure washers fit occasional residential cleaning, gas units suit large areas and frequent heavy work, and battery machines suit short rinsing tasks where portability matters more than productivity. A homeowner cleaning cars, furniture, and a small patio usually gains little from commercial gas equipment.
| Machine type | Typical output | Typical purchase price | Best fit | Limitation |
|---|---|---|---|---|
| Battery or handheld | 300-800 PSI, 0.5-1.0 GPM | $100-$250 | Camping gear, bikes, remote rinsing | Short battery runtime |
| Electric residential | 1,300-2,300 PSI, 1.1-1.8 GPM | $120-$350 | Cars, patios, furniture, small decks | Cord and lower flow |
| Gas residential | 2,500-3,200 PSI, 2.5-3.5 GPM | $300-$600 | Driveways, walls, large decks | Noise, fuel, maintenance |
| Gas commercial | 3,500-4,400 PSI, 3.5-4.0 GPM | $700-$2,000+ | Daily contractor work | Weight, exhaust, cost |
Electric induction motors generally tolerate more use than universal motors, but pump quality, water hardness, storage, and maintenance affect service life more than a single advertised lifespan figure. Gas models clean faster because higher GPM moves soil and rinse water more quickly, not simply because their PSI number is higher.
When is a garden hose or soft wash better?
A garden hose is better for delicate plants, light dust, and areas where high-pressure spray could enter gaps. Soft washing is better for biological growth on siding and roofs because detergent does much of the cleaning at low pressure.
Steam cleaning suits grease and some hard, heat-tolerant equipment, while manual brushing suits small items that need precise control. A pressure washer is a poor choice for fragile paint, old mortar, roof shingles, and water-sensitive electrical assemblies.
How Long and How Much Does Pressure Washing Cost?
A 20 x 20-foot driveway typically takes 30-120 minutes for washing alone and costs approximately $35-$130 to rent equipment for one day, depending on machine class and location. Professional service commonly costs more because labor, insurance, travel, surface treatment, and wastewater management are included.
| Job or equipment | Typical duration | Typical DIY cost | Main variable |
|---|---|---|---|
| Small patio, electric unit | 30-60 minutes | $0-$25 consumables | Furniture and stain density |
| 20 x 20-foot driveway | 30-120 minutes | $35-$80 rental | Concrete condition and attachment |
| One-story siding | 2-5 hours | $20-$60 consumables | Height, windows, algae |
| Vehicle wash | 20-45 minutes | $5-$15 detergent | Pre-rinse and detailing |
| Professional driveway cleaning | 1-3 hours | $150-$400 typical | Region, sealing, stain treatment |
Rental times exclude setup, hose management, detergent dwell time, and cleanup. A surface cleaner can reduce striping and labor on concrete, but it may add approximately $15-$40 to a rental package.
What Safety Mistakes Cause Damage?
The most expensive errors come from excessive force, incorrect chemistry, inadequate water supply, and uncontrolled spray direction. Professional operators often improve results by changing dwell time, nozzle distance, and flow before increasing PSI.
| Failure mode | Likely consequence | Safer correction |
|---|---|---|
| Red nozzle on wood or paint | Gouges, splinters, stripped coating | Use white or green and increase distance |
| Pump runs without water | Seal and pump damage | Open faucet and purge air first |
| Wand held stationary | Circular marks or etching | Keep overlapping passes moving |
| Spray aimed under siding | Hidden moisture intrusion | Spray downward from 18-30 inches |
| Thin extension cord | Voltage drop and motor heat | Use a short, heavy-gauge cord if manual permits |
| Gas unit used indoors | Carbon-monoxide poisoning | Operate outdoors, away from openings |
| Household chemicals used | Seal, plant, or coating damage | Use compatible pressure-washer detergent |
| Unmanaged runoff | Drain, soil, or waterway contamination | Block, collect, or redirect wastewater legally |
The National Institute for Occupational Safety and Health identifies carbon monoxide as a serious hazard from gasoline-powered equipment in enclosed or partially enclosed spaces. Keep gas pressure washers outdoors and position exhaust away from doors, windows, and air intakes.
Why Does a Pressure Washer Lose Pressure?
A pressure washer commonly loses pressure because of a clogged nozzle, restricted inlet, kinked hose, air leak, insufficient water flow, or a sticking unloader valve. Diagnose the water path first, then the nozzle and pump, because many apparent pump failures are simple supply restrictions.
| Symptom | Probable cause | Safe action |
|---|---|---|
| Pulsing spray | Air in system or blocked inlet | Purge trigger, inspect screen, remove kinks |
| Low pressure everywhere | Restricted faucet or hose | Test a short, unrestricted hose |
| Pressure drops under trigger | Clogged nozzle or worn pump | Clean tip, then consult manual |
| Water leaks at coupling | Damaged O-ring | Replace the correct seal |
| No detergent draw | High-pressure tip installed | Fit the soap nozzle and verify siphon tube |
| Engine stalls | Stale fuel, choke, overload | Follow engine manual; service carburetor if needed |
| Pump overheats | Extended bypass operation | Spray periodically and stop the machine |
| Motor trips breaker | Overloaded circuit or extension cord | Use the specified circuit and remove cord if allowed |
Use a nozzle-cleaning tool or the manufacturer’s approved method. Do not enlarge a nozzle orifice with a drill, knife, or oversized wire because the altered opening changes pressure and can damage the pump.
How Do You Maintain and Store the Machine?
Flush detergent from the system, clean the inlet screen and nozzle, inspect hose fittings, and protect the pump before long storage. Gas models also need fuel management, engine-oil checks, and freeze protection when temperatures may fall below 32°F.
After each use, run clean water through the detergent line if the manual permits. Remove water from the hose and gun, but do not disassemble pump components unless the manufacturer specifies the procedure.
For seasonal storage:
- Add fuel stabilizer before the final run, or drain fuel as directed.
- Change engine oil at the interval specified in the engine manual.
- Use pump protector or antifreeze approved for the machine.
- Store hoses loosely coiled, without tight bends.
- Keep the unit dry, ventilated, and protected from freezing temperatures.
- Store nozzles clean and labeled by spray angle.
Pump protector is not a substitute for engine antifreeze or proper fuel storage. Read the pressure-washer and engine manuals separately because they may specify different procedures.
Frequently Asked Questions
Can pressure washing remove mold permanently?
Pressure washing removes visible mold, mildew, and algae from many hard surfaces, but it does not guarantee permanent prevention. Moisture, shade, porous material, and airborne spores determine regrowth. A compatible cleaning solution, improved drainage, sunlight, and repairs to leaks usually provide longer-lasting results than pressure alone.
Can I pressure wash a roof?
Most asphalt-shingle roofs should not receive high-pressure washing because force can remove granules, damage seals, and shorten shingle life. Roof cleaning generally uses a low-pressure chemical method, controlled runoff, fall protection, and manufacturer-compatible treatment. Hire a qualified professional for steep, fragile, or multi-story roofs.
How much water does a pressure washer use?
A typical residential pressure washer uses approximately 1.1-4.0 GPM while spraying, depending on its design and trigger position. A 30-minute session therefore consumes about 33-120 gallons during active spraying, although pauses reduce total use. Check local water restrictions and direct runoff away from storm drains where required.
Can pressure washing remove oil from concrete?
Pressure washing can remove surface oil, but old stains often need an absorbent, degreasing detergent and dwell time before rinsing. Hot-water equipment works faster on heavy grease than cold-water residential machines. Capture contaminated runoff where local rules require it instead of sending oily water into a storm drain.
Should I pressure wash before painting?
Pressure washing can remove loose dirt, chalking, and some failed coating before painting, but the surface must dry fully and loose paint may require scraping. Test for lead paint on older buildings, repair damaged substrate, and follow the paint manufacturer’s preparation requirements. Painting damp siding can cause adhesion failure.
When should I hire a professional?
Hire a professional for roof work, lead-paint preparation, multi-story access, extensive wastewater control, hazardous mold, or surfaces that could suffer expensive damage. DIY pressure washing is reasonable for accessible patios, vehicles, furniture, and sound concrete when the operator can control spray distance and follow the equipment manual.
The Bottom Line
To use a pressure washing machine safely, begin with a clear work area and reliable water supply, purge air before starting, test the widest nozzle, and increase force only when the material tolerates it. Keep the wand moving, rinse detergent from top to bottom, and stop immediately if the surface changes texture or color.
For most homeowners, a 1,500-2,000 PSI electric pressure washer handles cars, patios, furniture, and small decks with lower noise and maintenance. Choose a higher-flow gas machine for large concrete areas or repeated heavy work, but never let machine capacity replace surface testing and safe technique. Follow these controls when applying How to pressure washing machine methods, and the cleaning result will depend more on judgment than maximum pressure.


