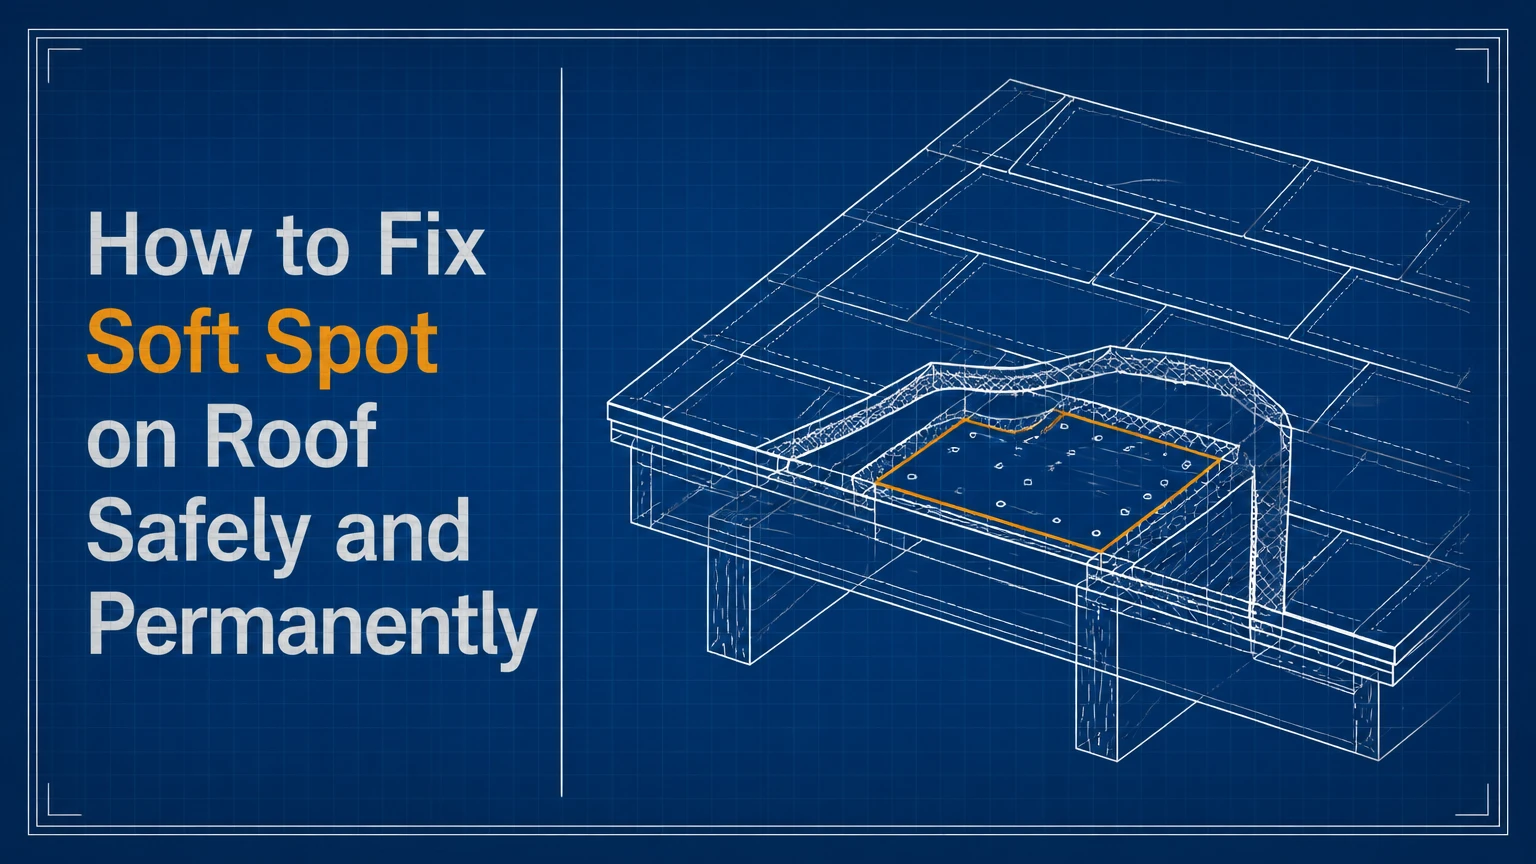
A soft spot on a roof usually means the roof decking beneath the shingles has lost strength from water damage, rot, or prolonged moisture exposure. To fix it, identify and stop the leak, remove the roofing above the damaged area, cut the deck back to sound supported framing, install matching sheathing, restore underlayment and flashing, then replace the shingles.
Key Facts at a Glance
- A roof soft spot is a structural decking problem, not a defect that roofing cement can permanently repair.
- Do not walk on a visibly sagging or severely spongy roof because the decking may not support a person.
- A replacement patch must rest on sound rafters or trusses, with its edges fully supported and fastened.
- Common residential roof decking is 1/2-inch or 5/8-inch plywood or OSB, but the replacement must match the existing thickness and local requirements.
- The leak source must be repaired at the same time, or the replacement wood can deteriorate again.
- A small asphalt-shingle repair typically takes a professional 2-4 hours and costs about $400-$900 in the United States.
What Causes a Soft Spot on a Roof?
A soft roof area forms when water reaches the sheathing and keeps the wood wet long enough to cause swelling, delamination, fungal decay, or fastener failure. Common entry points include failed flashing, damaged shingles, roof valleys, plumbing vents, skylights, ice dams, and clogged gutters that force water beneath the roofing system.
Roof construction usually includes shingles or another weathering layer, underlayment, roof decking, rafters or trusses, and attic insulation. The decking transfers roofing loads to the framing. Once plywood veneers separate or OSB strands swell and lose bond, the roof surface can flex even if the shingles above still look intact.
The U.S. Environmental Protection Agency explains that mold control depends on controlling moisture, and its homeowner guidance states: “The key to mold control is moisture control.” That principle applies to roof repairs because replacing rotten wood without correcting water entry treats the symptom rather than the cause.
How Serious Is a Soft Roof Area?
A soft spot can progress from a localized leak to a larger structural defect. A small patch near a plumbing vent may remain limited, while damage along a valley, eave, or poorly ventilated roof assembly can spread across several rafter bays.
Wood-decay fungi generally require sustained moisture, and building-material guidance commonly treats wood moisture above about 20% as a condition that supports fungal activity. The reading is a diagnostic indicator, not a guarantee of decay: old wood can remain weak after it dries, and recently wet wood may read high without advanced rot.
Treat these signs as urgent:
- A visible dip or sag between rafters
- A footstep that causes movement or cracking
- Dark, crumbly, stringy, or punky wood in the attic
- Active dripping or water marks after rain
- Rafters or trusses with deep decay, splitting, or twisting
- Ceiling stains combined with a musty attic odor
Can You Repair a Soft Spot Yourself?
A capable homeowner can repair a small, isolated soft spot on a low-slope, single-story asphalt-shingle roof, but the work requires safe roof access, accurate framing identification, and weather protection. Hire a roofing contractor when the roof is steep, high, fragile, extensively damaged, actively leaking, or supported by compromised rafters.
A soft deck is a fall hazard. The common inspection advice to step on a suspected weak area is unsafe, particularly when the roof has visible sagging or the attic shows widespread decay. Inspect from the attic first, use a roof ladder or professional access equipment where appropriate, and do not load a questionable surface with your body weight.
| Situation | DIY suitability | Recommended action |
|---|---|---|
| One soft area under 2 square feet on a low roof | Possible | Inspect framing, use fall protection, and follow local code |
| Damage across two or more rafter bays | Low | Obtain a contractor assessment before opening the roof |
| Visible roof sag or damaged rafters | No | Keep people off the area and call a licensed professional |
| Flat TPO, EPDM, or modified-bitumen roof | Usually no | Use a commercial roofing contractor familiar with that membrane |
Before You Start: Tools, Materials, and Safety
Prepare the replacement materials before removing weather protection. A small asphalt-shingle repair commonly needs 1/2-inch or 5/8-inch exterior-rated plywood or OSB, replacement shingles, roofing underlayment, compatible roofing nails, exterior screws or framing nails, roofing cement, a pry bar, a chalk line, a tape measure, a circular saw, a drill, a hammer, a utility knife, and fall-protection equipment.
Before-Repair Checklist
| Item | Typical requirement | Why it matters |
|---|---|---|
| Small-patch work time | 4-8 hours DIY | Includes dry weather and shingle matching |
| Professional patch time | 2-4 hours | Assumes accessible framing and materials |
| Replacement panel | 1/2 or 5/8 inch | Must match existing deck thickness |
| Panel edge gap | 1/8 inch | Allows limited expansion at joints |
| Underlayment overlap | 6 inches minimum typical | Maintains water-shedding continuity |
| Weather window | 4-8 dry hours | Protects exposed decking and adhesive |
Check the roof pitch, forecast, local permit rules, manufacturer installation instructions, and insurance requirements before beginning. A repair may require a permit where structural sheathing is replaced, especially after storm damage or on a multi-unit property.
How to Fix Soft Spot on Roof: Step-by-Step
Step 1: Find the Leak and Map the Damage
Inspect the attic from a safe position and look for wet insulation, darkened sheathing, rusted nails, mold, water trails, or daylight. Measure from a permanent reference such as an exterior wall, ridge, vent, or chimney so the damaged location can be found from above.
Water rarely enters directly above the interior stain. Roof framing, underlayment, and insulation can move water sideways before it becomes visible. Mark the likely exterior location from the attic, then inspect nearby penetrations and flashing without stepping on the suspect area.
You will know this step worked when the attic evidence and exterior roof feature point to the same repair zone. The common mistake is opening only the visibly soft wood while leaving wet or discolored decking beyond the first mark.
Step 2: Make a Temporary Weatherproofing Plan
Cover the area with a properly secured tarp if rain is possible, but do not trap water against the sheathing for days. Extend the tarp uphill beyond the suspected leak and secure it without relying on loose bricks or objects that can slide from the roof.
If water is entering the home, place containers below active drips, move electrical equipment away from wet areas, and switch off power to affected circuits only if the electrical panel can be reached safely. Wet insulation can hide continuing leakage.
You will know the temporary protection works when rainwater drains over the tarp and no water reaches the exposed interior. The mistake is applying roofing cement to wet, rotten decking and calling the roof repaired.
Step 3: Remove Shingles Above the Damaged Deck
Remove enough shingles to expose the entire damaged section plus a margin of sound deck. Start above the repair area so the new underlayment and shingles can be layered in the same direction as the roof’s water flow.
A shingle remover or flat pry bar can release nails from the course above. Work slowly around brittle shingles because cracking the surrounding field can enlarge the repair. Set aside only shingles that remain flexible, intact, and capable of resealing; shingles that are granule-worn, curled, brittle, or torn should be replaced.
You will know the opening is adequate when the complete repair boundary and the upper and lower underlayment laps are visible. The mistake is exposing too little roof, which forces the installer to create a reverse lap that can direct water beneath the patch.
Step 4: Cut Out the Rotten Sheathing
Snap straight lines around the damaged area and cut a rectangle or square that ends over the centerline of sound rafters or trusses. Set the circular saw depth to the actual deck thickness, not a generic setting, and finish corners with a handsaw or oscillating tool.
Before cutting, locate electrical cables, plumbing, ducts, and framing. A depth stop or careful test cut from the roof surface reduces the chance of cutting into rafters. If the damaged opening does not reach framing on every edge, install properly sized blocking or cleats before fitting the panel.
You will know the cutout is sound when every patch edge has continuous bearing and the remaining deck is hard under a screwdriver or awl. The mistake is cutting short of the framing center, leaving a floating edge that can flex and crack the roofing.
Step 5: Inspect Rafters, Trusses, and Insulation
Examine the exposed framing for softness, fungal decay, splitting, crushing, insect damage, or loosened fasteners. A surface stain on a rafter does not automatically require replacement, but a probe that enters deeply into the wood indicates a structural repair beyond simple sheathing replacement.
A short cleat can provide patch support when the rafter is sound but the cut edge lacks a suitable nailing surface. Use appropriately sized solid lumber and structural fasteners selected for the connection; a cleat is not a substitute for repairing a weakened rafter.
Replace or dry wet insulation where necessary. Cellulose can retain moisture and support mold, while fiberglass may conceal wet decking even after its fibers appear dry.
You will know this step is complete when the framing is dry, firm, and able to hold fasteners. The mistake is covering a rotten rafter because the new plywood feels rigid during installation.
Step 6: Fit and Fasten the Replacement Panel
Cut exterior-rated plywood or roof sheathing to fit the opening, keeping panel edges supported by framing or installed blocking. Leave approximately a 1/8-inch gap between adjacent panel edges, maintain the original panel orientation, and avoid forcing a swollen panel into place.
Use sheathing of the same thickness as the existing deck unless an engineer, building official, or roofing manufacturer specifies otherwise. APA guidance for structural wood panels emphasizes proper panel spacing and fastening, while local wind and snow requirements can impose stronger patterns than a basic repair detail.
Fastener type and spacing should follow the panel manufacturer and local code. A common residential repair pattern uses 8d nails or approved exterior screws at about 6 inches on supported edges and 12 inches in the field, but engineered systems, high-wind zones, and certain roof assemblies require different specifications.
You will know the panel is correctly installed when it sits flush, does not rock, has no unsupported edges, and matches the surrounding roof plane. The mistake is using interior plywood, particleboard, or a thinner panel because it is available.
Step 7: Restore Underlayment, Flashing, and Shingles
Install new underlayment so upper layers overlap lower layers in the direction water travels. A self-adhering membrane may protect vulnerable areas, but it must be compatible with the roofing system and installed on a clean, dry surface.
Reconnect or replace step flashing, valley flashing, plumbing-boot components, drip edge, or other details that caused the leak. A roof-deck patch cannot compensate for missing metal, exposed fasteners, a failed pipe boot, or an improperly sealed wall intersection.
Weave replacement shingles into the existing courses from the lower course upward. Match the shingle exposure, nail placement, sealant strip position, and manufacturer requirements. Use roofing cement sparingly where appropriate; excessive cement can prevent drainage and conceal future defects.
You will know the repair is finished when the shingle courses align, the surface is flush, all flashing laps shed water, and no fastener heads remain exposed. The mistake is reinstalling cracked old shingles simply because they lifted without breaking.
Which Roof Decking Repair Is Best?
Localized patching is best when decay is confined to a small area with sound surrounding decking and framing. Full-sheet replacement is better when damage crosses multiple rafter bays, reaches a valley or eave, involves swollen OSB across a broad area, or leaves too many weak joints.
| Repair approach | Typical scope | Typical material cost | Best use |
|---|---|---|---|
| Small deck patch | 2 x 2 feet | $50-$150 | One isolated leak or puncture |
| Multi-bay patch | 4 x 4 to 4 x 8 feet | $150-$400 | Several connected damaged sections |
| Full sheet replacement | 4 x 8 feet | $100-$300 per sheet | Broad rot across panel edges |
| Partial roof redecking | 200-600 square feet | $1,200-$3,000 professional | Valley, eave, or long-term leak zone |
Plywood generally holds fasteners well and tolerates brief exposure better than OSB, while OSB is often less expensive and provides consistent panel dimensions. Neither material is waterproof after prolonged exposure, and an OSB panel with permanent edge swelling should not be flattened and reused.
A patch also becomes less attractive when the existing shingles are near the end of their service life. Matching discontinued shingles can make a technically sound repair visibly different, and repeated localized repairs may cost more than replacing a roof section.
How Much Does a Soft Roof Repair Cost?
A professional repair for a small asphalt-shingle soft spot typically costs $400-$900, while a homeowner may spend $50-$150 on materials for a simple patch. Replacing a full sheet or repairing structural framing commonly raises the total to $1,200-$3,000 or more, depending on access, location, labor rates, and roofing type.
| Cost component | Typical DIY amount | Typical professional amount | Main price variable |
|---|---|---|---|
| Plywood or OSB panel | $35-$90 | Included | Thickness and local material prices |
| Shingles and underlayment | $25-$100 | Included | Minimum bundle purchase and matching |
| Small deck patch | $50-$150 total | $400-$900 total | Roof height and shingle complexity |
| Full-sheet replacement | $150-$400 materials | $1,200-$3,000+ | Tear-off area and framing damage |
Emergency tarping, steep-roof access, winter conditions, structural carpentry, hazardous mold, and difficult shingle matching can increase the estimate. Ask for an itemized scope that identifies the leak source, deck area, panel thickness, underlayment, flashing, shingles, disposal, and warranty.
What Commonly Goes Wrong?
The Saw Cuts Into a Rafter
A saw set deeper than the sheathing can weaken the rafter or sever hidden wiring. Stop immediately, document the damage, and have a qualified contractor or structural professional assess the framing before closing the opening.
The Patch Has Unsupported Edges
A panel edge that ends between rafters can move under snow, wind, or maintenance traffic. Add properly fastened blocking or enlarge the opening until the patch bears on framing.
The New Wood Sits Higher or Lower
A thickness mismatch creates a hump or depression that telegraphs through underlayment and shingles. Measure the old deck at an undamaged edge and replace it with the same thickness.
The Leak Returns
A recurring leak usually points to a missed flashing failure, failed seal at a penetration, poor underlayment overlap, or water migration from uphill. A hose test should proceed from the lowest suspected component upward, with one person in the attic monitoring each area.
Mold or Odor Remains
Drying the roof deck does not automatically remove contaminated insulation or mold-damaged materials. The EPA recommends fixing the moisture source and cleaning or removing affected materials according to the material type and contamination extent.
How Do Repairs Change for Other Roof Types?
Asphalt-shingle roofs allow a localized sheathing patch because individual shingle courses can be removed and woven back into place. Metal roofs, tile roofs, slate roofs, and low-slope membrane systems require different removal, flashing, and waterproofing methods.
| Roof type | Soft-spot cause often found | Correct repair method | Homeowner limitation |
|---|---|---|---|
| Asphalt shingles | Flashing or shingle leak | Replace deck, underlayment, and shingles | Moderate DIY only on safe roofs |
| Standing-seam metal | Condensation or failed penetration | Repair substrate and metal details | Panel removal can damage seams |
| Tile or slate | Broken units or flashing | Remove units, repair deck, relay compatible units | Brittle materials require skill |
| TPO or EPDM membrane | Wet insulation or failed seam | Remove membrane, replace insulation, weld or adhere patch | Usually commercial-professional work |
On a flat roof, a soft area may indicate saturated insulation rather than isolated rotten plywood. A commercial roofer may use moisture mapping, core cuts, or infrared inspection to define the wet assembly before replacing insulation and membrane.
A ceiling sag is different from a roof-deck soft spot. If drywall, plaster, ceiling joists, or interior framing are sagging, keep occupants away and obtain a structural assessment.
How Should You Verify the Repair?
Verify the repair from the attic, roof surface, and interior after the next significant rain. The patched deck should remain firm, the shingle surface should stay flush, the attic should show no new wetting, and the repaired flashing should direct water downhill.
Do not perform a forceful bounce test on a roof that has not been confirmed structurally sound. Instead, inspect the patch from a safe position, compare its plane with nearby shingles, and use attic observations to confirm that water is not passing the repaired area.
Photograph the exposed framing, panel thickness, fastener pattern, underlayment laps, flashing, and finished shingles. These records help with insurance claims, future maintenance, and contractor accountability.
FAQ
Can roofing cement fix a soft spot?
Roofing cement can seal a small shingle defect or temporarily limit water entry, but it cannot restore rotten plywood, OSB, rafters, or trusses. A soft area requires removal of unsound material and correction of the leak source. Cement over wet wood often traps moisture and delays detection.
Is a soft roof spot always caused by a leak?
No. Leaks are the most common cause, but condensation, inadequate attic ventilation, ice dams, plumbing overflow, long-term snow loading, and construction defects can also weaken decking. An attic inspection should look for both liquid-water paths and widespread moisture conditions.
Can I repair a soft spot from inside the attic?
A homeowner can sometimes install temporary support from the attic, but interior blocking does not replace rotten roof sheathing or restore the exterior water barrier. A permanent repair normally requires access from above so damaged decking, underlayment, flashing, and shingles can be removed and rebuilt.
Should I replace plywood with OSB?
Use a replacement panel that matches the existing thickness and complies with local code and roofing specifications. Plywood usually offers strong fastener holding and better tolerance of brief exposure, while OSB can be economical and structurally suitable when its edges stay dry and fully supported.
How long can a soft roof spot wait?
A small, dry, stable defect should still be scheduled promptly, while active leaks, visible sagging, spreading discoloration, or structural movement require immediate protection and professional evaluation. Rain, snow, and foot traffic can enlarge a weak area rapidly.
Will homeowners insurance pay for rotten roof decking?
Insurance commonly distinguishes sudden covered damage, such as wind or hail, from gradual deterioration, deferred maintenance, and long-term leakage. Photograph the condition before repairs, prevent further damage, retain receipts, and ask the insurer or adjuster how deck replacement is handled under the policy.
The Bottom Line
Fixing a soft spot on a roof means restoring the structural deck and eliminating the moisture source, not covering the area with sealant. Inspect from the attic, keep people off visibly weak surfaces, replace damaged sheathing back to supported framing, match the panel thickness, rebuild every water-shedding layer, and document the work. For a steep, sagging, flat, or structurally damaged roof, hire a qualified roofing professional rather than attempting a dangerous patch.


