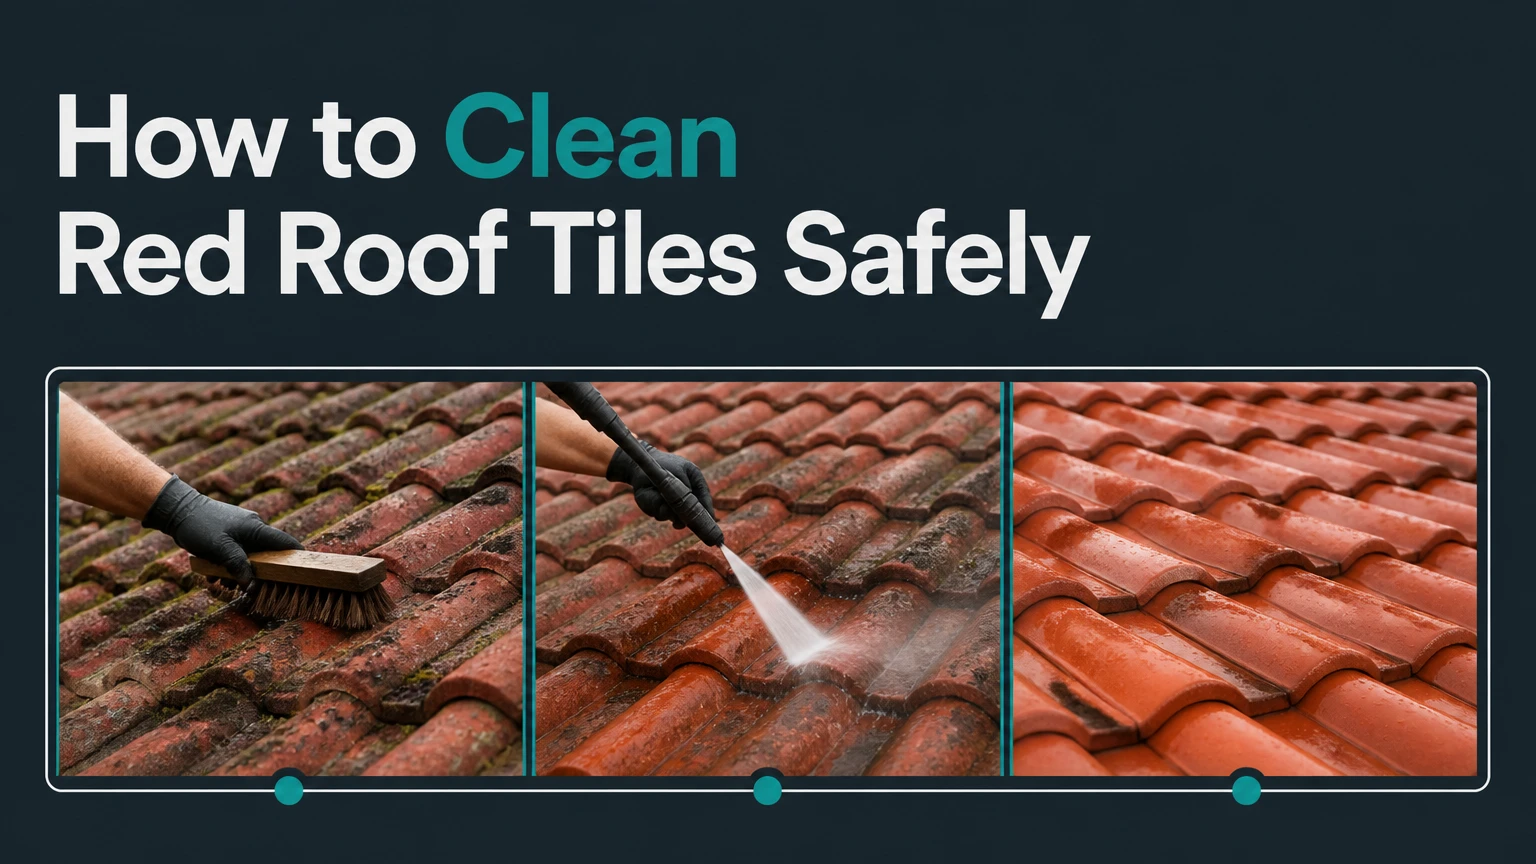
How to clean red roof tiles depends on whether the tiles are clay, terracotta, or concrete, and whether the roof is sound enough to access. Inspect and repair damage first, remove loose growth by hand, apply a compatible biocidal cleaner, allow the labeled dwell time, and rinse gently from ridge to eave. Avoid pressure washing, metal brushes, and walking on fragile tiles.
Key Facts at a Glance
- Red roof tiles may be clay, terracotta, concrete, or coated concrete, and each material tolerates cleaning differently.
- Moss should be removed mechanically before chemical treatment when thick growth holds moisture against tile laps.
- A garden hose or controlled low-pressure rinse is usually safer than a 1,200-1,500 PSI pressure washer.
- Sodium hypochlorite can kill algae and moss, but dilution, dwell time, ventilation, and plant protection must follow the product label.
- Lichen often leaves a pale shadow after the living growth dies, so one cleaning may not restore uniform color.
- A typical professional cleaning takes 4-8 hours of site work, while a heavily colonized or difficult roof can require several visits.
What Makes Red Roof Tiles Dirty?
Red roof tiles become dirty through a mixture of biological growth, airborne deposits, mineral residue, and aging surface coatings. Green moss forms a raised, soft mat; algae often appears as green film; dark streaks commonly indicate cyanobacteria; and lichen creates hard, crusted patches attached to the tile surface.
Organic growth is more persistent on shaded, damp slopes beneath trees. Moss can lift at tile edges and retain water near the headlap, while lichen attaches tightly to porous clay and concrete. Dirt alone usually needs only washing, but biological growth needs treatment that reaches the organisms rather than simply moving surface debris.
Roof tile cleaning is maintenance, not structural repair. Cleaning cannot restore a cracked tile, replace failed underlayment, reseal open flashing, or reverse advanced surface erosion. The Wienerberger roofing guidance recommends removing moss and dirt carefully and checking the roof condition before cleaning, a principle that applies particularly well to older terracotta roofs.
How Do You Identify the Growth?
Identify the growth before choosing a cleaner because moss, algae, lichen, and efflorescence respond differently. Green clumps are moss, dark streaks are usually algae or cyanobacteria, hard gray-green crusts are lichen, and white powdery residue is generally mineral efflorescence rather than biological growth.
| Appearance | Likely cause | Practical response |
|---|---|---|
| Green, raised, sponge-like clumps | Moss | Dry scrape, biocide, gentle rinse |
| Black, blue-black, or dark green streaks | Algae or cyanobacteria | Labeled algaecide or soft-wash treatment |
| Gray, orange, or pale crusted patches | Lichen | Carefully loosen, treat, allow repeated weathering |
| White chalky powder on concrete | Efflorescence | Dry brush, diagnose moisture source |
| Brown or red fading | Pigment loss or oxidation | Do not assume cleaning will restore color |
| Loose leaves, soil, and bird debris | Surface contamination | Dry removal and low-pressure rinsing |
Dark streaks are not always mold. A laboratory identification is rarely necessary for ordinary maintenance, but suspected asbestos-cement sheets, historic tiles, or unknown coatings require professional assessment before scraping or spraying.
Is It Safe to Clean a Tile Roof Yourself?
DIY cleaning is reasonable only on a low or moderate pitch roof with sound, accessible tiles, stable weather, and proper fall protection. Do not climb a steep, wet, brittle, or visibly damaged roof, and never treat a ladder as a complete roof-access safety system.
The Health and Safety Executive in the United Kingdom treats roof work as a fall-risk activity requiring planning and suitable protection. In the United States, OSHA fall-protection requirements can apply to residential construction work, while local rules differ for maintenance work. A homeowner should follow the stricter practical standard: use a qualified contractor when safe access is uncertain.
Stop and arrange an inspection if you find cracked or sliding tiles, sagging roof planes, exposed underlayment, damaged mortar, loose ridge caps, deteriorated flashing, or water entering the attic. Cleaning before repair can push water into openings and turn a cosmetic job into a leak.
Before You Start
| Item | Typical requirement | Why it matters |
|---|---|---|
| Work time | 4-8 hours for a simple 1,500-square-foot roof | Allows setup, treatment, rinse, and cleanup |
| Weather | Dry, mild, low-wind conditions for 12-24 hours | Prevents runoff, rapid evaporation, and overspray |
| Cleaner | 1 labeled roof biocide or algaecide | Avoids incompatible chemical mixing |
| Sprayer | 1 dedicated low-pressure pump sprayer | Provides controlled coverage |
| Tools | 1 plastic scraper, 1 nylon brush, hose nozzle | Removes growth without gouging tiles |
| Protection | Tarps, gloves, eye protection, footwear | Limits chemical and fall exposure |
| Water control | Downspout diverters and collection containers | Prevents concentrated runoff entering drains |
Never mix bleach with ammonia, acids, vinegar, or acidic rust removers. Chemical reactions can release toxic gases. Read the safety data sheet and product label before use, because roof-cleaning products vary in concentration, required dwell time, and permitted surfaces.
How to Clean Red Roof Tiles Step by Step
Cleaning red roof tiles safely requires six stages: inspect, protect, dry-remove growth, apply treatment, rinse under control, and inspect again. A simple roof often takes half a day, but the roof pitch, tile fragility, amount of lichen, and access method determine success more than the cleaner alone.
Step 1: Inspect the Roof and Repair Damage
Inspect the roof from the ground, attic, eaves, and safe access points before applying water. Replace broken or badly cracked tiles, secure displaced tiles, check ridge and hip mortar, and examine flashing around chimneys, skylights, valleys, and roof penetrations.
Do not walk across a roof merely to complete an inspection. Use binoculars, a camera pole, or a qualified roofer when the pitch or tile condition prevents safe access.
Success checkpoint: no visible open cracks, slipped tiles, exposed membrane, or failed flashing remain untreated.
Common mistake: cleaning first and discovering that the pressure of water has entered a pre-existing defect.
Step 2: Protect Plants, Drainage, and Water Systems
Water outdoor plants thoroughly before covering them, then use secured tarps to protect sensitive foliage near the eaves. Divert downspouts into containers or a controlled discharge area, keep children and pets away, and disconnect rainwater tanks before chemical application.
Do not allow concentrated cleaner to flow into storm drains, ponds, streams, or vegetable gardens. Local rules may restrict discharge of chlorinated or biocidal water, so check municipal requirements before starting.
Success checkpoint: every downspout has a planned outlet, and no tarp can slide into a walkway or create a trip hazard.
Common mistake: protecting leaves while ignoring soil. Chemical runoff can damage root zones even when foliage is covered.
Step 3: Remove Loose Moss and Debris While Dry
Remove leaves, twigs, and thick moss from dry tiles with a plastic scraper or stiff nylon brush. Work from the ridge toward the eaves so debris does not lodge beneath overlapping courses, and keep tools aligned with the tile profile rather than levering upward at laps.
Use a telescopic pole from a secure position whenever possible. If hand removal requires roof access, step only where the tile manufacturer permits foot traffic, typically near the lower center of a supported tile, never on exposed edges, interlocks, ridges, or valley channels.
Success checkpoint: thick mats and loose debris are gone, while firmly attached lichen remains ready for chemical treatment.
Common mistake: using a wire brush. Metal bristles can scratch coatings, remove pigment, and create lines that collect future dirt.
Step 4: Apply a Compatible Biocidal Cleaner
Apply a roof-labeled biocide, algaecide, or diluted sodium hypochlorite solution with a low-pressure pump sprayer. Follow the product label for dilution and coverage; a commonly used professional soft-wash range is approximately 1%-4% available sodium hypochlorite at the surface, but that range is not a universal DIY recipe.
Apply from the lower slope upward when using a liquid treatment, keeping the spray controlled and avoiding skylights, metalwork, painted surfaces, and unprotected plants. Do not combine products to make a stronger solution. Stronger chemistry can bleach tile color, corrode metals, and increase runoff damage without improving biological control.
Success checkpoint: the tile surface is evenly wet, with no dry bands or uncontrolled spray drifting beyond the roof.
Common mistake: applying cleaner in direct hot sun or strong wind. Rapid evaporation and overspray reduce treatment quality.
Step 5: Observe the Labeled Dwell Time
Allow the cleaner to remain wet for the label-specified period, often 10-60 minutes. A 45-60-minute dwell period may suit some heavily soiled surfaces, but the product label controls because formulas differ in strength and chemistry.
Keep the surface damp without flooding it. Reapply a small amount if the solution dries prematurely, but do not extend dwell time beyond the label. Dead moss and lichen may remain attached after treatment; biological death does not equal instant cosmetic removal.
Success checkpoint: algae changes color or loses its slippery film, and moss loosens without the surface drying into a concentrated residue.
Common mistake: rinsing immediately. Short contact time can leave living growth in porous areas and require a more aggressive second cleaning.
Step 6: Rinse Gently From Ridge to Eave
Rinse with a garden hose or a controlled low-pressure system, directing water downward over the tile courses. Use the lowest flow that removes residue, and never aim upward beneath laps, ridge tiles, flashing, vents, or mortar joints.
A pressure washer set to 1,200-1,500 PSI is not automatically a low-risk method for roof tiles. Those pressures may strip coatings, erode soft clay, fracture aged concrete, and force water under laps. The exact safe pressure depends on the tile manufacturer, nozzle, distance, angle, and condition, so a garden hose is the safer default for most homeowners.
Success checkpoint: runoff is clear of loose chemical residue, downspout controls remain secure, and no water has entered the attic.
Common mistake: rinsing upward from the eaves. Upward spray can defeat the roof’s overlapping drainage design.
Step 7: Inspect, Clean Up, and Treat Remaining Patches
Inspect the roof from safe ground-level viewpoints after rinsing. Remove small remaining debris, spot-treat living colonies according to the label, and leave firmly attached dead lichen alone if removing it would damage the tile.
Flush approved collection areas with clean water, remove tarps carefully, rinse plants, and restore downspouts only after chemical runoff has stopped. Record the product, dilution, date, weather, and areas that need a follow-up treatment.
Success checkpoint: tiles drain normally, no plants show chemical stress, and no new leak appears during the next rainfall.
Common mistake: scrubbing aggressively for instant uniform color. Lichen shadows and pigment variation may remain even after successful treatment.
Which Roof-Cleaning Method Should You Choose?
For most sound concrete or modern clay roofs, labeled biocide application followed by a gentle rinse offers the best balance of biological control and tile protection. Manual cleaning is safer for isolated growth and fragile historic tiles, while high-pressure washing is a poor default because immediate visual results can conceal long-term surface and waterproofing damage.
| Method | Typical pressure or contact | Typical cost | Best use |
|---|---|---|---|
| Manual scraping | Hand pressure, no metal tools | $0.50-$0.90 per sq. ft. | Small patches, fragile tiles |
| Biocide treatment | 0 PSI application, 10-60-minute dwell | $0.25-$0.50 per sq. ft. | Moss, algae, long-term control |
| Soft washing | Often 40-80 PSI rinse range | $0.30-$0.75 per sq. ft. | Sound tiles with widespread growth |
| Pressure washing | Often 1,200-1,500+ PSI | $0.30-$0.70 per sq. ft. | Only when manufacturer explicitly permits |
| Professional restoration | Method selected after inspection | $0.75-$2.00+ per sq. ft. | Historic, steep, damaged, or complex roofs |
Prices are typical planning ranges, not universal quotations. Labor rates, regional insurance costs, roof height, access, repairs, disposal, and treatment products can change the total substantially.
Clay and Terracotta Tiles
Clay and terracotta tiles need the gentlest physical treatment because aged pieces can become brittle and porous. Avoid pressure washing unless the tile manufacturer or a qualified specialist approves the method, and test any cleaner on an inconspicuous area for color change.
Historic terracotta may have handmade profiles, fragile glaze, lime mortar, or irreplaceable replacement difficulty. Manual removal with a preservation-compatible biocide is usually preferable to aggressive cleaning. A $100-$200 premium over standard concrete cleaning is possible for small jobs, but specialist access and conservation work can cost much more.
Concrete Tiles
Concrete tiles generally tolerate routine maintenance better than old terracotta, but pigment, sealers, and surface aggregates can still erode. White powder after cleaning may be efflorescence, where soluble salts migrate through the concrete, rather than leftover cleaner.
Dry-brush efflorescence with nylon after the tile is fully dry. If it returns, investigate moisture movement before applying a silane-siloxane treatment. A sealer can reduce water absorption on compatible tiles, but it cannot correct a leaking roof or trap moisture safely in every assembly.
Coated or Painted Red Tiles
Coated concrete and painted tiles require a cleaner approved for the coating. Strong chlorine, abrasive brushes, and pressure can create patchy fading that looks like incomplete cleaning.
Ask the coating manufacturer about pH, oxidizer tolerance, dwell time, and resealing. A small test area is mandatory when the coating age or formulation is unknown.
How Much Does Red Roof Tile Cleaning Cost and Take?
A typical 1,500-square-foot roof costs approximately $375-$1,125 for basic cleaning, while difficult access, fragile terracotta, repairs, or specialist preservation can raise the total above that range. A straightforward job may take 4-8 hours, but biological treatment can require several weeks of weathering before the final appearance develops.
| Roof situation | Typical duration | Typical cleaning range | Main cost driver |
|---|---|---|---|
| Accessible concrete, light algae | 3-5 hours | $0.25-$0.50 per sq. ft. | Setup and rinsing |
| Moderate moss on 1,500 sq. ft. | 5-8 hours | $0.40-$0.90 per sq. ft. | Manual removal |
| Steep or two-story roof | 1-2 days | $0.75-$1.50 per sq. ft. | Fall protection and access |
| Fragile terracotta or historic roof | 1-3 days | $1.00-$2.00+ per sq. ft. | Specialist labor |
| Cleaning plus tile repairs | 1-3 days | Cleaning plus repair quote | Replacement tiles and flashing |
Chemical treatments may continue working after the crew leaves. A roof can look cleaner immediately after rinsing but still show lichen shadows, while a slower biocide can improve the appearance over 2-12 weeks.
How Can You Prevent Moss and Algae From Returning?
Prevent recurrence by reducing shade and debris, keeping gutters clear, trimming branches, and scheduling inspection after wet seasons. A maintenance wash every 2-5 years is a typical planning interval, but shaded roofs with persistent moisture may need annual visual checks.
Zinc or copper strips near a ridge can release metal ions in rainwater and inhibit some new growth on the downslope. Strips do not remove established moss, do not protect every roof area, and may create runoff concerns for ponds, edible gardens, or sensitive metals. Install them only when compatible with the roof and local environmental requirements.
Do not apply a water-repellent sealer automatically. Sealers can change tile appearance, complicate future repairs, and trap moisture if the roof assembly is not suitable. Use a product approved for the exact tile and apply it only after the roof is dry, repaired, and free from active biological growth.
Common Mistakes and How to Fix Them
| Mistake | Result | Safer correction |
|---|---|---|
| Using a 2,500 PSI pressure washer | Erosion, broken tiles, wet laps | Stop, inspect, use hose rinsing |
| Walking on tile edges | Cracks and displaced courses | Use ground tools or a trained roofer |
| Scraping wet moss | Smearing and slippery footing | Wait for a dry surface |
| Using metal bristles | Gouged pigment and coatings | Switch to plastic and nylon tools |
| Ignoring runoff | Plant injury and drain contamination | Divert downspouts and collect discharge |
| Mixing cleaning chemicals | Toxic gas or corrosive reaction | Use one labeled product only |
Why Do Stains Remain After Cleaning?
Persistent stains usually come from dead lichen shadowing, pigment loss, oxidation, or growth embedded in a porous surface rather than a failed rinse. Wait for the labeled follow-up period before spot-treating, because repeated aggressive scrubbing can damage tile faster than it improves color.
If living green growth remains, apply a compatible spot treatment and repeat only as directed. If the surface is clean but permanently discolored, cleaning has reached its practical limit. Painting or coating may alter the roof’s breathability and should be considered a separate restoration decision.
What Causes White Chalky Residue?
White chalky residue on concrete roof tiles is often efflorescence, caused by soluble salts moving through moisture and crystallizing at the surface. Let the tile dry, brush lightly with nylon, and investigate recurring moisture before applying any sealer.
Do not use acid to dissolve efflorescence without confirming tile compatibility. Acid can etch concrete, attack metals, damage mortar, and worsen the appearance of red tiles.
When Should You Hire a Professional?
Hire a roofing or roof-cleaning professional when the roof is steep, more than one story high, fragile, historic, asbestos-containing, heavily damaged, or inaccessible without specialized fall protection. Professional work is also preferable when chemical runoff could reach a pond, rainwater tank, storm drain, or neighboring property.
Request a written quote that identifies tile material, cleaning method, chemical product, pressure range, plant protection, runoff handling, repairs, insurance, and warranty exclusions. A contractor who promises to make every tile look new with high pressure is describing a cosmetic result, not necessarily a safe maintenance process.
FAQ
Can vinegar clean red roof tiles?
Vinegar is not a universal roof-tile cleaner. Its acidity may affect mortar, concrete, metal flashing, coatings, plants, and runoff quality, while thick moss and lichen can remain attached. Use a product labeled for the specific tile material, or use dry mechanical removal followed by a compatible biocide.
How often should roof tiles be cleaned?
Inspect red roof tiles annually and clean when growth begins retaining moisture or blocking drainage. Many roofs need cleaning every 2-5 years, but heavily shaded properties may need earlier treatment. Cleaning frequency depends on tree cover, climate, roof orientation, ventilation, and gutter maintenance rather than a fixed calendar.
Can I clean roof tiles from a ladder?
A ladder can support low-level cleaning with a telescopic tool, but it does not make roof access safe by itself. Do not overreach, step from an unsecured ladder onto brittle tiles, or spray above shoulder height without controlling runoff. Use a professional when the work cannot be completed from stable ground.
Will cleaning remove black streaks permanently?
Cleaning can kill and remove much of the algae that causes black streaks, but recurrence is possible where the roof remains shaded and damp. A labeled biocide, clean gutters, reduced branch cover, and periodic inspection provide longer control than rinsing alone. Permanent pigment loss will not be corrected by another wash.
Should red roof tiles be sealed after cleaning?
Red roof tiles should be sealed only when the tile manufacturer approves the product and the roof is dry, repaired, and compatible with the coating. Sealant can reduce water absorption on some concrete tiles, but it cannot repair leaks, replace underlayment, or guarantee prevention of moss and algae.
The Bottom Line
How to clean red roof tiles safely is less about maximum washing power than controlled access, correct identification, compatible chemistry, and downward rinsing. Inspect and repair first, protect plants and drainage, remove loose growth with plastic or nylon tools, follow the cleaner label, and avoid pressure or foot traffic that can damage the roof. For steep, fragile, historic, or defective roofs, professional cleaning is the safer and often less expensive choice.


