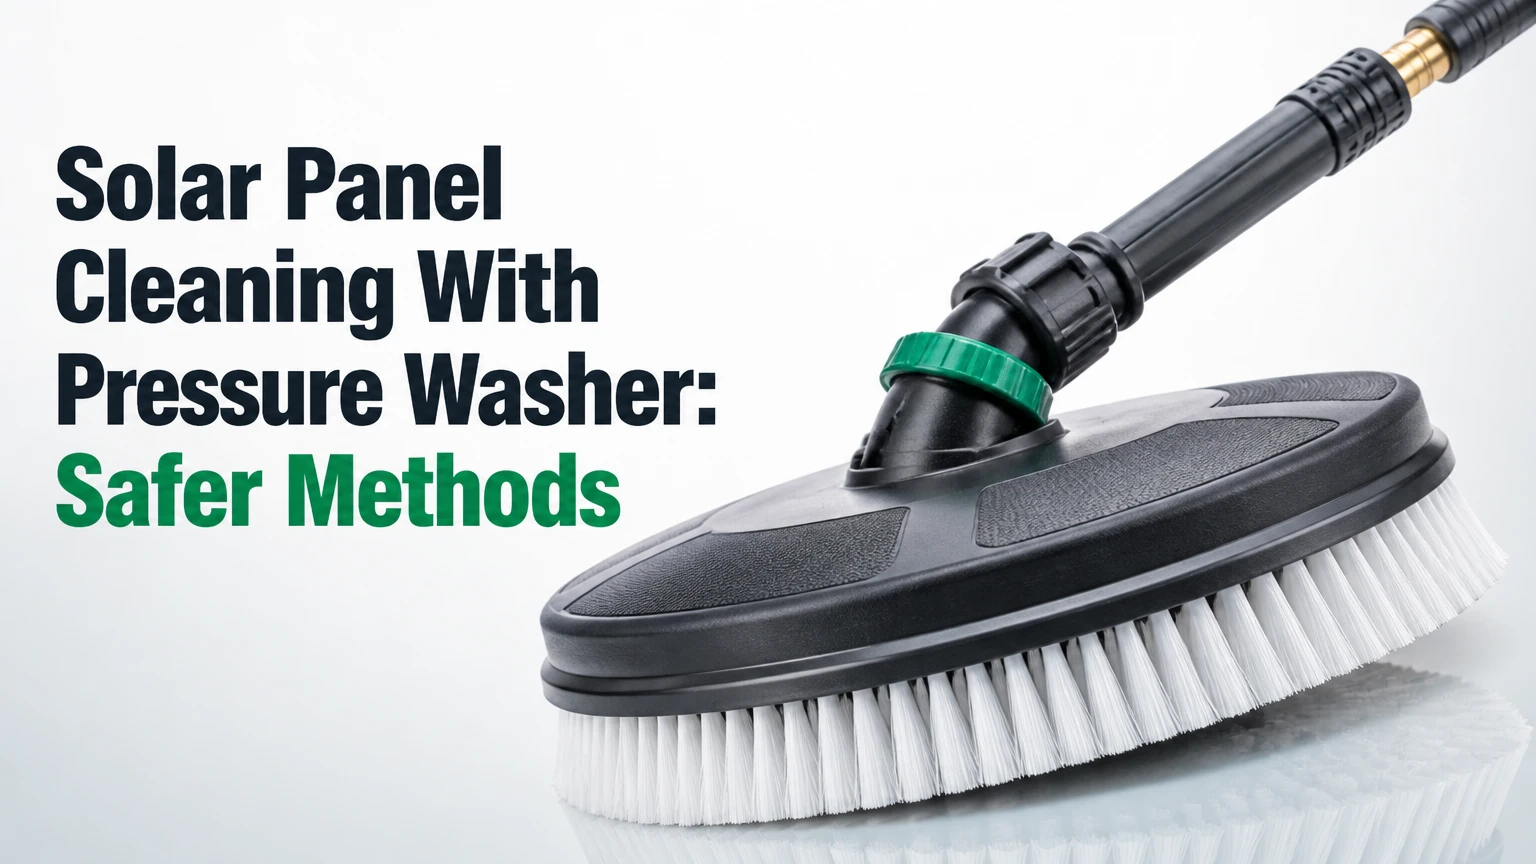
Solar panel cleaning with a pressure washer is technically possible, but conventional high-pressure washing is usually a poor choice for photovoltaic modules. Manufacturers commonly recommend following the module manual, using low-impact water-fed equipment, and avoiding concentrated jets because excessive force can damage glass, coatings, seals, wiring, or the warranty position.
Key Facts at a Glance
- A solar panel manufacturer’s cleaning instructions override generic pressure-washer settings.
- No universal PSI value is safe for every photovoltaic module, seal design, nozzle, or washing distance.
- Cold water on hot glass can create thermal stress, especially when the module surface is significantly warmer than the water.
- Deionized or reverse-osmosis water reduces mineral spotting, while hard tap water can leave calcium deposits.
- A soft brush and pure-water pole are safer for routine cleaning than a pressure-washer wand.
- Roof access and electrical exposure create greater injury risks than ordinary ground-mounted panel cleaning.
What Does Solar Panel Pressure Washing Mean?
Solar panel pressure washing means using mechanically pressurized water to remove dust, pollen, bird droppings, ash, salt, mud, or industrial residue from the front glass of a photovoltaic module. The cleaning target is the glass surface, not the rear sheet, junction box, connectors, frame gaps, or roof beneath the array.
Pressure washers create water pressure with a pump and regulate delivery through a nozzle. A narrow nozzle concentrates force into a small area, while a wider nozzle spreads the same flow across a larger area. Distance also matters: moving a wand closer sharply increases impact at the glass and seals.
The important distinction is between low-impact rinsing and conventional pressure washing. A wide spray used from a distance may rinse loose dust, but a driveway-style jet can stress tempered glass, disturb frame seals, drive moisture toward electrical components, or worsen existing microcracks. The phrase “soft wash” also lacks a universal technical definition, so the equipment label alone does not establish safety.
Is Solar Panel Cleaning With Pressure Washer Safe?
Solar panel cleaning with a pressure washer is safest when a manufacturer explicitly permits it and the operator uses a measured, wide spray without directing water at edges, connectors, or the junction box. For most homeowners, a hose, soft solar brush, or pure-water pole provides a lower-risk result without relying on an uncertain PSI threshold.
Some online guides cite limits such as 40 bar, or about 580 PSI, based on individual manufacturer guidance. That figure must not be treated as a general operating target. A pressure limit may apply to a particular module, test condition, nozzle, and standoff distance, while another manufacturer may prohibit pressure washing altogether.
The International Electrotechnical Commission’s IEC 61215 qualification tests assess module durability, but laboratory qualification is not permission to aim a pressure washer at an installed array. The U.S. Department of Energy also frames photovoltaic maintenance around inspection, obstruction removal, and manufacturer instructions rather than a universal cleaning pressure. Warranty language varies by brand and model.
Why Can High Pressure Damage Photovoltaic Modules?
High-pressure water can damage photovoltaic modules by stressing glass, entering compromised seals, abrading surface treatments, or wetting electrical connections. A panel may continue producing power after damage, so a normal inverter display does not prove that pressure washing was harmless.
Potential consequences include:
- Microcracks in silicon cells: Mechanical stress can create fractures that interrupt current paths and produce localized heating.
- Glass or coating damage: Abrasive grit carried by water or a stiff brush can scratch anti-reflective surfaces.
- Seal and laminate intrusion: Water aimed at frame joints can reach encapsulant edges, backsheets, or junction-box areas.
- Connector faults: Water forced into poorly secured MC4-compatible connectors can trigger insulation or ground faults.
- Warranty disputes: A manufacturer may reject a claim if inspection finds impact, abrasion, improper cleaning, or water intrusion.
A useful practitioner rule is simple: if the stream feels forceful against your hand from the planned working distance, it is too aggressive for routine panel cleaning. Never test that rule directly on a module.
What Equipment and Water Should You Use?
The safest cleaning setup uses a soft, non-abrasive brush attached to a telescopic water-fed pole, with filtered water and no pressure washer. If a pressure washer is unavoidable, use an electric machine with a pressure gauge, a wide fan nozzle, a long lance, and a setting confirmed against the exact module manual.
| Equipment choice | Typical output or specification | Best application | Main limitation |
|---|---|---|---|
| Garden hose with fan nozzle | 30-60 psi household supply | Loose dust on ground arrays | Hard-water spotting |
| Electric pressure washer | 1,000-2,000 psi machine capability, reduced at the tool | Controlled pre-rinse only when permitted | Output can spike |
| Gas pressure washer | 2,500-4,000 psi machine capability | Rare professional use with regulation | Excess power and exhaust |
| Pure-water pole | 20-60 ft reach, 0-50 ppm TDS target | Roof and commercial arrays | Filter and pole cost |
| Solar soft brush | 10-18 in head, non-abrasive bristles | Bird residue and pollen | Requires gentle contact |
| DI or RO filtration | 0-50 ppm TDS, ideally near 0 ppm | Spot-free final rinse | Consumable resin or membranes |
Water Quality and Cleaning Chemistry
Water quality determines whether a clean panel dries clear. Reverse-osmosis water removes much of the dissolved mineral load, while deionization reduces remaining ions and can produce water with a very low total dissolved solids reading.
Hard water commonly contains calcium and magnesium. When droplets evaporate, those minerals remain as white spots or scale that can reduce optical transmission and require another cleaning cycle. A typical practical target for a spot-free rinse is below 50 ppm TDS, although local water chemistry and technique affect the result.
Use only a manufacturer-approved, pH-neutral solar cleaning product when detergent is necessary. Household dish soap, ammonia-based glass cleaner, abrasive powder, solvent, and strong alkaline chemicals can leave residues or interact poorly with coatings and seals. Pure water and mechanical agitation usually remove routine dust without detergent.
How Should You Clean Panels With a Pressure Washer?
A cautious cleaning process has eight stages: review the manual, assess access, shut down where instructed, cool the modules, remove loose grit, wash with minimal force, rinse with low-mineral water, and inspect before re-energizing. A 15-20-panel ground array typically takes 45-90 minutes with a soft brush; roof access can take much longer.
Before You Start
| Requirement | Typical specification | Why it matters |
|---|---|---|
| Weather window | 10-25°C, overcast or early morning | Reduces thermal stress and rapid drying |
| Cleaning time | 45-90 minutes for 15-20 ground panels | Allows controlled rinsing and inspection |
| Water target | Less than 50 ppm TDS | Limits mineral spotting |
| Brush | 10-18 in soft solar brush | Prevents abrasive contact |
| Access equipment | 20-30 ft pole or certified roof access | Avoids walking on modules |
| DIY materials cost | $60-$250 without filtration | Covers brush, hose, pole, and cleaner |
Do not clean a steep or fragile roof from an improvised ladder position. A roof-mounted array may require fall protection, electrical competence, and a professional service provider even when the washing technique itself is simple.
Step 1: Read the Module and Inverter Instructions
Find the exact module model, inverter model, and installation manual before connecting water. Record any instructions about cleaning products, pressure, temperature, shutdown, connectors, coatings, and warranty exclusions.
Success checkpoint: You have a written cleaning limit from the manufacturer or have decided to use a non-pressure method.
Common mistake: Treating a generic 500-580 PSI internet recommendation as permission for a different panel brand.
Step 2: Inspect the Array and Plan the Water Path
Look for cracked glass, lifted frames, loose cables, damaged conduit, missing connector caps, bird nests, heavy corrosion, and standing water. Remove sticks or large debris by hand from the ground when possible, and prevent dirty runoff from entering roof openings or electrical equipment.
Success checkpoint: No damaged component will receive water, and the operator can clean without stepping on modules.
Common mistake: Starting at the top of a roof array and allowing dirty water to dry on lower panels.
Step 3: Shut Down According to the Manual
Follow the exact shutdown sequence specified by the installer and equipment manufacturer. Many systems involve an AC disconnect and a DC isolator, but switch locations and procedures differ, and turning a switch off does not remove all voltage from illuminated modules.
Success checkpoint: The inverter indicates the intended shutdown state, and no operator assumes the array is electrically dead.
Common mistake: Disconnecting plugs or touching wiring because the inverter screen is blank.
Step 4: Wait for Cool Glass
Clean at dawn, late afternoon, or under stable cloud cover. Avoid spraying cold water onto a module that has been heating in strong sun, because a large temperature difference can increase thermal stress in glass and materials.
Success checkpoint: The glass feels close to ambient temperature, and the rinse will not flash-dry immediately.
Common mistake: Cleaning at noon because solar output is highest.
Step 5: Pre-Rinse With a Wide Fan
Use a garden hose or the lowest permitted pressure, with a 40-degree or wider fan pattern if the manual allows pressure equipment. Keep the nozzle several feet away, move continuously, and spray across the surface rather than at frame edges.
Success checkpoint: Loose dust and grit flow away without visible impact marks or water entering edges.
Common mistake: Using a red 0-degree or yellow 15-degree nozzle. Those concentrated tips are designed for hard surfaces, not module glass and seals.
Step 6: Loosen Adhered Contamination
Apply clean water first. For bird droppings, sap, or dried mud, wet the area for 5-10 minutes, then use a soft solar brush with light pressure. A small amount of approved pH-neutral cleaner may help with oily residue, but repeated aggressive scrubbing is more likely to create surface wear than improve output.
Success checkpoint: Contamination lifts under the brush without scraping, squeaking, or requiring body weight.
Common mistake: Scrubbing dry droppings, which can drag mineral grit across the coating.
Step 7: Rinse From Top to Bottom
Use RO or DI water for the final rinse, working in overlapping passes. Maintain a broad spray and avoid directing water toward the junction box, cable glands, connectors, frame gaps, or rear surface.
Success checkpoint: Panels dry without visible white rings, detergent film, or streaks.
Common mistake: Using untreated well water for the final rinse, then blaming the panel coating for mineral spots.
Step 8: Inspect, Dry, and Restore Operation
Check for remaining deposits, cracked glass, displaced cables, and standing water before following the documented restart sequence. Compare inverter readings with previous normal operation after the system returns to service, but do not treat immediate power output as a complete electrical inspection.
Success checkpoint: The system restarts normally, produces expected readings for the weather, and shows no isolation, ground, or arc-fault message.
Common mistake: Re-energizing immediately while water remains around damaged connectors or suspected seal failures.
Which Cleaning Method Is Best for Each Situation?
A pure-water pole is the preferred routine method for most roof arrays, while a hose and soft brush suit accessible residential systems. Pressure washing belongs in a narrow category: manufacturer-permitted, heavily soiled, safely accessible modules cleaned by an operator who can verify pressure at the surface.
| Method | Typical cost | Typical time for 15-20 panels | Finish and risk profile |
|---|---|---|---|
| Hose and soft brush | $30-$120 equipment | 60-120 minutes | Low impact, possible mineral spots |
| DI or RO water-fed pole | $150-$600 DIY setup | 45-90 minutes | Low impact, spot-free finish |
| Soft pressure rinse | $150-$400 equipment | 30-60 minutes | Fast, pressure and seal risk |
| Professional solar cleaning | $150-$350 residential visit | 45-120 minutes | Access managed, documentation available |
Pressure washing is not automatically more water-efficient. A pressure washer may use 1.5-2.5 gallons per minute, while a controlled water-fed pole can use less, depending on the brush, pump, filtration system, and operator. Flow rate, not pressure alone, determines much of the total consumption.
When Is Cleaning Actually Worthwhile?
Cleaning is most valuable when contamination is persistent and uneven, such as bird droppings, agricultural dust, salt spray, ash, pollen, or nearby construction debris. Rain may remove loose dust, but rainfall does not reliably remove hardened droppings or oily deposits.
A practical decision method is to compare the expected production gain with cleaning cost. Review inverter data before and after cleaning under similar irradiance, temperature, and shading conditions. A short-term increase can be misleading if cloud cover, seasonal sun angle, or inverter clipping changed at the same time.
Typical maintenance frequency ranges from once yearly to several times per year in dusty or coastal locations. Monthly cleaning is rarely justified for ordinary residential dust unless monitoring shows a repeatable production loss.
What Are the Most Common Failure Modes?
The most expensive cleaning mistakes involve concentrated force, unsafe access, and water entering electrical components. Cosmetic spotting is usually recoverable, but cracked glass, damaged coatings, and concealed cell fractures can require technical inspection or module replacement.
| Failure mode | Observable symptom | Immediate response | Likely escalation |
|---|---|---|---|
| Mineral spotting | White rings after drying | Rinse with low-TDS water | Professional stain removal if etched |
| Isolation fault | Inverter ground or insulation alarm | Follow shutdown procedure | Certified solar electrician |
| Cell microcracks | Lower output or hot cells | Stop pressure cleaning | Infrared or electroluminescence test |
| Coating abrasion | Haze, scratches, uneven reflection | Stop brushing | Manufacturer assessment |
| Connector intrusion | Repeated fault after rain | Do not unplug energized connectors | Qualified technician |
| Roof injury risk | Unstable footing or poor reach | Stop work and descend | Qualified roof contractor |
If an inverter displays an isolation fault after washing, leave the system in the manufacturer’s safe state and contact a qualified solar technician. Do not repeatedly reset the inverter, disconnect wet connectors, or wait a fixed 24-48 hours as a substitute for diagnosis. Drying may clear temporary moisture, but persistent faults can indicate insulation damage.
A sudden generation decline after aggressive cleaning also deserves investigation. Infrared thermography can identify abnormal hot cells under suitable operating conditions, while electroluminescence testing can reveal cell fractures that ordinary visual inspection misses.
How Much Does Solar Panel Cleaning Cost?
Typical homeowner cleaning costs range from $60-$250 for basic equipment and $150-$350 for a professional residential visit, excluding difficult roof access, scaffolding, travel, repairs, or heavy contamination. Commercial arrays may be priced per panel, per square foot, or under an annual maintenance contract.
| Cost item | Typical range | Included scope | Cost driver |
|---|---|---|---|
| Soft brush and pole | $40-$180 | 10-30 ft reach | Pole material and length |
| DI resin or RO system | $100-$600 | Filtered rinse water | TDS, flow, and capacity |
| Electric pressure washer | $120-$400 | Machine and basic nozzle | Pressure control and accessories |
| Residential professional visit | $150-$350 | 15-30 panels | Roof pitch and minimum charge |
| Difficult roof access | $300-$800+ | Additional safety equipment | Height, pitch, and obstructions |
| Commercial maintenance | $5-$20 per panel typical | Cleaning and inspection | Array size and contract terms |
These are typical market ranges, not guaranteed quotes. Ask whether the price includes electrical shutdown, water filtration, before-and-after photographs, damage reporting, travel, and a return visit for fault conditions.
Which Users Should Avoid a Pressure Washer?
Homeowners with roof-mounted panels should generally choose a soft brush or hire a solar maintenance contractor, especially when the roof is steep, the array is older, or the module manual is unavailable. Commercial and agricultural operators should use a written method statement that identifies water quality, access controls, pressure verification, and responsibility for damage.
Ground-Mounted Residential Arrays
A ground-mounted system provides the best conditions for careful DIY cleaning because the operator can work from stable ground and inspect the array closely. Use a hose, soft brush, and low-mineral final rinse unless the manual specifically permits a controlled pressure rinse.
Roof-Mounted Residential Arrays
Roof work adds fall hazards, fragile roofing, skylights, overhead conductors, and difficult cable access. The safest decision is usually professional cleaning from a certified access system, not a longer pressure-washer lance.
Agricultural and Industrial Arrays
Agricultural arrays may accumulate mud, manure aerosols, feed dust, and chemical residue that require repeated wetting and controlled disposal. Industrial and coastal sites may need scheduled inspection for salt deposits, corrosion, and connector degradation rather than a simple annual wash.
FAQ
Can rain clean solar panels adequately?
Rain removes loose dust but often leaves bird droppings, pollen film, salt, and dried mud. Panels beneath trees, near roads, beside farms, or in coastal air may need manual cleaning even when annual rainfall is high. Inspect the glass and compare monitored production before scheduling additional work.
Can I use a Karcher or other branded pressure washer?
A Karcher, Sun Joe, Ryobi, or similar machine is not automatically suitable for photovoltaic modules. Brand name does not control impact force. Confirm the module manual, use a wide spray, avoid edges and electrical parts, and prefer a soft brush or pure-water pole for routine cleaning.
Should solar panels be cleaned with soap?
Solar panels usually do not need soap for ordinary dust. Use only a manufacturer-approved, pH-neutral product for oily or adhered contamination, because dish soap and household glass cleaners may leave residue or conflict with surface coatings.
Can I use a pressure washer on flexible solar panels?
Flexible solar panels require separate instructions because polymer faces, adhesives, cable glands, and mounting surfaces differ from framed glass modules. Do not apply pressure-washer guidance for tempered-glass modules to flexible products without written manufacturer approval.
How can I tell whether cleaning improved output?
Compare inverter or monitoring data under similar sunlight, temperature, shading, and time-of-day conditions before and after cleaning. A single reading cannot isolate cleaning effects from cloud cover, seasonal irradiance, inverter clipping, or shading changes.
Does cleaning void a solar panel warranty?
Cleaning does not automatically void every warranty, but damage caused by prohibited pressure, chemicals, abrasion, impact, or improper maintenance may be excluded. Save the module manual, cleaning method, water-quality record, photographs, and contractor invoice if warranty protection matters.
The Bottom Line
Solar panel cleaning with a pressure washer should be treated as an exception, not the default maintenance method. Use the exact manufacturer instructions, avoid concentrated jets, never walk on modules, control thermal and electrical risks, and choose a soft brush with DI or RO water when possible. For most homeowners, the safer method delivers a clean surface without exposing valuable modules to unnecessary pressure.


